This exterior scene was made by Ireneusz Jaworski from Evermotion. It was set in 3ds Max and rendered in V-Ray.
You can:
Click on image to enlarge
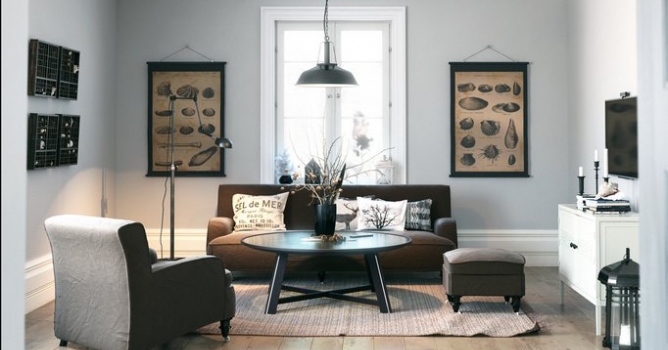
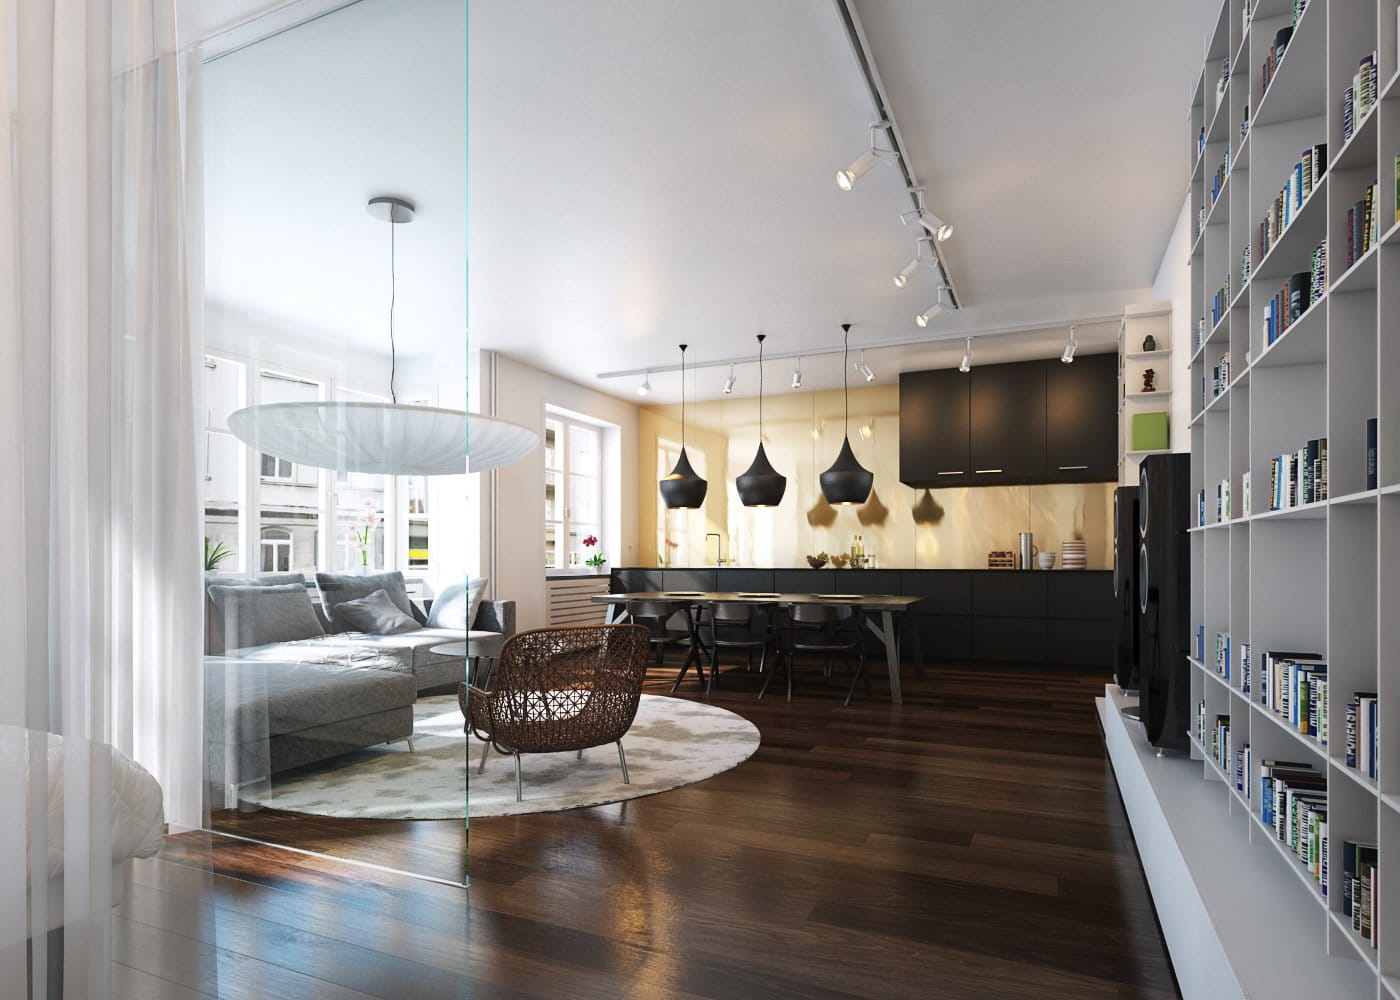
This if the final scene after post-production - small, scandinavian room with elegant props.
Click on image to enlarge 
And that's how this scene looks in 3ds Max viewport.
Click on image to enlarge 
3ds Max viewport - scene with material and object color enabled.
Click on image to enlarge 
There is one main light source in this scene and it is VraySun. Settings on the right.
Click on image to enlarge 
Complimentary to VraySun,we used also VraySky.
Click on image to enlarge 
As usual, we used background map for the exterior.
Click on image to enlarge 
Background map - material settings.
Click on image to enlarge 
Background map is washed out (desaturation + brightness increase) by color correction node.
Click on image to enlarge 
Isometric view of the building. Only the ceiling is a separate mesh.
Click on image to enlarge 
Mesh of the building. There are Vray lights (portals) in every window that let the sunlight to go through. Using portals increases the speed of the rendering.
Click on image to enlarge 
Camera is placed in the next room. Settings on the right.
Click on image to enlarge 
Camera placement - top view.
Click on image to enlarge 
Walls, doors and floor are collapsed to a single editable poly with one big multi-material. Here are Floor material settings. Although bitmaps look more like a concrete in these preview windows, it's actually wood.
Click on image to enlarge 
Floor material - VrayDirt settings.
Click on image to enlarge 
Floor material - diffuse bitmap color correction settings (we increased saturation).
Click on image to enlarge 
Oak floor - diffuse bitmap.
Click on image to enlarge 
The building is collapsed to single mesh (editable poly).
Click on image to enlarge 
Walls material (plaster)
Click on image to enlarge 
Walls material - diffuse map.
Click on image to enlarge 
We placed in the room armchair, sofa, pouf, table, lamp and some smaller props.
Click on image to enlarge
Armchair (close up).
Click on image to enlarge 
Armchair material.
Click on image to enlarge 
Armchair material - fallof map settings. Fallof controls diffuse color (using fresnel type).
Click on image to enlarge 
Armchair material - color correction of diffuse map. Increased gamma / contrast on all channels and slightly lower contrast on red channel.
Click on image to enlarge 
Armchair material - diffuse bitmap.
Click on image to enlarge 
Archmchair material - bump map settings.
Click on image to enlarge 
Armchair material - two reflect maps are mixed with fallof node.
Click on image to enlarge
Round table mesh.
Click on image to enlarge
Round table - glass material.
Click on image to enlarge
Round table - wood material.
Click on image to enlarge
Carpet.
Click on image to enlarge
Carpet mesh / wireframe.
Click on image to enlarge
Carpet material.
Click on image to enlarge
Carpet material - color correction of diffuse map.
Click on image to enlarge
Carpet material - fallof map in reflect slot.
Click on image to enlarge
Did you notice a bird behind the window?
Click on image to enlarge
A bird is a bitmap on plane.
Click on image to enlarge
Prop mesh.
Click on image to enlarge
Prop mesh / wireframe.
Click on image to enlarge
Prop material.
Click on image to enlarge
Render settings.
Click on image to enlarge

Raw render.
Click on image to enlarge

Photoshop stack. First, we added specular layer (screen, 50%), then we added refraction layers with blur (so we have now nice glow in the window area). Sun and Light select layers make lighting more prominent. Color balance 1 makes the image colder, hue / saturation layer desaturates it a bit and curves ("s" shape) bring more contrast to this image.
This exterior scene was made by Ireneusz Jaworski from Evermotion. It was set in 3ds Max and rendered in V-Ray.
You can:
Click on image to enlarge
This if the final scene after post-production.Thank you for reading! :)


 Customer zone
 Your orders
 Edit account
 Add project
 Liked projects
 View your artist profile
COMMENTS