Evermotion Pass 10% Off - Get Instant Access to Thousands of 3D Assets

Check Plans

Information Clause

In accordance with the art. 13 section 1 and 2 of the European Parliament and Council Regulation 2016/679 of the 27th April, 2016 on the protection of natural persons, with regard to the processing of personal data and on the free movement of such data, and repealing Directive 95/46/EC (General Data Protection Regulation), hereafter RODO, I hereby inform that:

1. EVERMOTION S.C., 8 Przędzalniana Str., 15-688 Białystok, Poland is the Administrator of your Personal Data (APD)

2. Data Protection Inspector can be reached through e-mail: iod@evermotion.org

3. Your personal data are to be processed on the basis of art. 6 section 1 letter a, b and f of RODO in order to:
a) prepare, conclude and execute the agreement and for other purposes approved by you,
b) to execute the legitimate interest like marketing of products and the agreement, claim assertion or defence against claims resulting from the law regulations.

4. Entities entitled to the reception of your personal data may be the authorised public bodies; mail providers; providers of the services covered by the agreement; responsible for debt recovery, keeping the archives, document utilization, legal consulting, technical services, IT services and accountancy.

5. Your personal data shall not be transferred to the third country, nor to the international bodies.

6. Your personal data shall be processed within the period of the agreement and upon your additional consent until you withdraw it. APD shall keep the data for the period of any civil law claim execution connected with the agreement.

7. You have the right to demand an access to your personal data, to correct or to delete the data if there is no other basis for the processing or any other purpose of such processing or to limit the processing of the data, to transfer the data to another administrator and to raise objections to the further data processing if there is no legal basis for further processing and to withdraw any previous consent.

8. You provide the personal data voluntarily, however they are necessary to conclude the agreement. The refusal of providing such data may result in the refusal of the agreement conclusion.

9. You have the right to lodge a complaint to the Personal Data Protection Office when in your opinion the data processing violates the regulations of General Data Protection Regulation of the 27 April, 2016 (RODO).

10. Your data will be automatically processed, including the form of profiling.
11. You are obligated to forward above mentioned information to your representative, especially if you appointed this person in the agreement as the contact person or as the representative for the agreement execution.

OK

Making of Archinteriors vol. 29 scene

Piotr Mróz 2013-08-14 13:28 tutorial  > 3ds MAX  > misc

Hi! My name is Piotr Mroz and I work in Evermotion. I would like to show You how I made one of our interior visualizations.

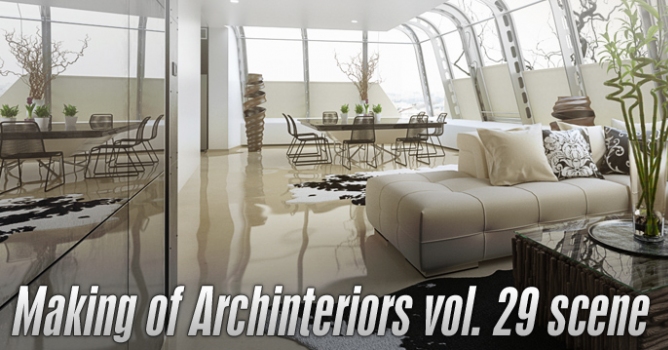
The scene that I am going to show comes from Archinteriors vol. 29 and it is available here: Archinteriors vol. 29.

We will start with the most difficult task ;) - setting proper units in 3ds max.
 
001_units_001.jpg
Setting units...
 
002_units_002.jpg
Setting units...
 
003_gamma_2.2.jpgOpen Gamma tab and change value to 2.2. This value ensures that we will work with linear workflow, so the renders will be physically precise and colors will be accurate.
 
 
Modeling

It is good to start modeling interior with a reference image. If You use such help, You will need to paint some perspective lines in it (using Photoshop or Gimp) so it will be easier to match perspective later in 3ds max. Here is a link to tutorial that will help You with this task: Making an interior scene by Kuba Dabrowski
 
Click on image to enlarge
004_001_basic.jpg
I start with simple interior, no materials at all, i just try to match real-world scale of things.
 
Click on image to enlarge
005_002_basic.jpgI made an interior and I can start adding elements, like furniture, small details, etc. If you make things from scratch, prepare for a lot of modeling, preparing materials, etc. It is much faster if You use ready for render models, like those from Evermotion collections. It is real time saver.
 
 
Lighting
 
Click on image to enlarge
006_enivronment_map.jpg

When my furniture is on place it is time for setting up the lights in scene. I use all kind of lights, my choice depends of the scene I want to lighten up. In this case I used just a simple sky bitmap. I set it as my environment map. This map is my main light for a scene.

 
007_environment_settings.jpg

You can assign a map to environment map slot in 3ds max environment settings. Just press "8" on a keyboard.

Click on image to enlarge
008_outside_map.jpg.jpg
I used the second map as an exterior that You can see outside windows. It is a map downloaded from CG Textures, I modified it a bit in Photoshop - originally it was sunny day picture, I made it more cloudy.
 
Click on image to enlarge
009_cylinder_mapping.jpg
I put this map on cylinder. I also created additional VRayLights with "Skyportal" option enabled. This way shadows are sharper and more precise. It extends rendering time but gives greater realism.
 
010_Alpha_contribution.jpg

You have to remember to change "Alpha contribution" for cylinder to 0.0 in Your VRay object properties. This lets you to render alpha separately - everything behind the windows will be transparent. This way You can change the background later in Photoshop.

 
011_object_settings.jpg
In cylinder object properties You also should turn off receive shadows and cast shadows options.
 
Click on image to enlarge
012_skyportal_on.jpg
This is how the scene looks like with "skyportal" option on in VrayLights settings. Nice, clean, shadows.
 
Click on image to enlarge
013_skyportal_off.jpg
...and this is "skyportal" option off. Shadows are blurred.
 
014_skyportal_on_closeup.jpg
Skyportal option on (close-up)
 
015_skyportal_off_closeup.jpg
Skyportal option off (close-up)
 
Click on image to enlarge
17_copy.jpg
Our scene without materials.
 
 
Materials
 
Click on image to enlarge
016_floor_bump_on.jpg
I haven't use any complicated materials in this scene. Some trick that I used to achieve "imperfection" of floor was to add simple procedural noise map to bump slot. It made floor look more natural, like it was not perfectly flat. The difference can be clearly seen if You compare reflection on a floor with noise map....
 
Click on image to enlarge
017_floor_bump_off.jpg
...and without it. Reflections on the floor are now flat. As You know, real things are never perfect, so adding imperfections as the one above makes scenes look more realistic. Good tip is to use maps in reflect slot and reflect glossiness or bump slots. They will add some natural looking roughness to the surface.
 
Click on image to enlarge
018_history.jpg
Another tip: when I am rendering I often use "regions". Thanks to VRay Frame Buffer History window I can save every render I made and load it anytime. It makes comparing the results faster.
 
018b_history_01.jpg
History window - saved renders
 
019_render_001.jpg
At the end I make my final render. I increase some quality settings, like GI. Those are my render settings (1)
 
020_render_002.jpg
Render settings (2)
 
021_render_003.jpg
Render settings (3)
 
022_render_004.jpg
Render settings (4)
 
023_render_005.jpg
Render settings (5)
 
024_render_006.jpg
Render settings (6)
 
Click on image to enlarge
final_03.jpg
This scene was rendered from three different VrayPhysical cameras.
 
Click on image to enlarge
final_04.jpg
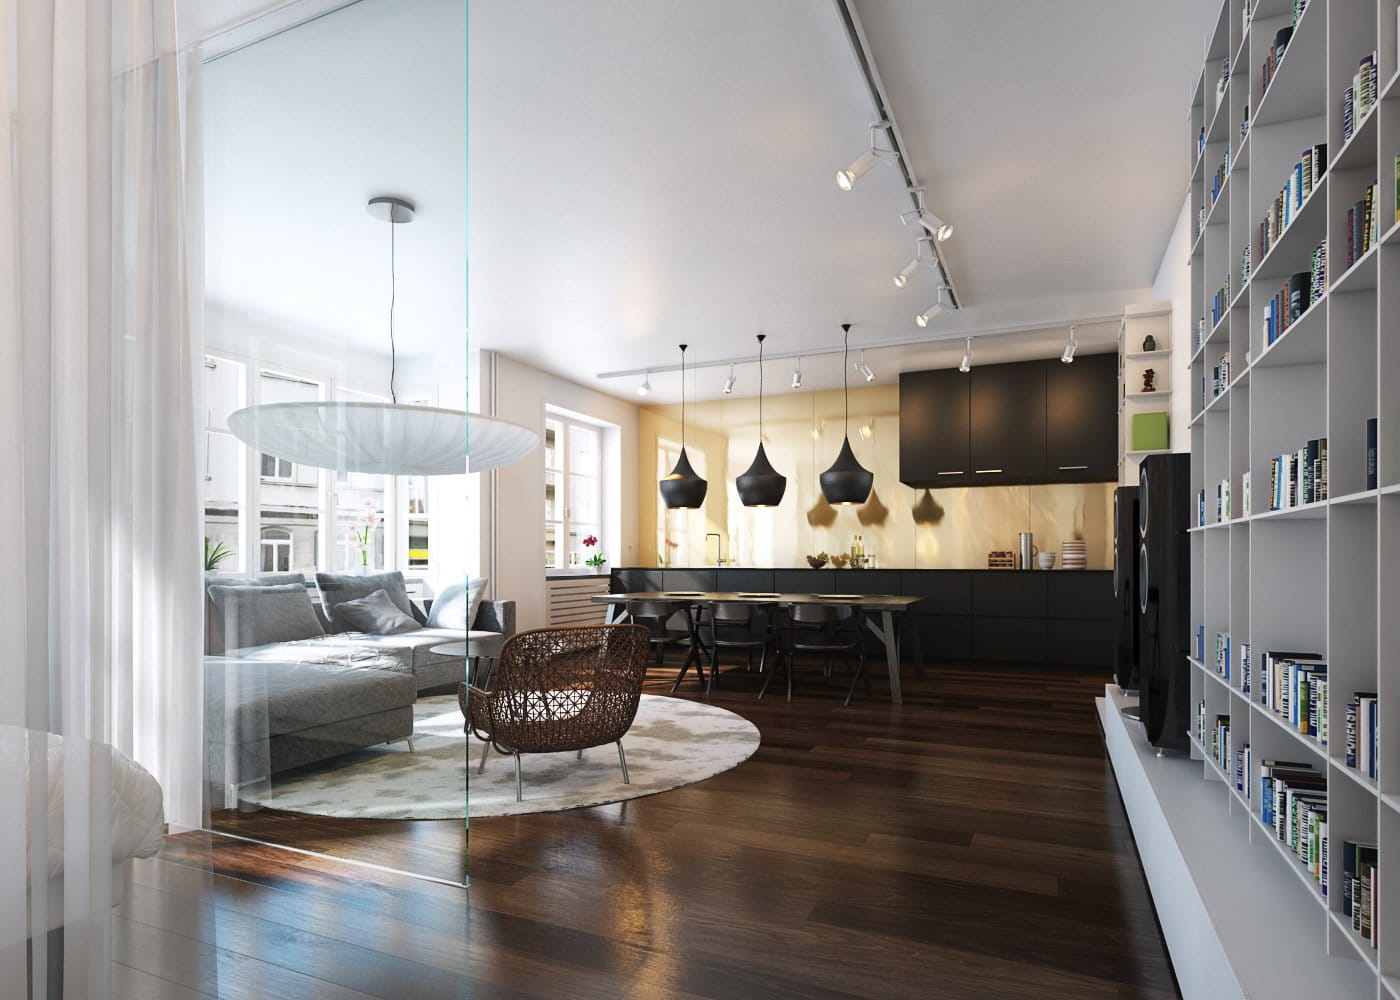
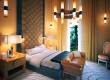
Final stage: After my final renders are finished I load them into Photoshop and make small corrections: making refractions and reflections more visible, sharpen the image a little. I also added subtle glow for windows. To achieve that I rendered such layers as VRay reflection and VRay refraction separately.
 
Click on image to enlarge
final_04.jpg
Final stage, camera 2
 
Click on image to enlarge
final_04.jpg
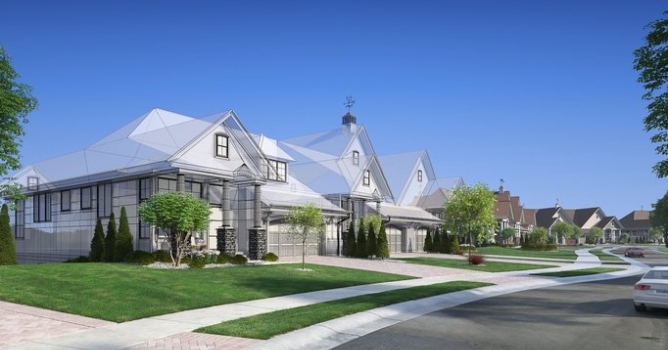
Final stage, camera 2 - wireframe
 
 Click on image to enlarge
final_04.jpg
Final stage, camera 3
 
 Click on image to enlarge
final_04.jpg
Final stage, camera 3 - wireframe
 
 
All the best for You all, hope that it was useful to You! :)

Piotr "Joker" Mróz


Author: Piotr Mróz Editor: Michal Franczak
Tags: archinteriors
You may also like...
Making of Archinteriors vol. 32 scene

Making of Archinteriors vol. 32 scene

Andrew from Evermotion shows how he made Archinteriors vol. 32 scene using Blender for modeling and 3ds Max and VRay for lighting and rendering.
×

LEAVE A COMMENT

You need to be logged in to leave a comment. Don't have account? Register now.

jecinci 16:58:07  |  14-08-2013
Great tutorial !!! Thanks !! Do you use a white (255) material for tests or gray(200)? Do you use diffuse color or a vray color ( with gamma specified ) for this(test renders)?
AgentP 18:31:24  |  15-08-2013
I just purchased this volume (Architeriors.vol29)...I was particularly interested in this volume because of the rendered plan sections that you show...I am having a hard time reproducing this image and was wondering if you could give me any tips or tricks...Thank you and great job!
umang.jadav 09:25:16  |  18-08-2013
Thank you so much for sharing this beautiful work, only thing wonders me is that, you said you used only bitmap to light up the scene but how could you get this nice illumination with only a bitmap? I mean where did you set the intensity of it. Another thing, how did you created those rectangular ceiling lights, is it IES?
moumouh 13:44:15  |  26-08-2013
i purchased this volume , he use a bitmap for light the scene and he set the intensity on RGB LEVEL on bitmap outeput , he set RGB LEVEL TO 20 , and vray camera: shuter speed 30 and iso 200 :)
rezaes 08:22:45  |  31-08-2013
very nice lighting ,thank you
Kidrobot 04:43:46  |  09-09-2013
Thanks for this wonderful tutorial. I've learn a lot from you.
ibnu 06:53:37  |  17-09-2013
nice.
sollozzo13 22:49:41  |  30-10-2013
not bad
MACROVISION 00:41:57  |  07-11-2013
nice dear I am looking for an interior designer for my company. so if interested to joint us please contact me on my mail " husain.mv@gmail.com " best regards, Husain
TomasBelica 11:25:57  |  21-08-2014
Please post the settings for V ray Lights - Sky Portals / Vray camera give us this scene complete:-)) Thank you!
reza-abbasi 13:21:16  |  18-02-2015
more than great tutorial , ty man . very nice work
reza-abbasi 10:40:44  |  24-02-2015
ty again man , amazing work