Welcome to the private office! This room is iside a house designed by Jamie Bush. It has unique look. Original building is located in La Cañada Flintridge, California. Interior scene was made in 3ds Max and V-Ray by Marcin Białecki from Evermotion. It is scene 10 from Archinteriors vol. 36. You can buy Archinteriors vol. 36 collection in Evermotion Shop.
Click on image to enlarge 
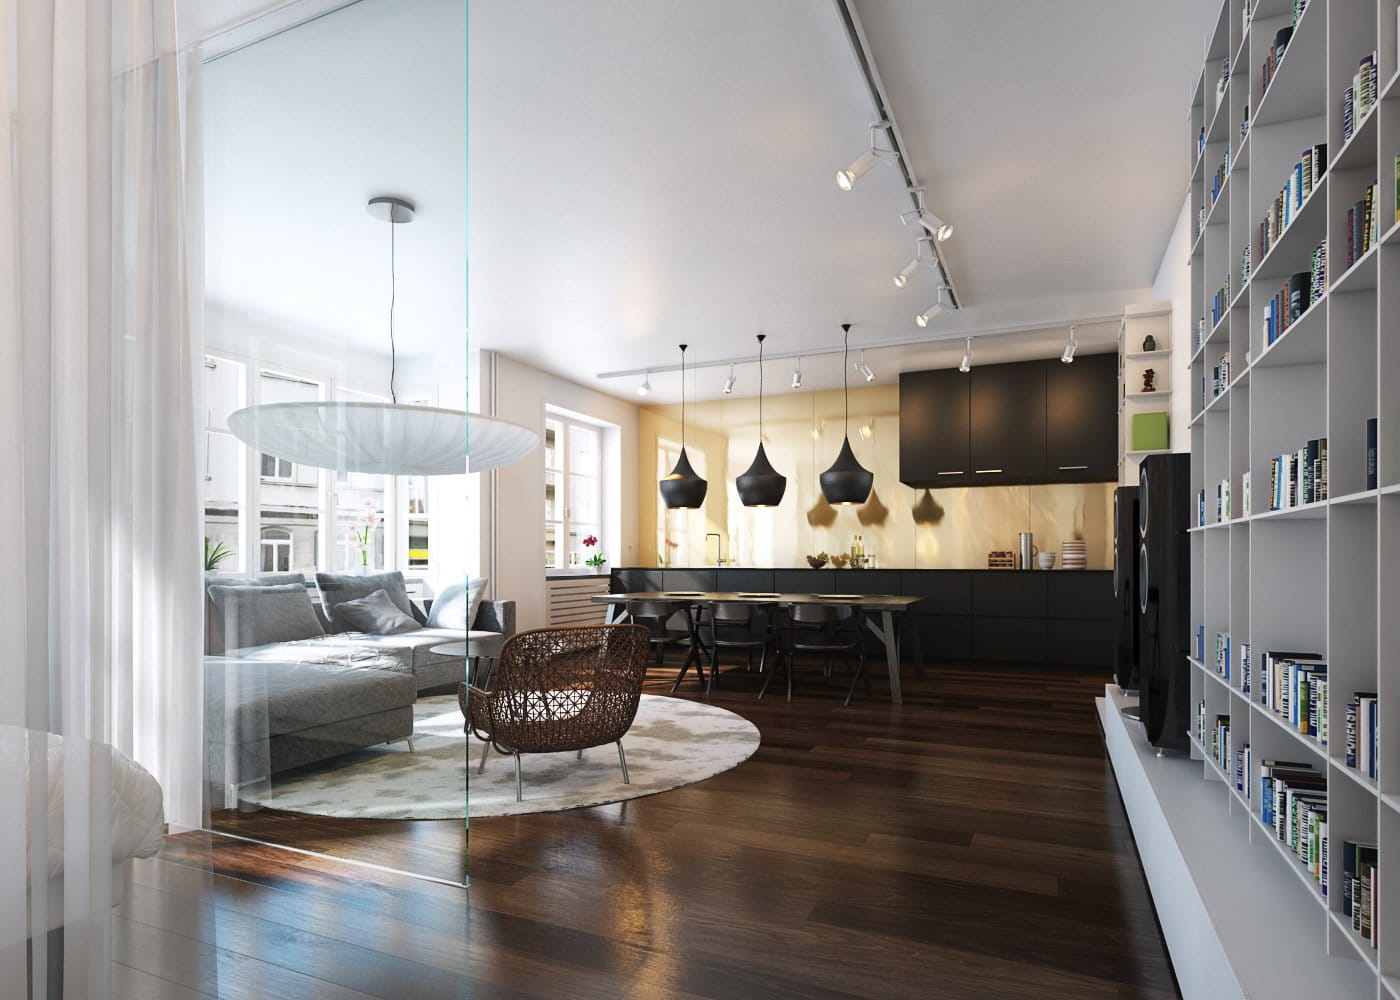
Final image after post-production. the room seems simple at glance, but there is a lot interesting things in the scene - we have not-ordinary desk, quite prominent paneling, interesting floor and carpet materials. There is also a lot of greenery outside, made with models from our Archmodels collections.
Click on image to enlarge 
Click on image to enlarge 
Click on image to enlarge 
Click on image to enlarge 
Overview - Far environment cylinder surrounds the building. Grey boxes are grass, leaves and tree proxies. The only non-proxy greenery in the scene is the biggest tree visible through window.
Click on image to enlarge 
Environment cylinder material.
Click on image to enlarge 
Environment cylinder material - map.
Click on image to enlarge 
Environment cylinder material - opacity map. Material is not visible over trees line, so the light from our Vray Light sources can pass through.
Click on image to enlarge 
Outside halfdome Vray light settings.
Click on image to enlarge 
Target direct light settings.
Click on image to enlarge 
Light behind the biggest window. Settings on the right.
Click on image to enlarge 
We used more lights to lit this interior. Some of them are placed in the next room, like the one that is selected on the picture above.
Click on image to enlarge 
One light is placed behind the camera.
Click on image to enlarge 
Two small lights are placed on the sides, in small windows.
Click on image to enlarge 
Click on image to enlarge 
Click on image to enlarge 
Paneling material - VrayBlend Material which uses two Vray materials and mixes them with fall-off map. Those two materials have different glossiness settings and fall-off map acts here as fresnel. This material gives us great control over reflection and glossiness of paneling.
Click on image to enlarge 
Paneling - base material settings.
Click on image to enlarge 
Paneling, base material. Marcin mixed two versions of the same bitmap to make texture more interesting.
Click on image to enlarge 
Paneling - coat material with glossiness value 0,95 (base material has only 0,8).
Click on image to enlarge 
Falloff map that blends two materials into one VrayBlend material.
Click on image to enlarge 
Click on image to enlarge 
Click on image to enlarge 
Click on image to enlarge 
Click on image to enlarge 
We wanted to achieve interesting pattern of carpet, so we used Multi/Sub-Object material with four submaterials.
Click on image to enlarge 
Carpet - material 1 settings.
Click on image to enlarge 
Carpet - material 2 settings.
Click on image to enlarge 
Carpet - material 3 settings.
Click on image to enlarge 
Carpet - material 4 settings.
Click on image to enlarge 
Table in the room is made of tree trunk and glass blade.
Click on image to enlarge 
Trunk material, similar to paneling material is made of two VrayMaterials blended with fall-of map. One of them has glossines 0,6 and the other has glossiness value 0,5.
Click on image to enlarge 
Trunk material, base material settings.
Click on image to enlarge 
Trunk material, opacity map.
Click on image to enlarge 
Trunk material, coat material settings.
Click on image to enlarge 
Trunk material, falloff map settings.
Click on image to enlarge 
Click on image to enlarge 
Click on image to enlarge 
Blade material map settings.

Marcin put many proxies in the scene. We have proxy grass, proxy leaves, proxy bushes and proxy trees. Models come from our Archmodels collections.
Click on image to enlarge 
Click on image to enlarge 
Raw render without post-production.
Click on image to enlarge 
Photoshop stack. The bottom layer is our raw render. Layer two increases saturation of lampshade. Layer three increases brightness and contrast of fur on the chair. Highpass 0.8 sharpens image a bit. Then Marcin put four passes layers to add details to the final image. He also used Color balance to make image a bit colder and placed a curves layer on the top to increase contrast.
Click on image to enlarge
Final image after post-production. Thanks for reading! :)


 Customer zone
 Your orders
 Edit account
 Add project
 Liked projects
 View your artist profile
COMMENTS