Evermotion: More Than an Asset Library
How Evermotion became a full-scale production partner for archviz, automotive and synthetic data.


Total: € 0

This nice white interior was prepared for Blender and rendered in Cycles. It consists of two rooms filled with high quality assets that give some life and cosiness. Let's take a look.
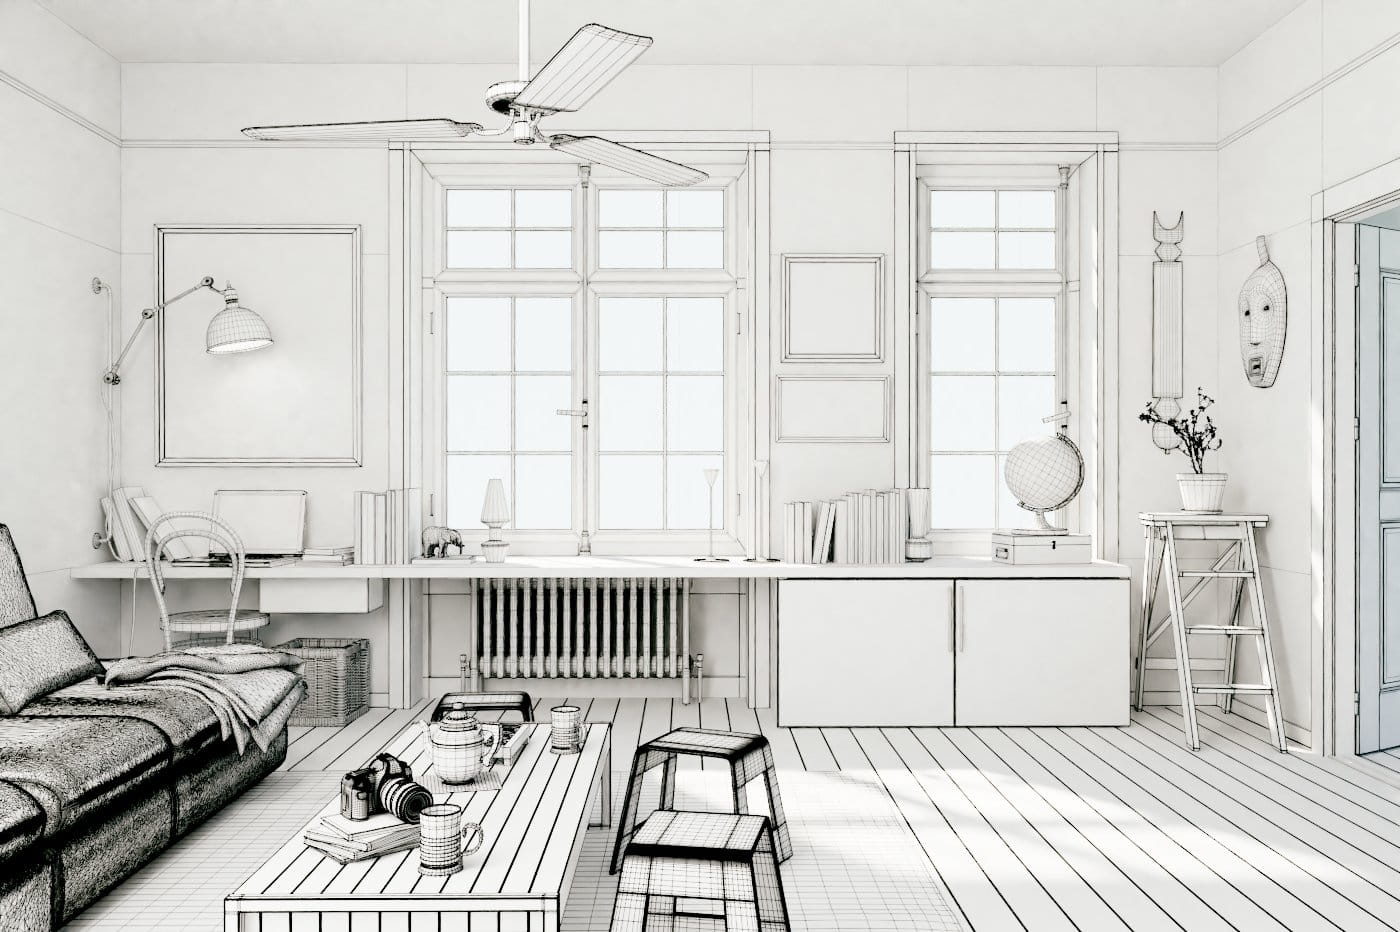
Wireframe view.

This is how the scene looks in viewport.

Th scene in viewport, texture mode enabled.
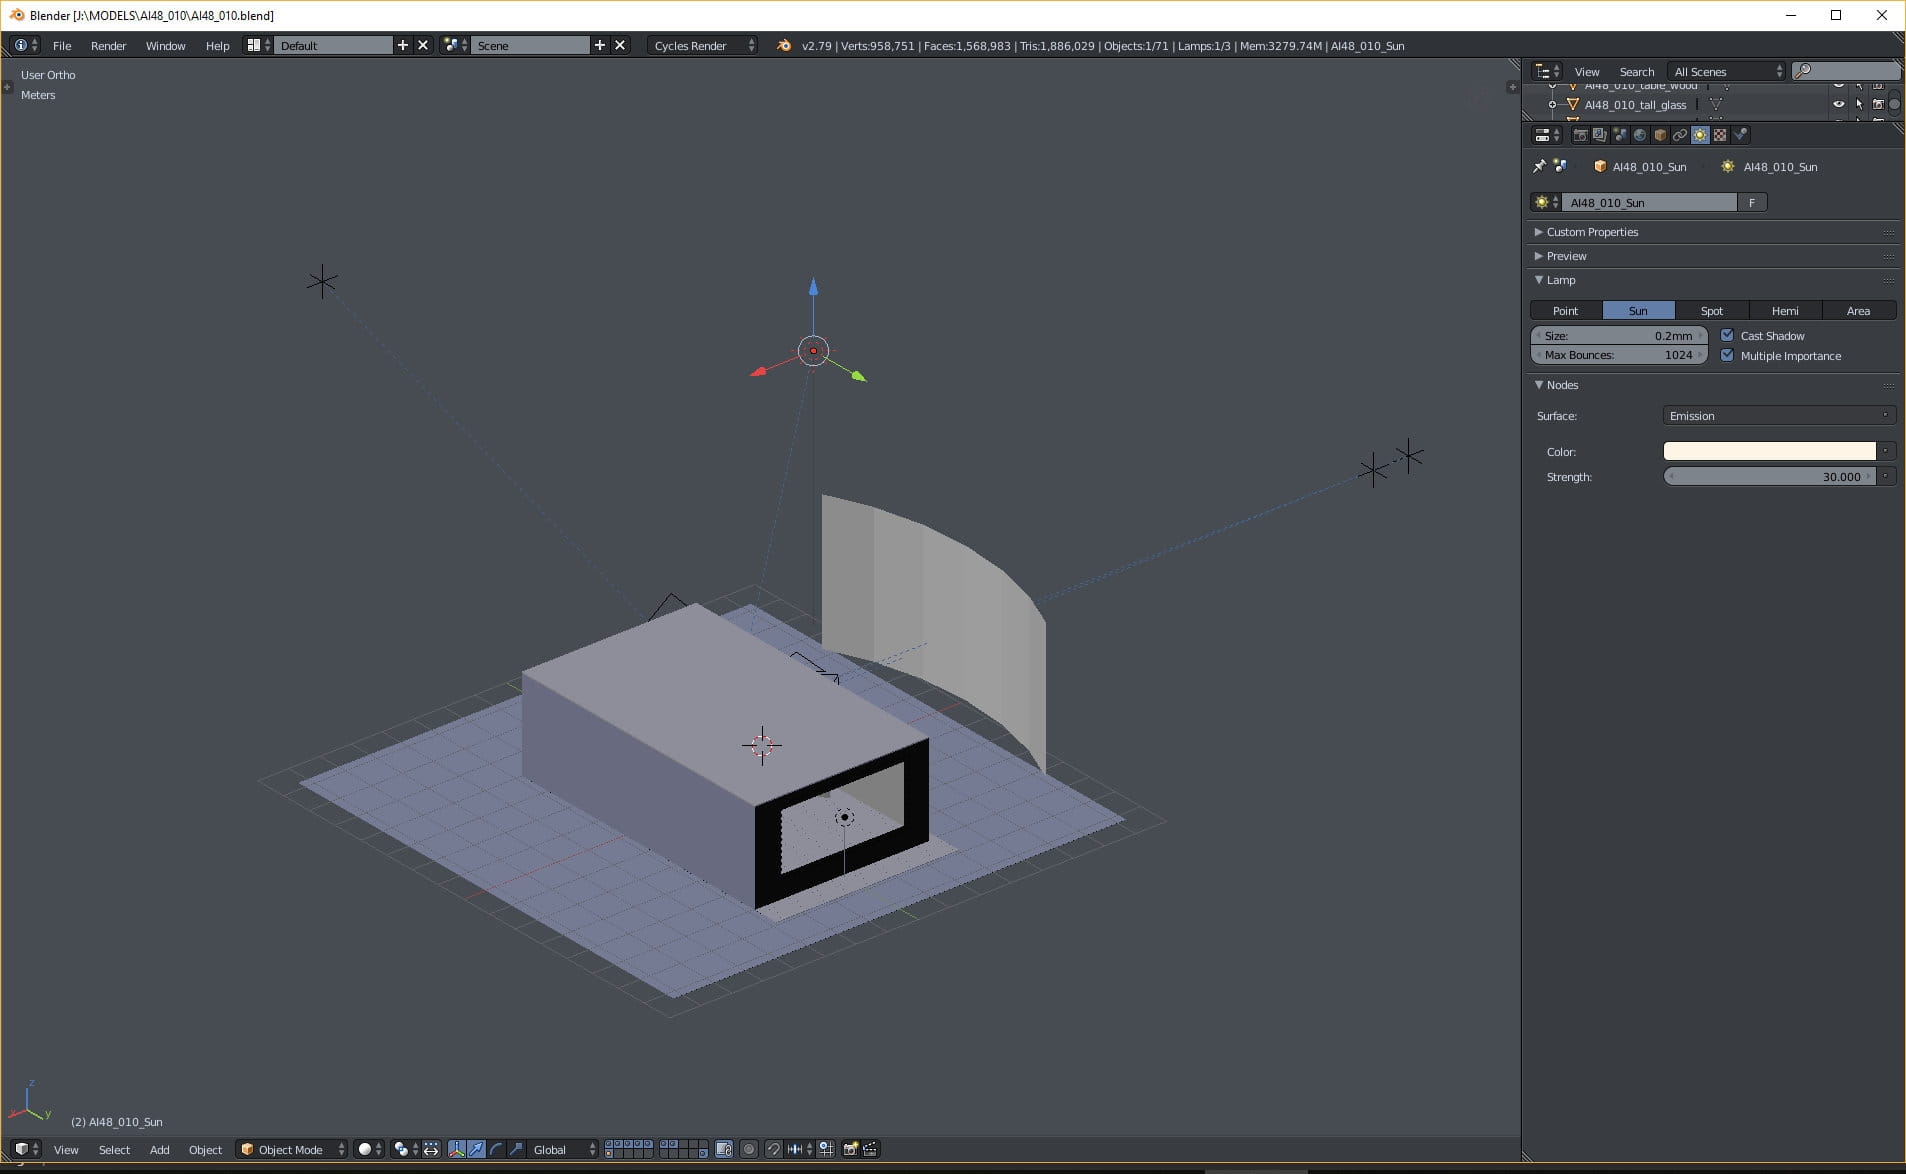
Overview of the scene. Nothing complicated - we have two rooms and a place outside. One direct sunlight - settings on the right.
Plane material.
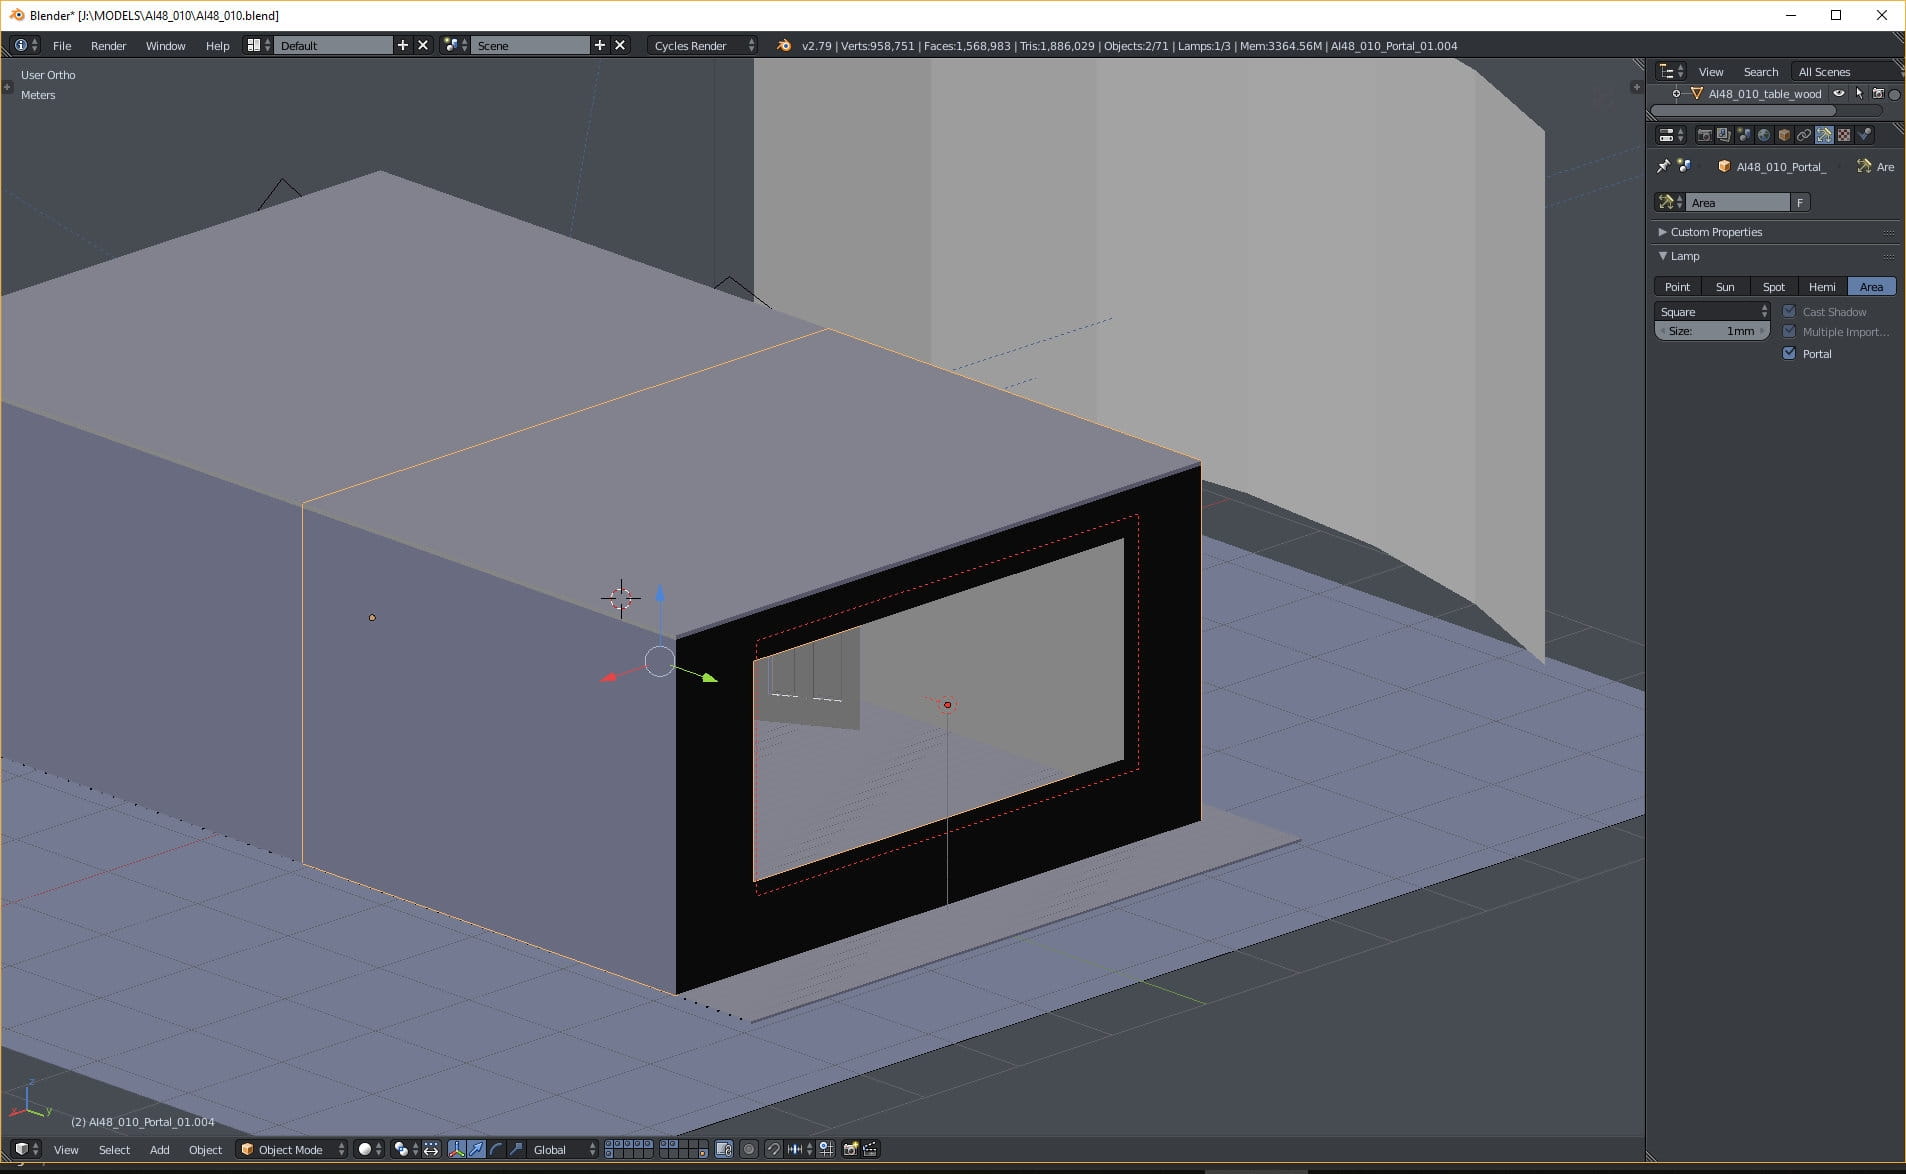
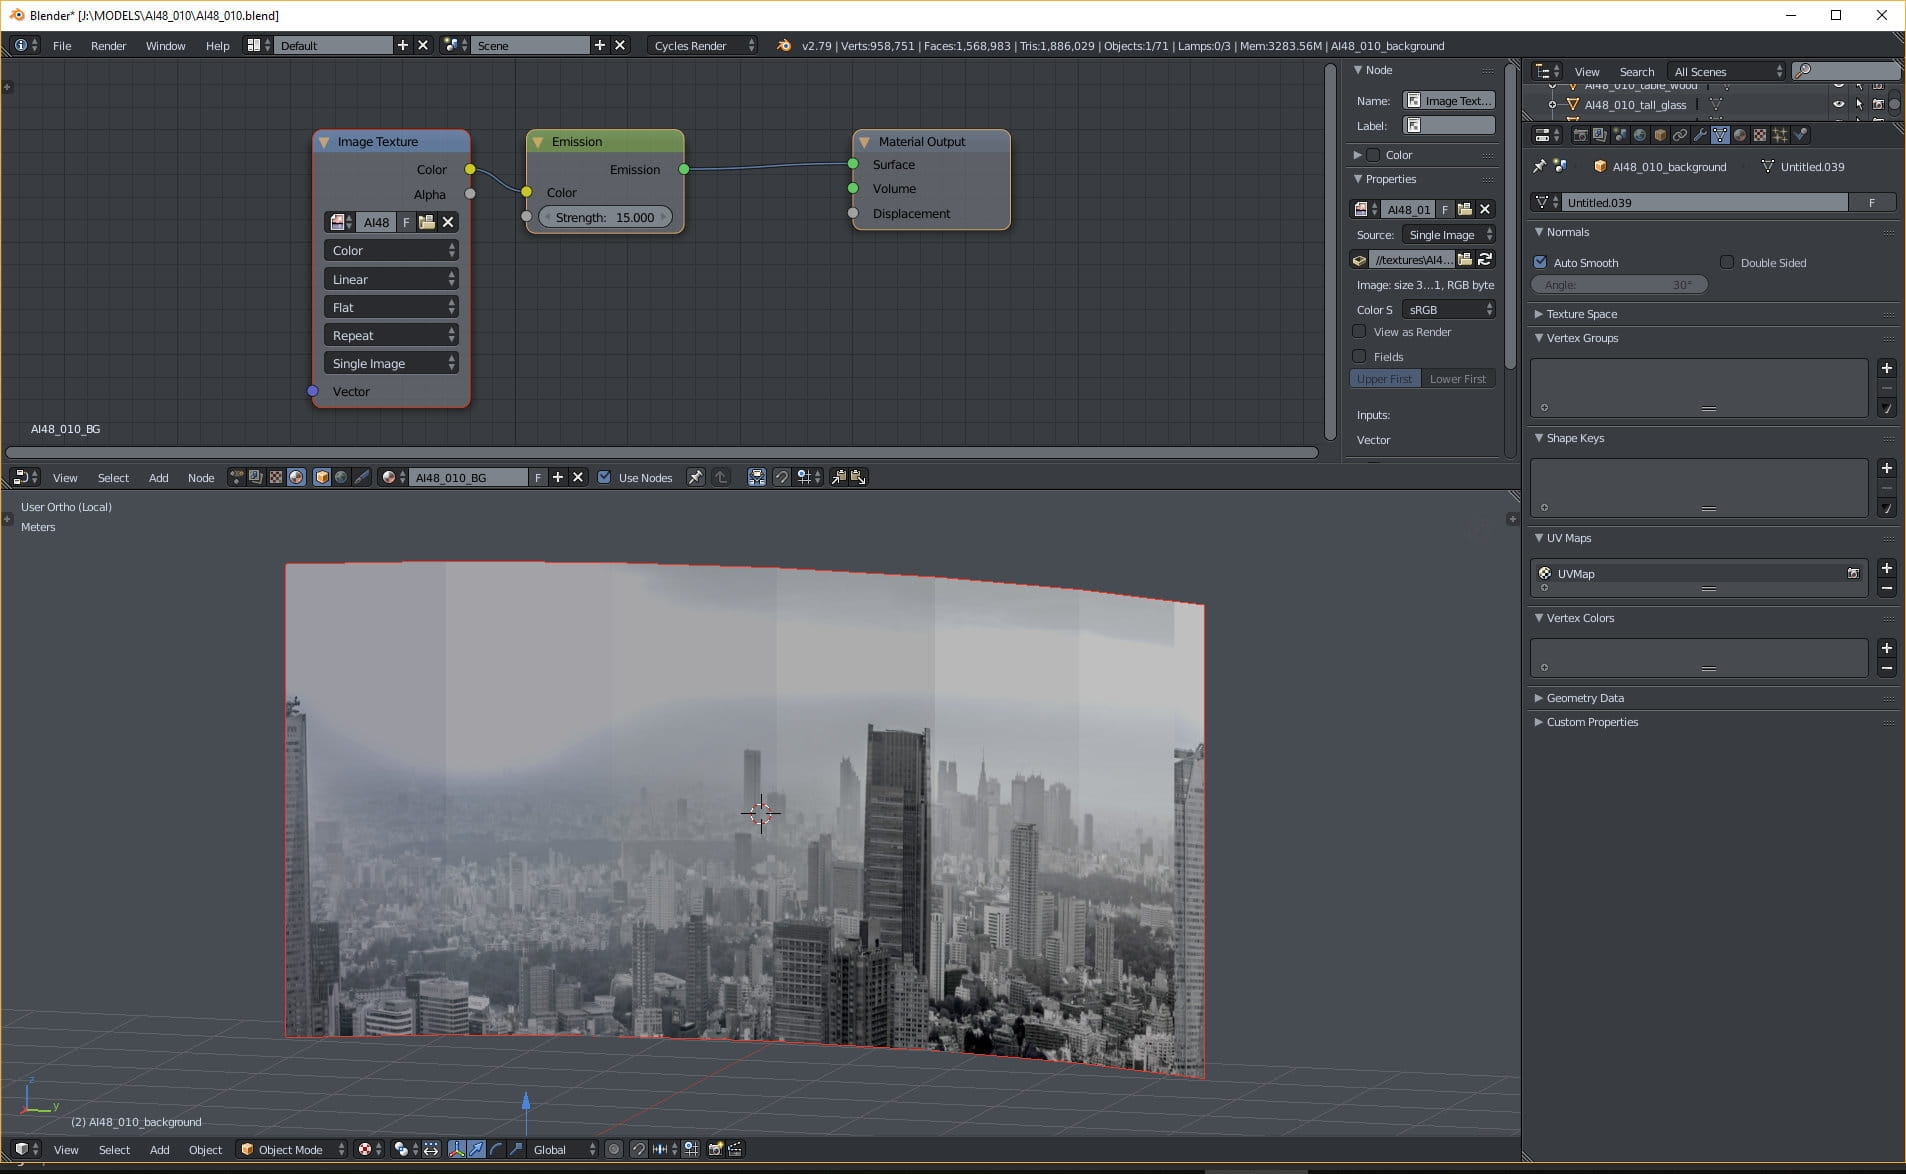
Light portal.

Additional light plane inside. It is used to brighten-up the interior. It sometimes useful to fake the lighting with planes, instead of cutting holes in the walls and making more windows. Mesh lights are easier to control, when we want just a slight change in lighting and we know, that the camera will not rotate enough to reveal that plane.
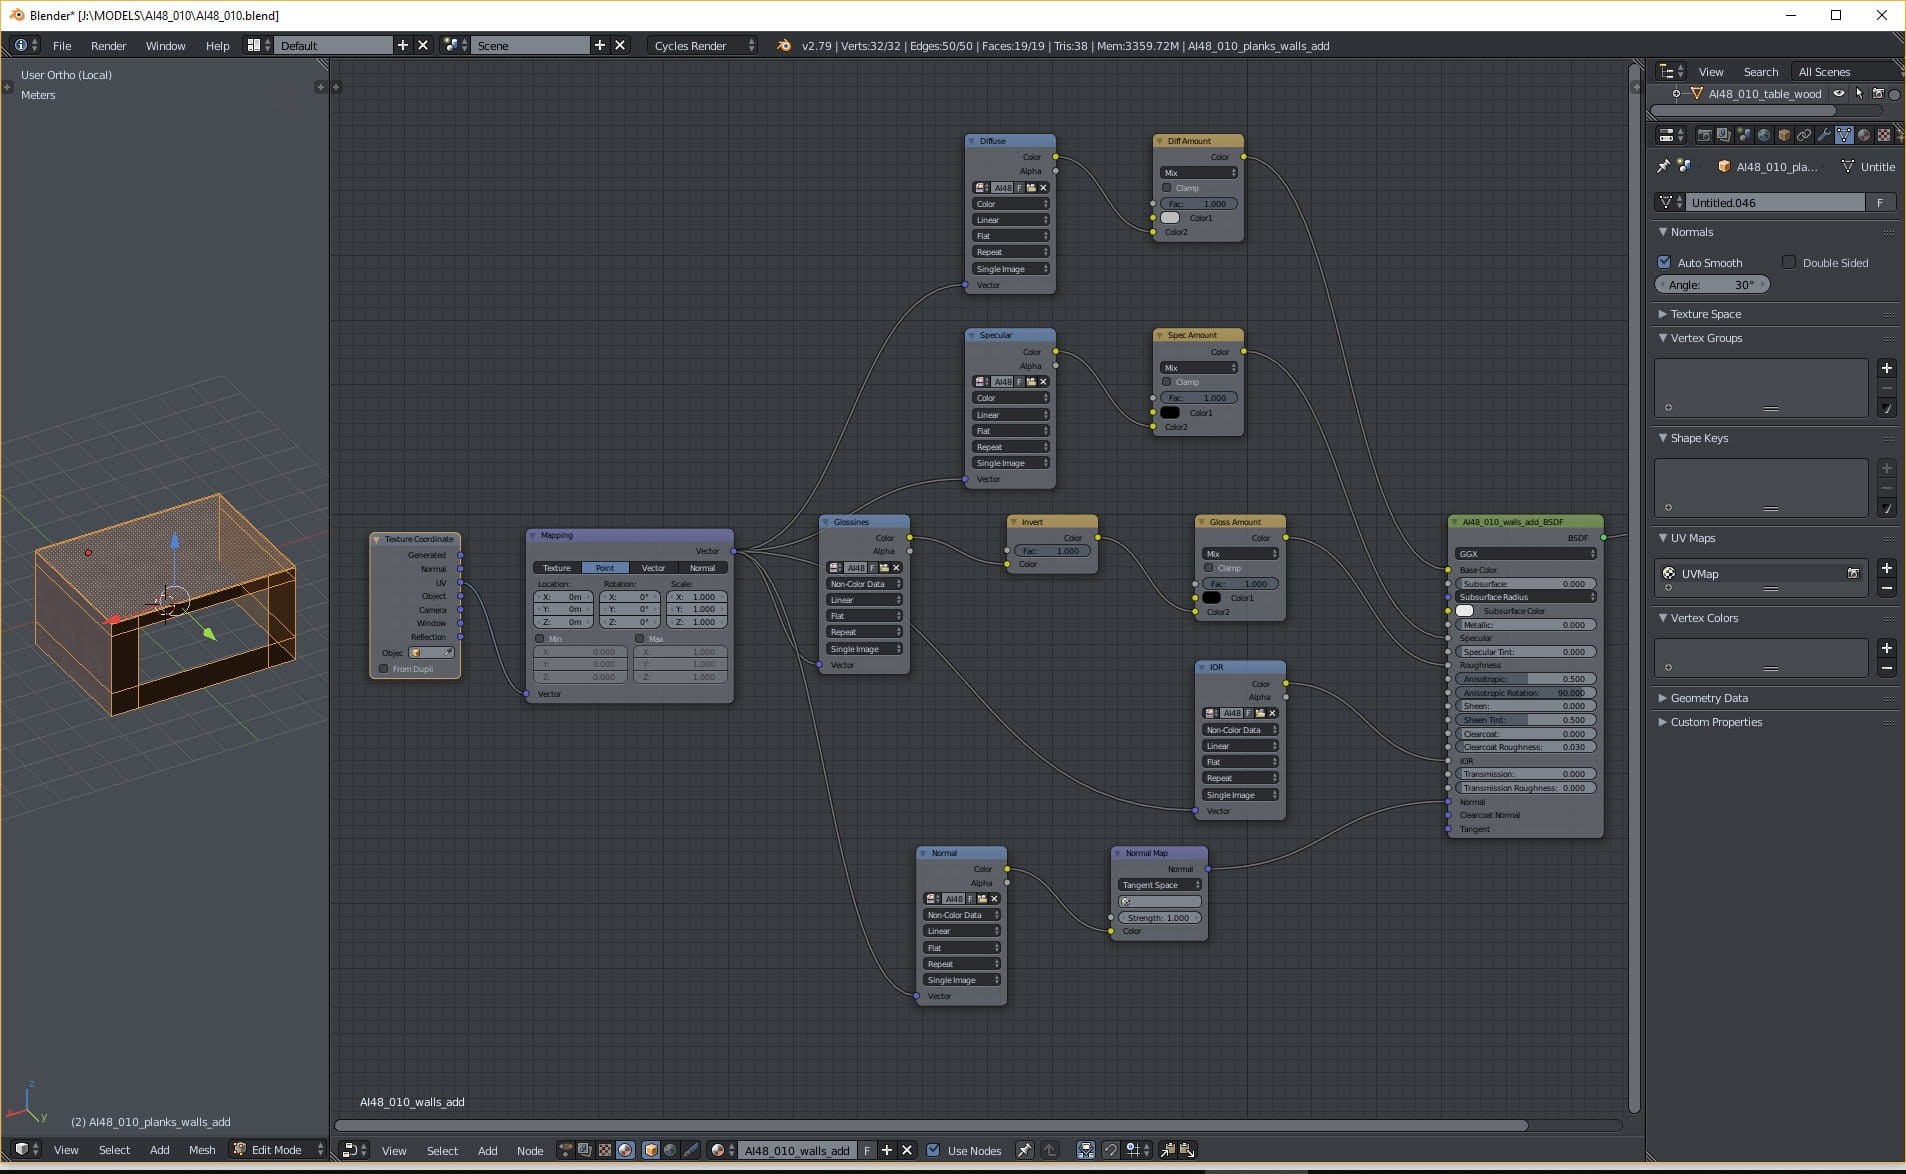
Walls material. We used five basic maps - diffuse for color, reflection map for specular input, inverted glossiness map for roughness input, ior map for index of reflection.
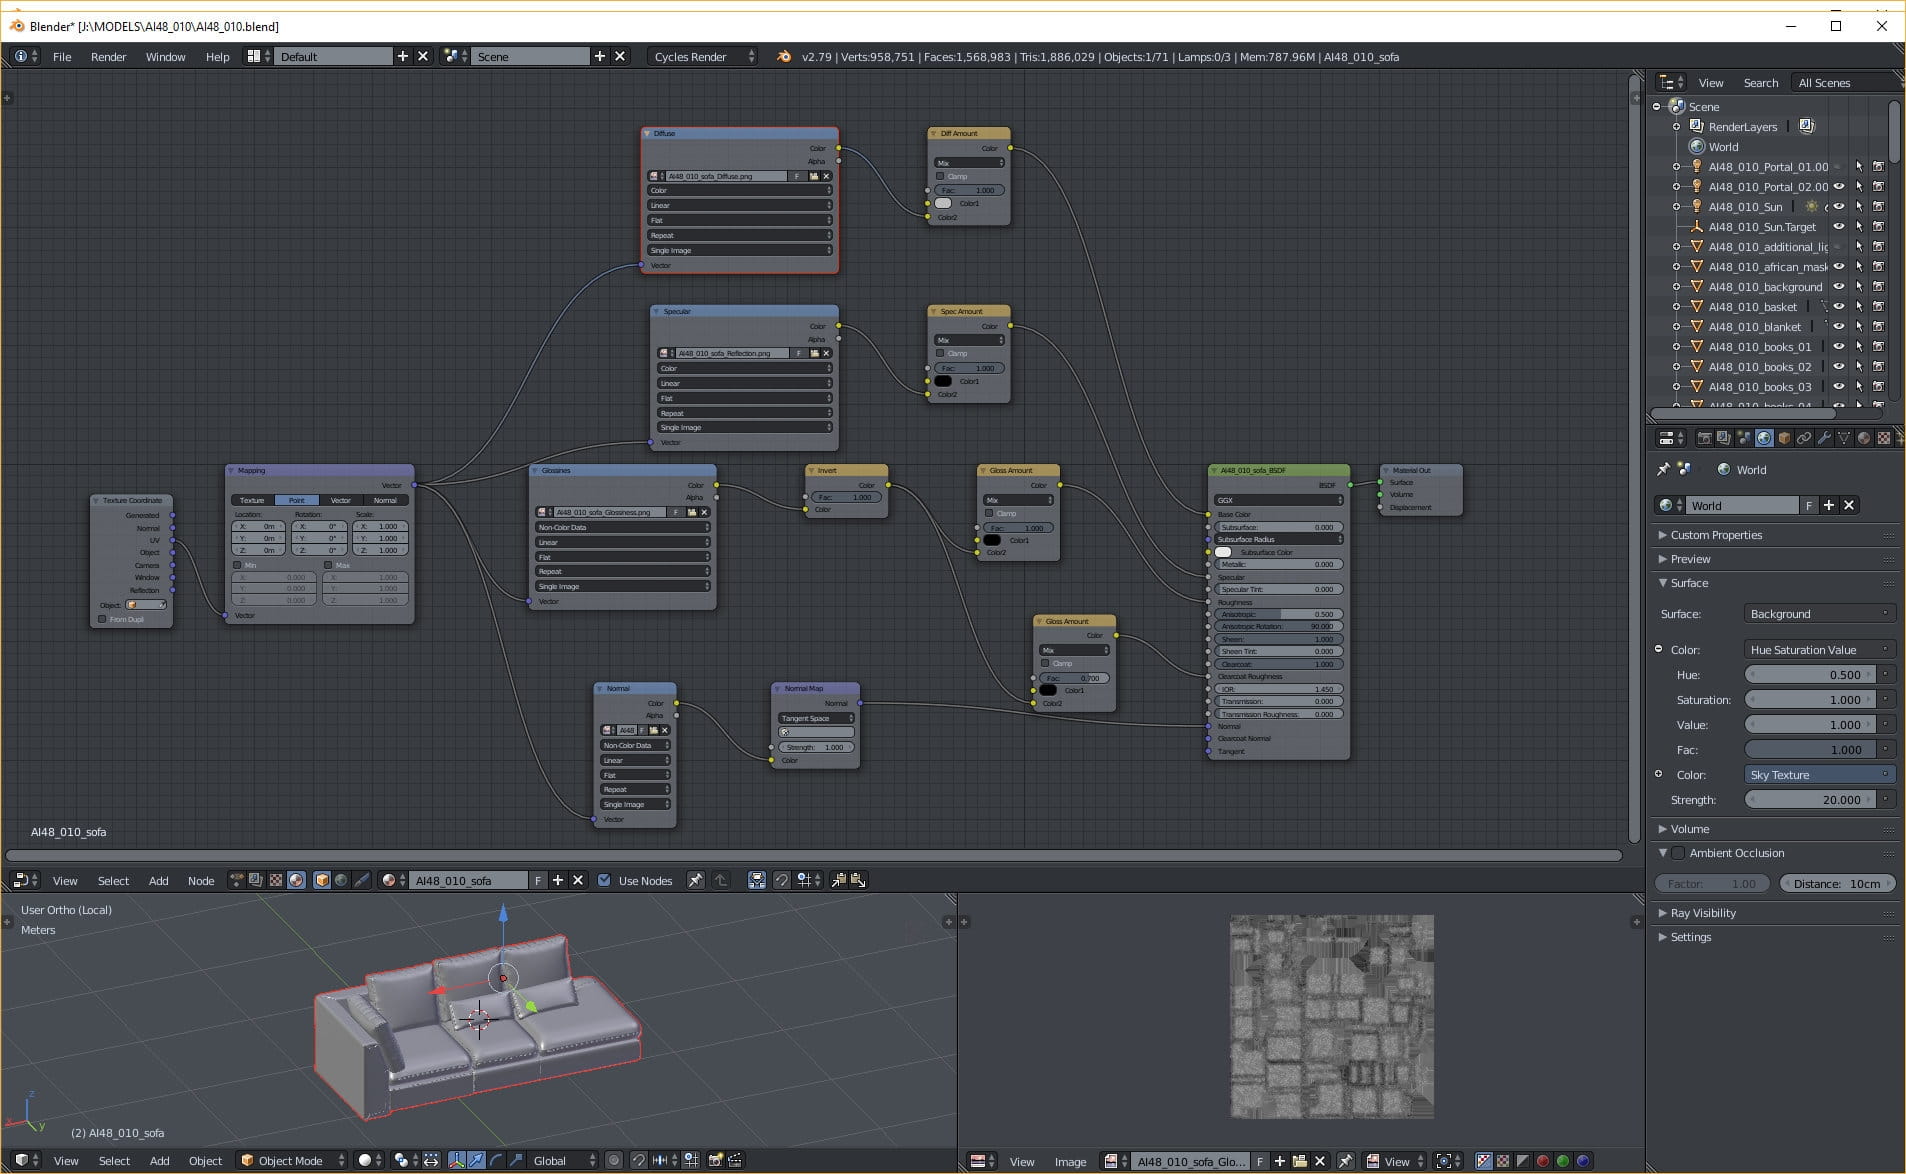
Sofa. The only difference from regular material is that we use Clearcoat input for making more interesting roughness. We use the same inverted glossiness map as in the roughness input, but we change gloss amount to 0.7.
Models are detailed - beveled edges of a table.
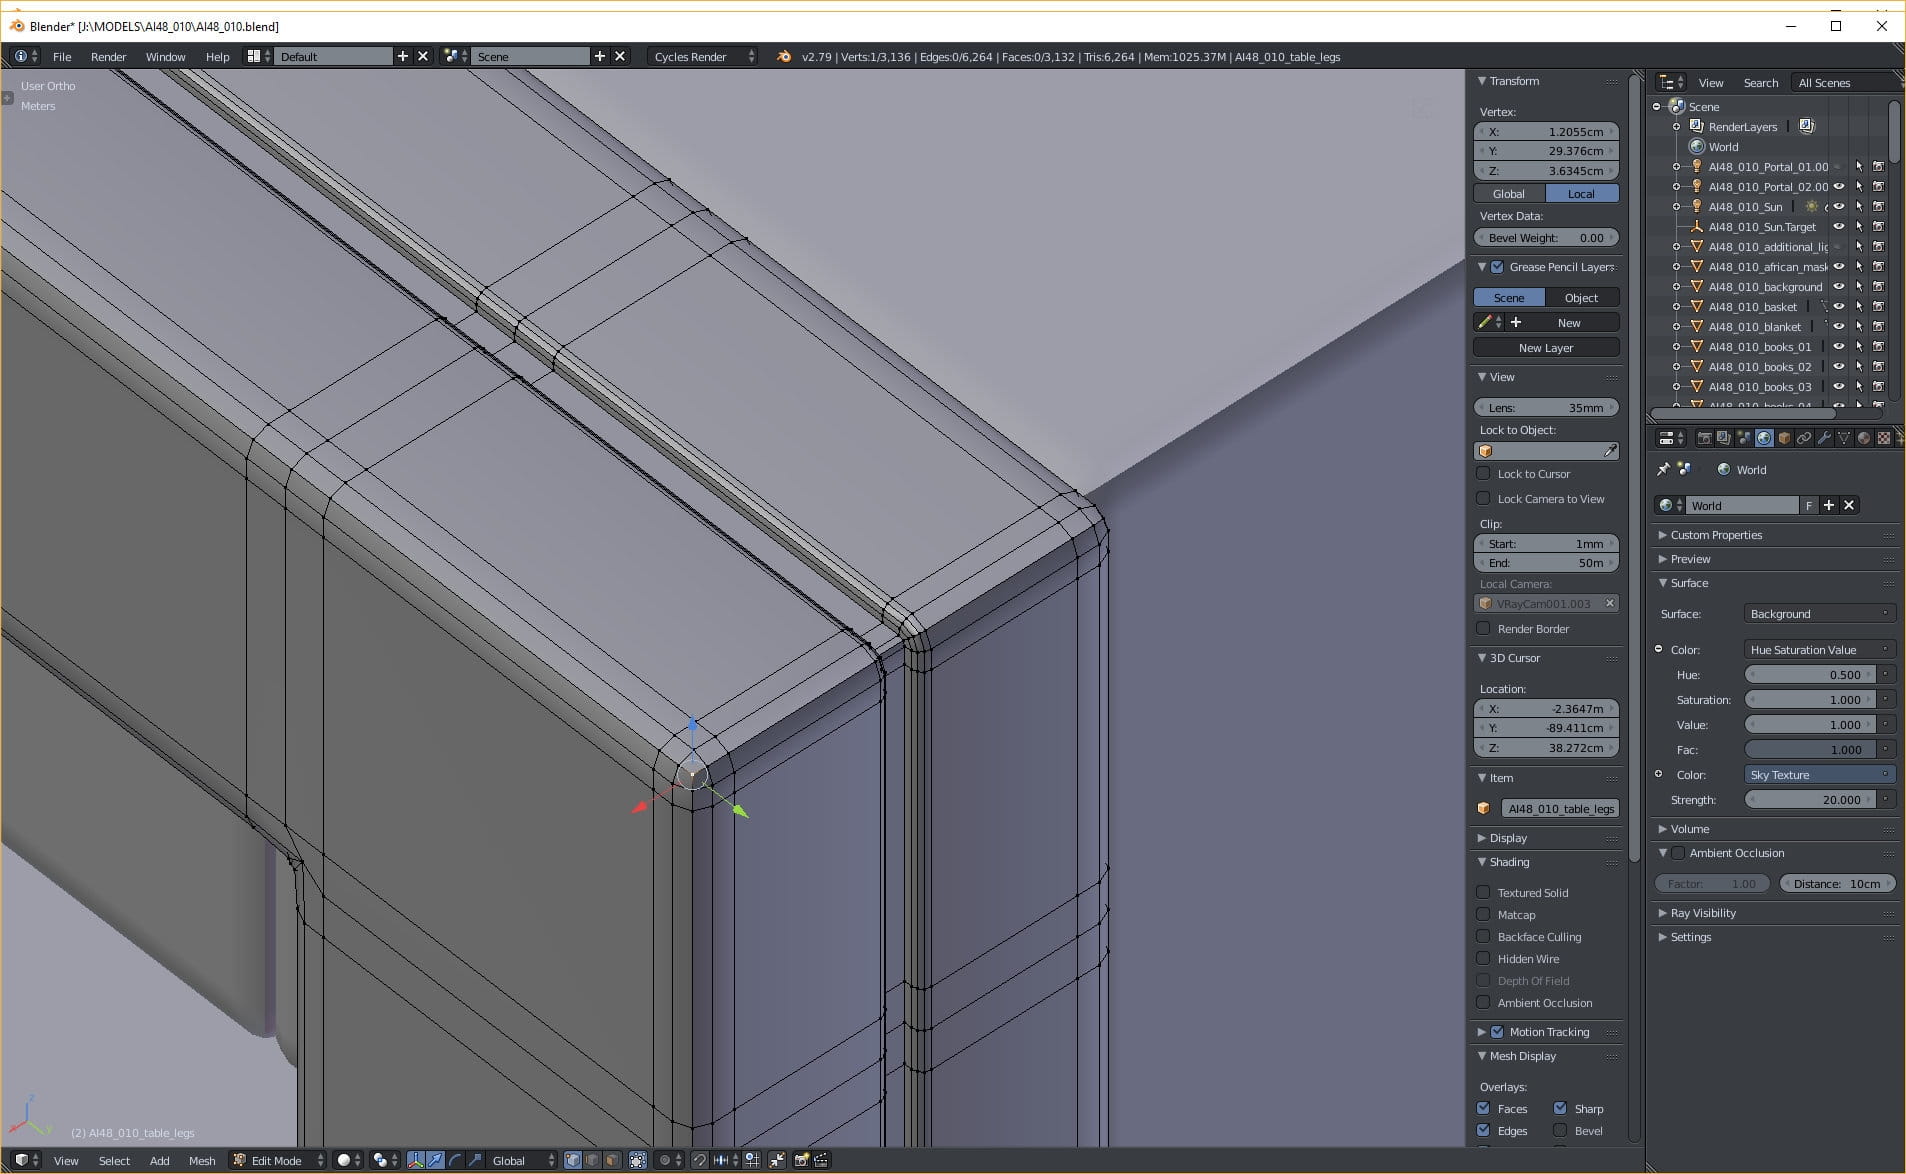
Table - details.

DSLR camera mesh.
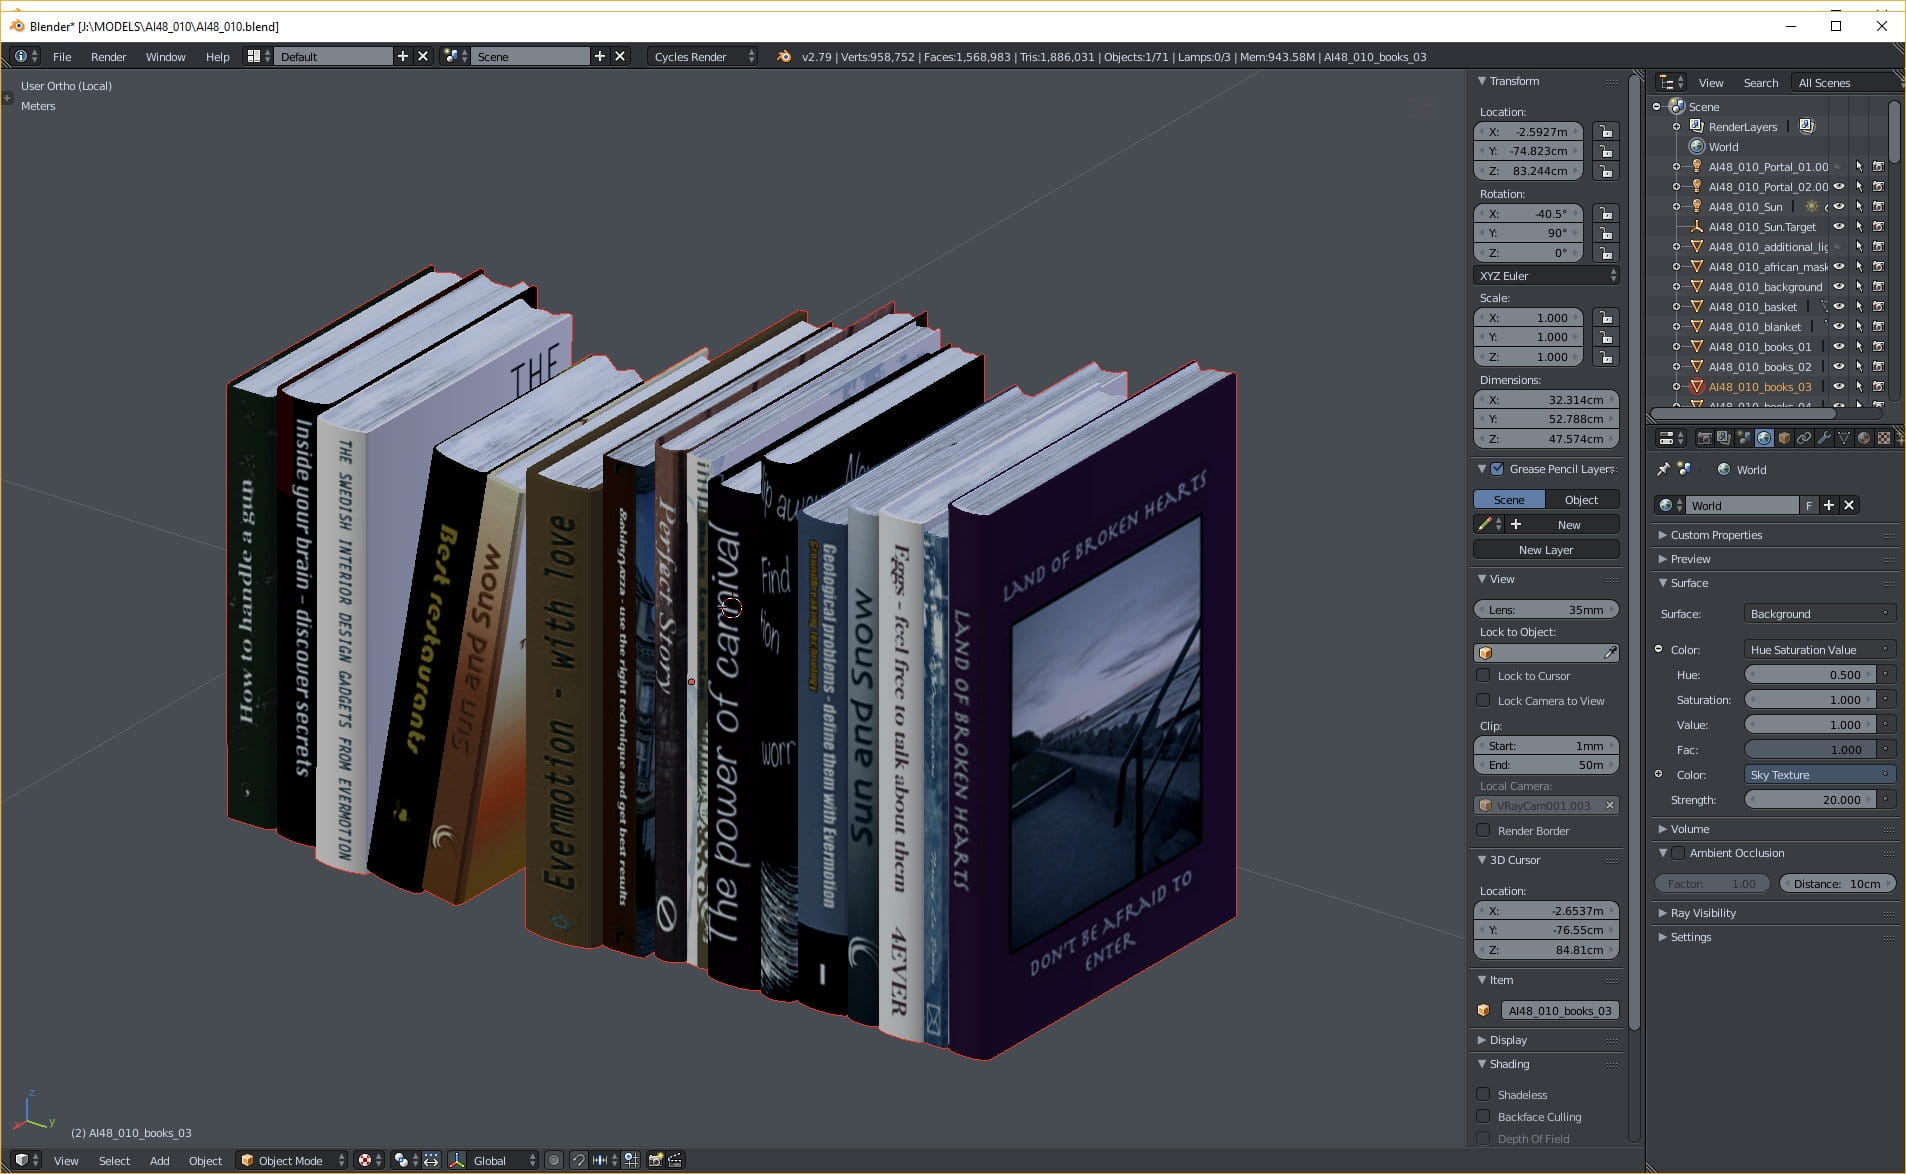
Books with textures.
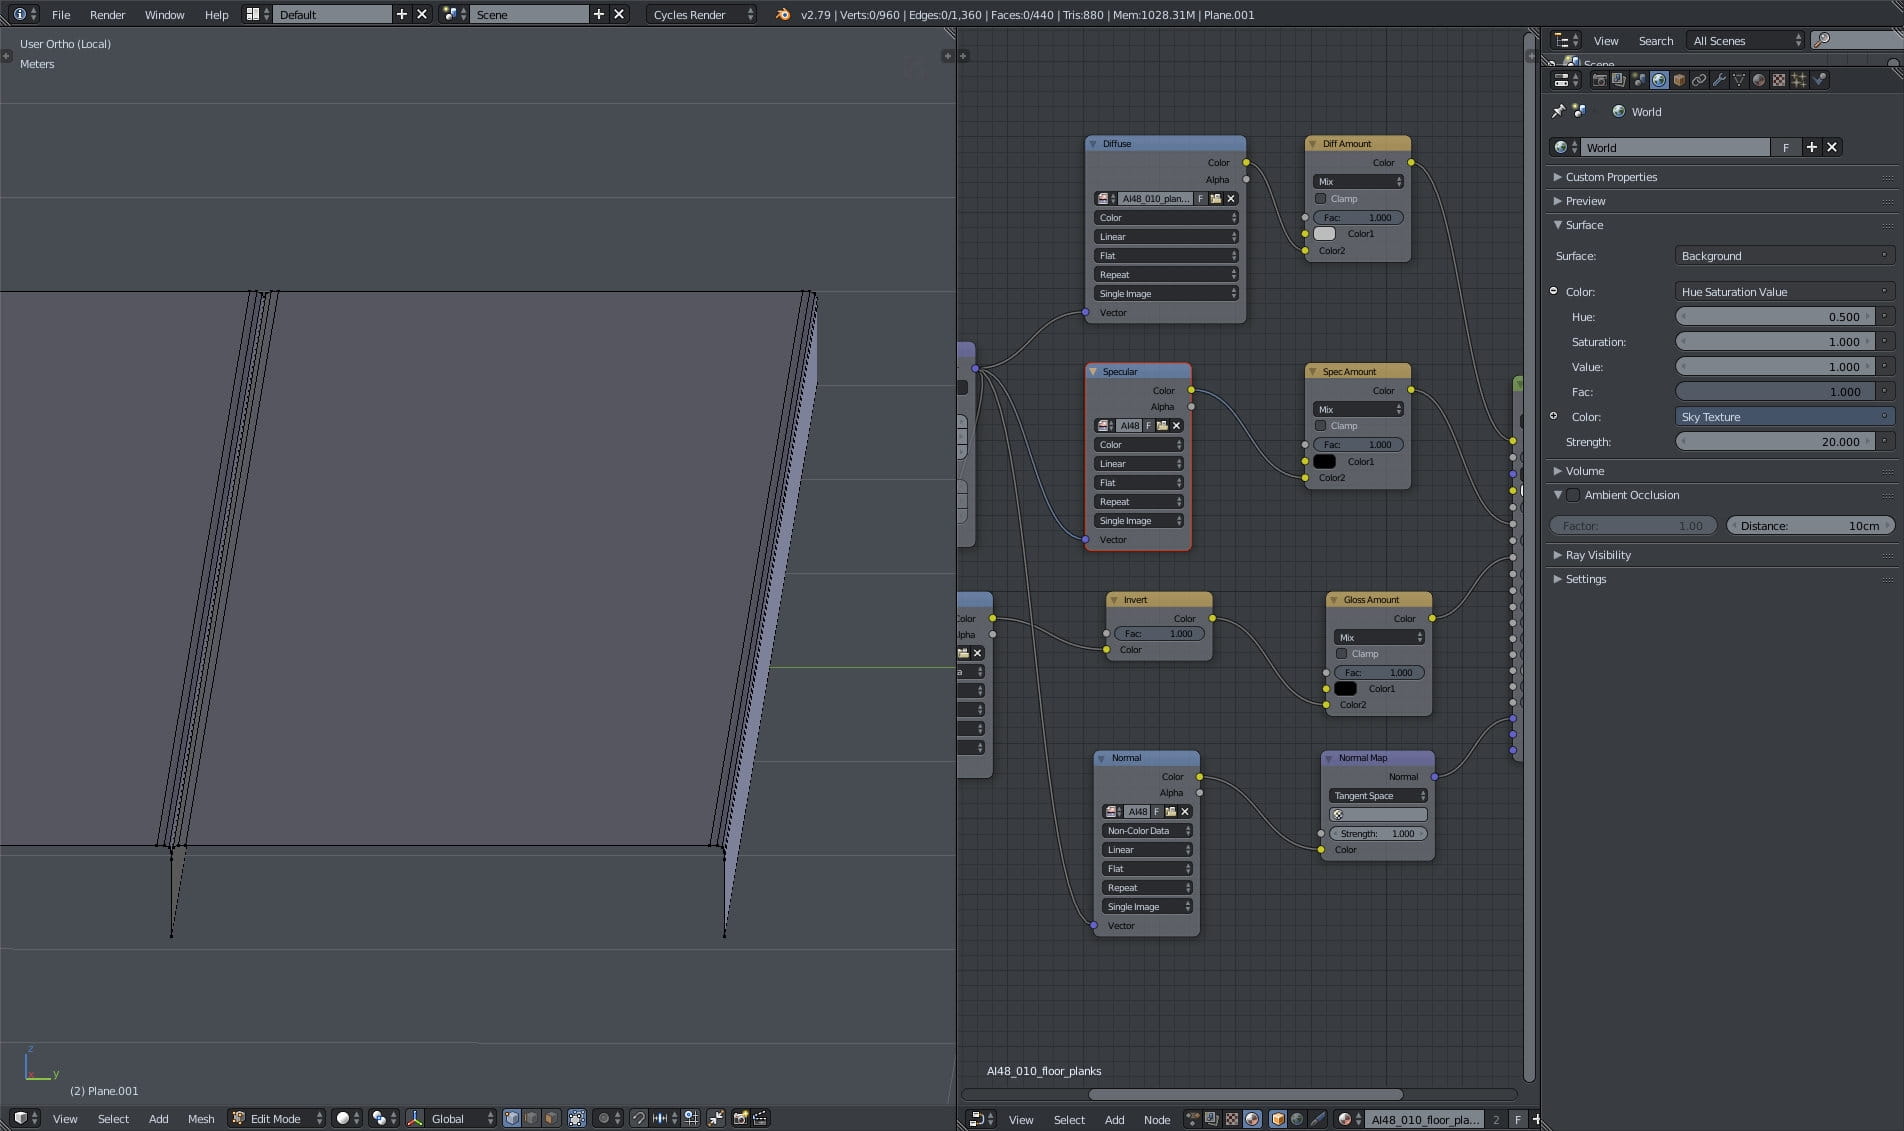
Floor mesh. Material made with standard settings.
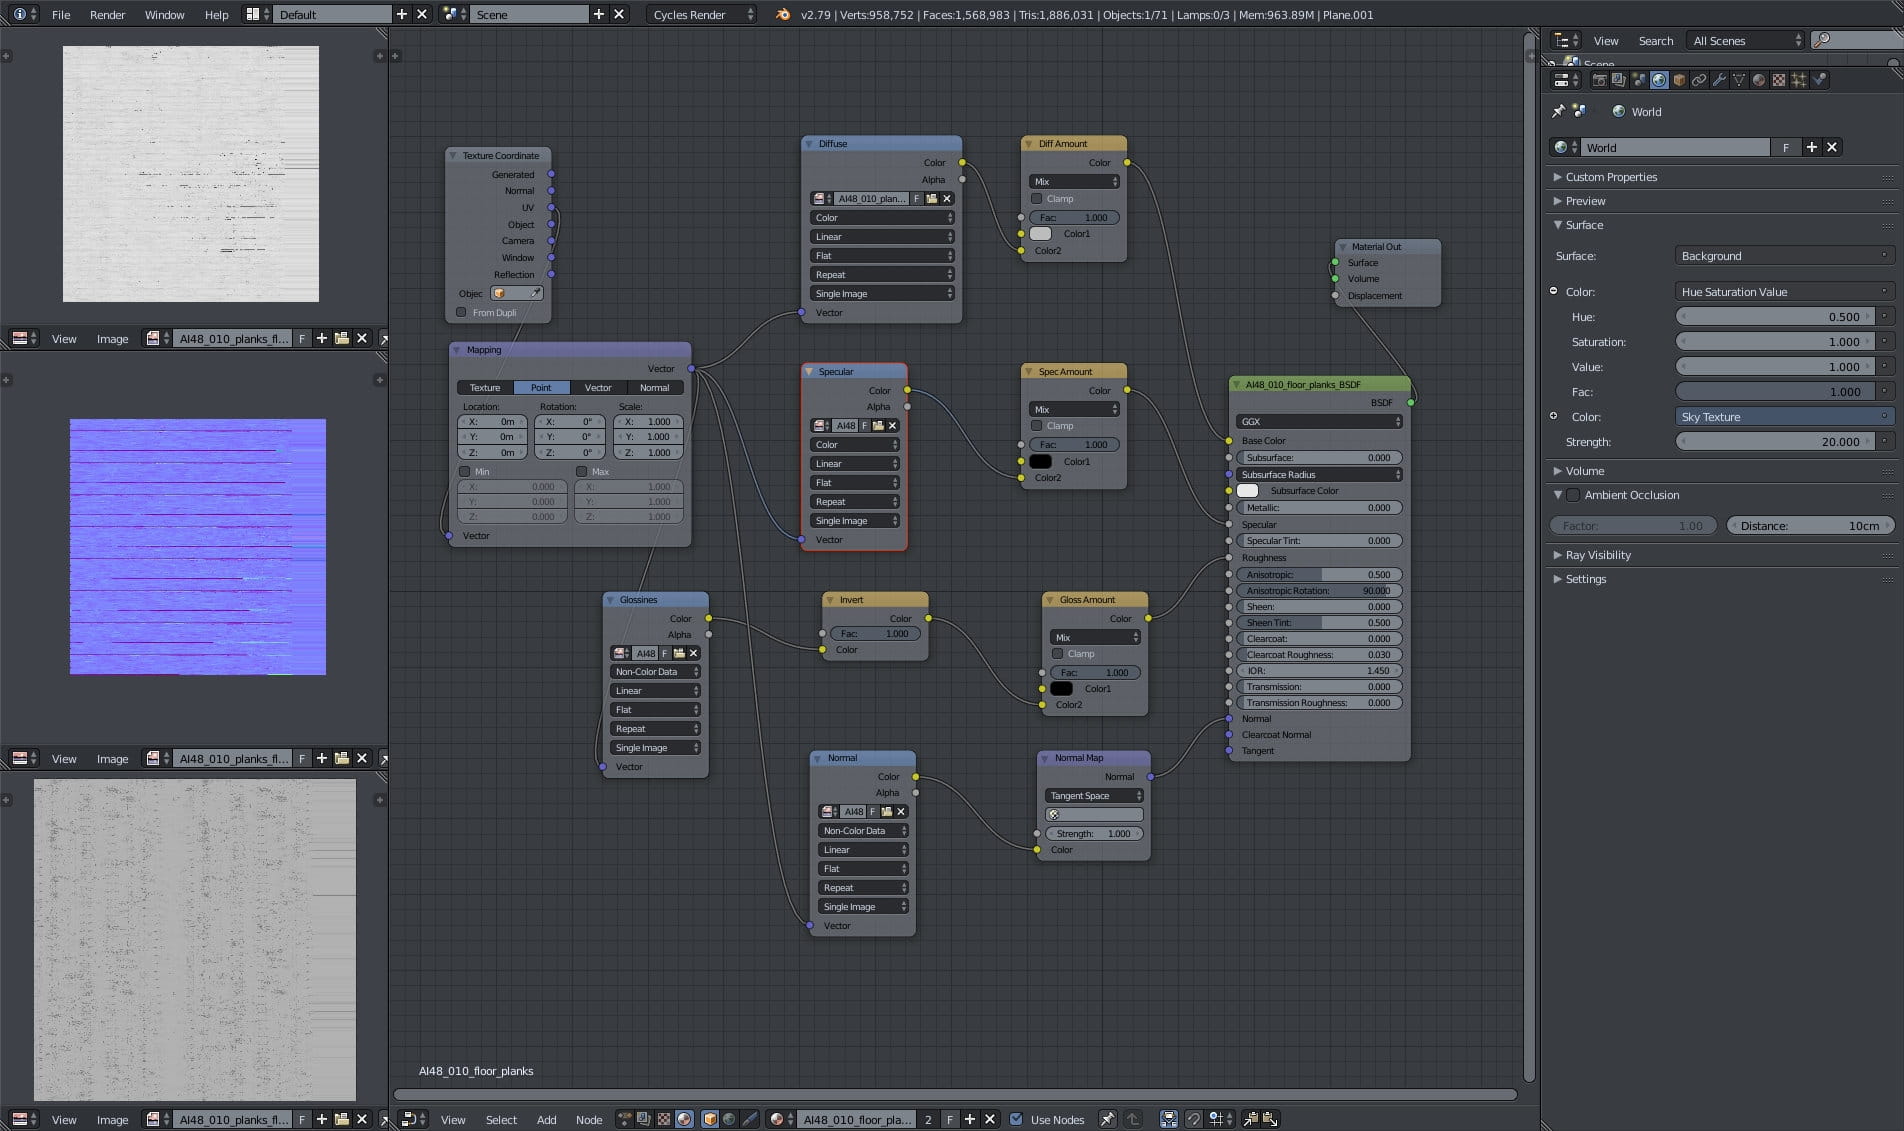
Floor material - on the left (from the top to the bottom) you can see diffuse, normal and reflection map. Material settings are standard. It's worth noting that we textured all assets in Substance Painter which allowed us to texture once and then export to V-Ray, Cycles and Unreal without additional work.
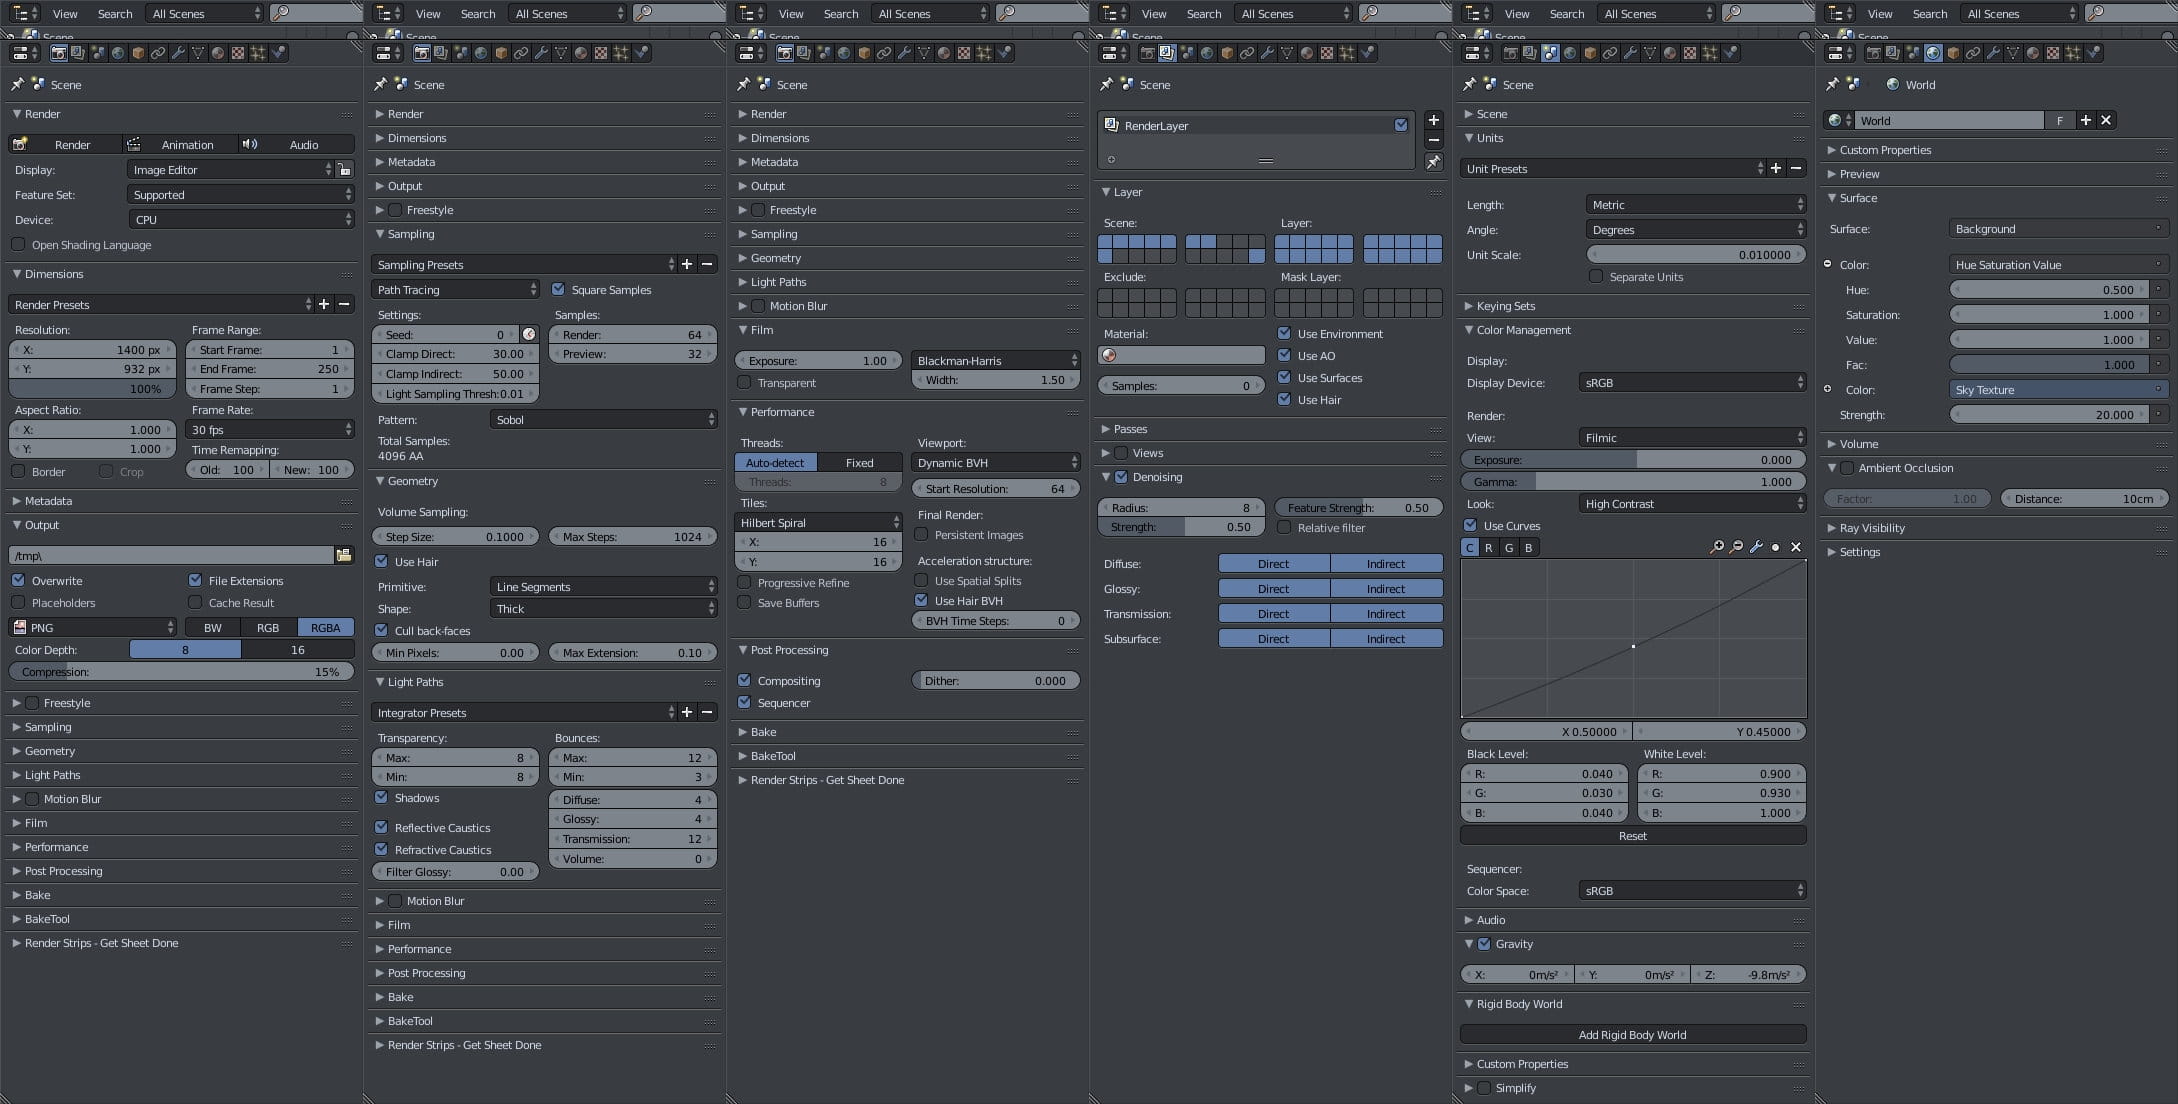
Render settings. Due to high quality maps, the scene is rendered with CPU (it uses almost 10 GB memory). As you can see we use 64 render samples, but we have "square samples" option enabled, which means, that total number is 64 squared (64 x 64 = 4096 samples). It takes some time to render at this quality, but lowering this number to 2000 should be still possible without visible artifacts. We also have Denoising anabled and we sue Filmic color management.
Thanks for reading! You can buy this scene or entire collection in Evermotion Shop.

We made post-production in Blender, but it was just a slight touch. Post-production in Composite Editor was limited to adding a vignette using Ellipse mask, that was blurred and overlayed over the rendered image.
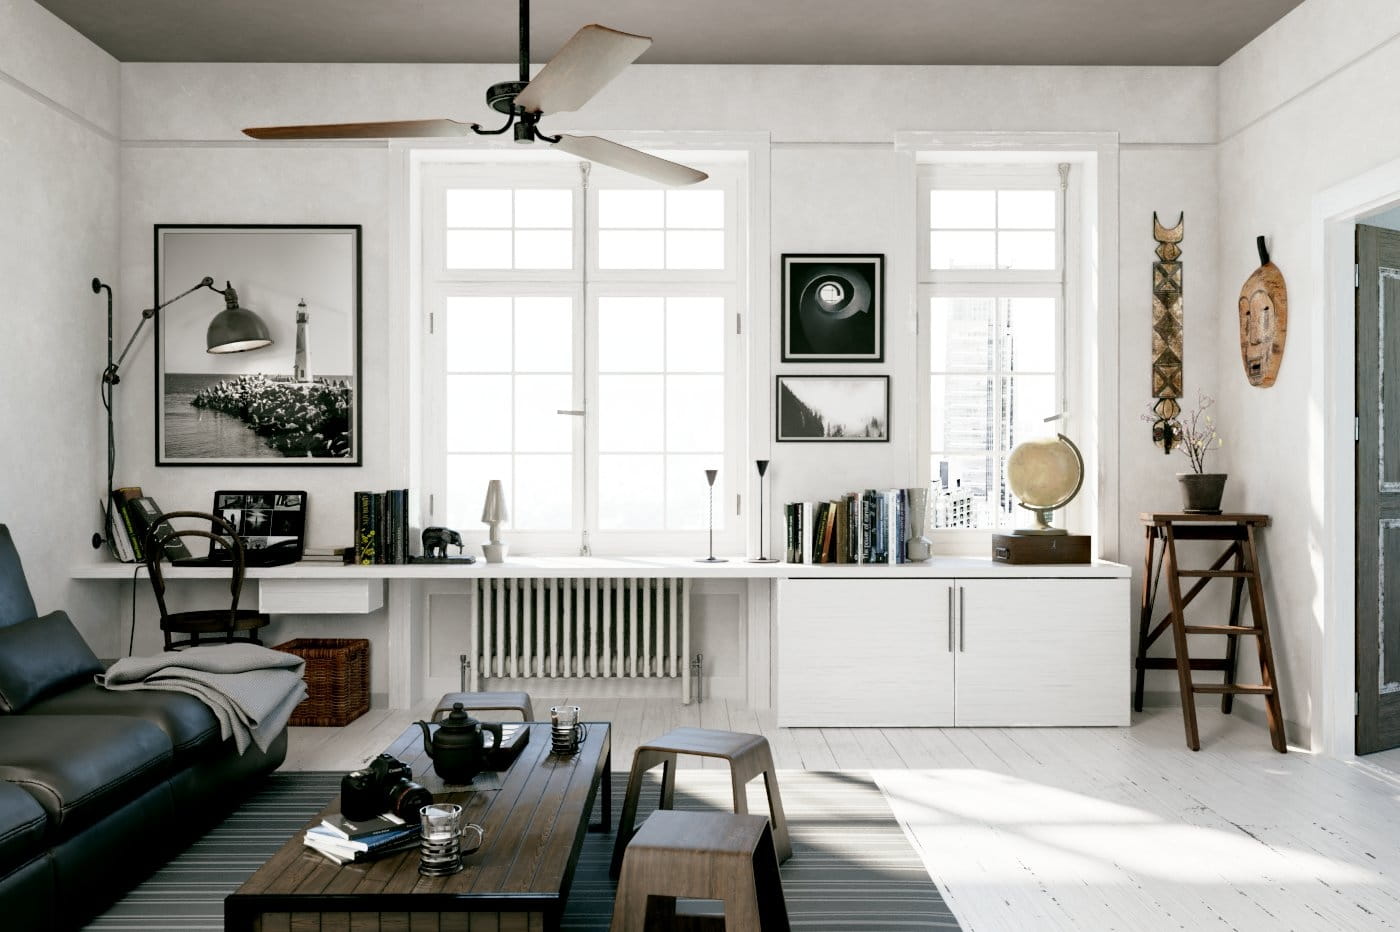
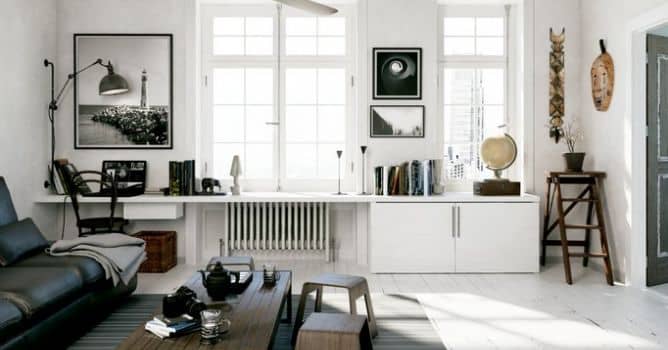
This is a final render after post-production.


LEAVE A COMMENT


|

|

|

|

|
 Customer zone
 Your orders
 Edit account
 Add project
 Liked projects
 View your artist profile
COMMENTS