Evermotion: More Than an Asset Library
How Evermotion became a full-scale production partner for archviz, automotive and synthetic data.


Total: € 0

Hello everyone, my name is Algimantas Raubiška, (a.k.a. Freak`az) and I would like to explain my workflow with Corona renderer in this “Making Of” Small Living Room.
Introduction:
First of all I’d like to thank Evermotion team for inviting me to prepare this tutorial. The scene was created with the intention to try and explore the possibilities of new Corona renderer that is currently in open alpha test stage. So it was a quick and fun workout. The main idea was to create a bright small living room with some Scandinavian design influences.
Inspiration:
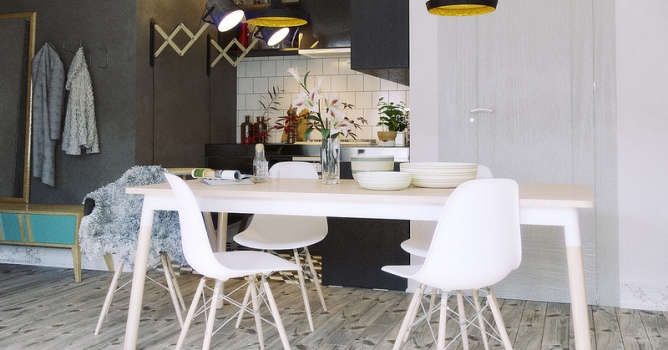
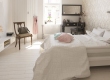
For the inspiration I browsed design blogs and collected references in the “Inspirations” folder. Here are some photos that I checked while working on this project and that caught my attention.
Click on image to enlarge 
Scene setup:
The first (important) step in modeling is the basic scene setup which is setting the correct units. To have everything in the scene in proportion. I work in cm, as my main display and system units. I Also change Gamma value to 2,2.
Click on image to enlarge 
Modeling:
Nothing very special about the modeling process - almost everything in the scene was created with basic poly modeling tools, and all the furniture or accessories were modeled or collected before and were already in my library, so it was basically a drag and drop procedure. Here are some clay renders from the scene.
Click on image to enlarge 
Click on image to enlarge 
Click on image to enlarge 
Click on image to enlarge 
Click on image to enlarge 

I always soften the edges of furniture with support edges and apply the turbosmooth modifier. Cushions on the chair and the sofa and carpets were created with Marvelous Designer, and for the curtains I used max’s native Cloth modifier.
For the floor and wall planks and kitchen wall tiles I used Floor generator script by cg-source. This is free, useful and easy to use script for creating floor geometry.
Click on image to enlarge 
Click on image to enlarge 
First of all I created a high poly basil leaf from a plane and added noise and bend modifiers for the leaves to look more natural. Then I used the GrowFx plugin to generate the plant. For the main stems (1st path in GrowFx) I added a distributor, assigned cylinder mesh to it with Noise, vector and random direction modifiers.
Click on image to enlarge 
After the stem was created I added four more paths in GrowFx, assigned the path position distributor to it with different number of positions and I added an “”instanced geometry mesh” in mesh parameters. For the mesh I used the leaves I created before and adjusted the custom scale of it.
Click on image to enlarge 
Here’s the viewport with plant with all the paths applied. After that I added a simple leaf texture the plant was done. The fun of working with GrowFx is the fact that it allows for making a lot of variations in a fast way. I easily adjusted the stem count and variation of my plant with a single click by changing the seed parameter. This way I got 6 variations of the same plant in one minute.
Click on image to enlarge 
Click on image to enlarge 
The fur on the chair was created with hair and fur modifier. The base mesh was dropped on a chair, using cloth modifier. Then I slightly stylized hair, adjusted clumping, frizz and kink parameters.
Click on image to enlarge 
Materials:
Shading is the hardest part of the process as I often struggle to create realistic materials. I like the materials with uneven reflections so I often use bitmaps with dirt in the reflection and glossiness slots to add subtle imperfections to the material. I also use multilayered maps to avoid repetitiveness. When creating materials in Corona I use the same principles as in V-Ray.
Click on image to enlarge 
Click on image to enlarge 
In diffuse slot I used a mix of two different grey colors, I used light grayscale bitmap of a wood texture for mix amount. I used the same texture for reflection map. For the glossiness I used a composite map consisting of few different dirty textures. For the bump I used mix of the wood texture and a dirt map. That’s the basic workflow I use for the most of the materials.
Click on image to enlarge 
Click on image to enlarge 
Click on image to enlarge 
Click on image to enlarge 
Lighting
I tried the simpliest scenario possible for the lighting. I wanted a bright lit room so I used just Corona sun and sky for scene illumination. The kitchen zone was a bit dark so I added couple of spherical Corona lights in the lamps. I reduced sun intensity to make it less visible and increased sun size for softer shadows. The sky is basically at default settings with just a minor adjustments in Overcast setting.
Click on image to enlarge 
After light setup I made a few quick test renders. And I completely fell in love with Corona renderer as you can adjust the lighting of the image while rendering. You can simply increase the lightness of the image by adjusting “exposure compensation” and adjust the “highlight compression” in the Post processing tab of Corona renderer settings. I also adjusted the white balance to make renders have a bit blueish tint.

Click on image to enlarge 

Rendering
Nothing much to talk about here because Corona has simple settings. The default settings should give you a fairly good result. The simplicity is genius. No more headache about color mapping, and lots of tweaking of bunch of settings. I just switched secondary solver to HD Cache for faster rendering and increased it's PT samples to 1024 to increase sample accuracy in the Sampling increased path tracing samples up to 32 and increased max. sample intensity to 200.

I rendered my images in progressive mode and stopped the renderer whenever it looked clean enough for my taste. The render times were about 4-6 hours per image (2000x1500 px resolution).
Post production
Photoshop was the main tool for postprocessing with the Magic Bullet Photolooks plugin, but I wasn’t bothering to save the *.psd files so I’ll try to recreate the basic workflow which is indeed very simple and quick. Here’s a Raw vs Post comparison.
Click on image to enlarge 
Renders were saved as 32 bit .exr and the first steps in photoshop was addind Diffusion, chromatic aberration, vignette and Anamorphic flare in magic bullet photolooks.
Click on image to enlarge 
I usually duplicate the main image twice and change the blend mode to overlay with opacity of about 30-40%. On the second copy I change the blend mode to screen and again change the opacity of the layer to whatever it looks good to my eyes (about 20-30%). Later I add the curves and color balance adjustment layers. Finaly I add adjustment layer with gradient map called “Transparent Rainbow”. Change the opacity to 2% and blending mode to Overlay to give the image a very slight crossprocessed effect.
Click on image to enlarge 
Conclusion
This is the basic workflow. This project was my first baby steps in Corona and I hope that this “making of” will be helpful for existing and future Corona community. Thank you for reading and Good luck!
Final renders


Click on image to enlarge 
Click on image to enlarge 
You can see all final rendes are on Evermotion Forum - in Small Living Room Thread.

LEAVE A COMMENT


|

|

|

|

|
 Customer zone
 Your orders
 Edit account
 Add project
 Liked projects
 View your artist profile
COMMENTS