Topology Study : How To Model Ski Googles in Blender
Using Blender modeling tools for creating realistic ski googles.


In accordance with the art. 13 section 1 and 2 of the European Parliament and Council Regulation 2016/679 of the 27th April, 2016 on the protection of natural persons, with regard to the processing of personal data and on the free movement of such data, and repealing Directive 95/46/EC (General Data Protection Regulation), hereafter RODO, I hereby inform that:
1. EVERMOTION S.C., 8 Przędzalniana Str., 15-688 Białystok, Poland is the Administrator of your Personal Data (APD)
2. Data Protection Inspector can be reached through e-mail: iod@evermotion.org
3. Your personal data are to be processed on the basis of art. 6 section 1 letter a, b and f of RODO in order to:
a) prepare, conclude and execute the agreement and for other purposes approved by you,
b) to execute the legitimate interest like marketing of products and the agreement, claim assertion or defence against claims resulting from the law regulations.
4. Entities entitled to the reception of your personal data may be the authorised public bodies; mail providers; providers of the services covered by the agreement; responsible for debt recovery, keeping the archives, document utilization, legal consulting, technical services, IT services and accountancy.
5. Your personal data shall not be transferred to the third country, nor to the international bodies.
6. Your personal data shall be processed within the period of the agreement and upon your additional consent until you withdraw it. APD shall keep the data for the period of any civil law claim execution connected with the agreement.
7. You have the right to demand an access to your personal data, to correct or to delete the data if there is no other basis for the processing or any other purpose of such processing or to limit the processing of the data, to transfer the data to another administrator and to raise objections to the further data processing if there is no legal basis for further processing and to withdraw any previous consent.
8. You provide the personal data voluntarily, however they are necessary to conclude the agreement. The refusal of providing such data may result in the refusal of the agreement conclusion.
9. You have the right to lodge a complaint to the Personal Data Protection Office when in your opinion the data processing violates the regulations of General Data Protection Regulation of the 27 April, 2016 (RODO).
10. Your data will be automatically processed, including the form of profiling.
11. You are obligated to forward above mentioned information to your representative, especially if you appointed this person in the agreement as the contact person or as the representative for the agreement execution.
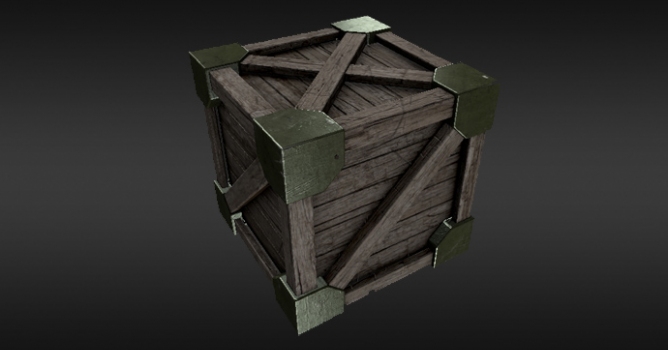

Blender gives us all kind of texturing techniques that would take days if not weeks to describe. Still it's not a common ground for many 3D artists as there are not many good free tutorials that investigate this subject. In order to fill this gap I decided to create this short tip that explains how to use GLSL shading and tweak our textures in realtime without using any other 2D or 3D software. I focused on two kinds of materials – wood and metal. Both of them require Color, Specular and Normal Maps. They all belong to the lowpoly crate I made exclusively for this exercise.

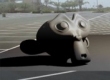
First thing's first; because we are going to take advantage of Blender's GLSL shading, we need to focus on our scene. This mode requires light sources so I added 3 sun lamps and rotated them, so that they would hit my object from different angles. I also switched to Texture Viewport Shading mode in order to see my texturing progress directly in my 3D View.

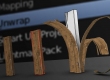
Flawless texturing workflow requires solid unwrapping, therefore you should always think twice before performing this task. Placing seams and all the islands in UV/Image Editor is crucial as it can speed up our work. Personally I don't trust all kinds of automatic unwrapping as they evetually need additional corrections in the end. Marking seams manually lets you hide them so that future painting over texture is no longer required. In this case I also made sure that all the islands are rotated horizontally according to the direction of my texture's wooden rings. I didn't mind that they were way off the borders of my UV/Image Editor as I decided to use only seamless textures in this case.
Click on image to enlarge
I prefer to think ahead, so I decided to bake AO for my models. I added two new images 2048 x 2048 pixels each in UV/Image Editor and performed this action for both of my objects. So far I worked on default materials therefore the textures I got were in greyscale. However if by any reasons you get other result always make sure to enable Normalized option that will get rid unnecessary tones.
Click on image to enlarge
Let's get to work! Wooden parts of the crate were my first target. I used one texture for colour that I mixed with AO in two other slots. For the first one I used Substract Blend mode and Negative option that resulted in dark, dirty and jaggy stains-like shadows. The second was just a Multiply that gave my crate more vintage look. Needless to say that for Ambient Occlusion images I used one extra UV mapping that kept all my islands inside UV/Image Editor.
Click on image to enlarge
Time for bump and specular maps. For this task I reached for my diffuse texture that I had to slighlty improve in other application. Unfortunatelly Blender's GLSL shading ignores procedural textures and any changes that are made from the Colors set of Texture option. In other words desaturating or changing contrast of our image would not be visible in 3D View. For those who would still like to limit their workflow to just one application I suggest reaching for Node Editor that works with GLSL as expected. In my case I made another texture with higher contrast and greyscale that I set as an influence on surface's Specular Intensity and Normal. I also darkened a bit Material's Specular colour and changed its intensity to zero in order to control my texture's influence better.

In order to get a few extra scratches I added another seamless texture and doubled its size using Mapping options. I limited its usage to just one slot where I made it influence material's bump, colour and specular (multiplying the last two). My work on planks was at this point over.

For my second shader I took a different approach. I started with a greenish diffuse colour that became my base for other textures. I also set material's Specular Intensity to zero but changed its tone to light green.

Again I used just one seamless texture for colours that I prepared myself; I doubled its size and set Blend mode to Overlay. This way I saved object's base colour that now became scrapped and dirty.

My next goal was to lighten the edges of crate's metal corners so that they would feel more smooth and brushed-like. I found Dirty Vertex Colors in Blender's search window that added another handy feature inside Toolbox. With a help of few sliders I brightened sharp edges of my object creating new Vertex Colors for my model. Because I needed this result in form of a .jpg I marked Vertex Color Paint in my material's Options and baked its texture to the new image. I loaded it to texture slot, disabled Vertex Color Paint back again (default state) and set its Blend mode to Lighten. Because the result was to bright I decreased Color influence to somewhere below 0.2.

Because metal corners needed additional stratches, I loaded another greyscale seamless image texture and placed it in two another slots. The first one controlled material's Specular Intensity , while another its color and bump. This time I inverted its colors so that all the scratches would be brighter than original colour of the surface. I achieved that by switching Blend Type to Add.
Click on image to enlarge
I started working on material's specularity by using diffuse texture as the one that controls it (RGB to Intensity, Multiply Blend Type). Corners looked fine already but I came up with another idea. I loaded another image texture that looked like a highly contrasted dirt and set its influence to Specular Intensity once again. Choosing Multiply Blend Type I darkened current specularity of my object not affecting its Diffuse color at all. This way I received some grease stains that became visible only on the highlited surface of my metal corners.

Just one more AO image that multiplies the color of the crate and texturing is finally done. The only thing that's left is baking its Textures (diffuse map), Specular intensity or Normals (if you want to save bump as a normal map image) to three different images. This way you can delete all the textures from the slots and replace them with only 3 files. Moreover such images can be easily used in other 3D programs that do not allow complex texturing blending.
Happy blending, folks!


LEAVE A COMMENT


|

|

|

|

|


COMMENTS