I decided to work in my favourite programme Blender and use its Internal render engine. I started my work from modelling "a head" of the microphone out of a single Cube. First I added dozens of edge loops marking all the places that would be cut out in the near future.
After that I added a Smooth Modifier and increased its smoothing iterations (Repeat slider) until I got the shape more round.
When I made sure that my mesh was round enough I applied Smooth Modifier and deleted all the faces my microphone did not need. Since it did not have any thickness I used a Python script called Soldify Selection with its default settings that did the trick
After adding some details to my mesh I used Subsurf Modifier in order to make it more smooth. To fix problems with areas that became a bit too round I created extra edge loops around every hole.
The remaining parts of my microphone were easier to model. I made them using such Blender tools as Proportional Edit, Spin and beveled Curves (for cables) mostly. I grouped all the objects together (using Ctrl+G), named them "microhone" and then added them twice to my scene. It helped me to keep my scene clean and if it would only be necessary let me change the shapes of my microphones all at the same time.
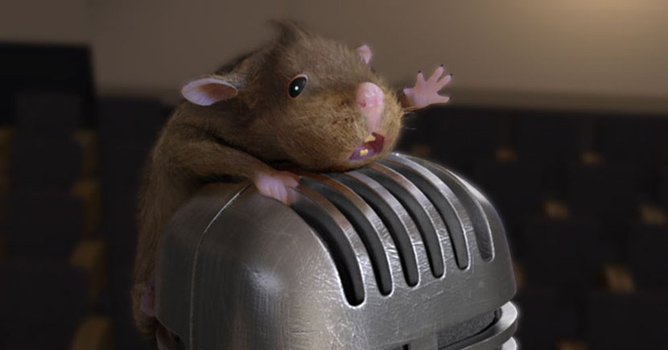
When I decided that there was nothing more to improve I started modelling my roddent. Since I could not figure out how it should look like without its fur I found some pictures of wet rats on the web. Having some clues I prepared a simple mesh using box modelling technique. I did not keep too much attention to details except for its face and paws as I realized that the rest of its body would be covered with fur.
The next thing I made was an armature for my roddent. I consider all the rats and lemmings as quite agile creatures so I did not spare some extra bones for my roddent's fingers, ears and spine.
When I parented them all together I selected the mesh, then the armature, hit Ctrl+P, chose Armature and finally Create From Bone Heat option. This way Blender automatically creates vertex groups parenting them to the nearest bones.
After switching to Pose Mode I started working on my roddent's position. I kept an extra care to his fingers though they were supposed to hold the micropone, trying to raise the body at the top of it.
Afterwards I covered my creature with three layers of hair using Blender's Particle System. To make sure that they would not grow on such areas as mouth or eyes I made vertex groups selecting all the faces that should not remain bald. I put the name of those groups in every fur layer's Extras panel.
The first hair layer was responsible for a short fur and covered the whole roddent's body. The second one added a bit longer but straggly fur, while the third gave my roddent a moustache. I combed them all a bit, messing up with roddent's hairdo in Blenders Particle Mode. This way I gained even greater control over roddent's hairstyle, changing the shape, length and density of chosen fur areas.
I made the background of the scene by modelling one chair and then multiplying it with an Array Modifier.


 Customer zone
 Your orders
 Edit account
 Add project
 Liked projects
 View your artist profile
COMMENTS