Evermotion Pass 10% Off - Get Instant Access to Thousands of 3D Assets

Check Plans

Information Clause

In accordance with the art. 13 section 1 and 2 of the European Parliament and Council Regulation 2016/679 of the 27th April, 2016 on the protection of natural persons, with regard to the processing of personal data and on the free movement of such data, and repealing Directive 95/46/EC (General Data Protection Regulation), hereafter RODO, I hereby inform that:

1. EVERMOTION S.C., 8 Przędzalniana Str., 15-688 Białystok, Poland is the Administrator of your Personal Data (APD)

2. Data Protection Inspector can be reached through e-mail: iod@evermotion.org

3. Your personal data are to be processed on the basis of art. 6 section 1 letter a, b and f of RODO in order to:
a) prepare, conclude and execute the agreement and for other purposes approved by you,
b) to execute the legitimate interest like marketing of products and the agreement, claim assertion or defence against claims resulting from the law regulations.

4. Entities entitled to the reception of your personal data may be the authorised public bodies; mail providers; providers of the services covered by the agreement; responsible for debt recovery, keeping the archives, document utilization, legal consulting, technical services, IT services and accountancy.

5. Your personal data shall not be transferred to the third country, nor to the international bodies.

6. Your personal data shall be processed within the period of the agreement and upon your additional consent until you withdraw it. APD shall keep the data for the period of any civil law claim execution connected with the agreement.

7. You have the right to demand an access to your personal data, to correct or to delete the data if there is no other basis for the processing or any other purpose of such processing or to limit the processing of the data, to transfer the data to another administrator and to raise objections to the further data processing if there is no legal basis for further processing and to withdraw any previous consent.

8. You provide the personal data voluntarily, however they are necessary to conclude the agreement. The refusal of providing such data may result in the refusal of the agreement conclusion.

9. You have the right to lodge a complaint to the Personal Data Protection Office when in your opinion the data processing violates the regulations of General Data Protection Regulation of the 27 April, 2016 (RODO).

10. Your data will be automatically processed, including the form of profiling.
11. You are obligated to forward above mentioned information to your representative, especially if you appointed this person in the agreement as the contact person or as the representative for the agreement execution.

OK

3dsmax: Reactor

LIS 2006-12-06 00:00 tutorial  > 3ds MAX  > animation

Hello everyone! I had prepared three tutorials about using reactor in 3ds Max. Reactor is a tool that allow you to simulate real world feature like gravity, objects, cloths.

1. Coins
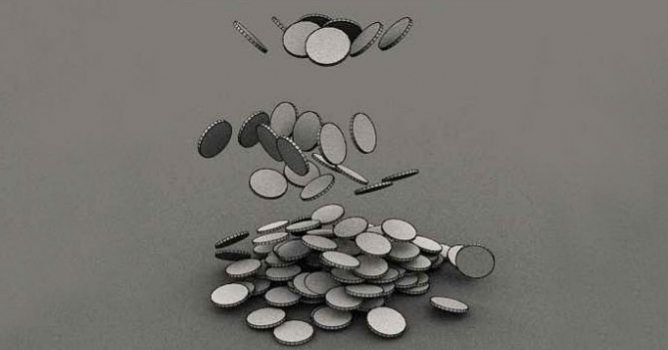
In first part you get to know how to make coin stack by using only "Ridig Body Collection".


In this part We are going to do a coins stack. It's hard to keep accuracy when we want to do that manually because of lots number of objects. So it is quite smart to do some simulation.


1. Let's start from simple plane divided into 50 , 50 segments.


2. Create simple coin model from Cylinder primitive. Remember to add UVW mapping (plane) now.


3. By using Clone order just copy, rotate and move coins till you get column of coins.


4. Hit Ctrl + A to select all objects in scene and apply "Rigid Body Collection".


5. Select only coins and open "Property Editor". Set all values as i show bellow. Select floor and in "Property Editor" set Concave mesh.


6. Go to Utilities->Reactor-> World and set "Col.Tolerance" to 2.0cm Open also "Preview & Animation" Tab and set "End Frame" to 200.


7. Your scene is ready to start simulation. Press "Preview Animation" and press "P" from your keyboard. If everything is doing right close simulation Window and press "Create Animation" Button.


You can download complete scene Here.


2. Curtain
Second one will show you how to make curtain. I used "Deforming Mesh Collection" and "Cloth Collection".


Welcome in second part of this tutorial. This time i will show you how to make curtain.


1. Just Create Box divided to 1 , 1 , 15. Exactly bellow it make plane divided to 10 , 15.


2. Select box and apply "Deforming Mesh Collection". Select plane and apply "Cloth Modifier" and "Cloth Collection".


3. Select box, go to frame 5 on time-line and set key. Now go to frame 40, Using Select&Scale tool scale box to 15% of original value i x axis. hit "set key".


4. Select box, hit "Open Property Editor" and mark "Unyielding".


5. Select plane and go to modify panel. turn on "Avoid Self-Intersection" and set Air Resistance to 0,01. Click on "Attach To DefMesh", select box for "Deformable mesh" and select upper vertex.


6. Go to Utilities -> Reactor -> World and set Col.Tolerance to 1,0cm.


7. Now you can test simulation by hitting "Preview Animation". If it's OK press "Create Animation.


You can download complete scene Here.


3. Lift
Last tutorial present the way to create simple lift. We will use "Ridig Body Collection",

"Point-Point Constraint", "Rope Collection" and "Motor".


In this part I Will explain you how to make simple Lift.


1. We need to create geometry for simulation. Let's make simple Crate, Spinning-wheel, rope(spline), and floor. During making a spline, take care to put Vertex densely. We will need also two boxes next to our Spinning-wheel. Your scene should look like bellow.


2. Hit Ctrl + A to select all, and apply "Ridig Body Collection".


3. Select Crate and go to "Property Editor". Set Mass value to 5,0.


4. Select Spinning-wheel and go to "Property Editor". Set Mass value to 1,0 and Concave mesh. Select floor and in "Property Editor" set Concave mesh.


5. Create two "Point-Point Constraint" objects and set them as i show bellow.


6. Create "Constrain Solver" and select it. Go to modify panel, Chose "RB Collection" and add all "Point-Point Constraints".


7. It's time to select our rope and apply "Rope Modifier" and "Rope Collection"


8. Select rope and go to modify panel. Set Air Resistance to 5,0. Click on "Attach To Rigid Body", Show Spinning-wheel as RB Collection and select upper Vertex. Do this same for crate, remember to select vertex at opposite site of rope this time.


9. Last thing to do is to select Spinning-wheel and apply Motor. Set it as bellow. Go to Utilities->Reactor->World and set Col. Tolerance to 2,0cm.


10. Now you can test scene by "Preview Animation". When it's OK press "Create Animation.


You can download complete scene Here.


Author: LIS
Tags:
You may also like...
Using 3D models in game design: Innovative approaches to production

Using 3D models in game design: Innovative approaches to production

In game development, 3D modeling is now a fundamental shift towards creating immersive and visually captivating gaming experiences.
×

LEAVE A COMMENT

You need to be logged in to leave a comment. Don't have account? Register now.

Adanedhel 12:11:52  |  16-07-2011
weird i didnt see this tutorial earlier :). at least now i can learn few more things that will help me with my projects. was trying to find this everywhere but didnt know it was reactor that was doing this. thx andrzej pozdro