Evermotion Pass 10% Off - Get Instant Access to Thousands of 3D Assets

Check Plans

Information Clause

In accordance with the art. 13 section 1 and 2 of the European Parliament and Council Regulation 2016/679 of the 27th April, 2016 on the protection of natural persons, with regard to the processing of personal data and on the free movement of such data, and repealing Directive 95/46/EC (General Data Protection Regulation), hereafter RODO, I hereby inform that:

1. EVERMOTION S.C., 8 Przędzalniana Str., 15-688 Białystok, Poland is the Administrator of your Personal Data (APD)

2. Data Protection Inspector can be reached through e-mail: iod@evermotion.org

3. Your personal data are to be processed on the basis of art. 6 section 1 letter a, b and f of RODO in order to:
a) prepare, conclude and execute the agreement and for other purposes approved by you,
b) to execute the legitimate interest like marketing of products and the agreement, claim assertion or defence against claims resulting from the law regulations.

4. Entities entitled to the reception of your personal data may be the authorised public bodies; mail providers; providers of the services covered by the agreement; responsible for debt recovery, keeping the archives, document utilization, legal consulting, technical services, IT services and accountancy.

5. Your personal data shall not be transferred to the third country, nor to the international bodies.

6. Your personal data shall be processed within the period of the agreement and upon your additional consent until you withdraw it. APD shall keep the data for the period of any civil law claim execution connected with the agreement.

7. You have the right to demand an access to your personal data, to correct or to delete the data if there is no other basis for the processing or any other purpose of such processing or to limit the processing of the data, to transfer the data to another administrator and to raise objections to the further data processing if there is no legal basis for further processing and to withdraw any previous consent.

8. You provide the personal data voluntarily, however they are necessary to conclude the agreement. The refusal of providing such data may result in the refusal of the agreement conclusion.

9. You have the right to lodge a complaint to the Personal Data Protection Office when in your opinion the data processing violates the regulations of General Data Protection Regulation of the 27 April, 2016 (RODO).

10. Your data will be automatically processed, including the form of profiling.
11. You are obligated to forward above mentioned information to your representative, especially if you appointed this person in the agreement as the contact person or as the representative for the agreement execution.

OK

Making of the weed way

Yones Bana 2014-02-18 09:56 tutorial  > 3ds MAX  > rendering

My name is Yones Bana and I am excited to share in this tutorial a making of the weed way that I recently completed.

Click on image to enlarge01_900_00908.jpg
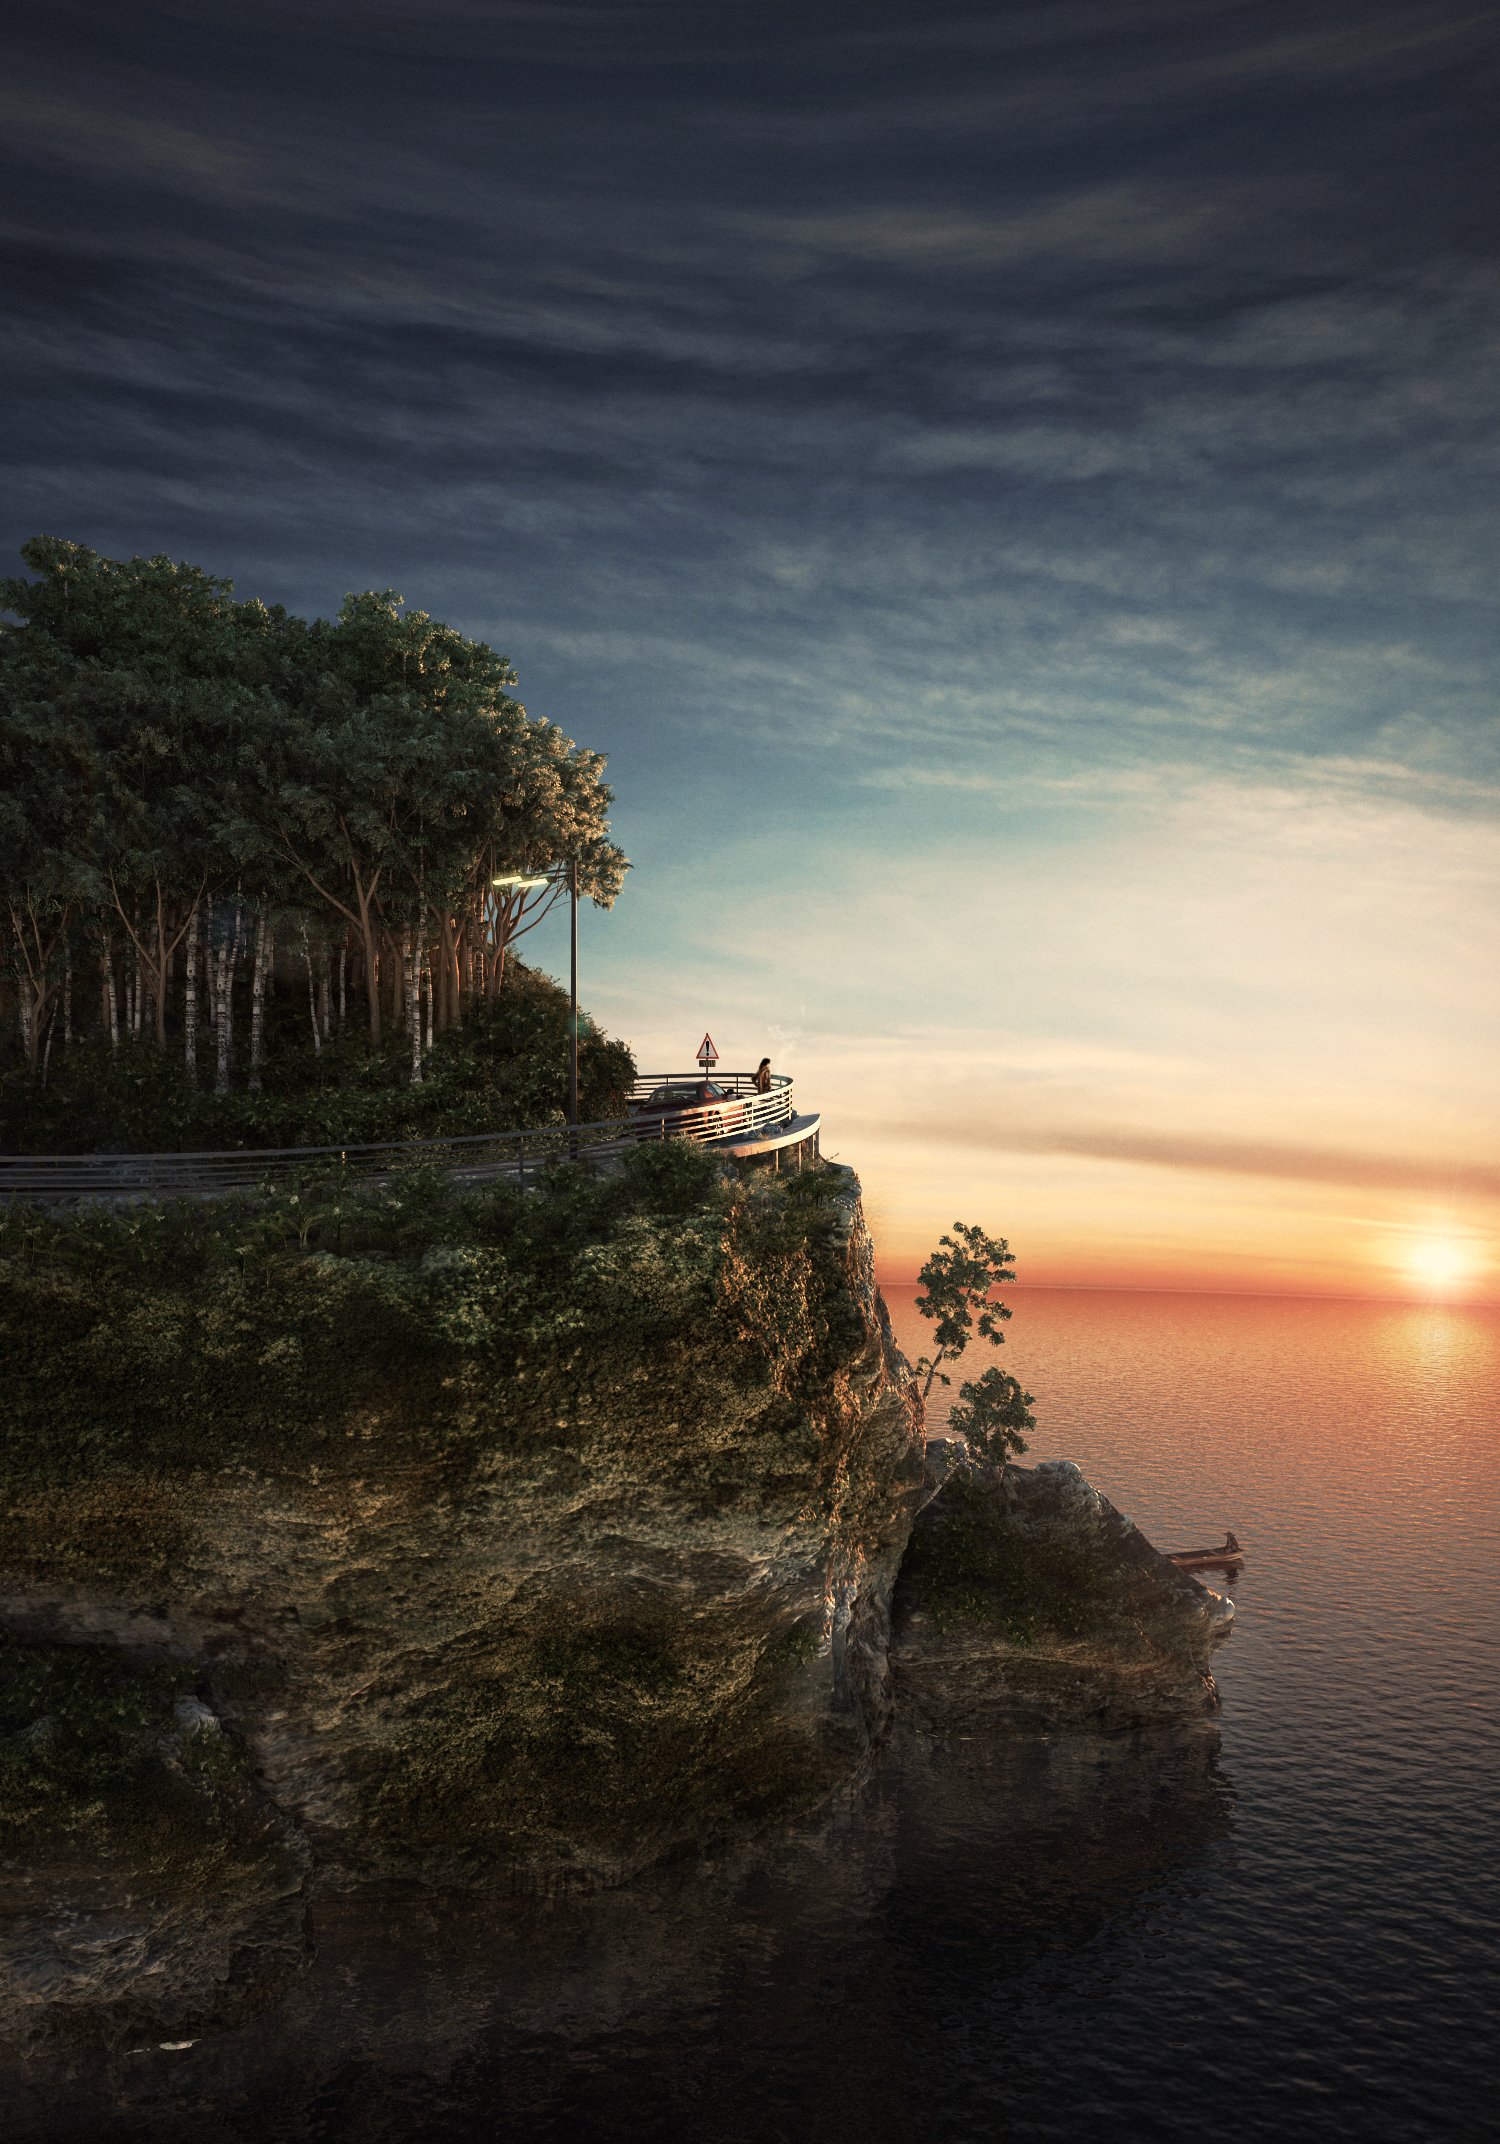
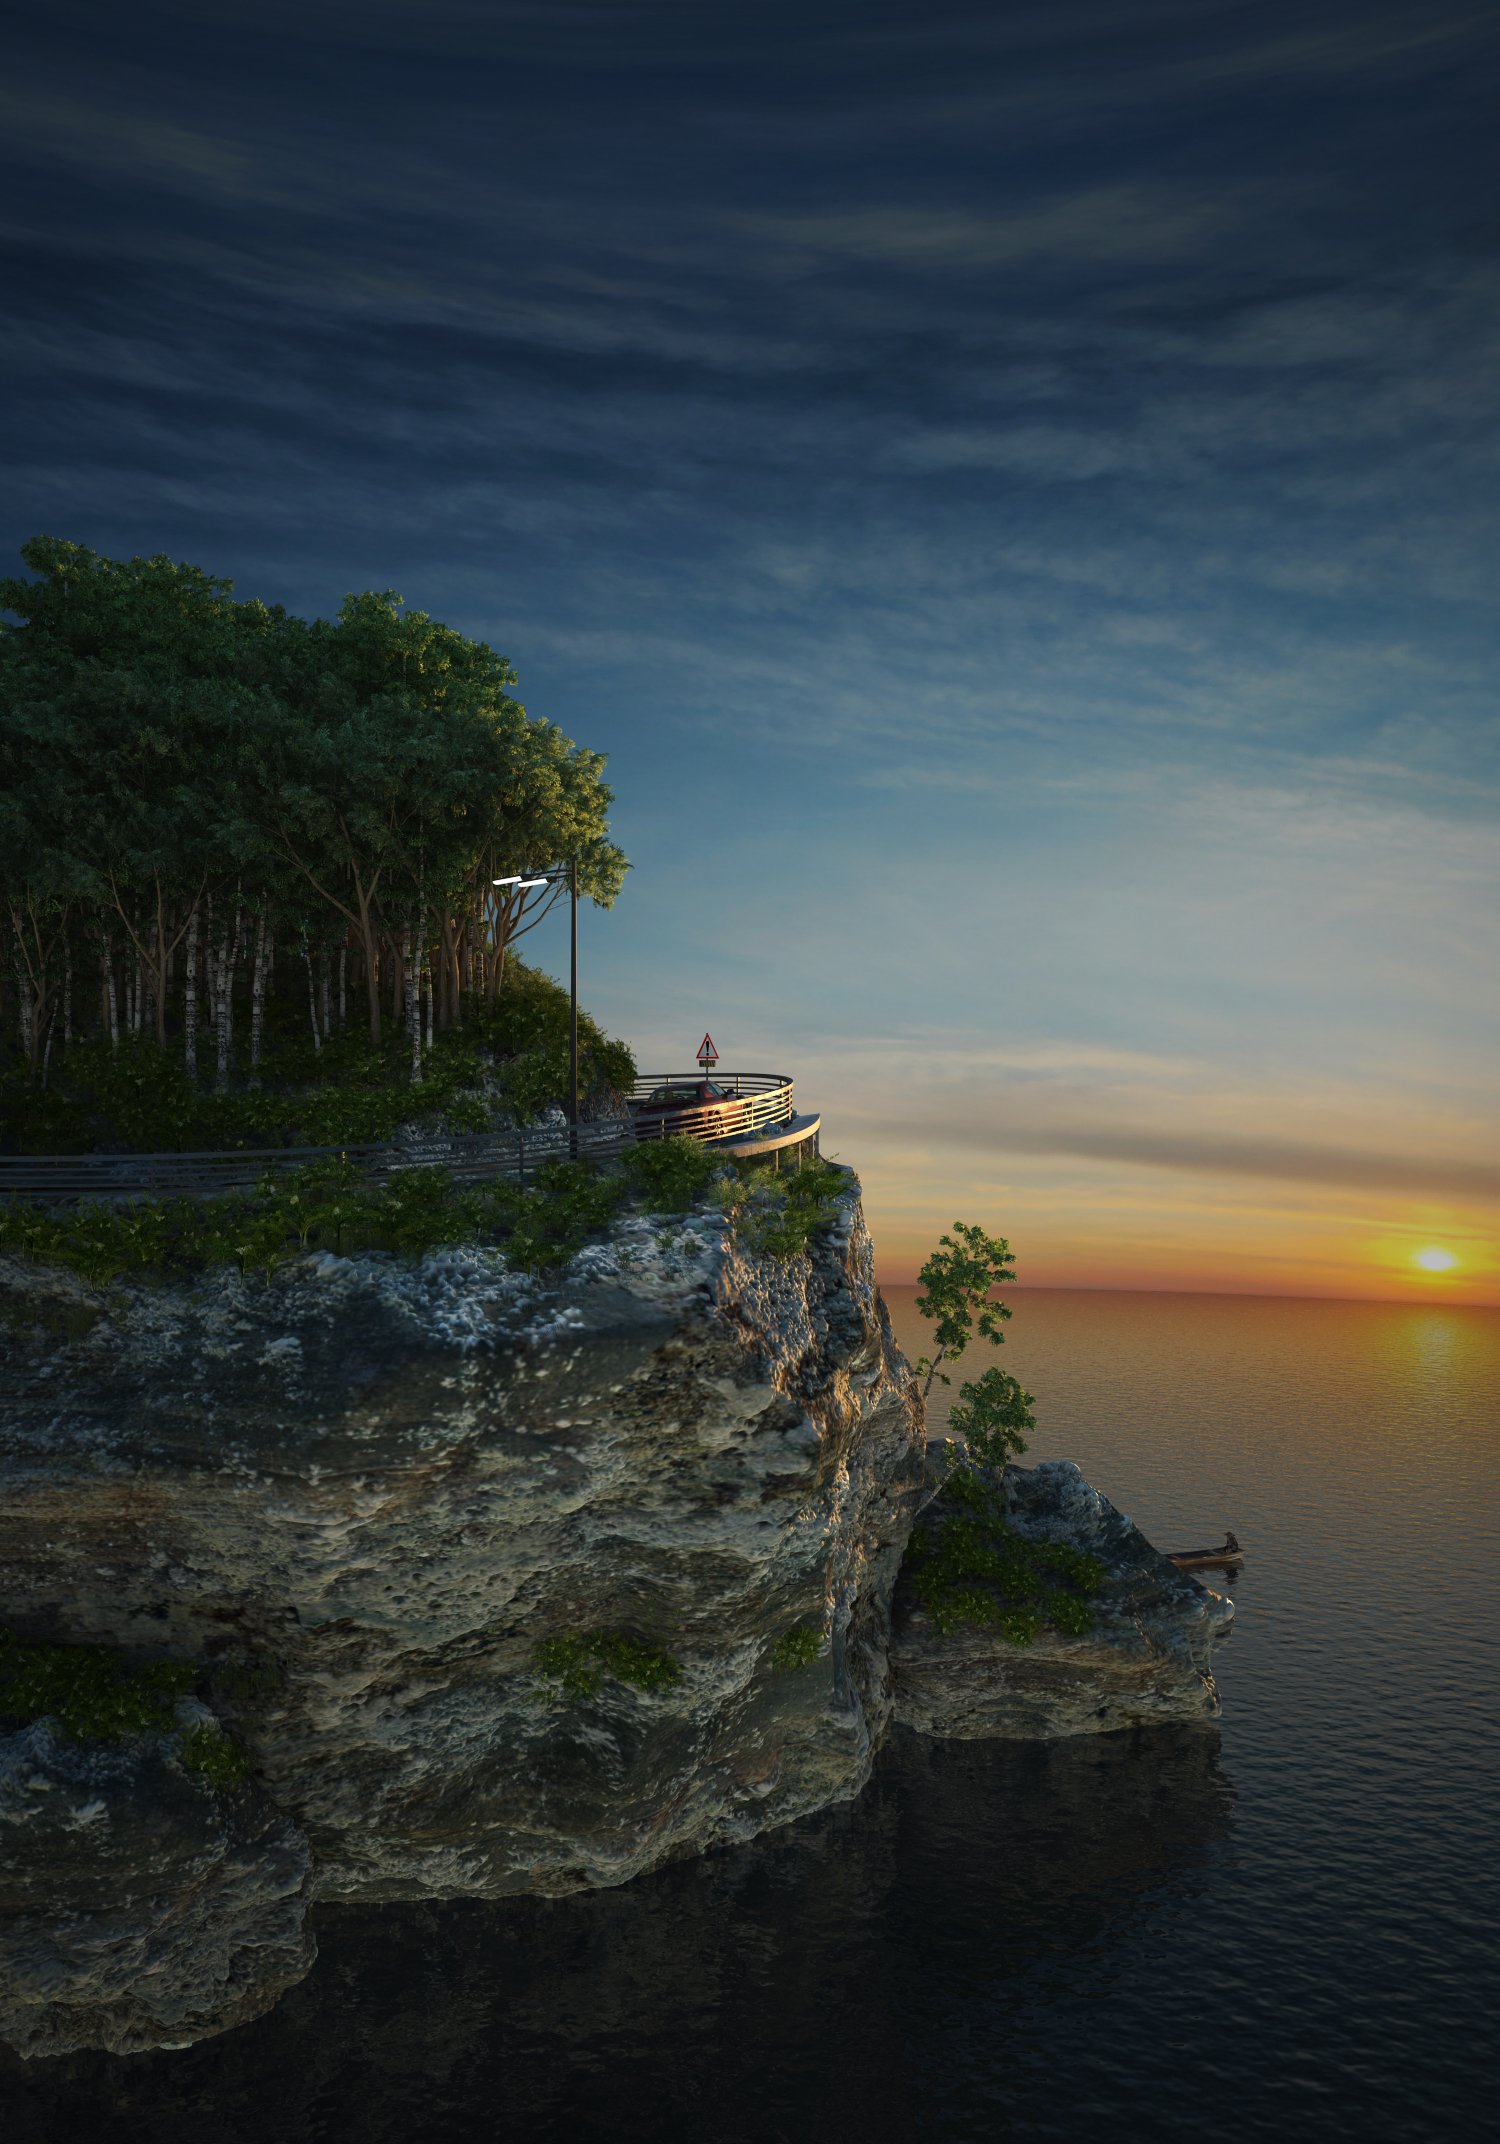
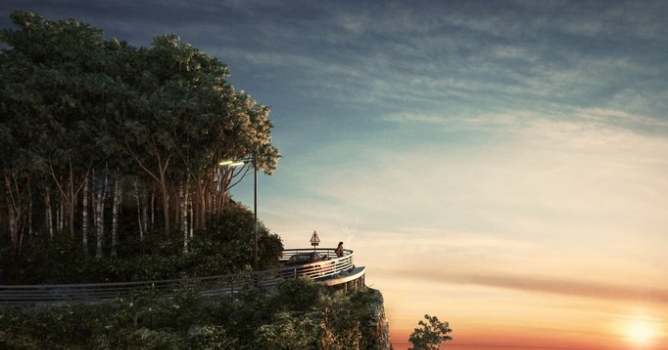
This is how the finished image came out. All the scene was created in 3ds Max and V-Ray. Postproduction was done in Photoshop. In addition I used Rock Generator and Terrain conformer scripts in this scene.


Modeling

As previously mentioned the rocks were made with Rock Generator script. Download Rock Generator here. From the customize menu, select Max script and Run script then run the script that you downloaded.

Click on image to enlarge02_900_00906.jpg
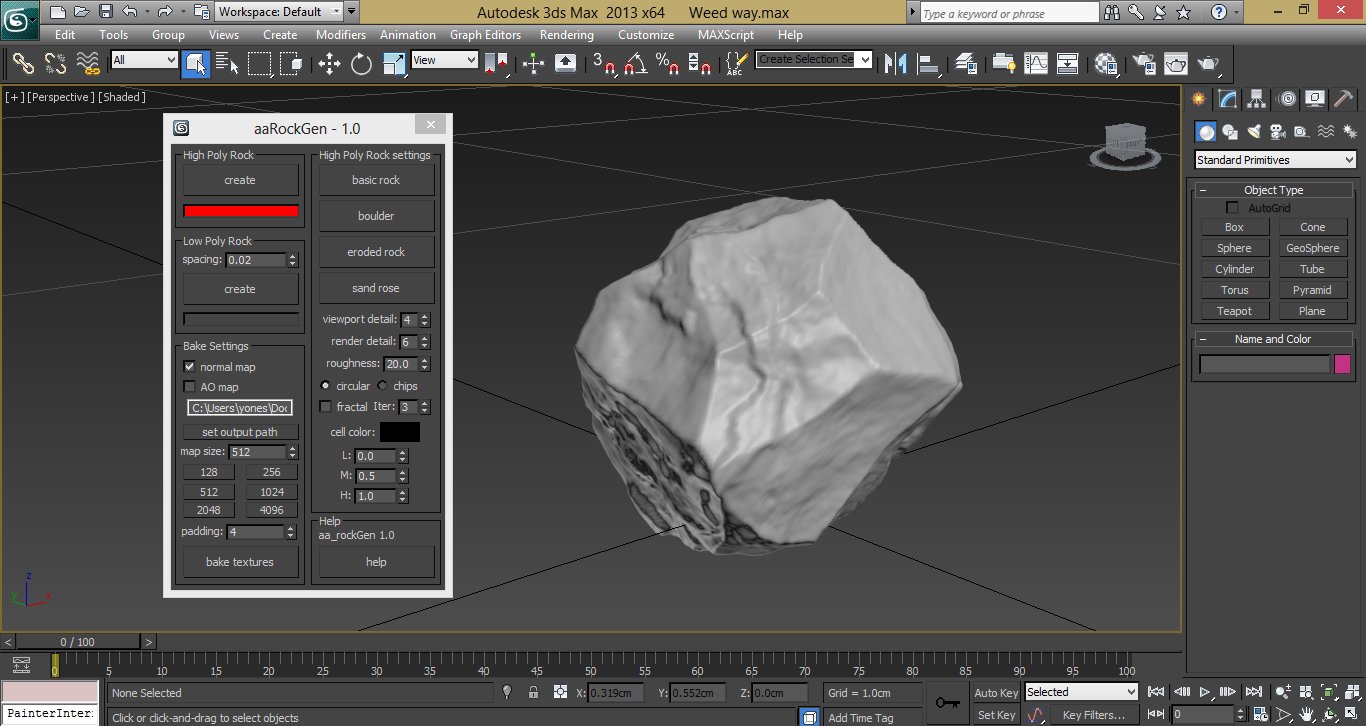
 Press "create" button to create a rock in center of scene. Play with parameters to get the desired result.


Click on image to enlarge03_900_00905.jpg
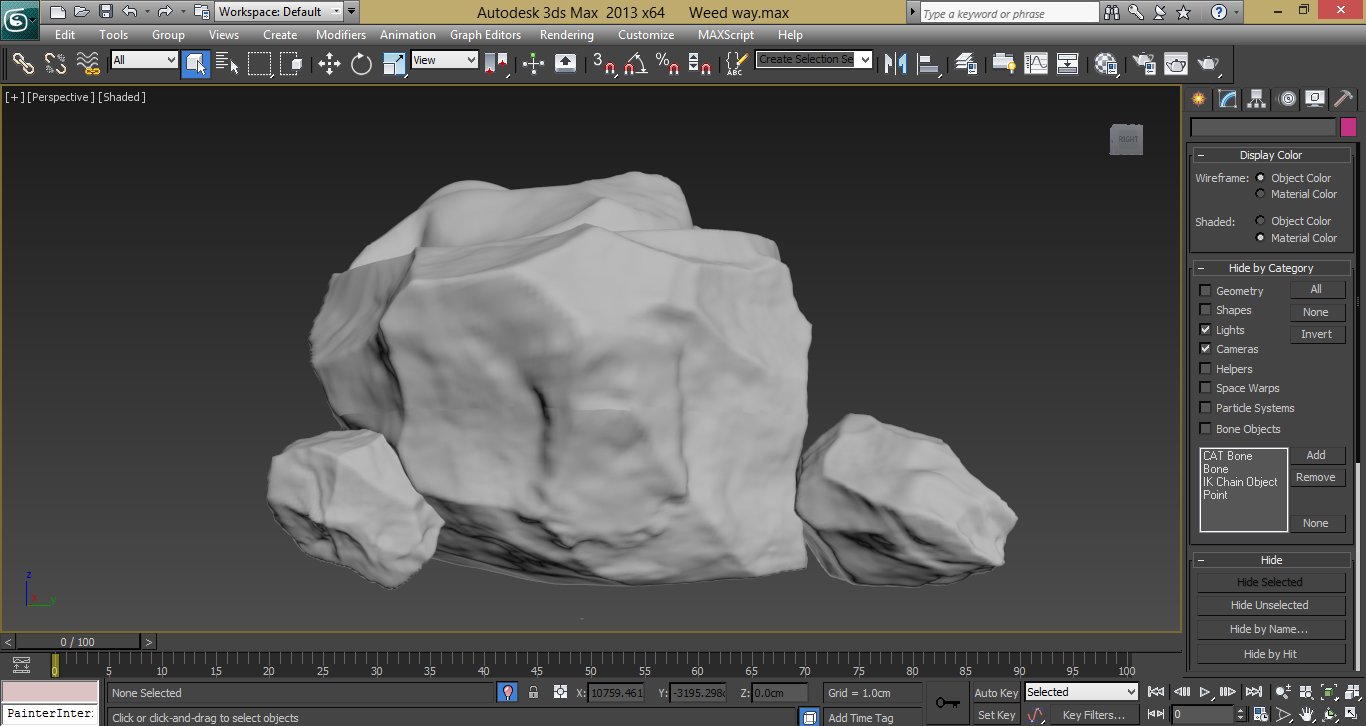
I created three different rocks, you can use FFD modifier to deform each rock individually.


Click on image to enlarge04_900_00904.jpg
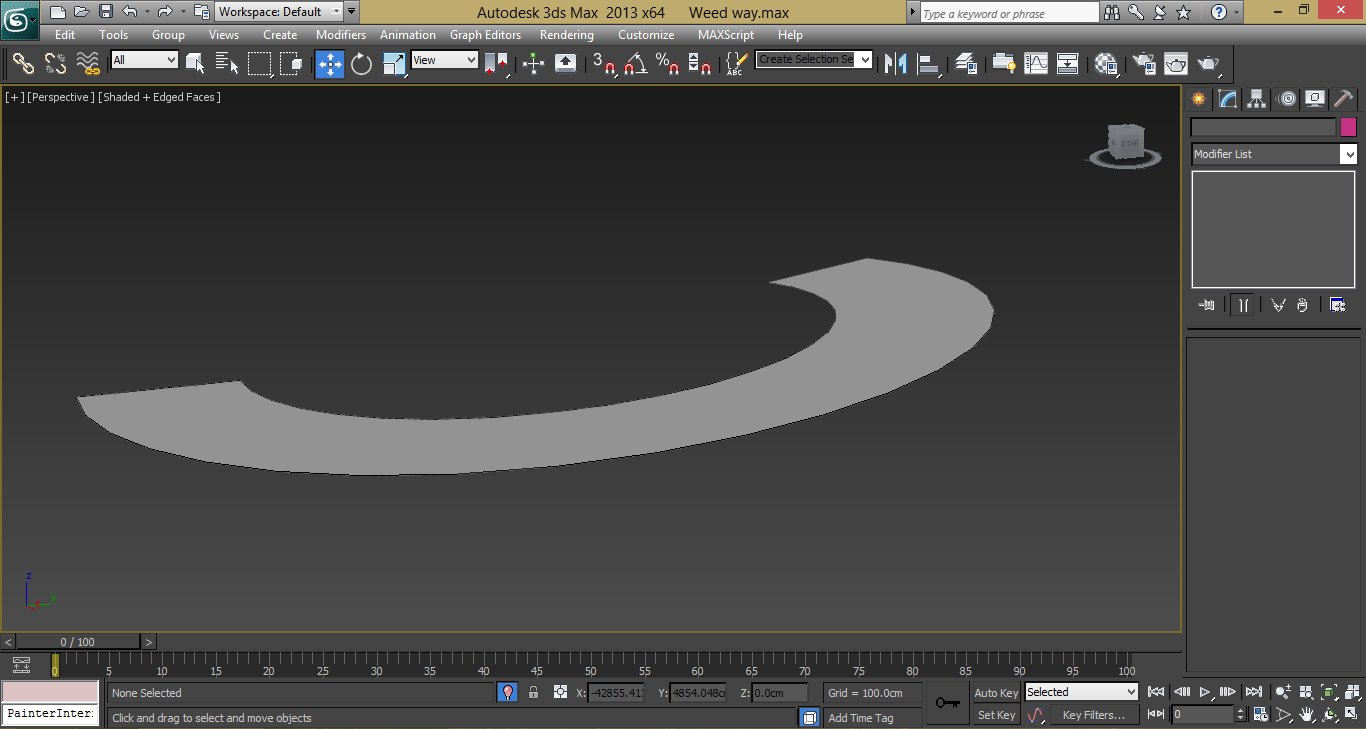
Road surface. I used Arc and Outline tools in edit spline, then converted it to editable poly and with the FFD modifier made it a little steep.


Click on image to enlarge05_900_00903.jpg
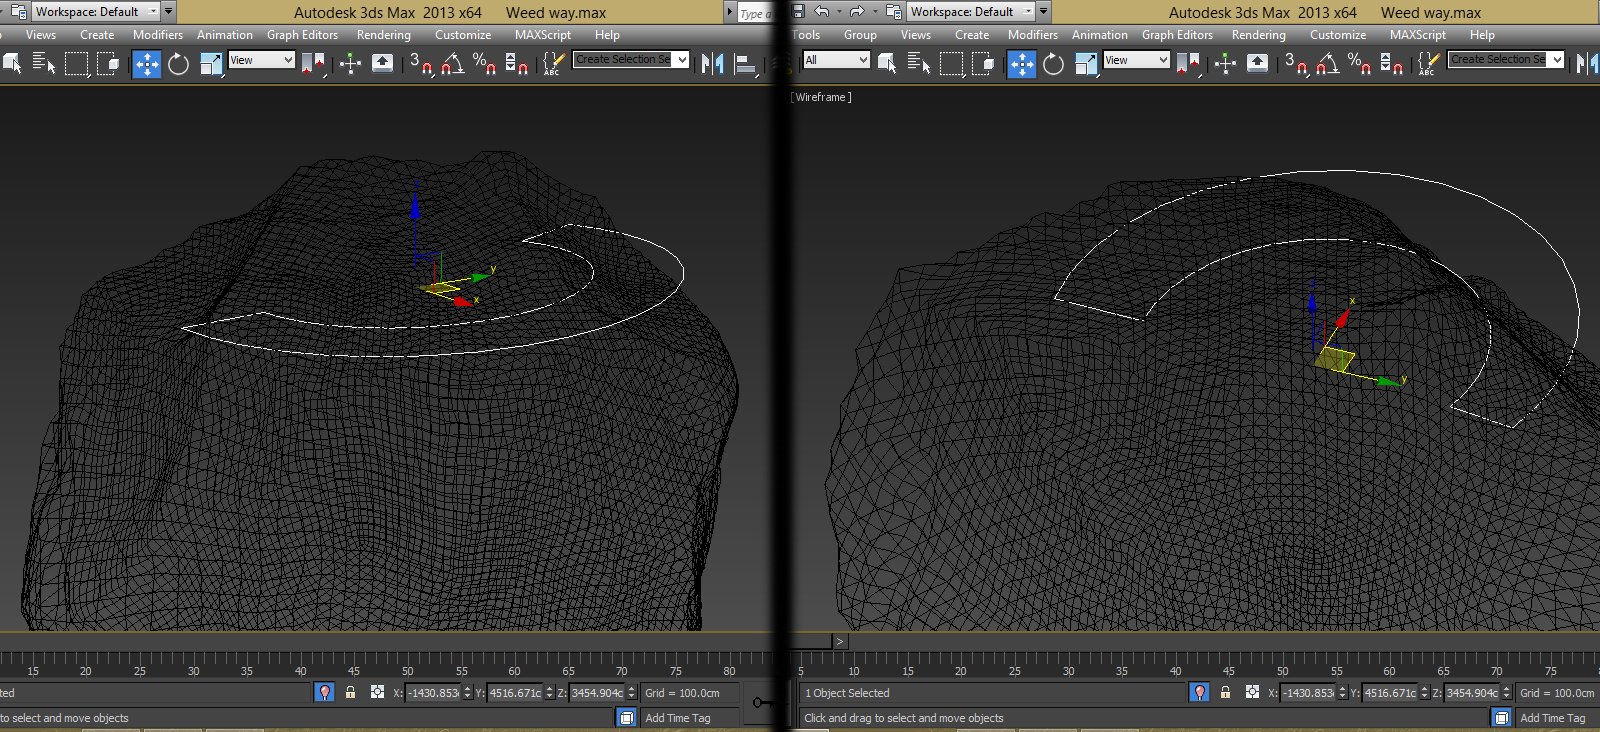
Place the road object on top of rock.


Now the scene is ready for using Terrain conformer script, you can download this script from here.

Click on image to enlarge06_900_00902.jpg
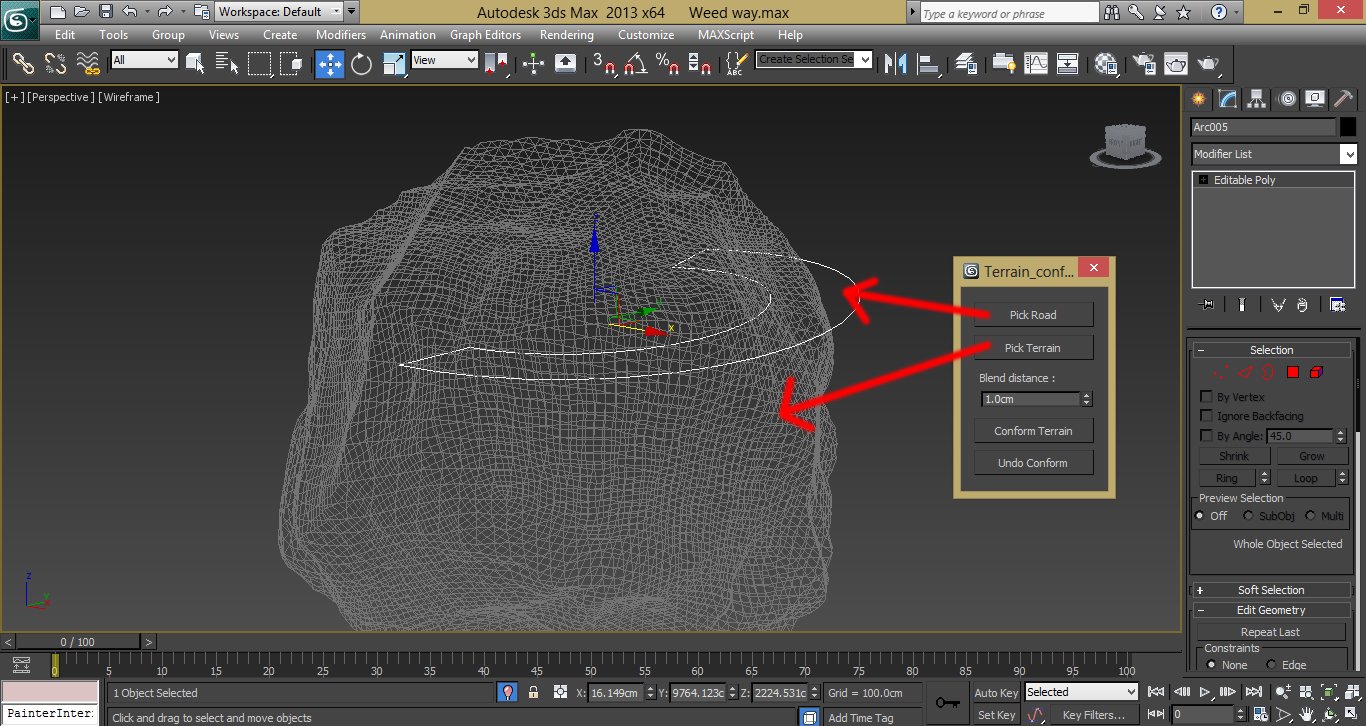
Working with this script is very simple, just specify road and terrain (rock)


Click on image to enlarge07_900_00901.jpg
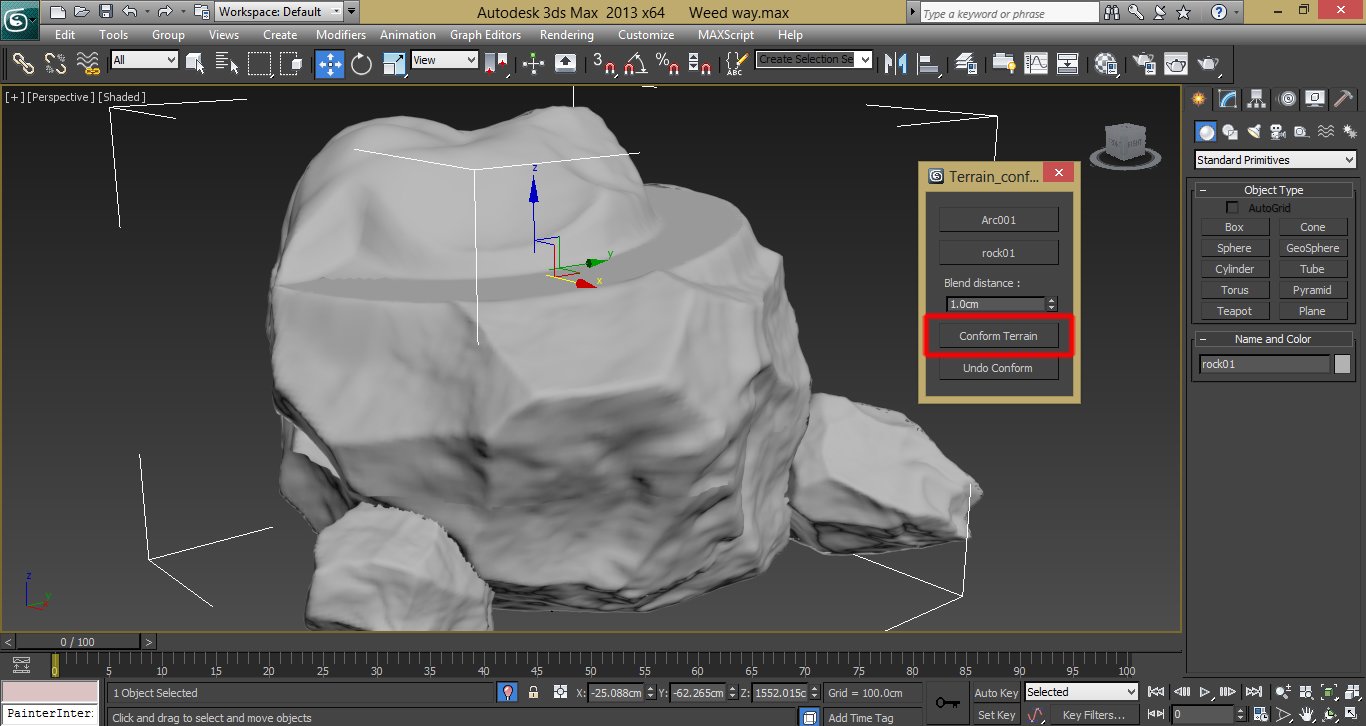
Finally click on conform terrain


Click on image to enlarge08_900_00900.jpg
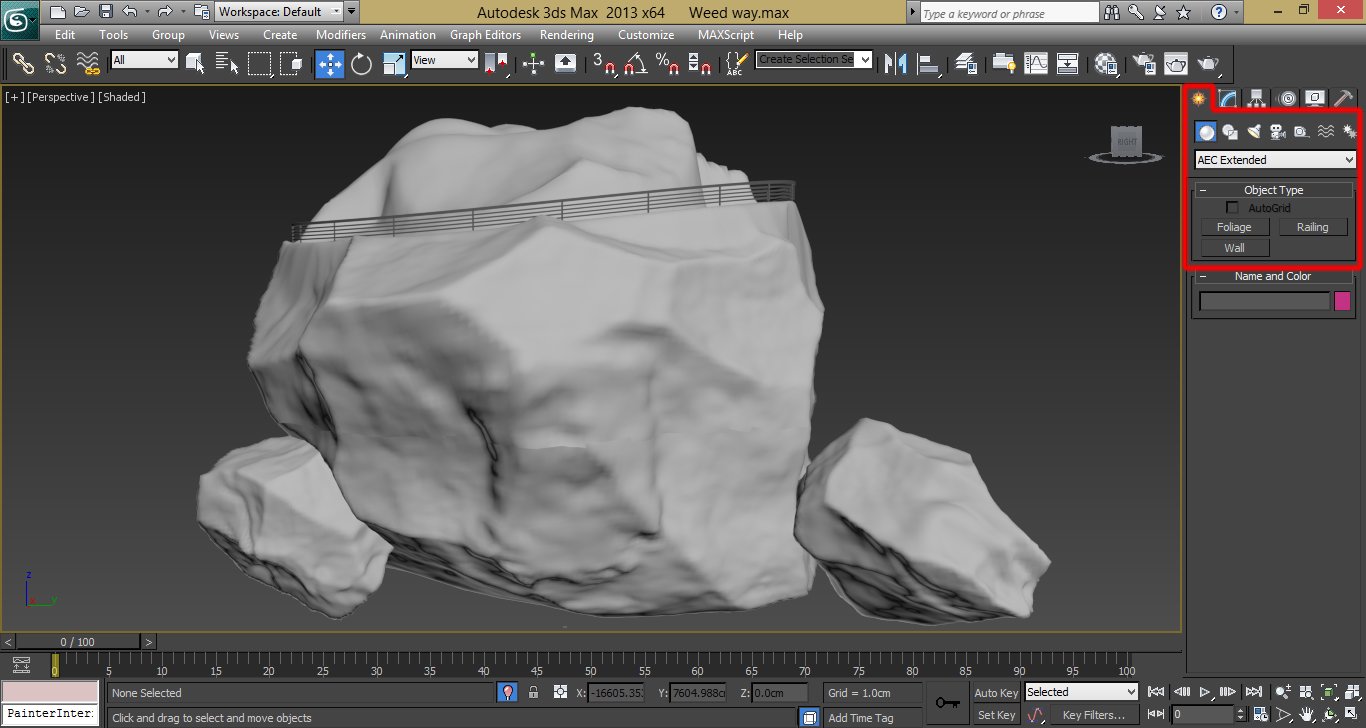
From Create > Geometry > AEC Extended, use Railing to build a fence around the road.


Click on image to enlarge09_900_00922.jpg
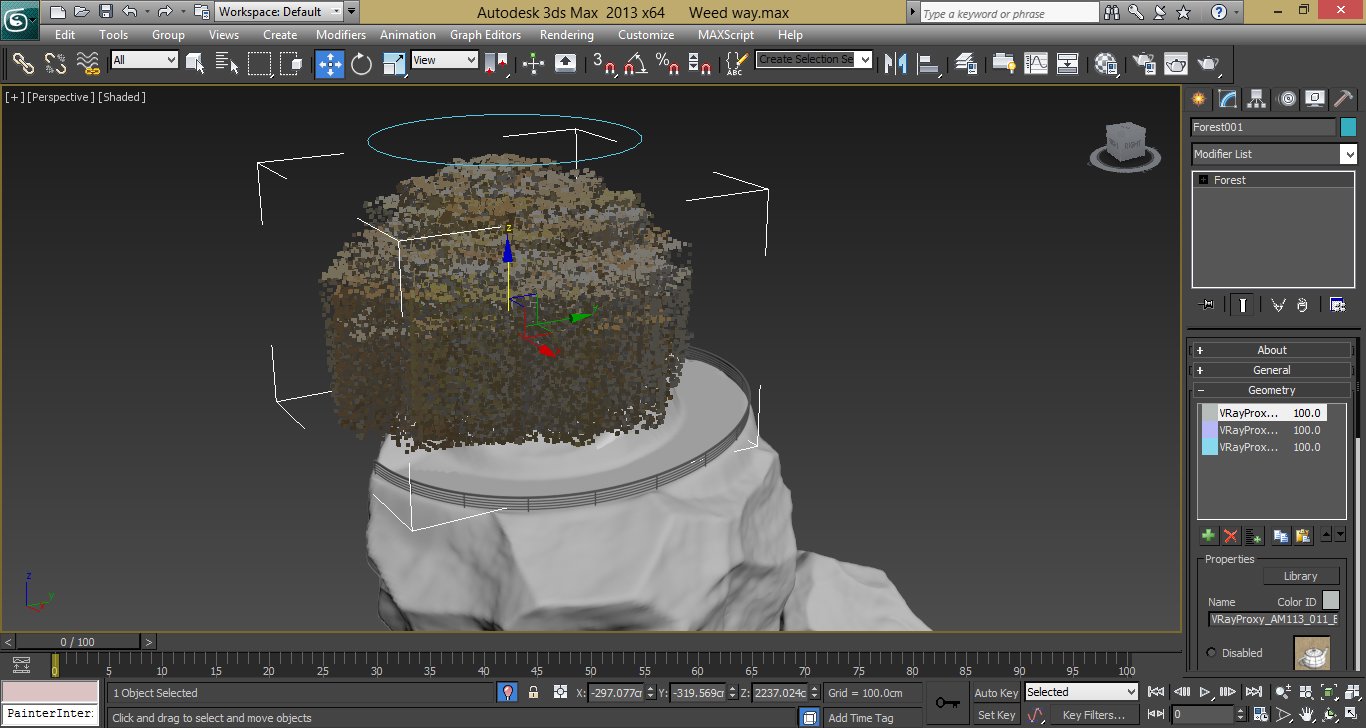
Vegetation was created with Itoo Forest plugin. For this area I used a circle. Three models were used for variety of trees.


Click on image to enlarge10_900_00921.jpg

Two trees were added manually to the scene.


Click on image to enlarge11_900_00920.jpg
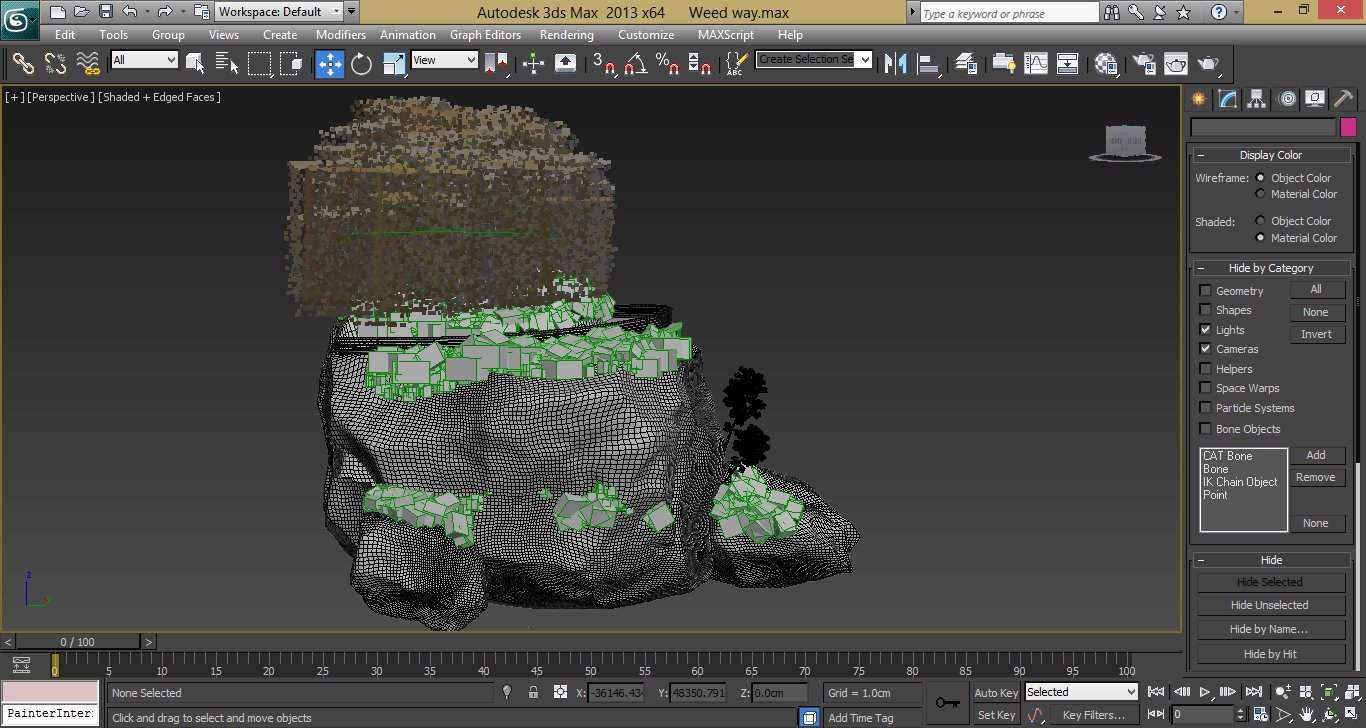
For the bush, I used four different models and for scattering I used Advanced painter. In addition to reducing the file size I suggest to use proxy.


Click on image to enlarge12_900_00909.jpg
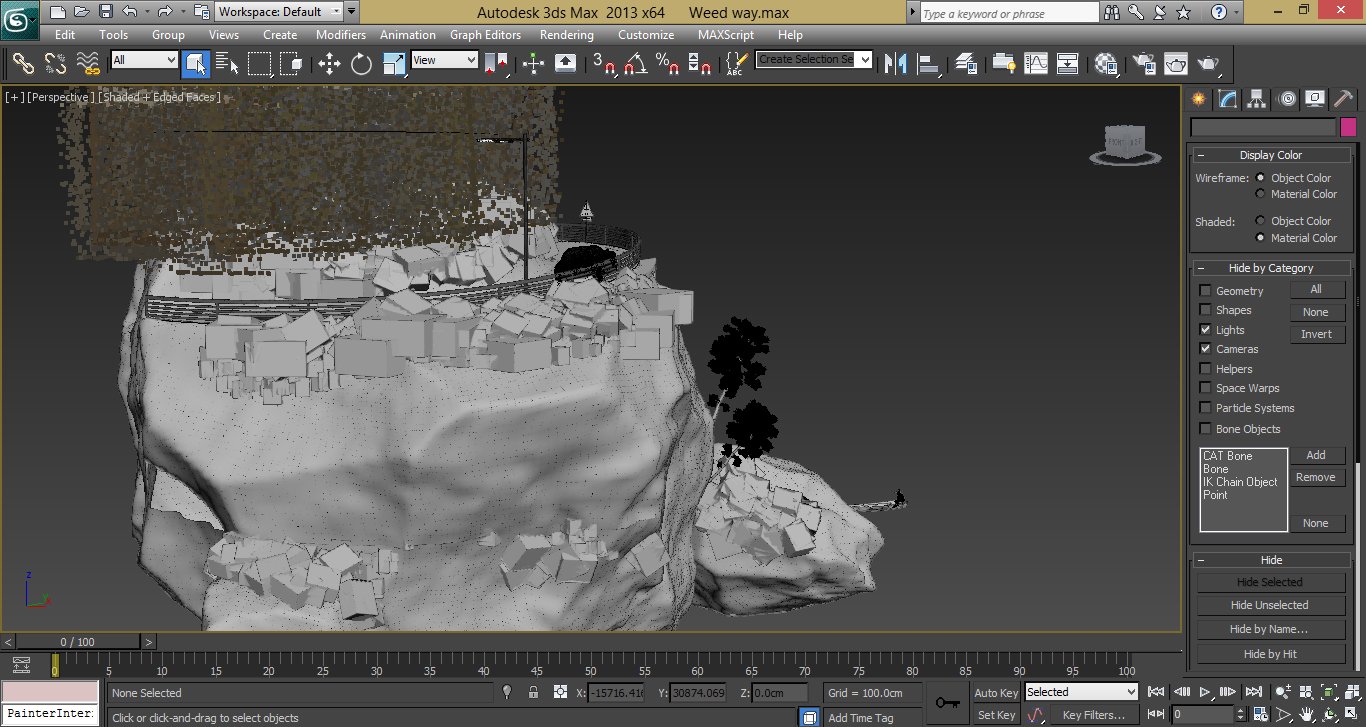
Complete the scene with some additional objects.


Click on image to enlarge13_900_00919.jpg
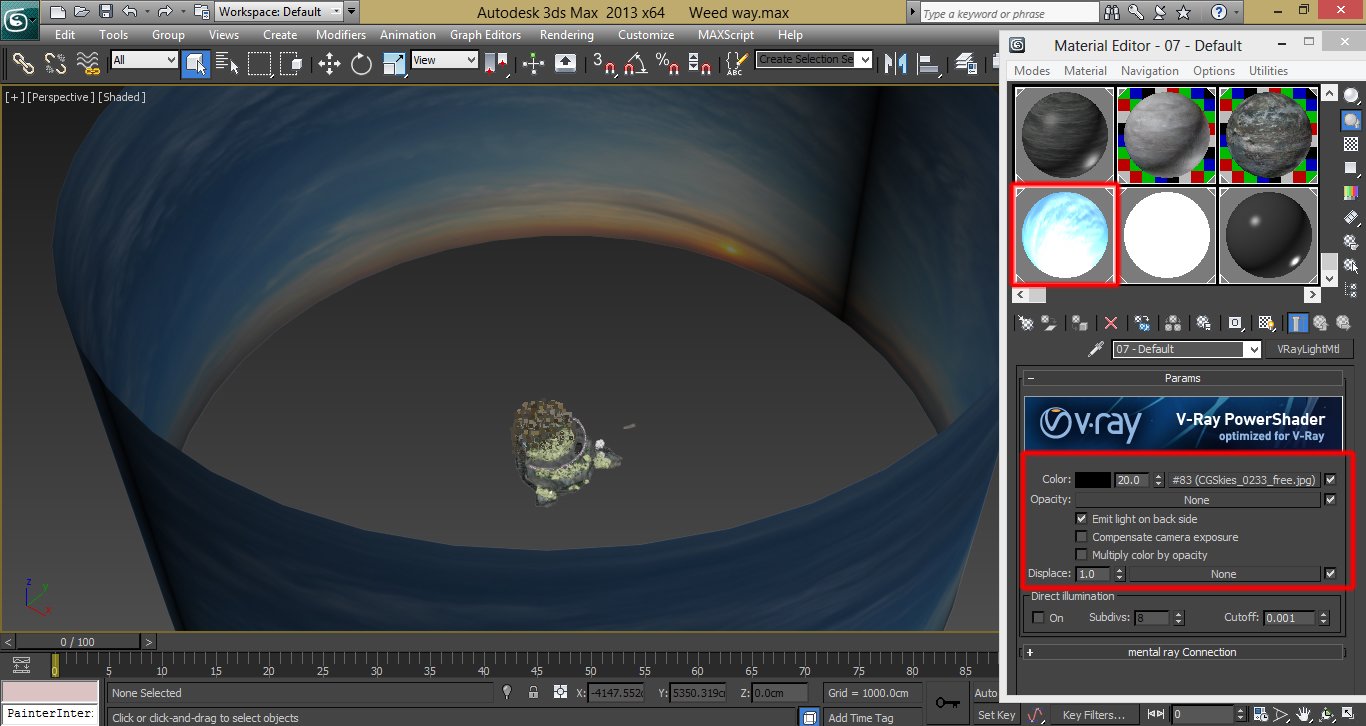
For the environment I used a cylinder and deleted top and bottom faces. Then I added a normal modifier and created a vraylightmtl with a nice picture of sky and applied it to cylinder.


Materials

The most important material to the scene was rock and water. Rock material is simple. I used some proper textures for diffuse and reflect, and normal bump for bump.

Click on image to enlarge14_900_00918.jpg
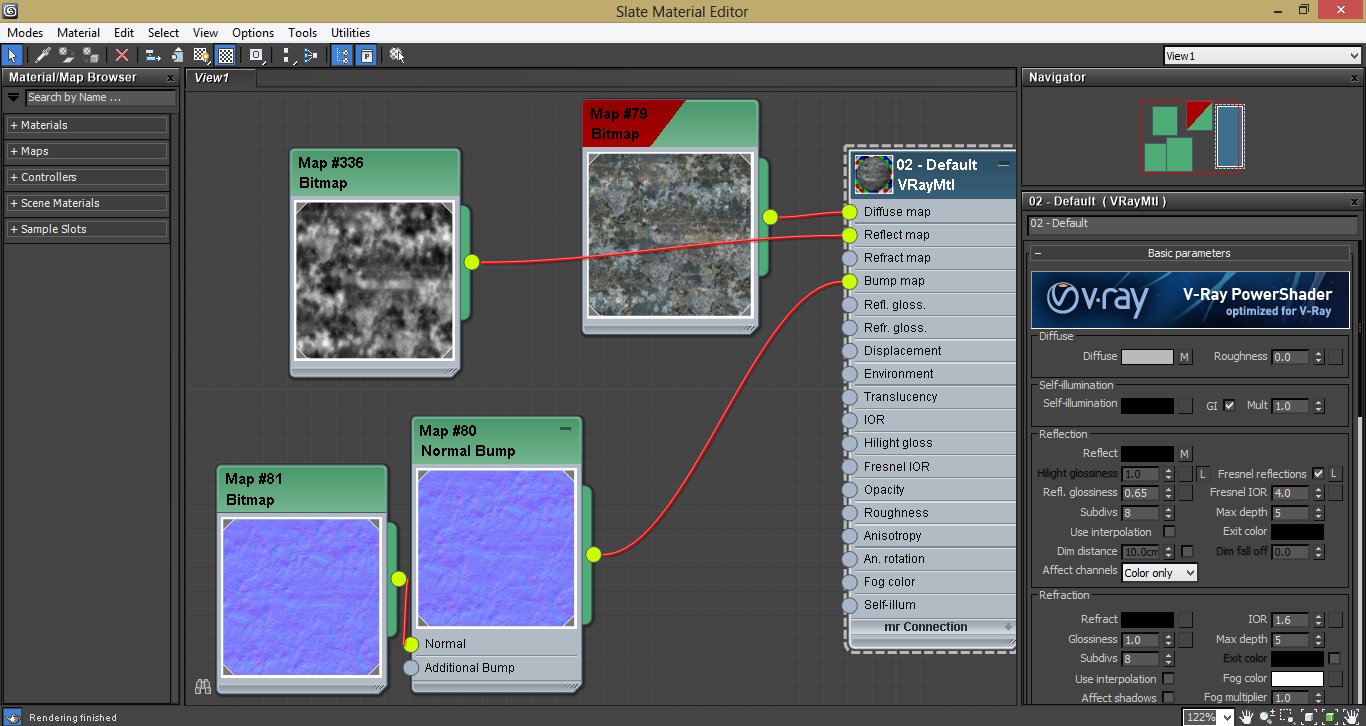
In Reflection part, set the refl. glossiness to 0.65 and check Fresnel reflection. For IOR use 4.


Click on image to enlarge15_900_00917.jpg
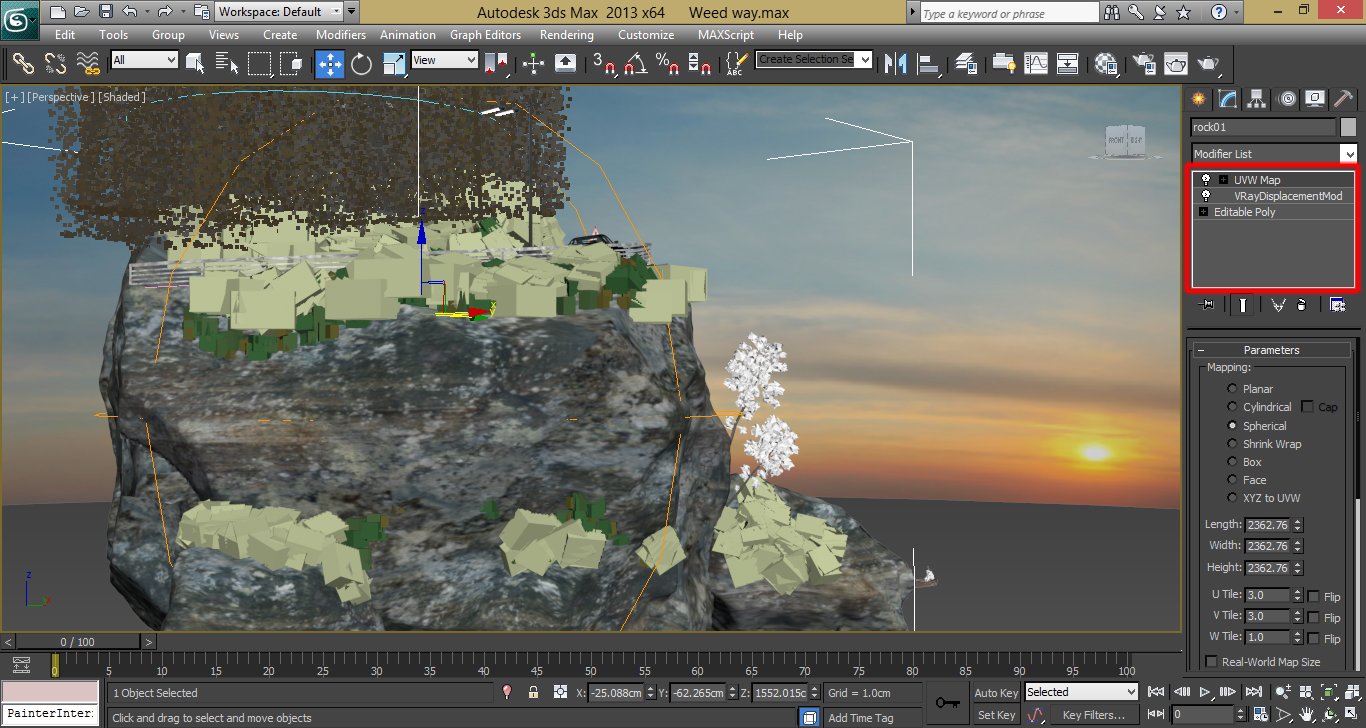
For more natural look, use vraydisplacement modifier and uvw map with spherical mapping.


Click on image to enlarge16_900_00916.jpg
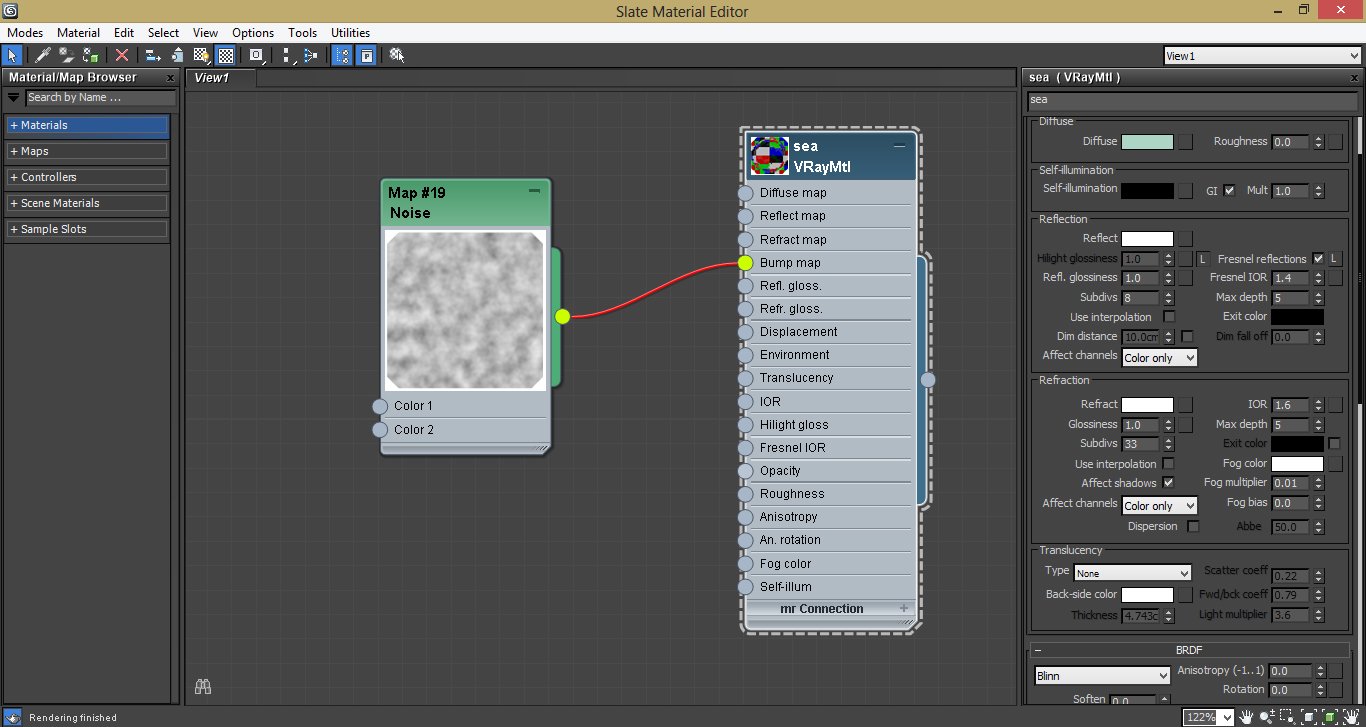
For water surface I used varyplane.


Camera and Lighting

Click on image to enlarge17_900_00915.jpg
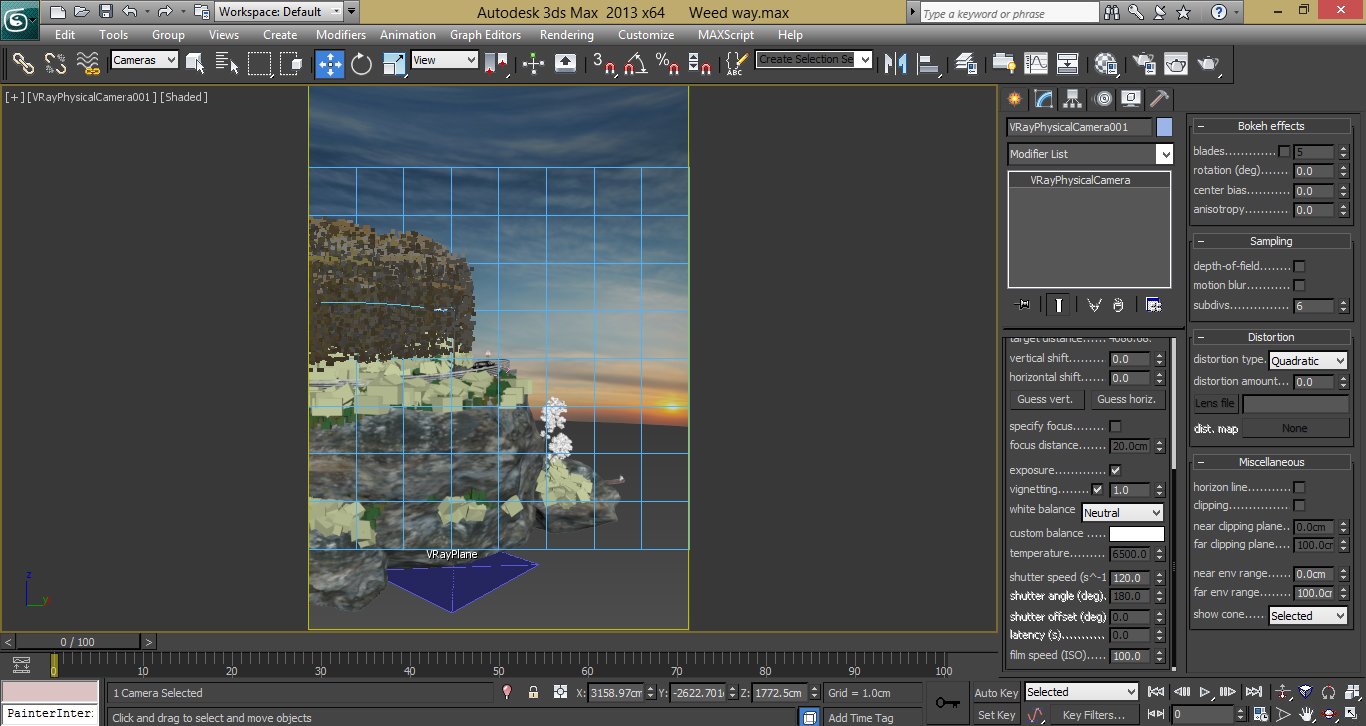
I created a vrayphysical camera in a nice place and set the shutterspeed to 120. I also used Neutral white balance.
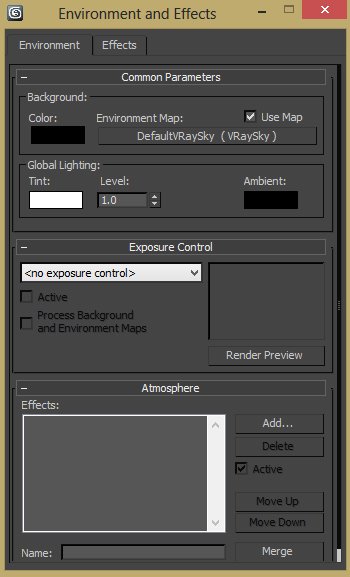
 

18_900_00914.jpg

To light up the whole scene I used Vraysky map for environment map.


Click on image to enlarge19_900_00913.jpg
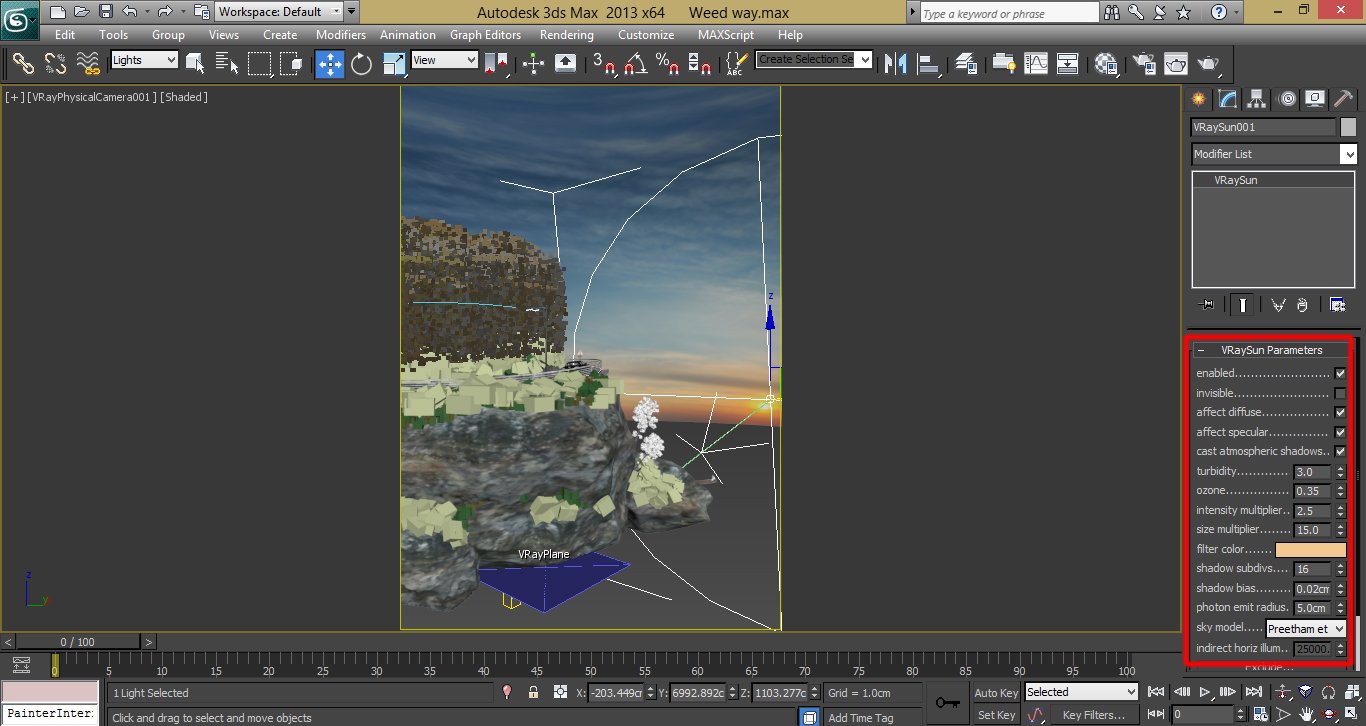
I put vraysun exactly in position of sun in the environment.


Click on image to enlarge20_900_00912.jpg
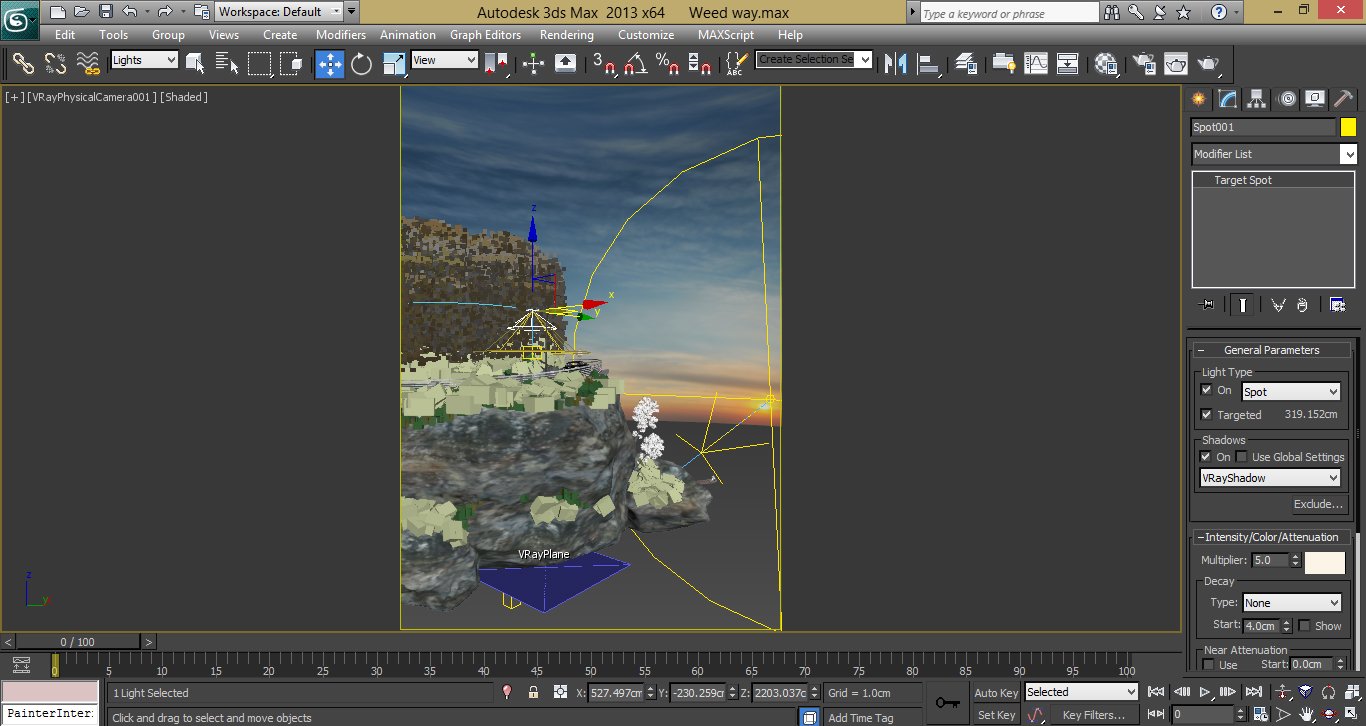
Street light - I used a target spot.


Render setup

Click on image to enlarge21_900_00911.jpg

Render setup


Click on image to enlarge22_900_00910.jpg

This is a raw render


Post-production

Finally you can use your Elements and blending mode to achive better result. Then with some adjustments like Curves, Color balance, hue/saturation finish the job.

Click on image to enlarge23_900_00907.jpg
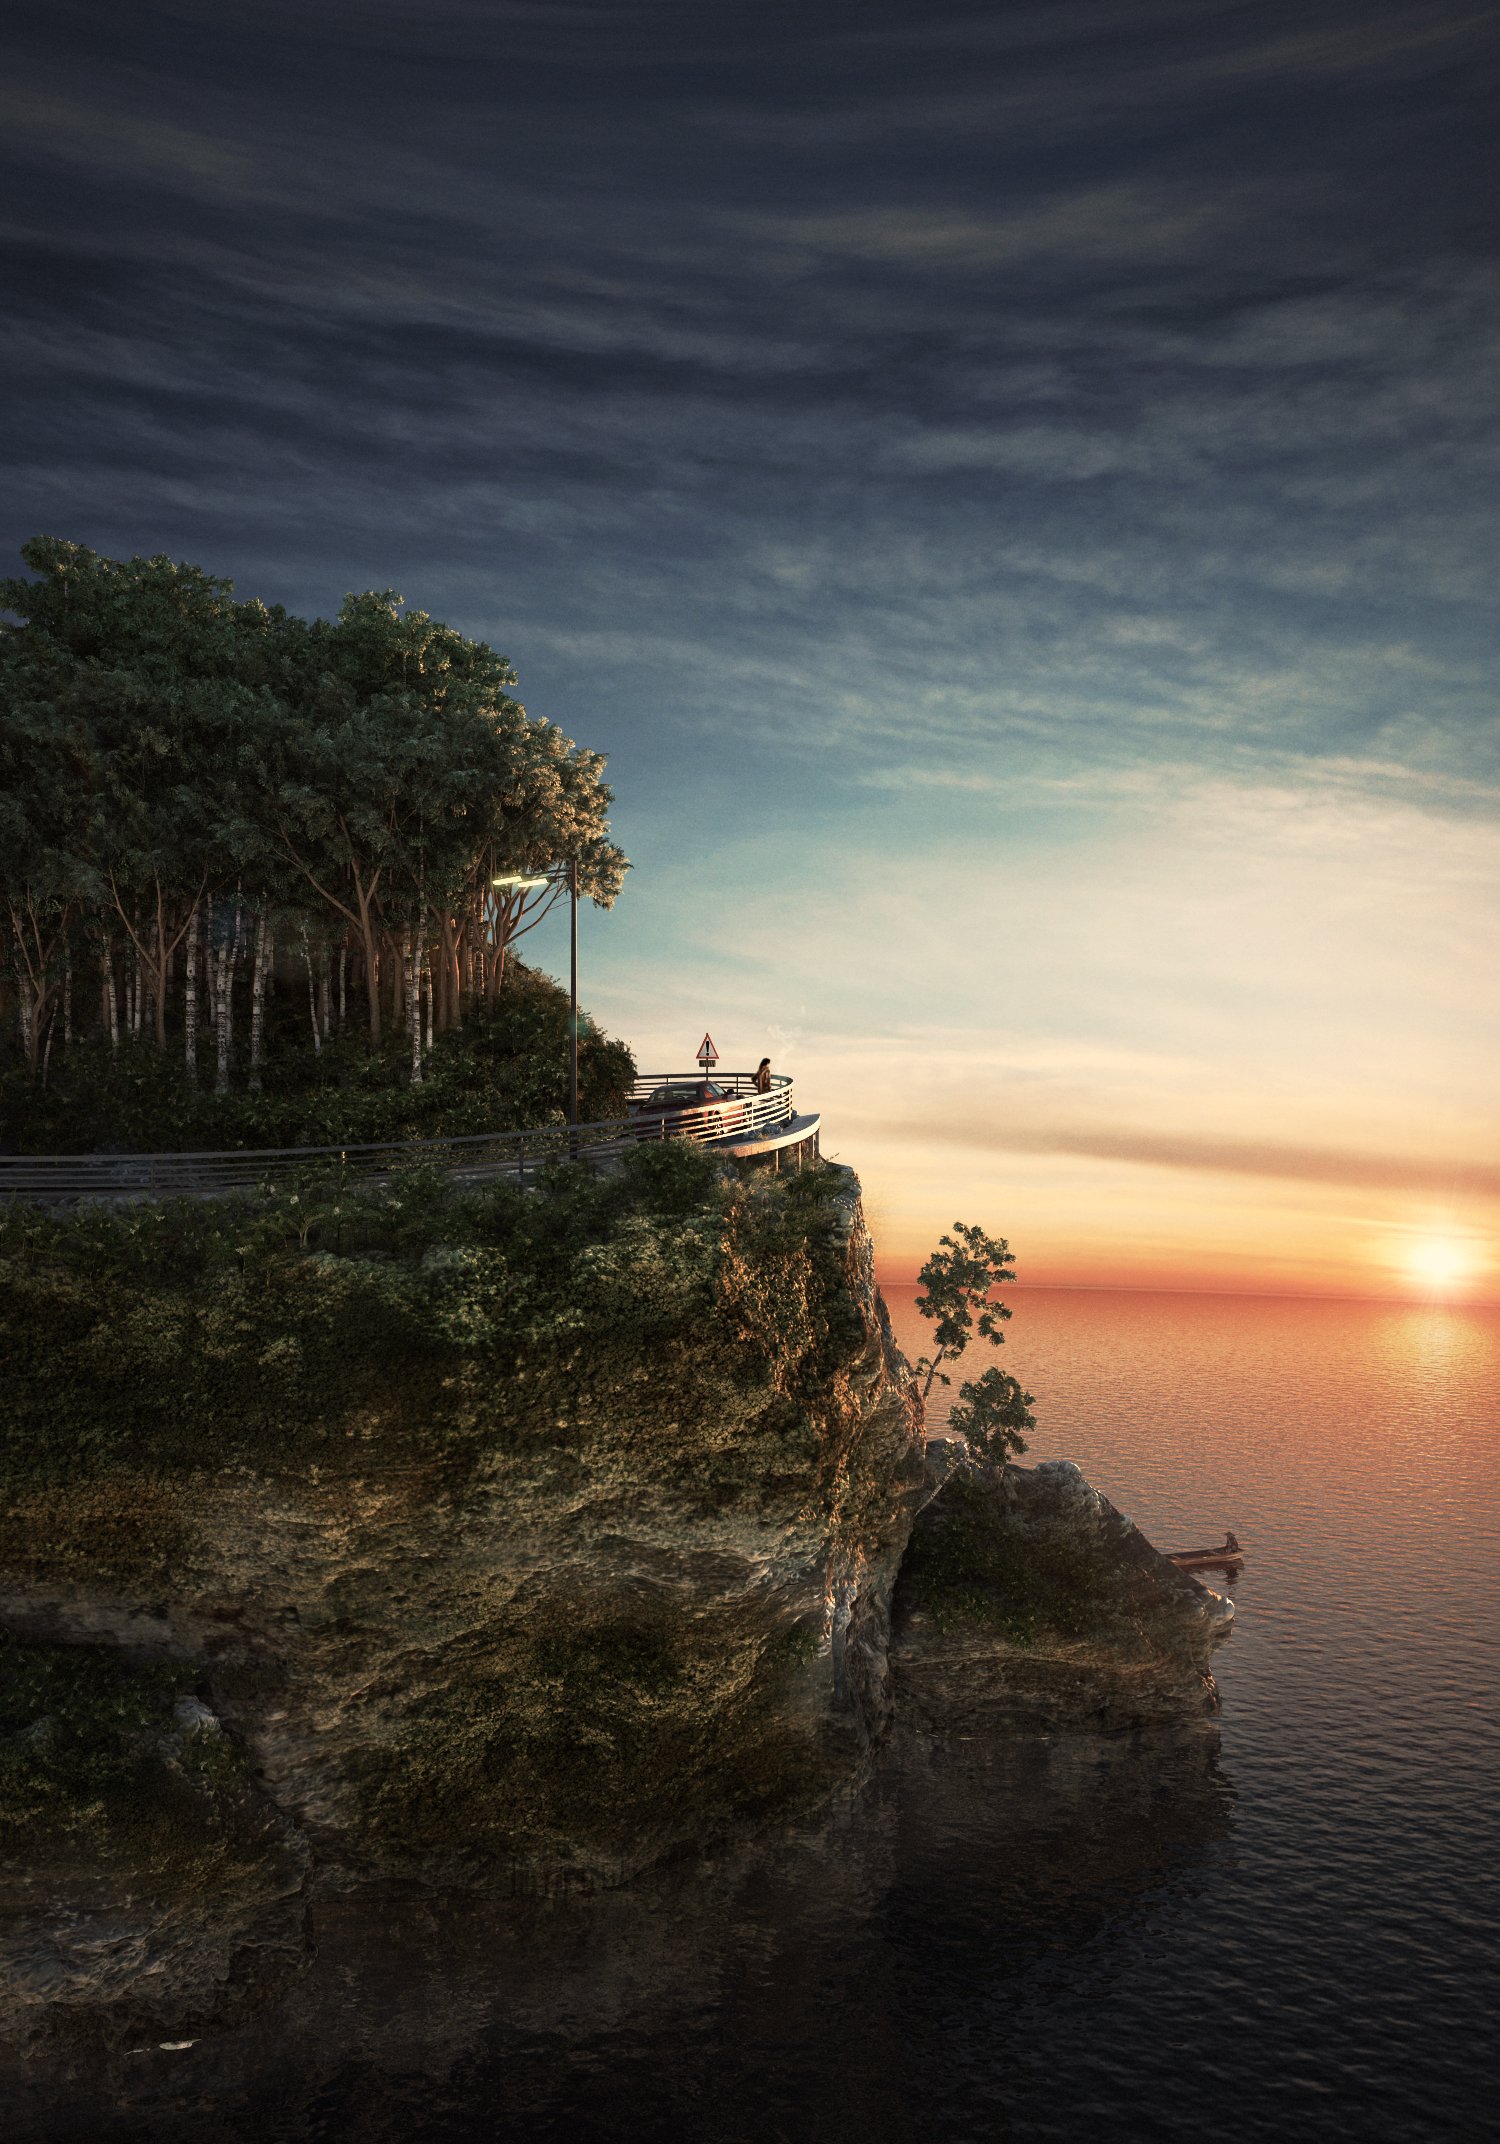
All done!


Hopefully this was helpful. Yonas Bana.
 
 
Author: Yones Bana Editor: Michal Franczak
Tags:
You may also like...
Outdoor Lighting in 3D. Is there a magic formula?

Outdoor Lighting in 3D. Is there a magic formula?

Ever struggle to light exterior scenes in 3D? In this video, we'll have a look at a cinematic lighting framework, inspired by filmmaking techniques, to elevate your 3D art.
×

LEAVE A COMMENT

You need to be logged in to leave a comment. Don't have account? Register now.

Dennis leu 12:56:19  |  18-02-2014
awesome pro
frank1 18:02:54  |  18-02-2014
NiNice work
Piash 18:07:54  |  20-02-2014
Nice ... & thanks a lot
12523666 07:36:11  |  21-02-2014
Very nice
proto 13:24:23  |  24-02-2014
Thanks for the great tutorial. I have a problem with lighting. I place a cylinder same way you did. And then place a vray sun. Problem is vray sun does no effect.Scene is ligting only with vray light material (cylinder). Can you help?.
Yones 19:48:43  |  24-02-2014
thank all. your sun must ne inside the cylinder or you can exclude the cylinder in vraysun.
aremrsh 21:48:18  |  25-02-2014
Very. Good faghat ghesmate material rock to nafahmidam?
proto 15:48:30  |  27-02-2014
Thank you Yones. I excluded the cylinder and everything is just fine. Thank you again for the tutorial.
Headway 19:59:51  |  19-07-2014
Hi yones! Great.. Nice... lovely... Move on bro... damet garm ;)