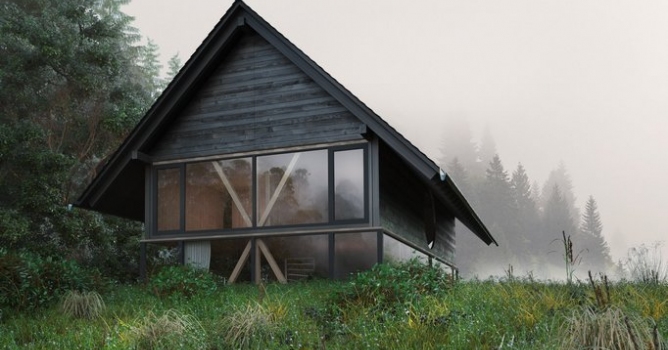
Evermotion Pass 10% Off - Get Instant Access to Thousands of 3D Assets

Check Plans

Information Clause

In accordance with the art. 13 section 1 and 2 of the European Parliament and Council Regulation 2016/679 of the 27th April, 2016 on the protection of natural persons, with regard to the processing of personal data and on the free movement of such data, and repealing Directive 95/46/EC (General Data Protection Regulation), hereafter RODO, I hereby inform that:

1. EVERMOTION S.C., 8 Przędzalniana Str., 15-688 Białystok, Poland is the Administrator of your Personal Data (APD)

2. Data Protection Inspector can be reached through e-mail: iod@evermotion.org

3. Your personal data are to be processed on the basis of art. 6 section 1 letter a, b and f of RODO in order to:
a) prepare, conclude and execute the agreement and for other purposes approved by you,
b) to execute the legitimate interest like marketing of products and the agreement, claim assertion or defence against claims resulting from the law regulations.

4. Entities entitled to the reception of your personal data may be the authorised public bodies; mail providers; providers of the services covered by the agreement; responsible for debt recovery, keeping the archives, document utilization, legal consulting, technical services, IT services and accountancy.

5. Your personal data shall not be transferred to the third country, nor to the international bodies.

6. Your personal data shall be processed within the period of the agreement and upon your additional consent until you withdraw it. APD shall keep the data for the period of any civil law claim execution connected with the agreement.

7. You have the right to demand an access to your personal data, to correct or to delete the data if there is no other basis for the processing or any other purpose of such processing or to limit the processing of the data, to transfer the data to another administrator and to raise objections to the further data processing if there is no legal basis for further processing and to withdraw any previous consent.

8. You provide the personal data voluntarily, however they are necessary to conclude the agreement. The refusal of providing such data may result in the refusal of the agreement conclusion.

9. You have the right to lodge a complaint to the Personal Data Protection Office when in your opinion the data processing violates the regulations of General Data Protection Regulation of the 27 April, 2016 (RODO).

10. Your data will be automatically processed, including the form of profiling.
11. You are obligated to forward above mentioned information to your representative, especially if you appointed this person in the agreement as the contact person or as the representative for the agreement execution.

OK

Making of Swiss house

Anatolii Nikolaiev 2015-09-28 11:35 tutorial  > 3ds MAX  > modeling

Arch-viz tutorial by Anatolii Nikolaiev.

Hello to all readers! My name is Anatolii Nikolaiev and I want to present you “making-off” for one of my last projects of 3d visualization - "Swiss house" House in Balsthal by Pascal Flammer Architect.

The scene was made in 3ds Max and was rendered in Corona-renderer v.1.2.1. The models of greenery used in the scene come from:

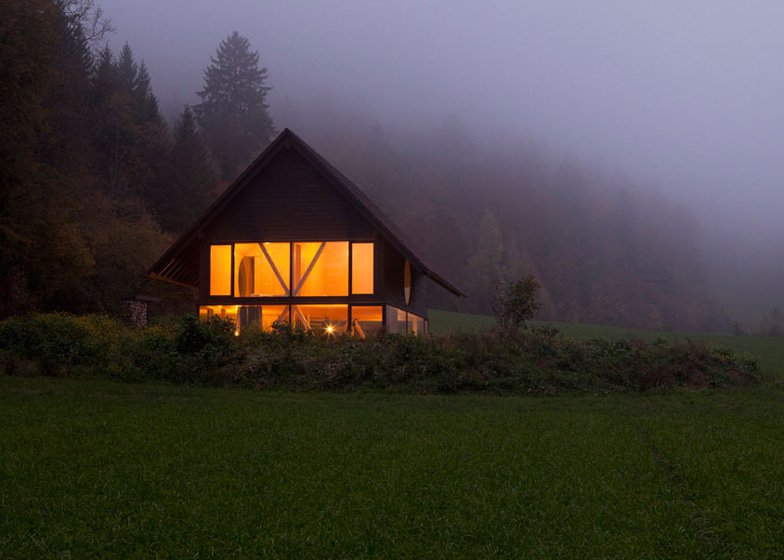
So, let’s begin. I found such a great reference "House in Balsthal by Pascal Flammer Architect" by surfing the Internet and decided to reproduce it in 3d as detailed as possible. 

Click on image to enlarge ref_01_874.jpg
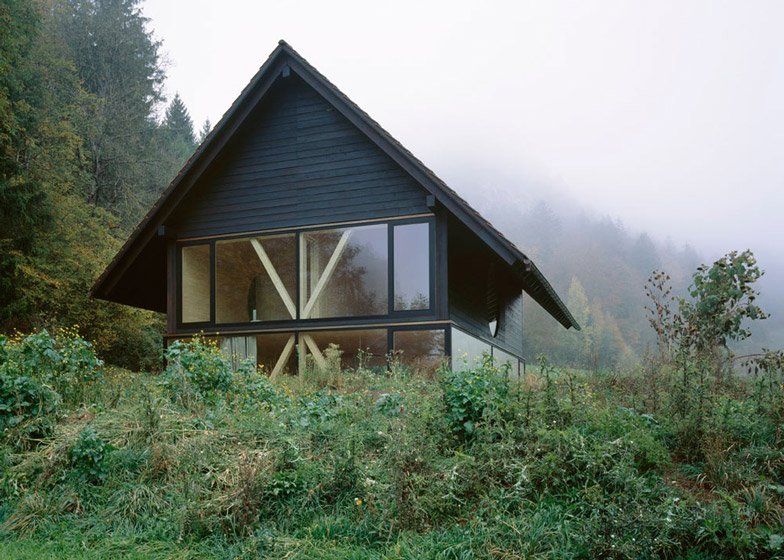
Reference image.


Click on image to enlargeref_02_875.jpg

Reference image 2.


Click on image to enlarge ref_03_876.jpg
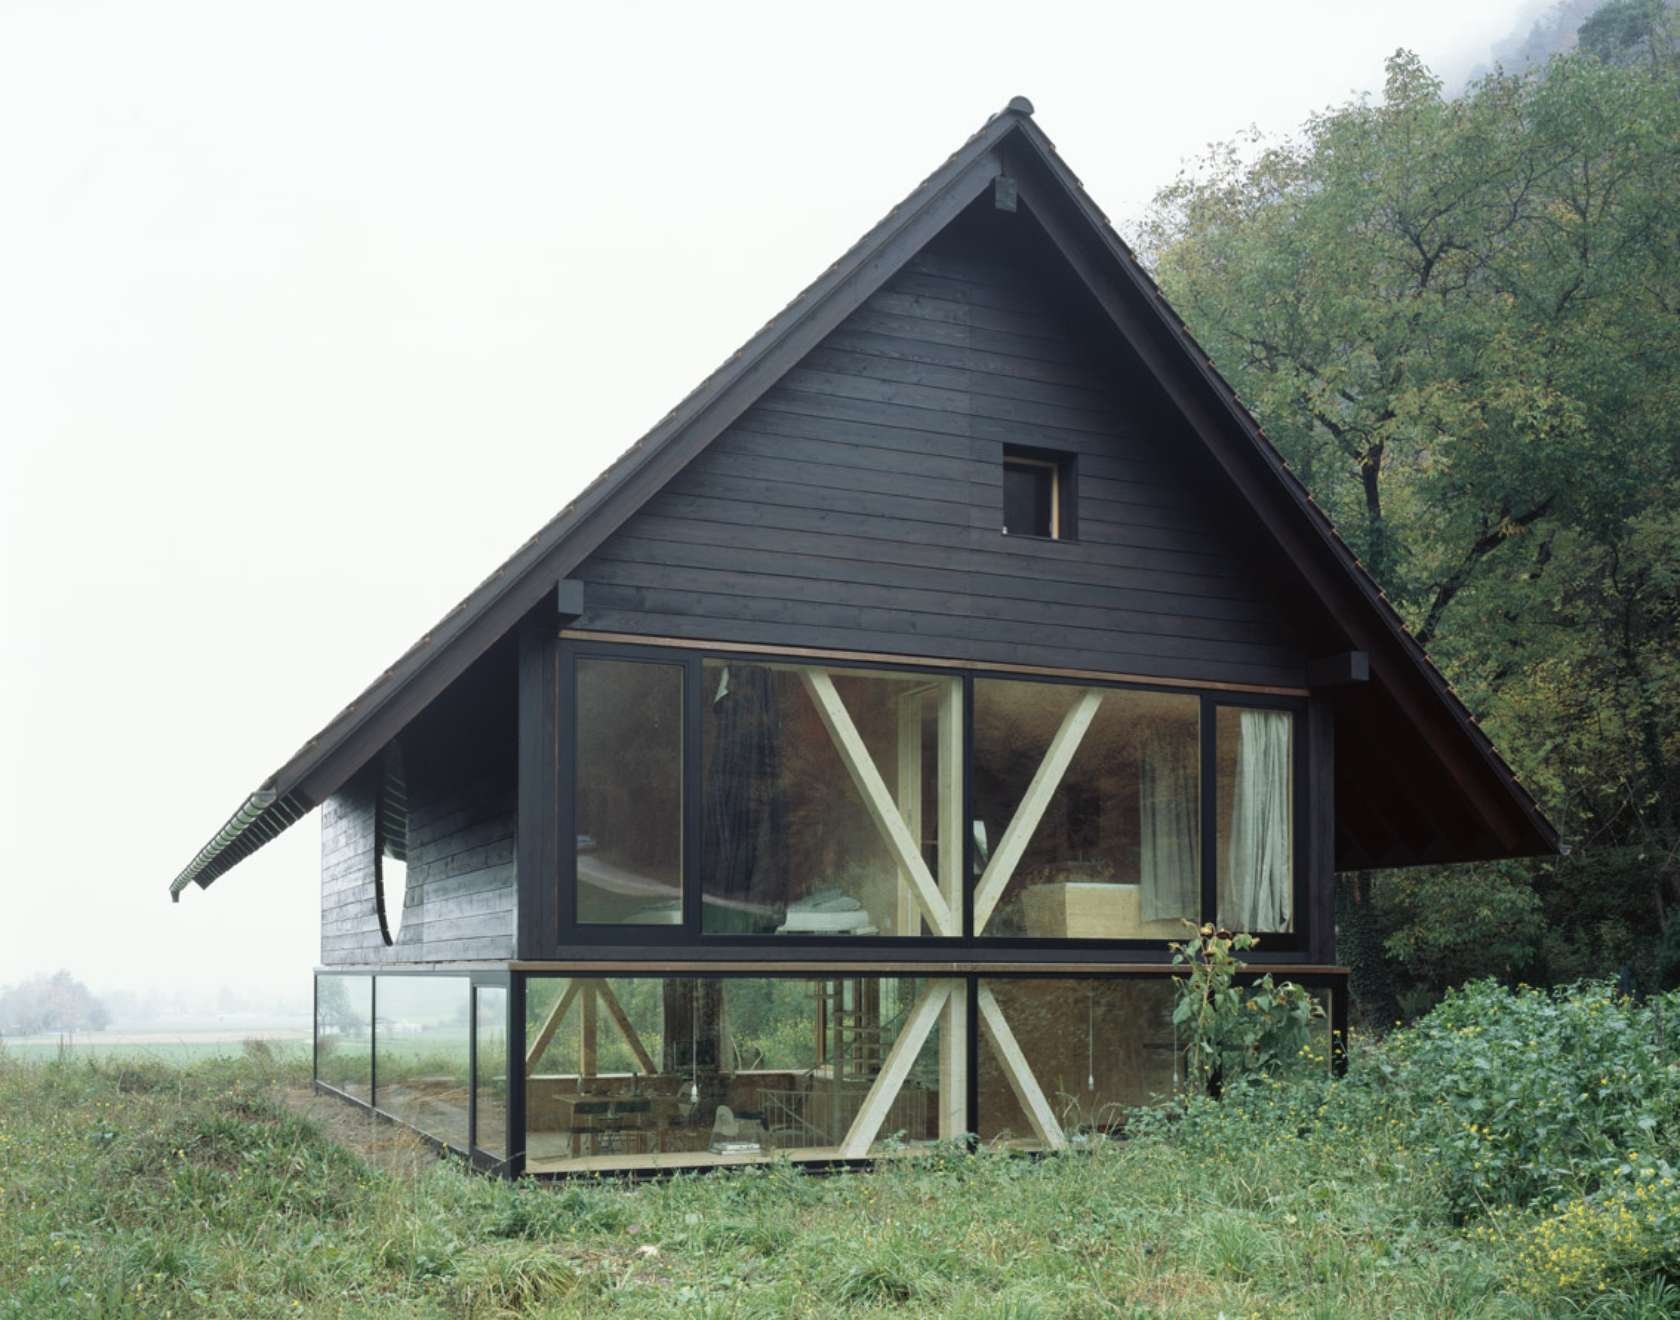
Reference image 3


Click on image to enlarge ref_04_877.jpg

Also I selected a few beautiful references with fog. 

Click on image to enlarge fin_01_871.jpg
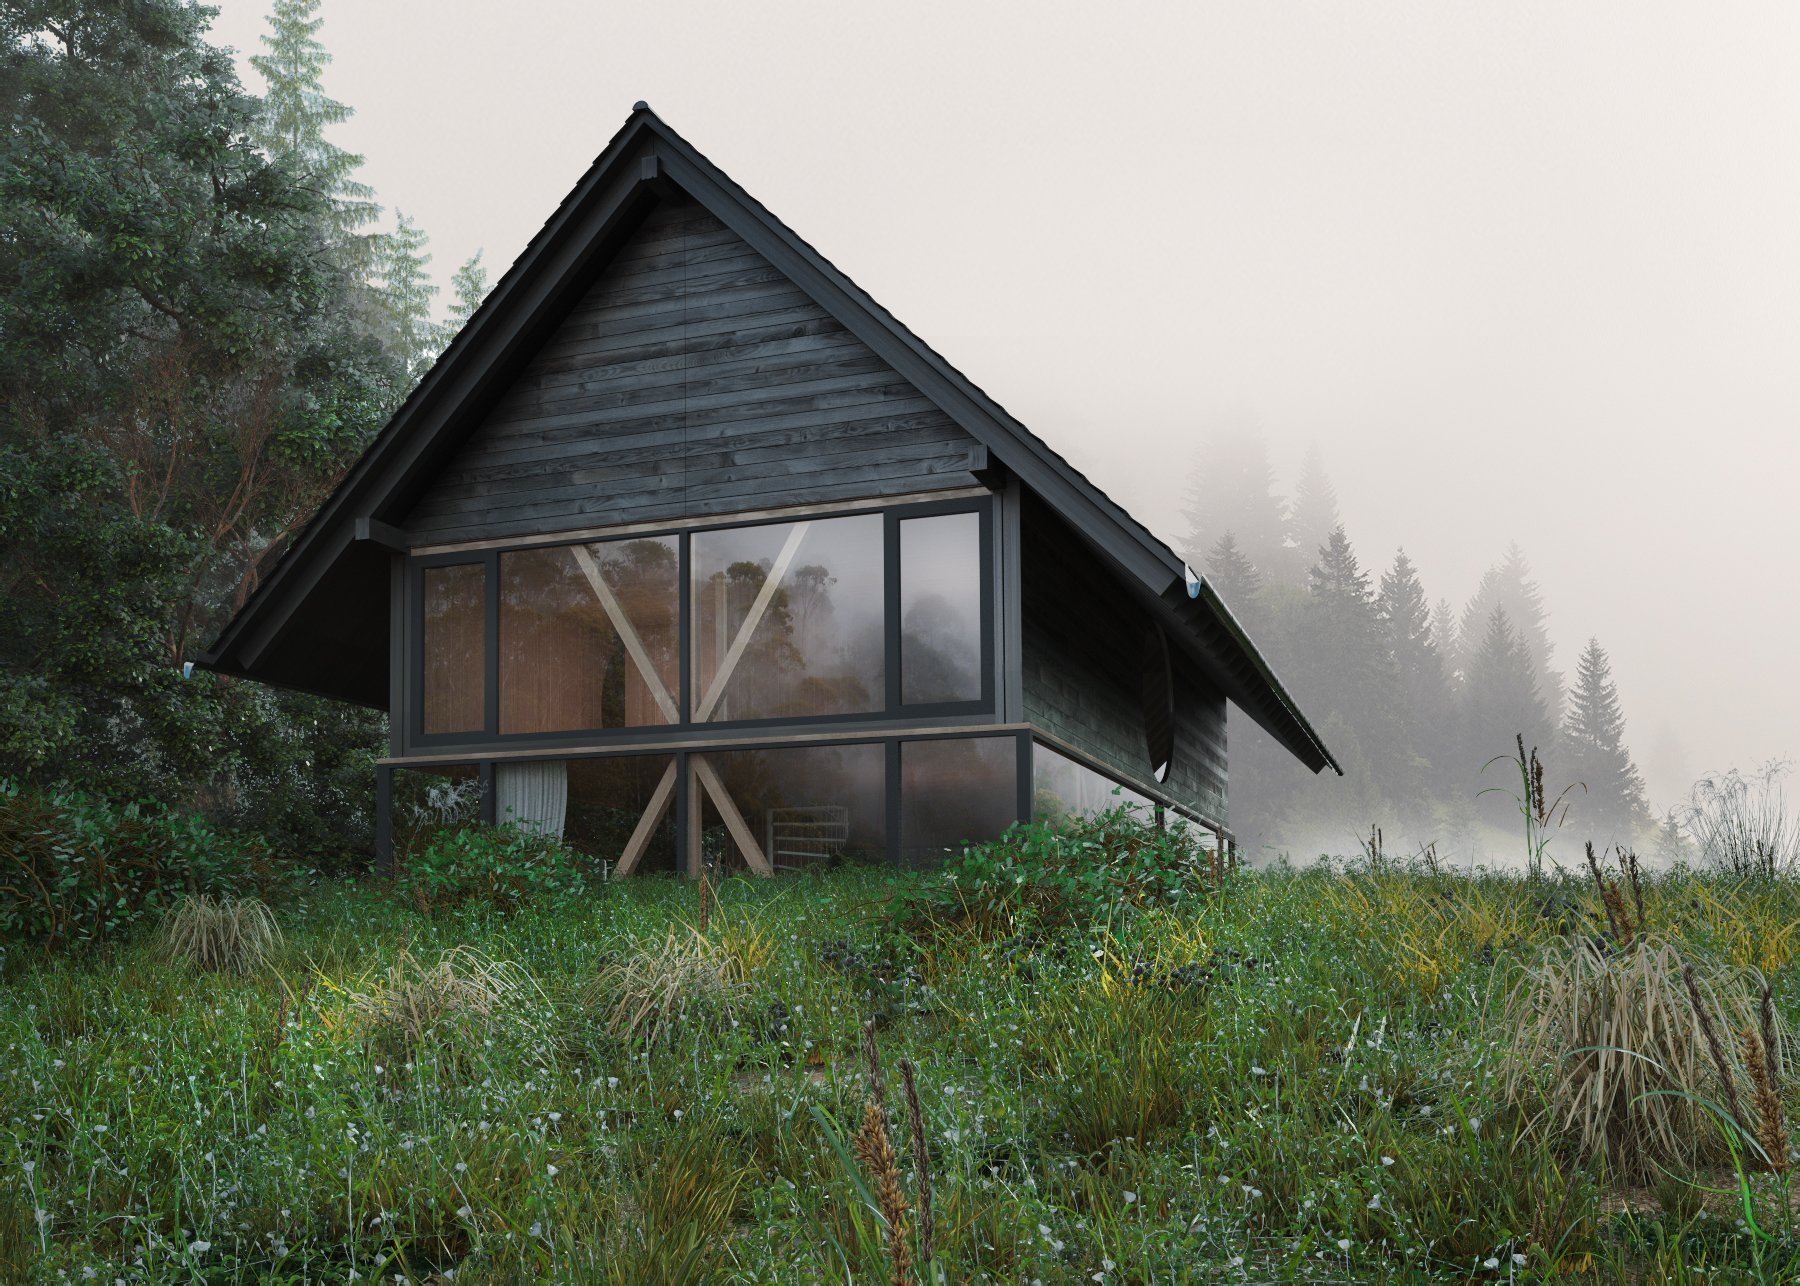
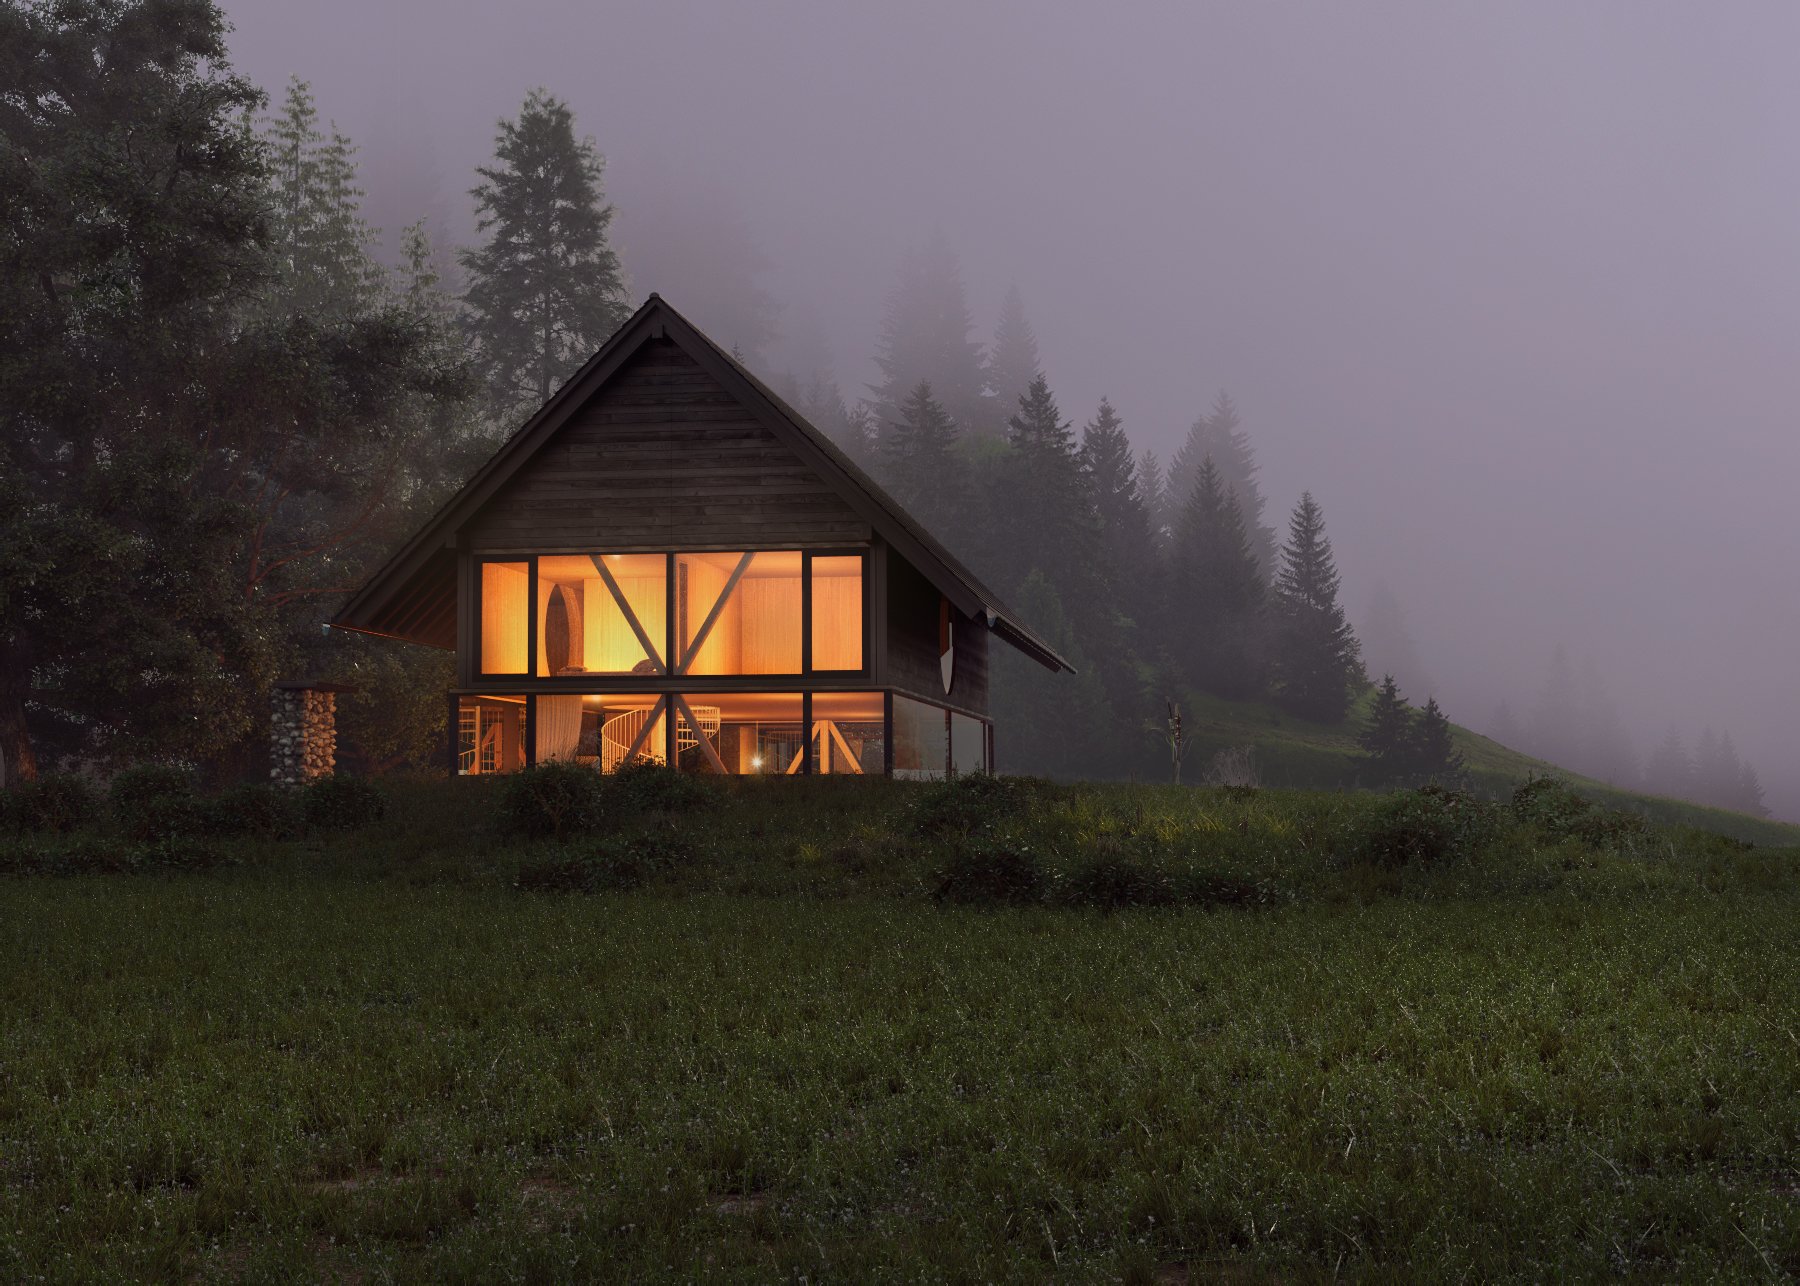
Final render 1.


Click on image to enlarge fin_02_872.jpg

Final render 2.


Click on image to enlarge fin_03_873.jpg

Final render 3.


Modeling

Modeling is quite easy, so I`m going to tell you just about a few moments. 

Click on image to enlarge 01_perspective__match_878.jpg
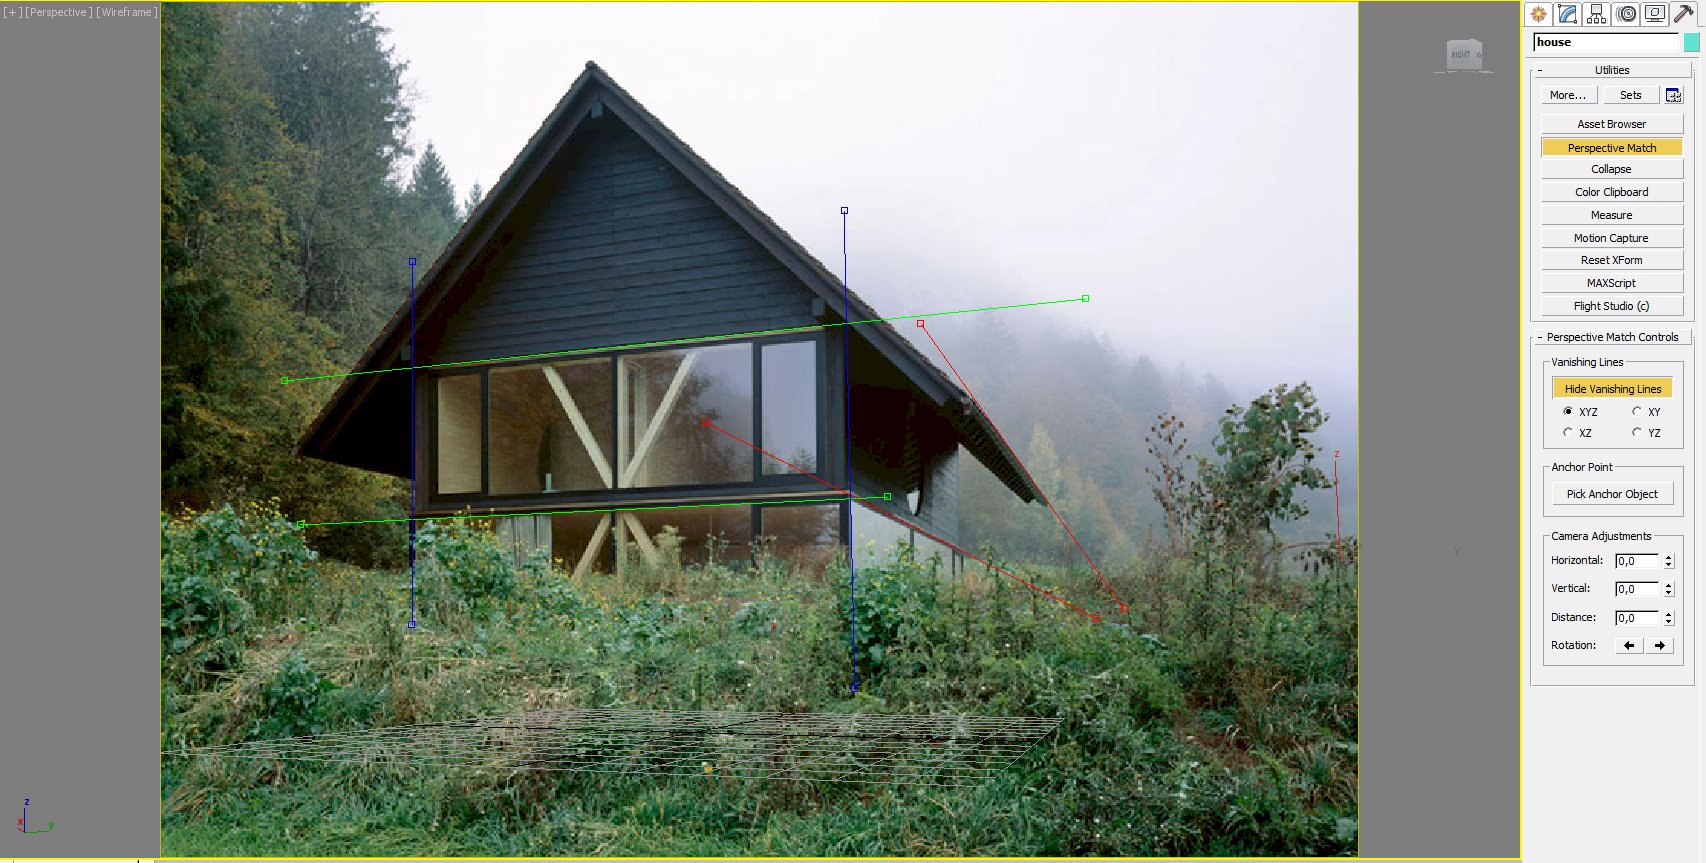
I corrected a perspective for my reference by using a tool perspective match. I created a camera direct by hot keys Ctrl+C and locked it.


Click on image to enlarge 02_house_model_879.jpg
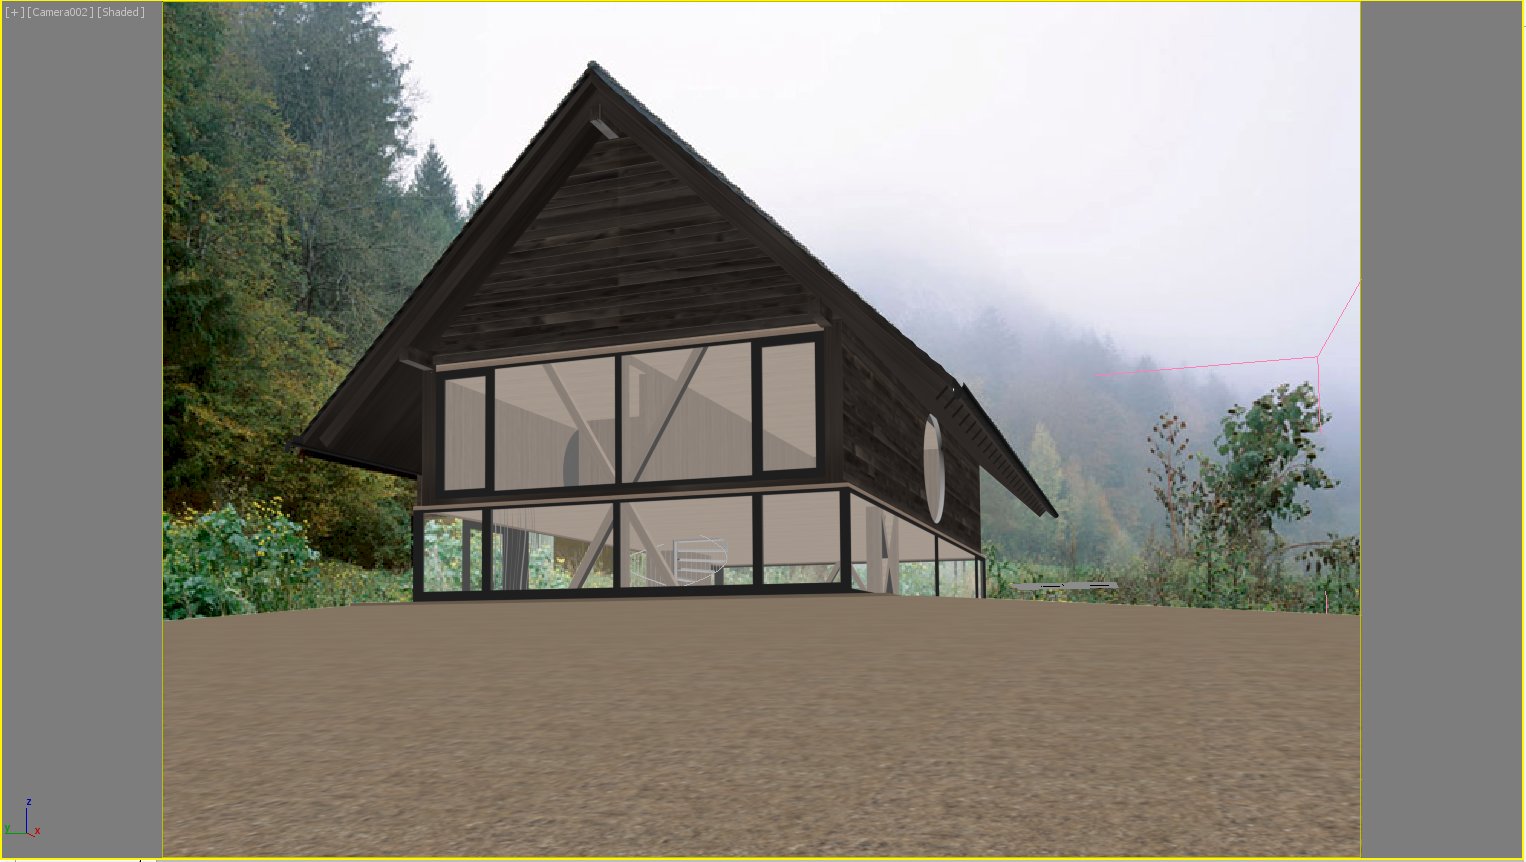
Further I made an extent (volume) of the house – the model isn’t complicated. Almost the whole model consists of simple boxes and a few boolean options for round windows creating.


Click on image to enlarge 03_planks_880.jpg
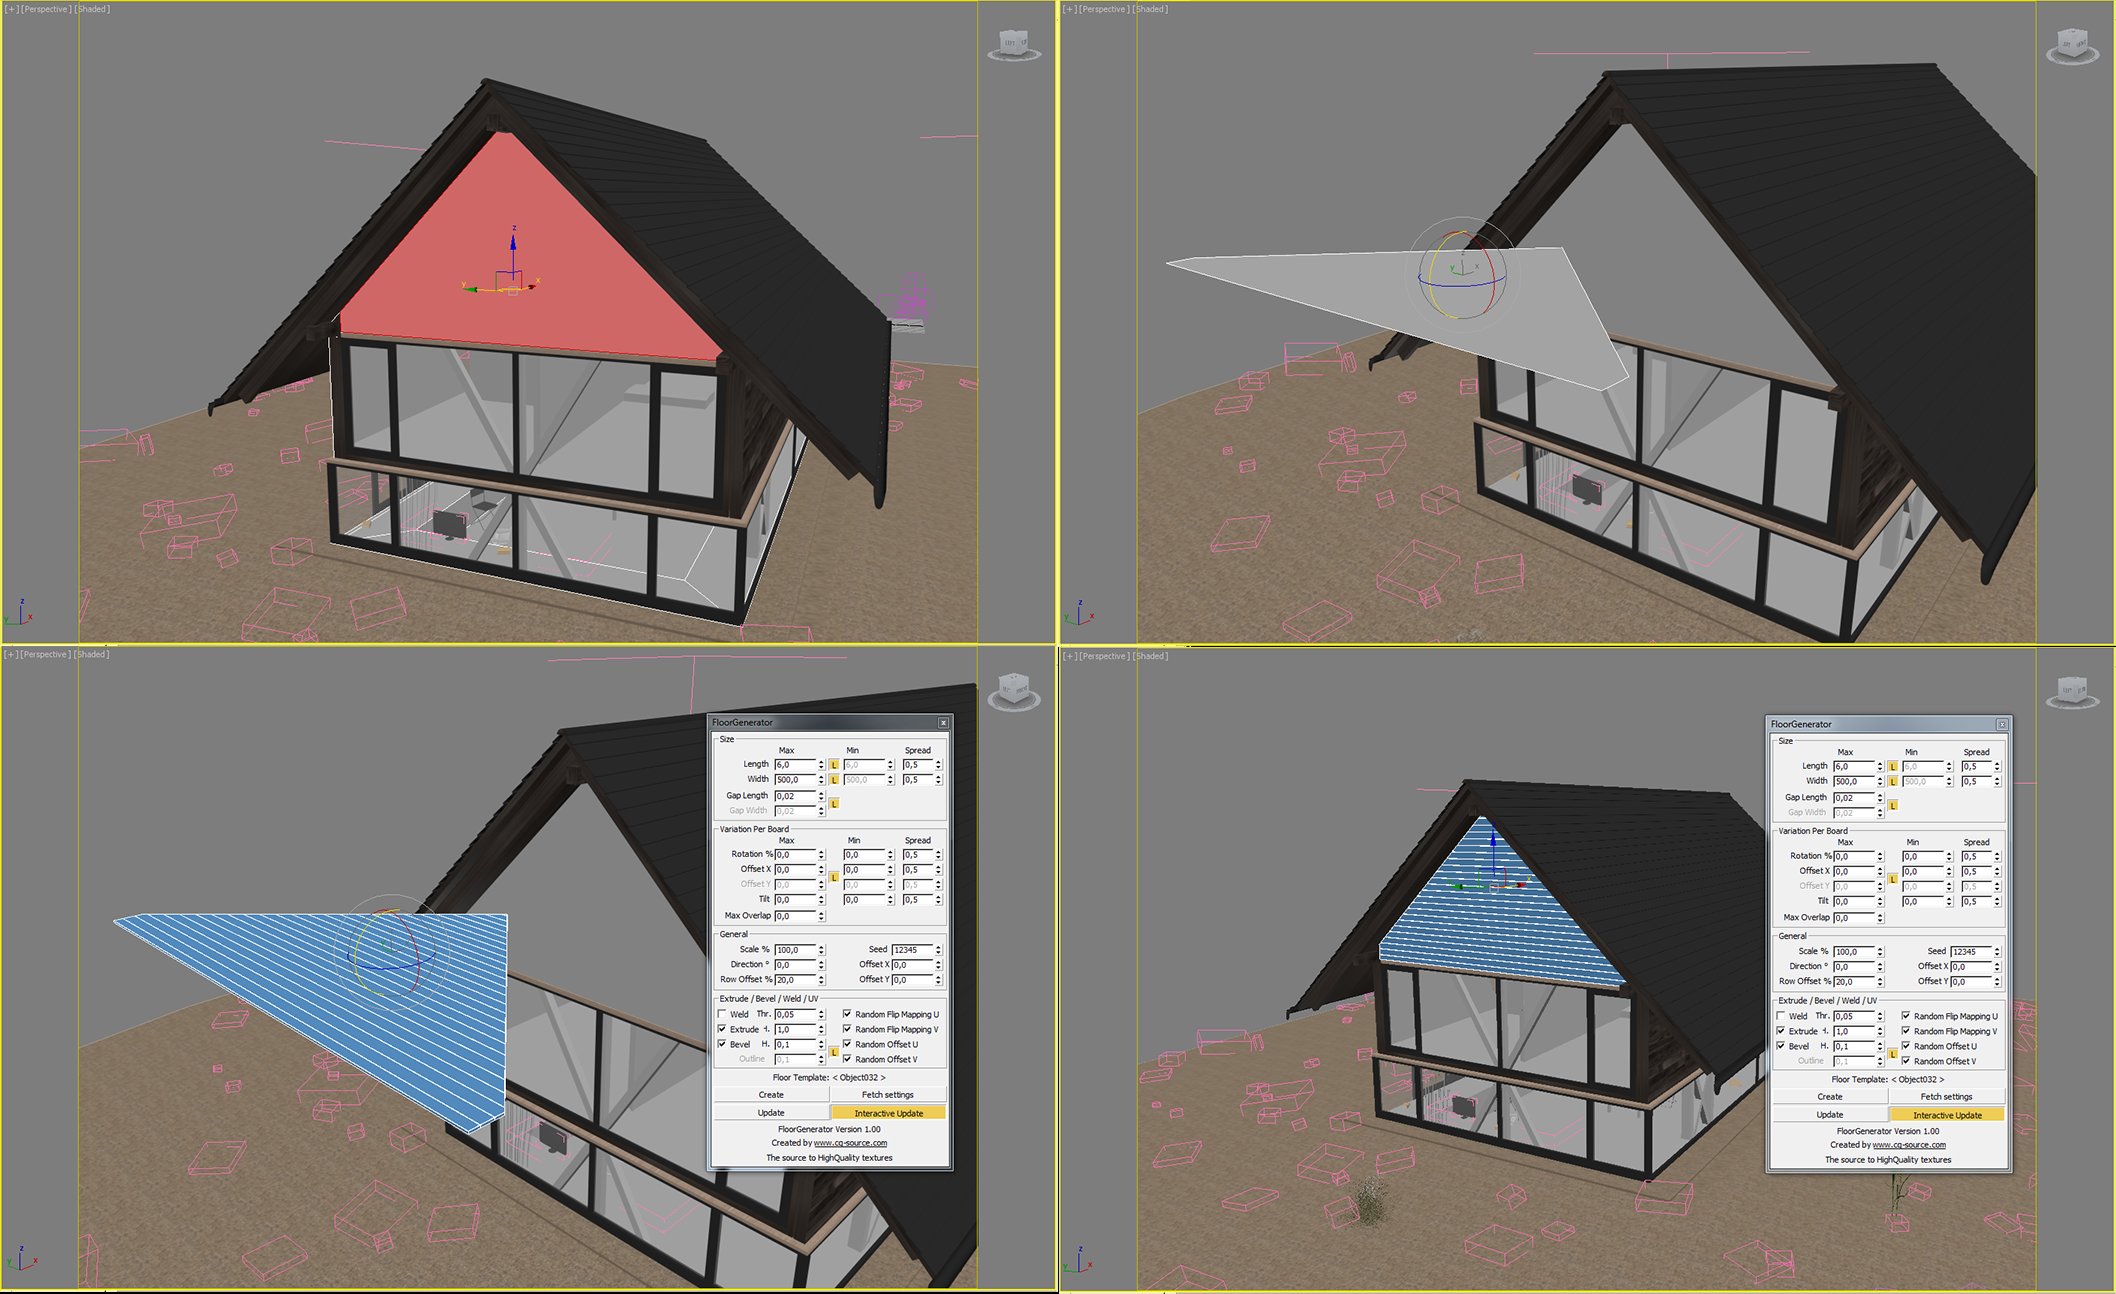
I've got many questions about realistic wood. For the wood I used a script - Floor Generator. As we know, the script works only in horizontal plane, but we need it in vertical one. So we choose a polygon of wall where we need to create a wood and make a copy of this polygon. Swing it into horizontal position. Then drive the script and create the wood. Swing the completed wood into vertical position and put it on the right place.


Click on image to enlarge 04_vegetation_881.jpg
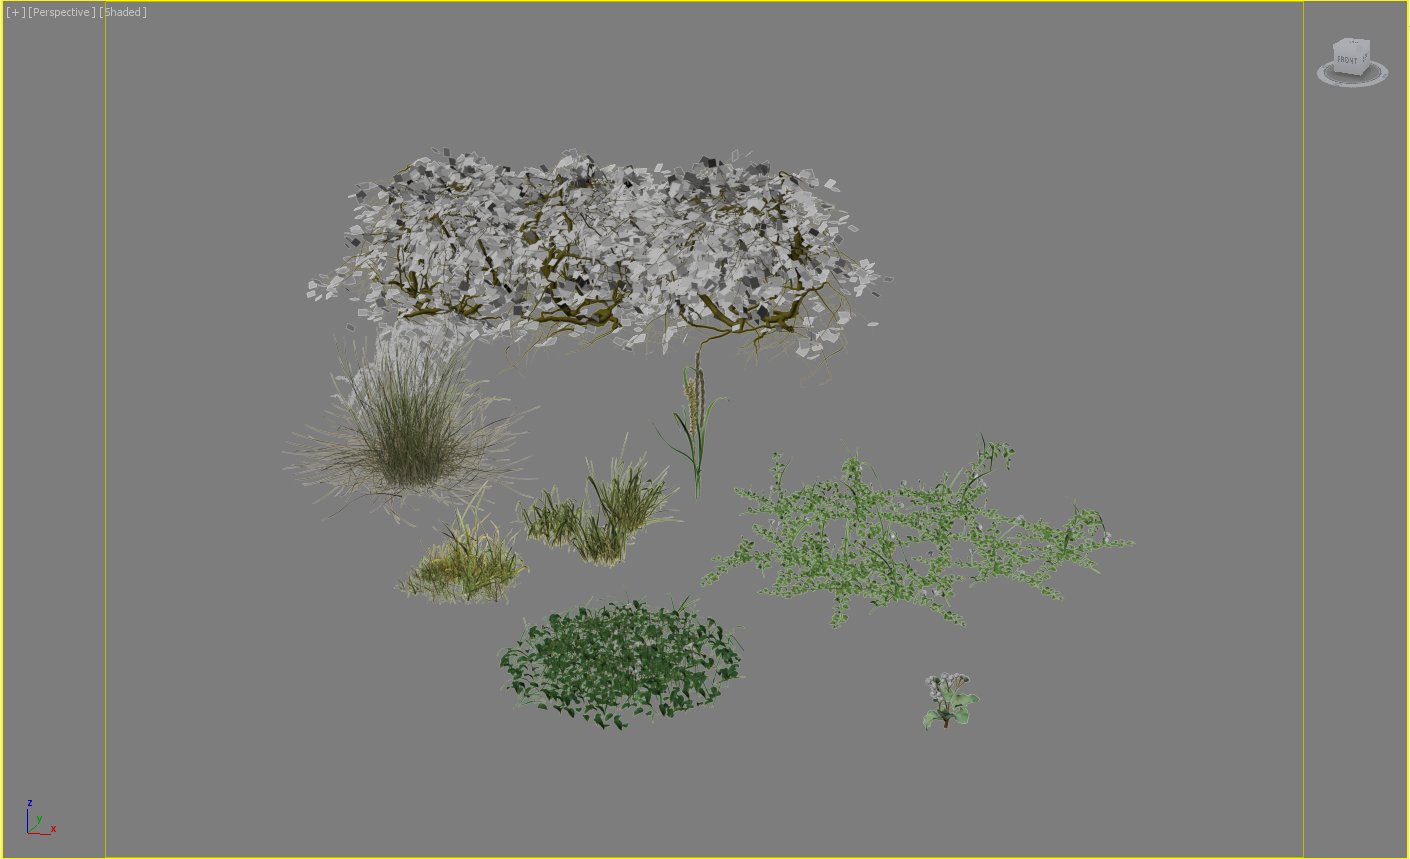
On this level the modeling of the house is finished. Then I downloaded some furniture models into the house and started the main part of this project – planting of greenery. I used such models of grass from the Evermotion Archmodels vol.124 and Archmodels vol.126 collections.


Click on image to enlarge 05_scatter_01_02_882.jpg
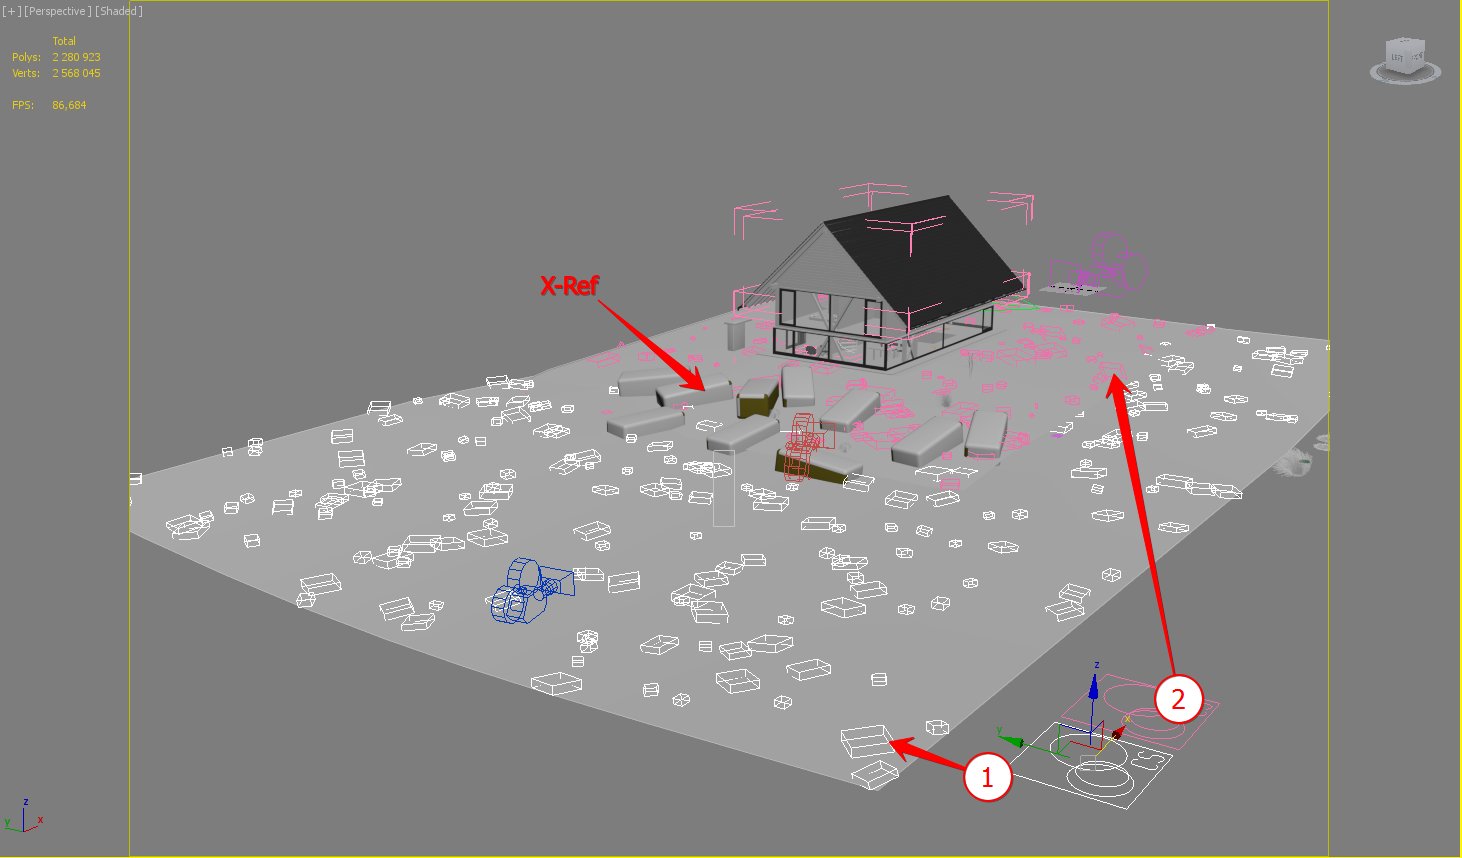
For grass placing I used corona-scatter. It's not as functional as MultiScatter, but for this project it was enough. I created three different scatters, each of them has its own individual plane. 


Click on image to enlarge 06_scatter_03_883.jpg
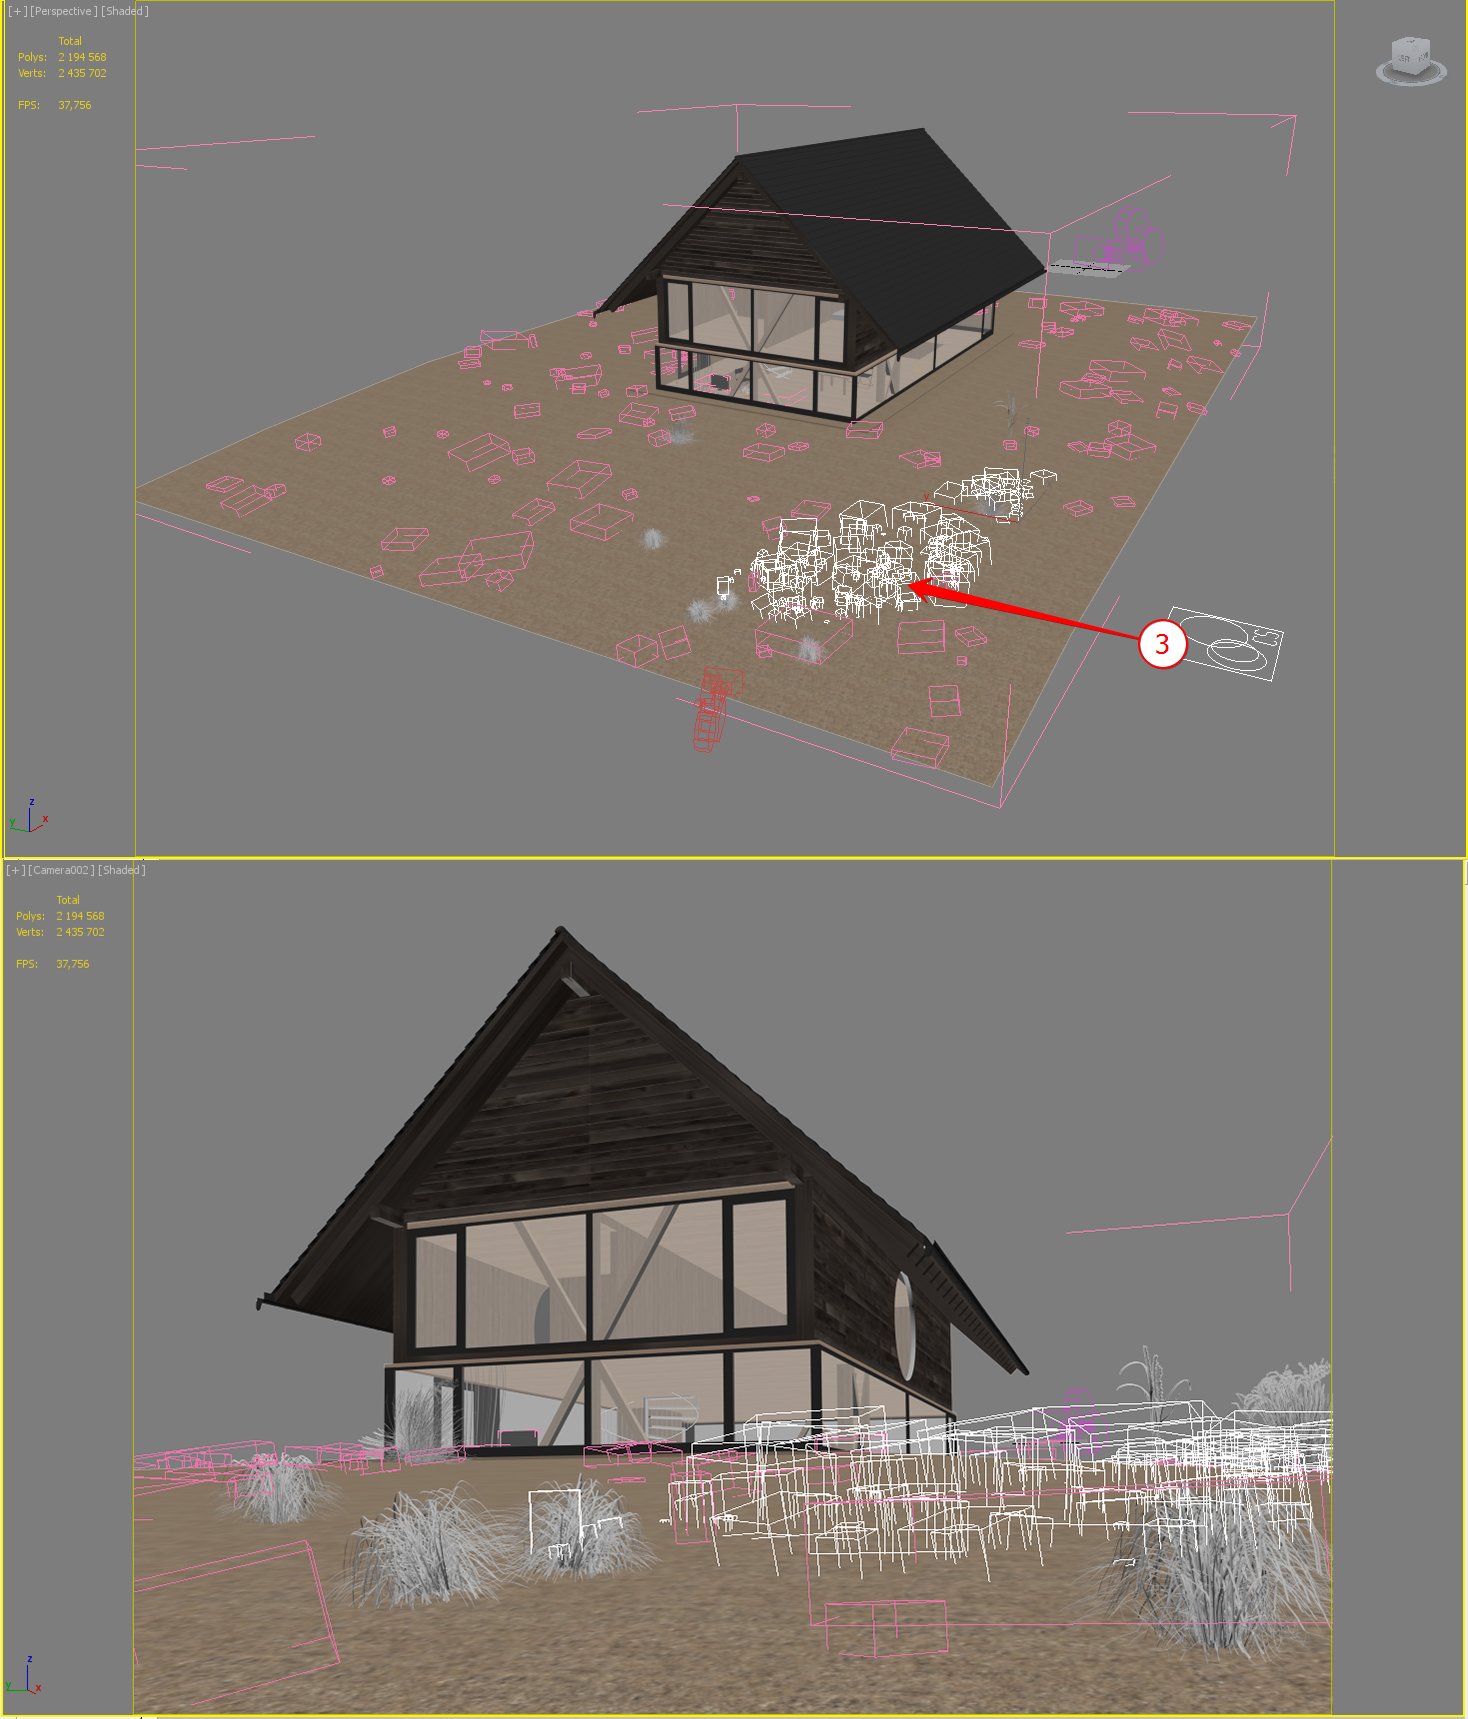
To save a control over the bush textures on the foreground I downloaded them by using x-ref and planted them manually.


Click on image to enlarge 07_grass_884.jpg
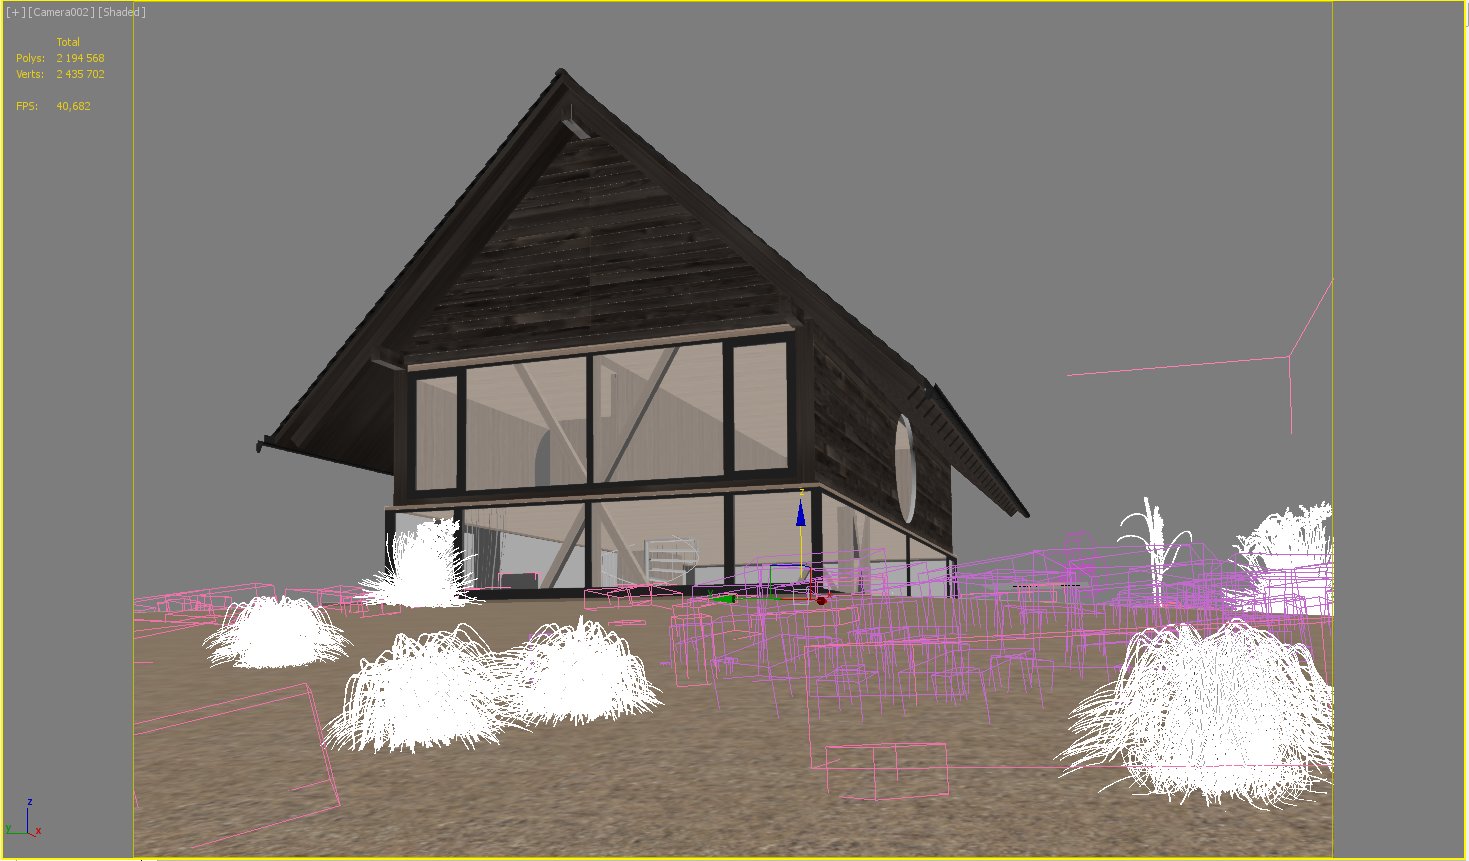
Grass models on the foreground were planted in the same way.


Click on image to enlarge 08_trees_885.jpg
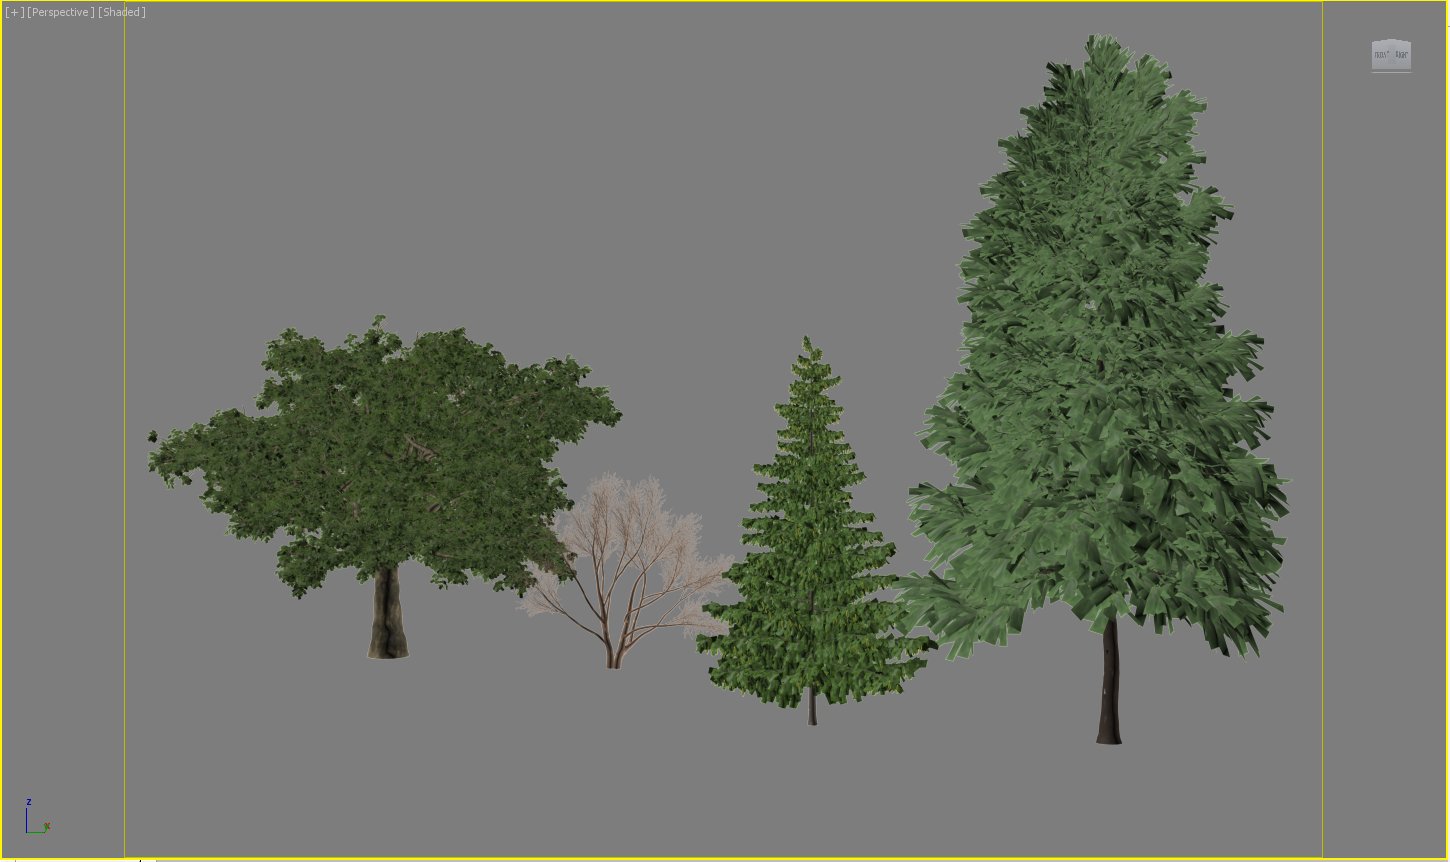
The trees are also from the Evermotion Archmodels vol.58 catalog.


Click on image to enlarge 09_proxy_trees_886.jpg

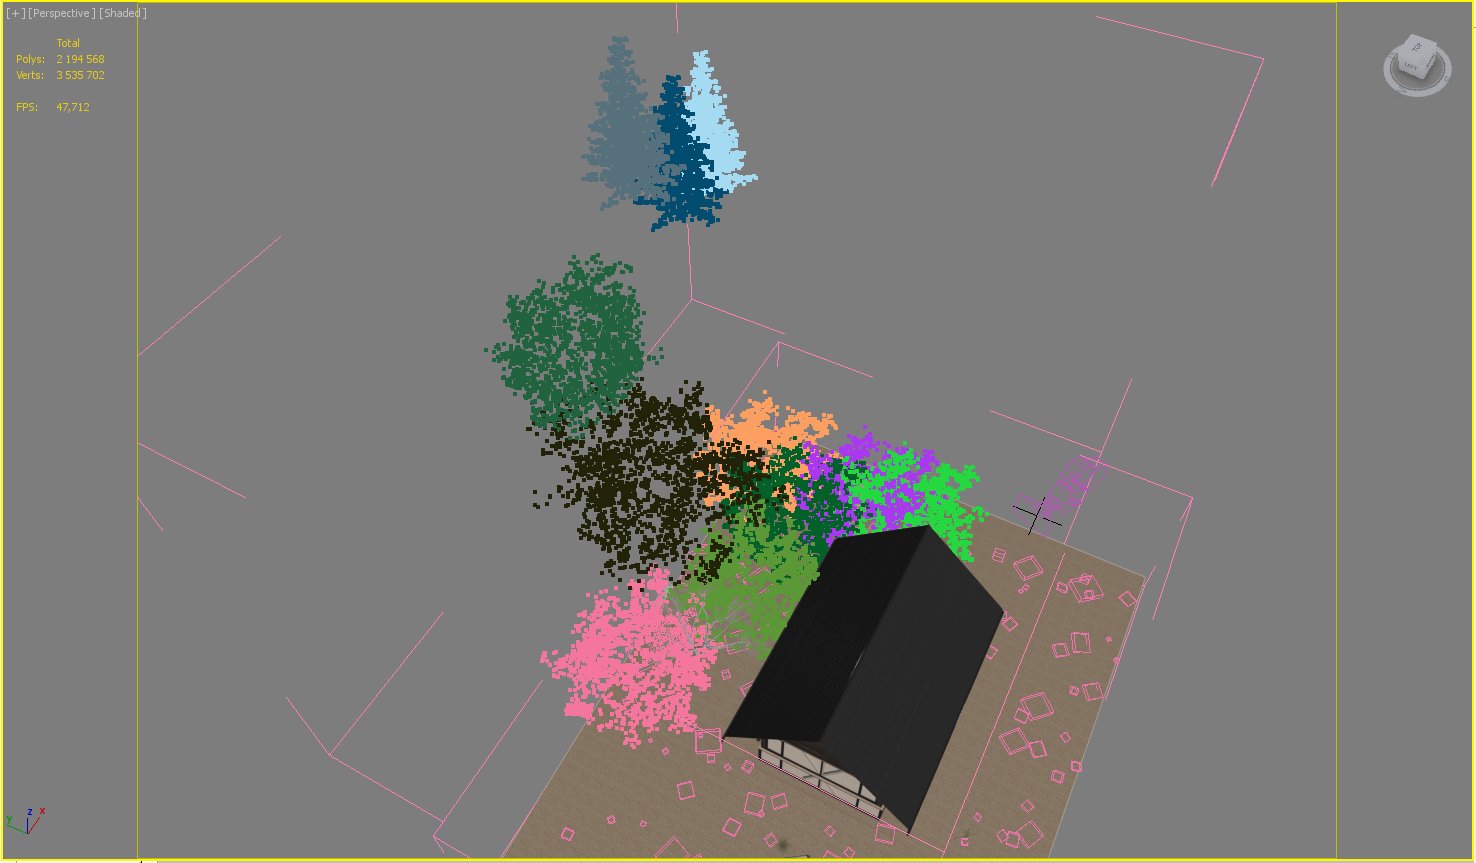
The trees were converted in corona proxy and planted manually.


Lighting 

Click on image to enlarge 10_lighting_887.jpg
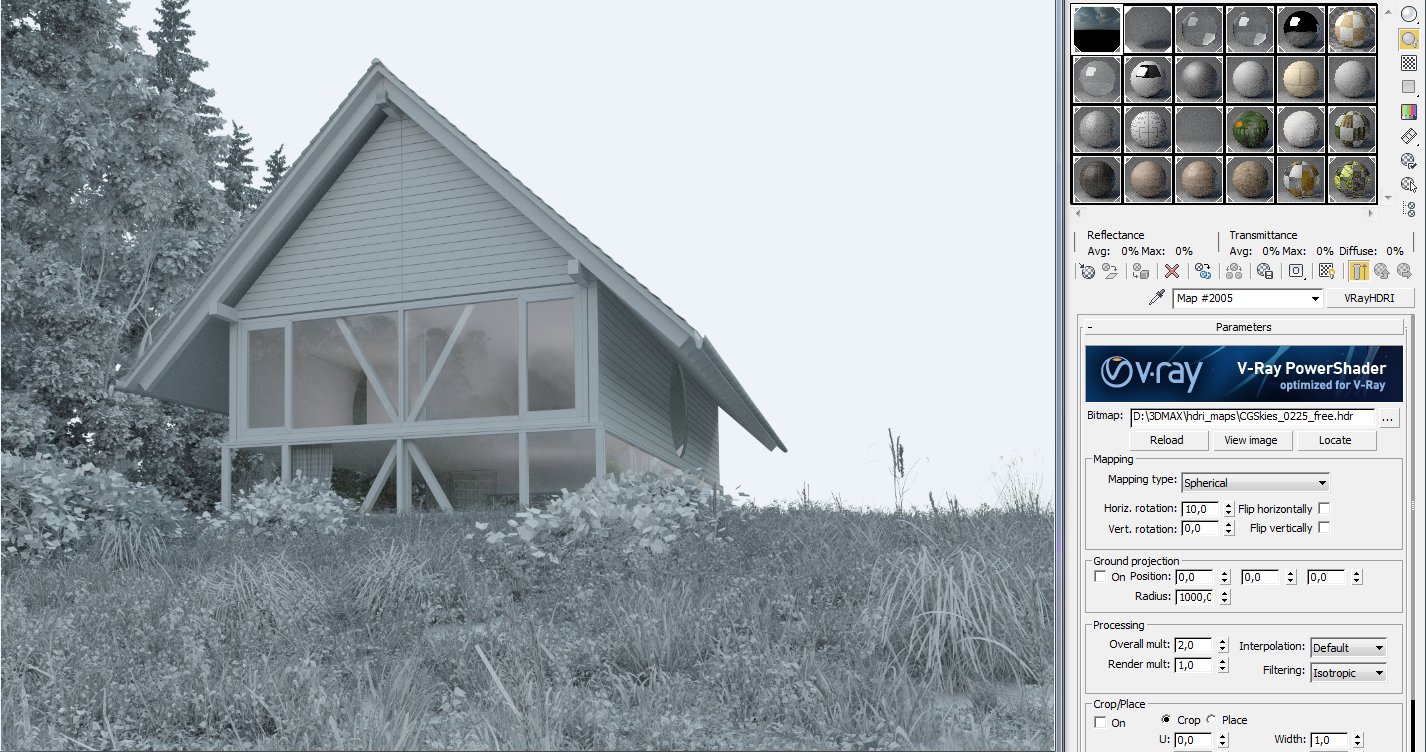
For lighting hdri map from the cgsckies resource was used. Considering that the atmosphere of the image has to be dull and foggy, I rolled the hdri for each view for avoiding of the sharp shadows.


Click on image to enlarge 11_lighting_888.jpg
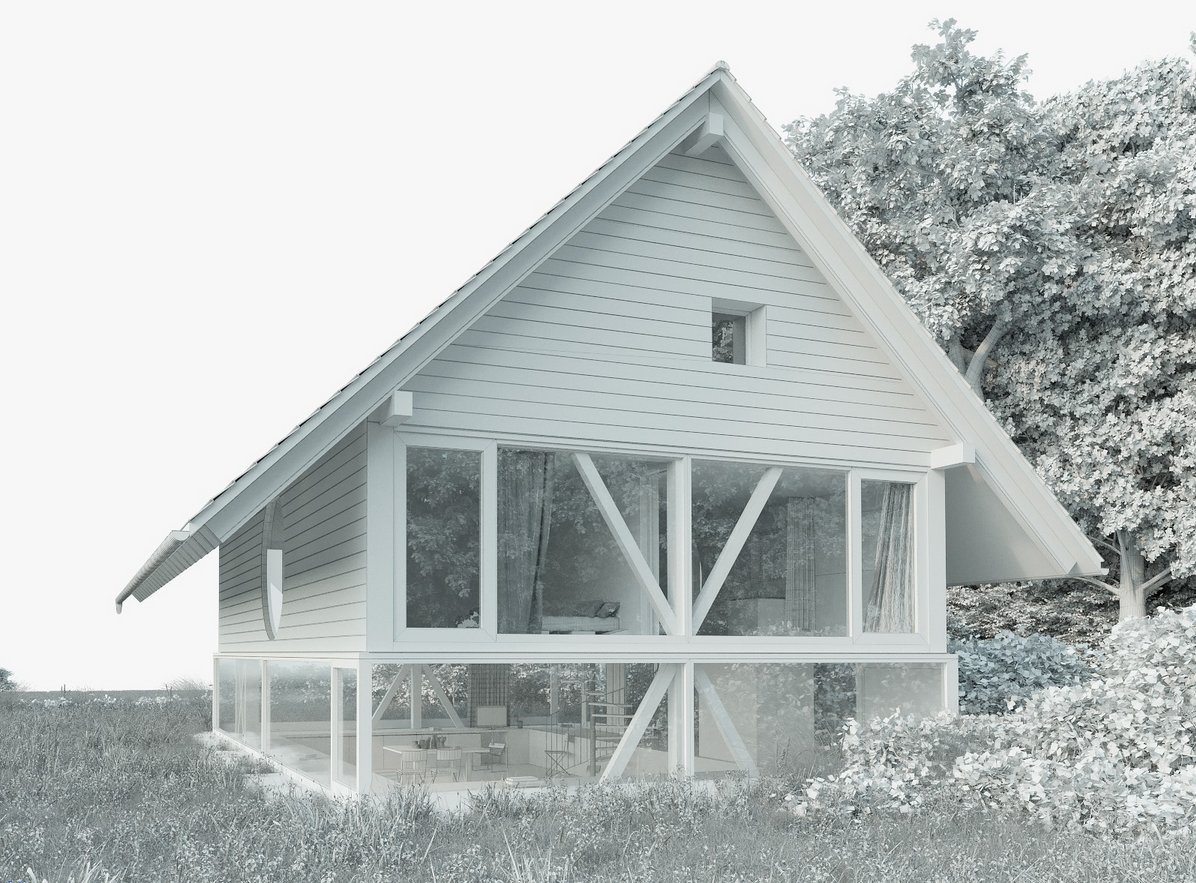
Lighting.


Click on image to enlarge 12_corona_light_889.jpg

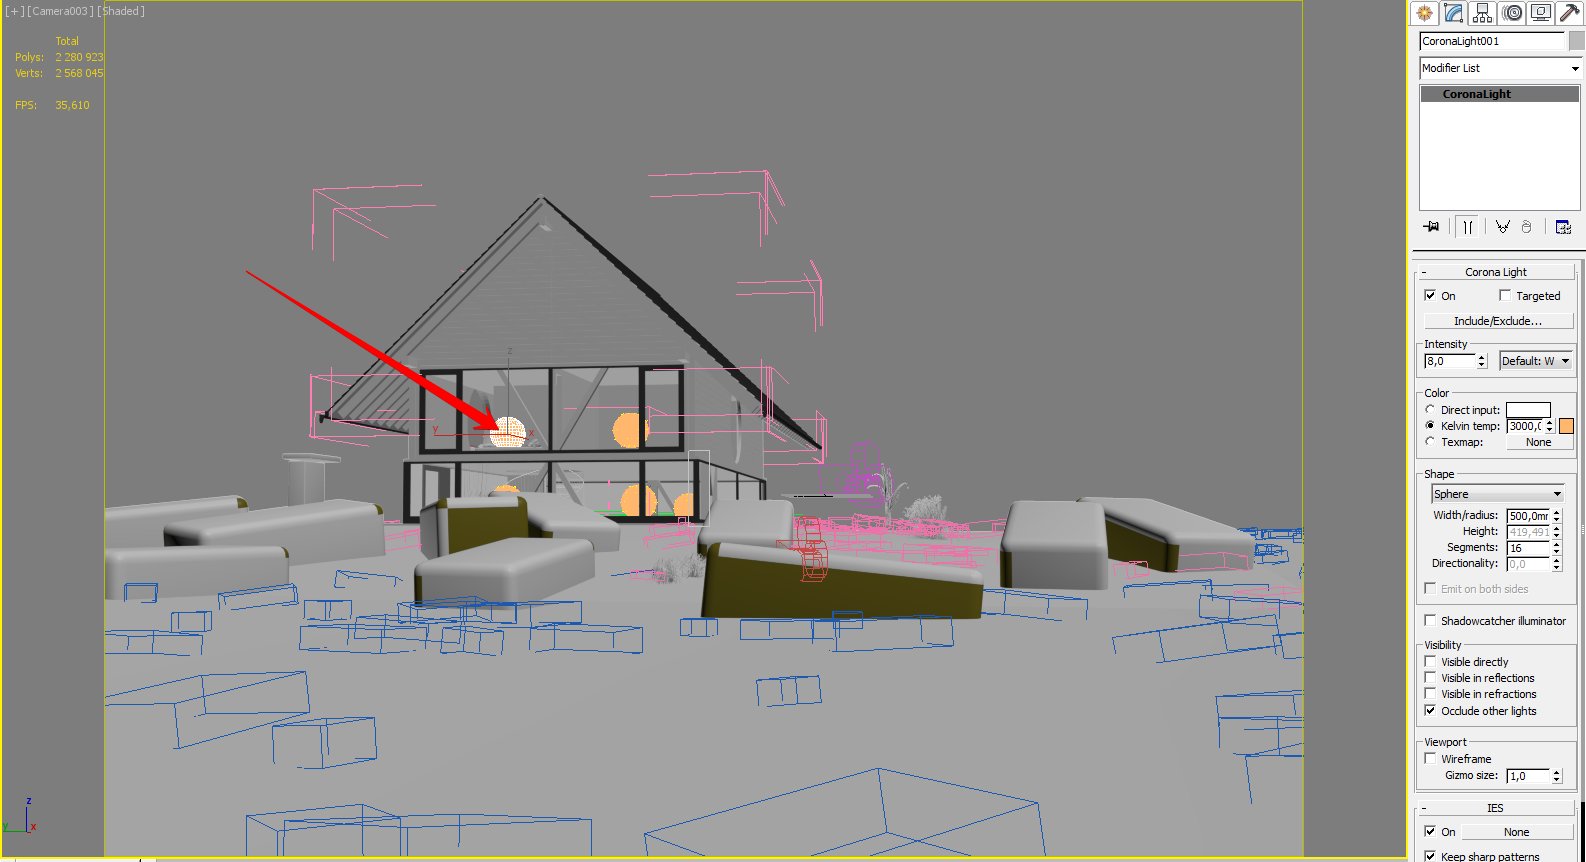
For the night view I added corona lights into interior with such settings.


Materials 

Click on image to enlarge 13_wood_mtl_890.jpg
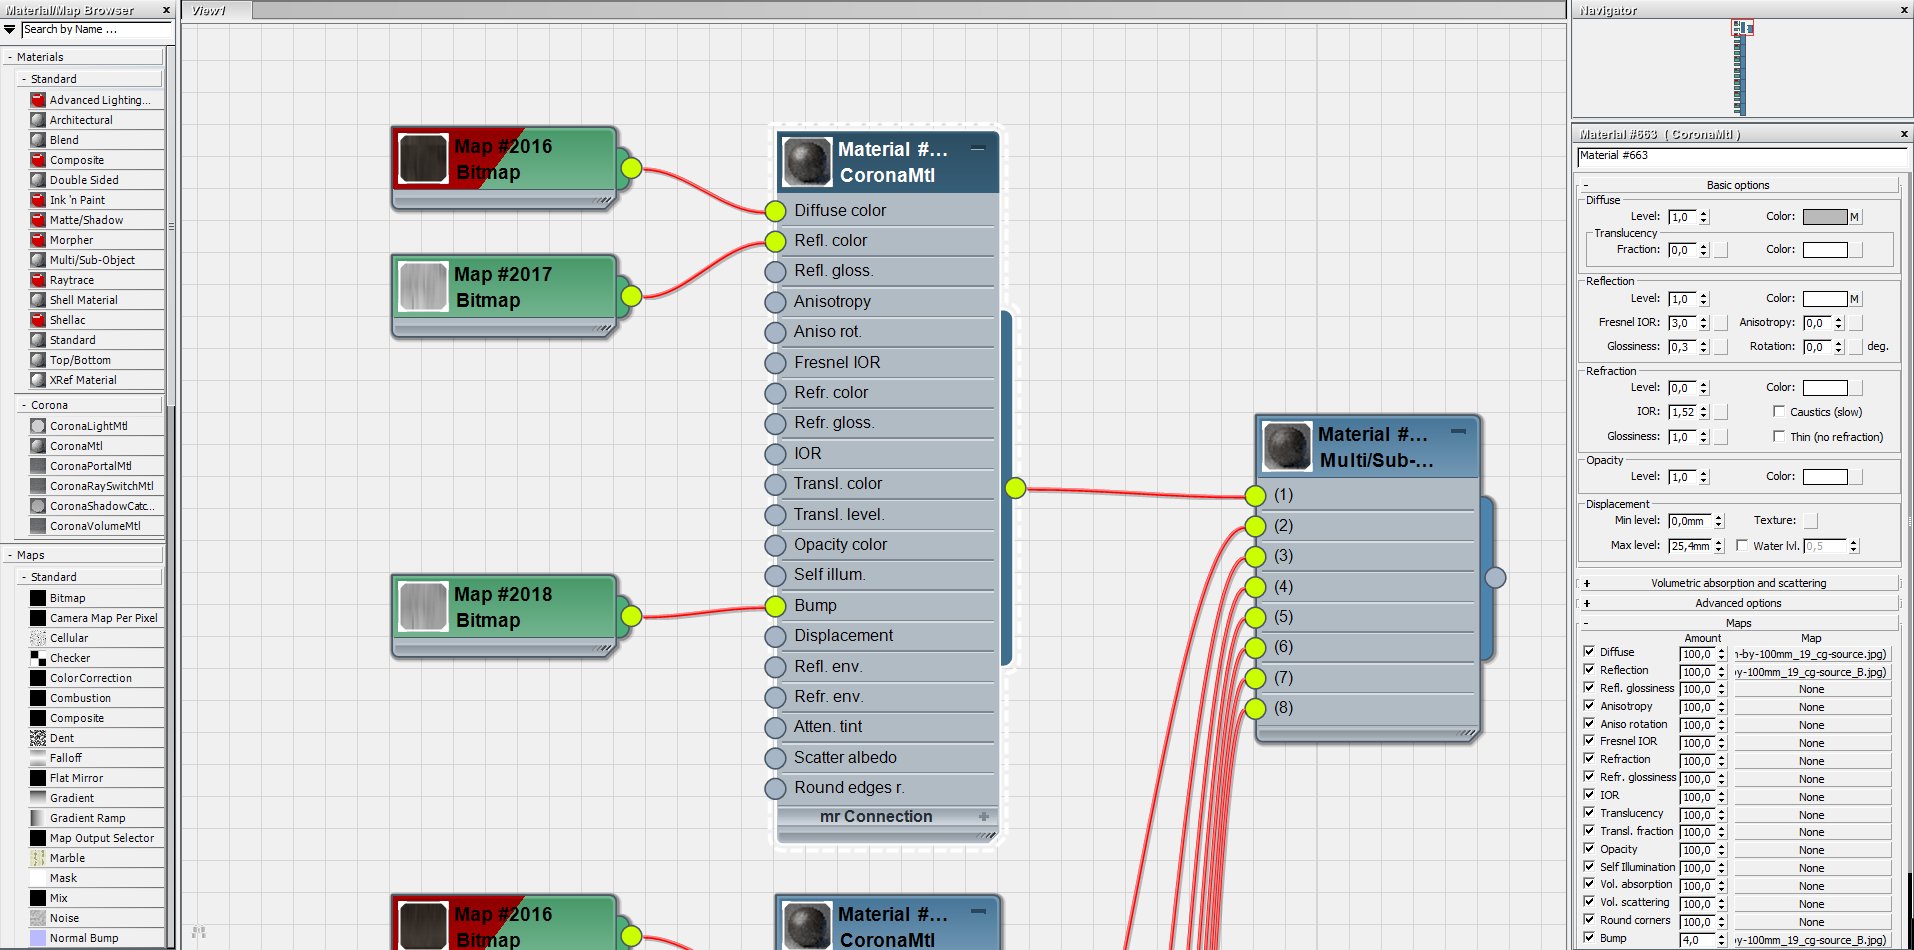
Materials in this scene are quite simple; I’ll show some of them. Wood. It is a Multi\Sub-object material. I used Multitextures from CG-Source for it.


Click on image to enlarge 14_glass_mtl_862.jpg
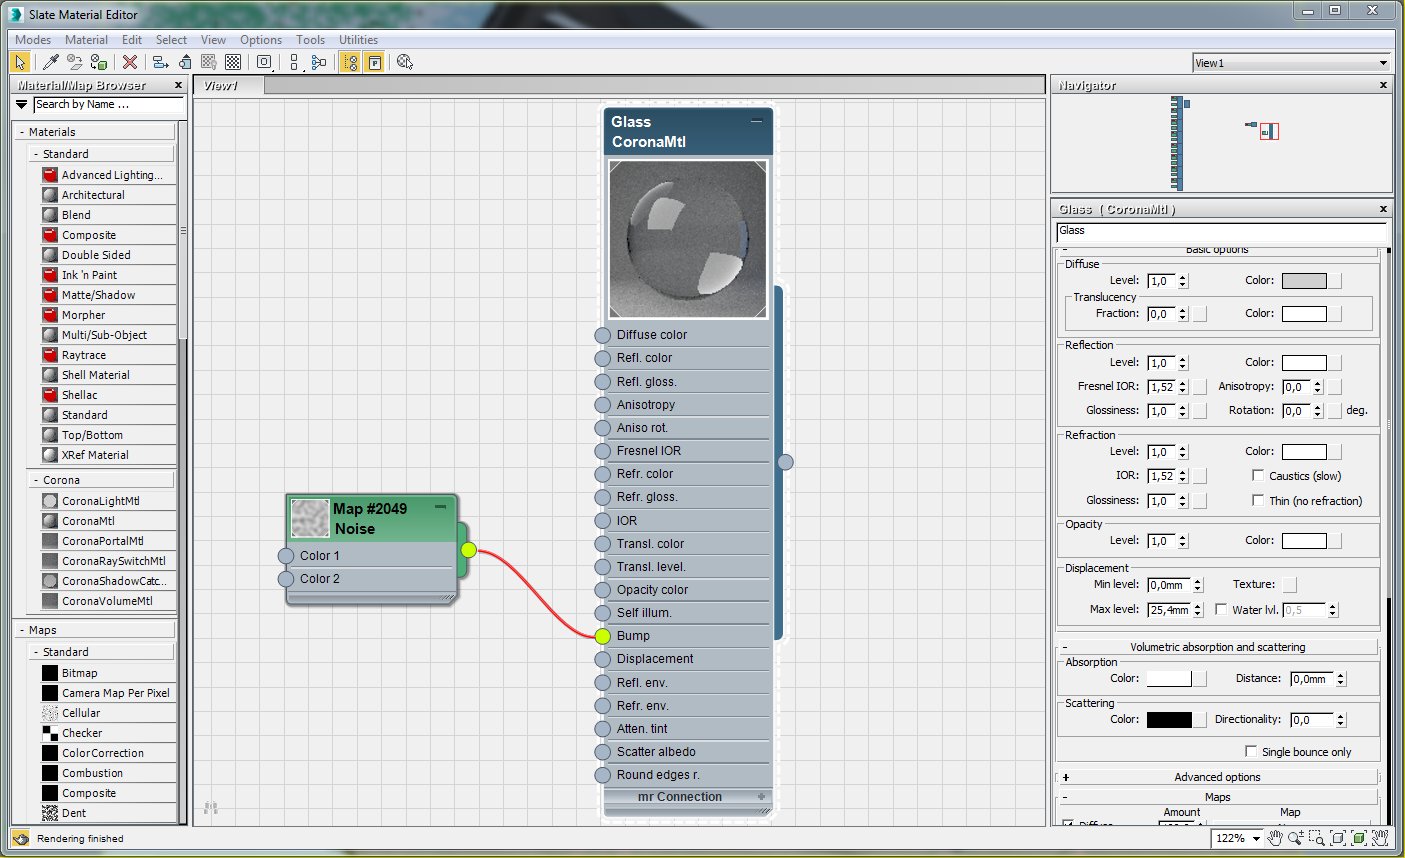
Glass. I added a noise map with a big radius into bump slot for getting an asperity in reflections. That’s the details which make a photorealism.


Click on image to enlarge 15_corona_light_mtl_863.jpg
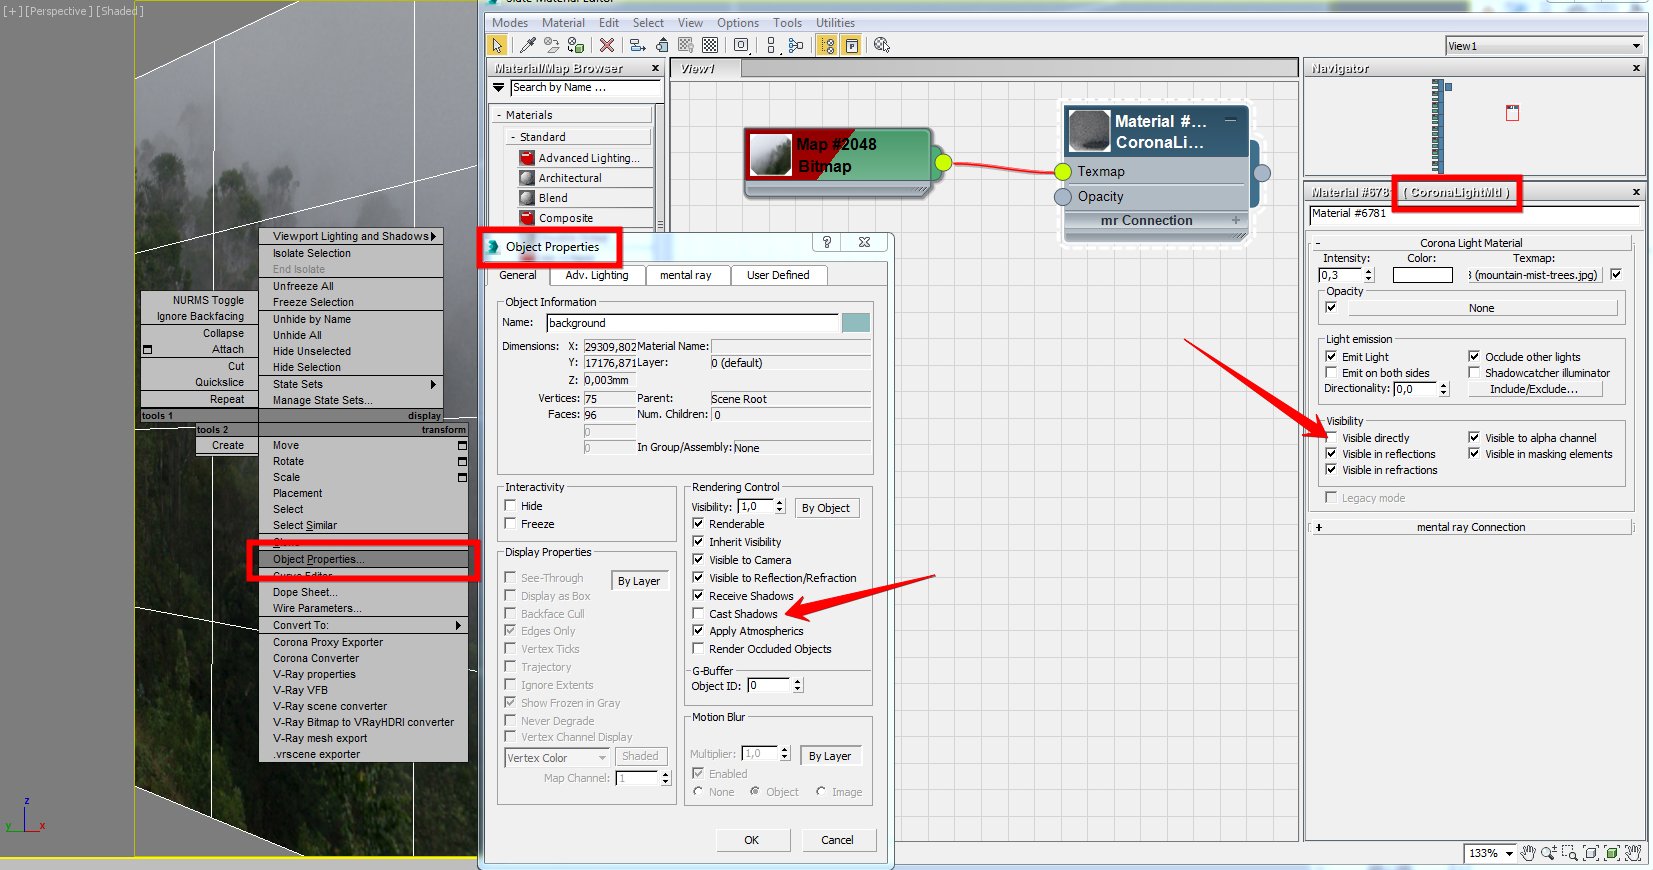
The reflections in the glass. I created some planes and added a texture with a great landscape and fog. I used Corona light material. I unchecked "cast shadows" and "visible directly". this way the planes are invisible on render and do not mess with HDRI. This way I achieved beautiful reflections in the glass.


Click on image to enlarge 16_plane_in_reflection_864.jpg
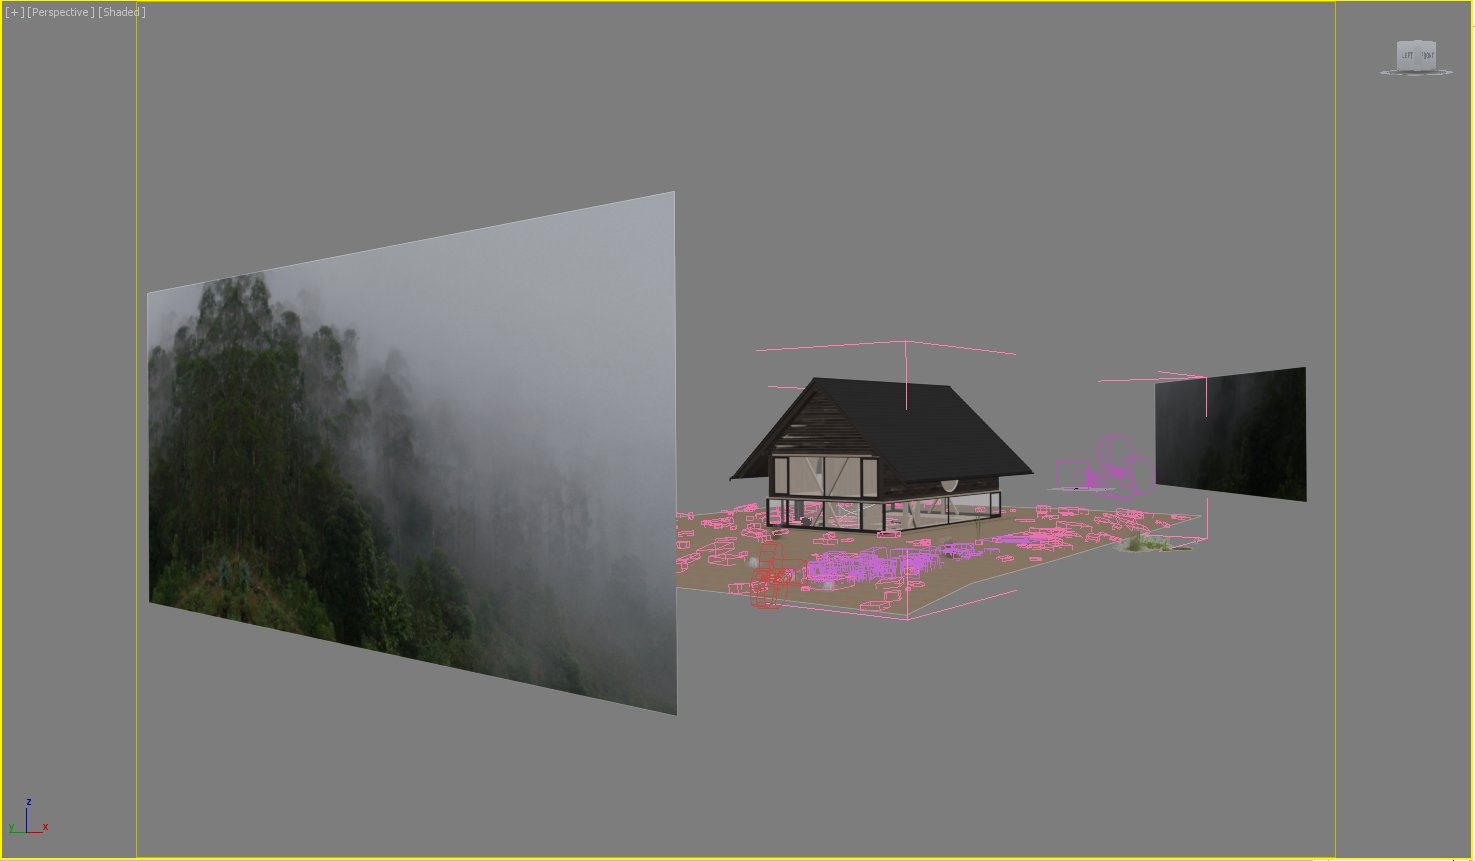
I left default materials of greenery, only corrected translucency and bump in some copies.


Post-production

Click on image to enlarge 17_raw_render_view_01_865.jpg

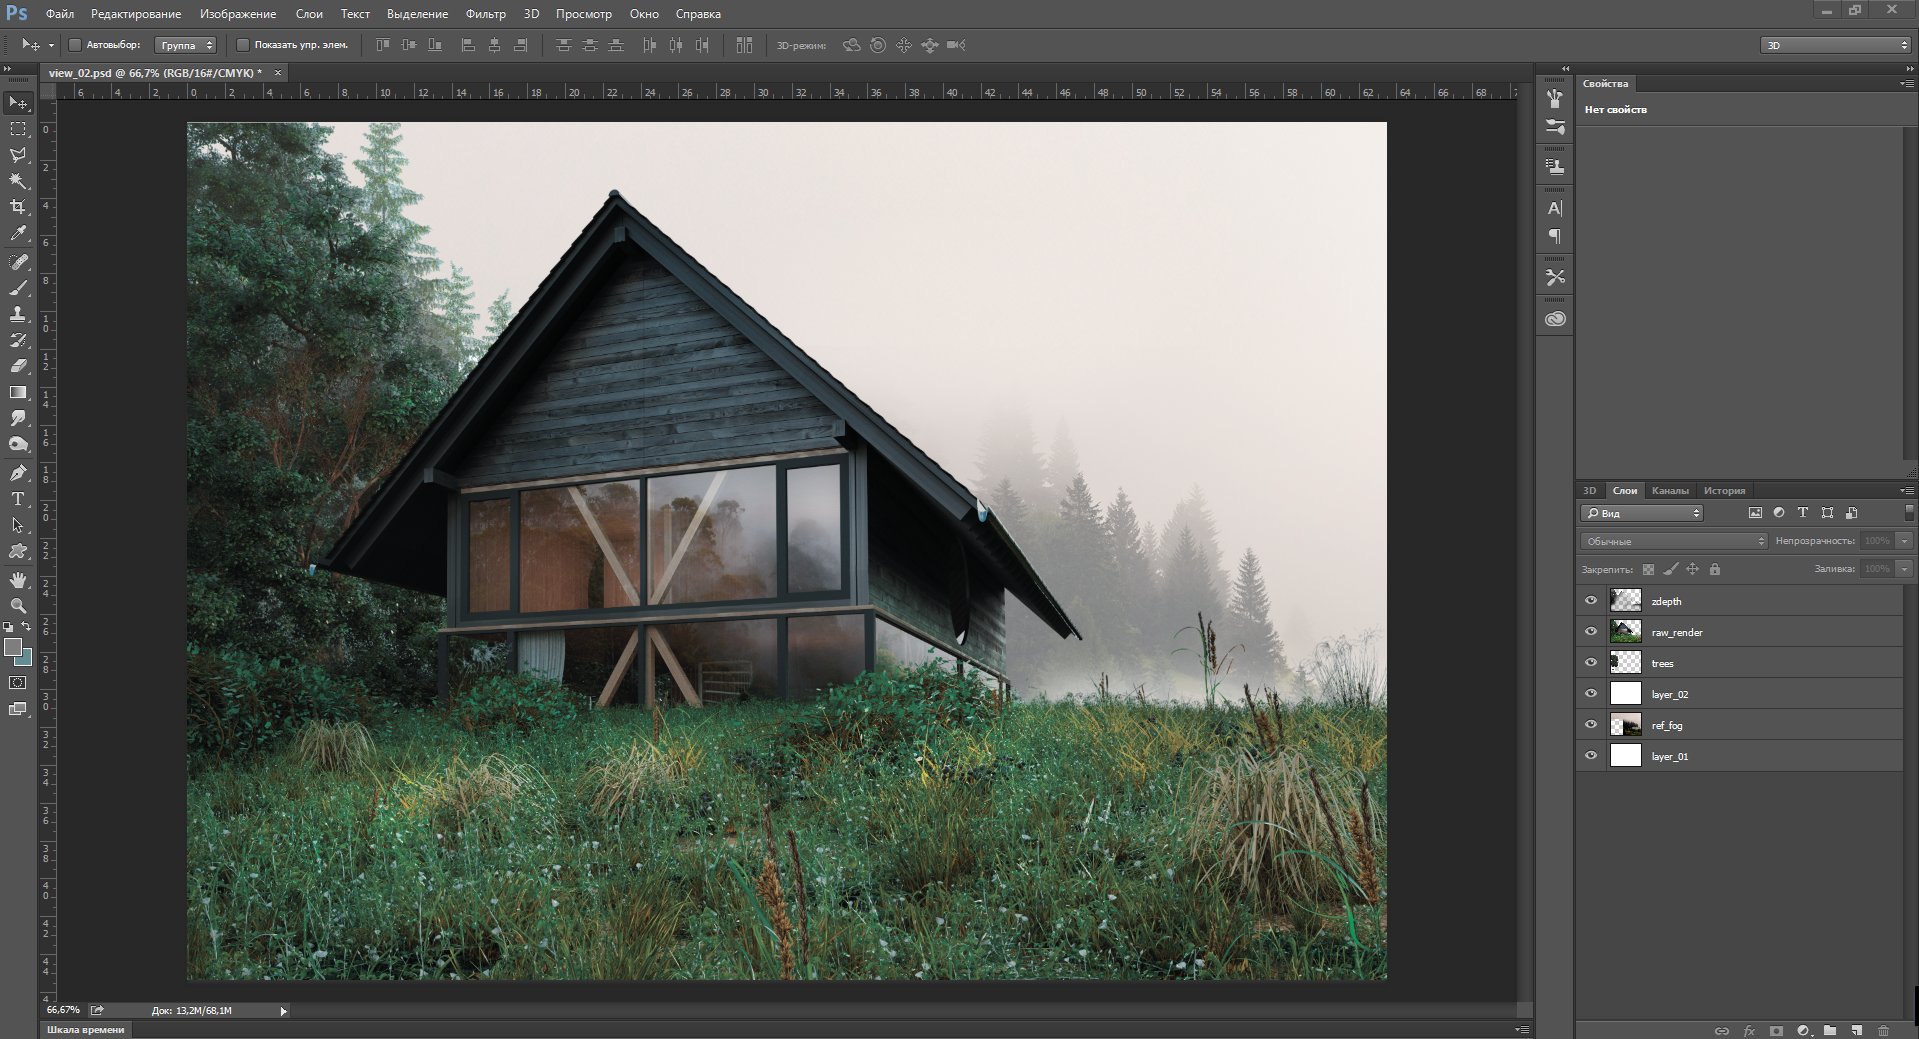
Photoshop was used for post-production. Let’s look at the raw render.


Click on image to enlarge 18_raw_render_view_02_866.jpg

Raw render.


Click on image to enlarge 19_reflect_zdepth_867.jpg

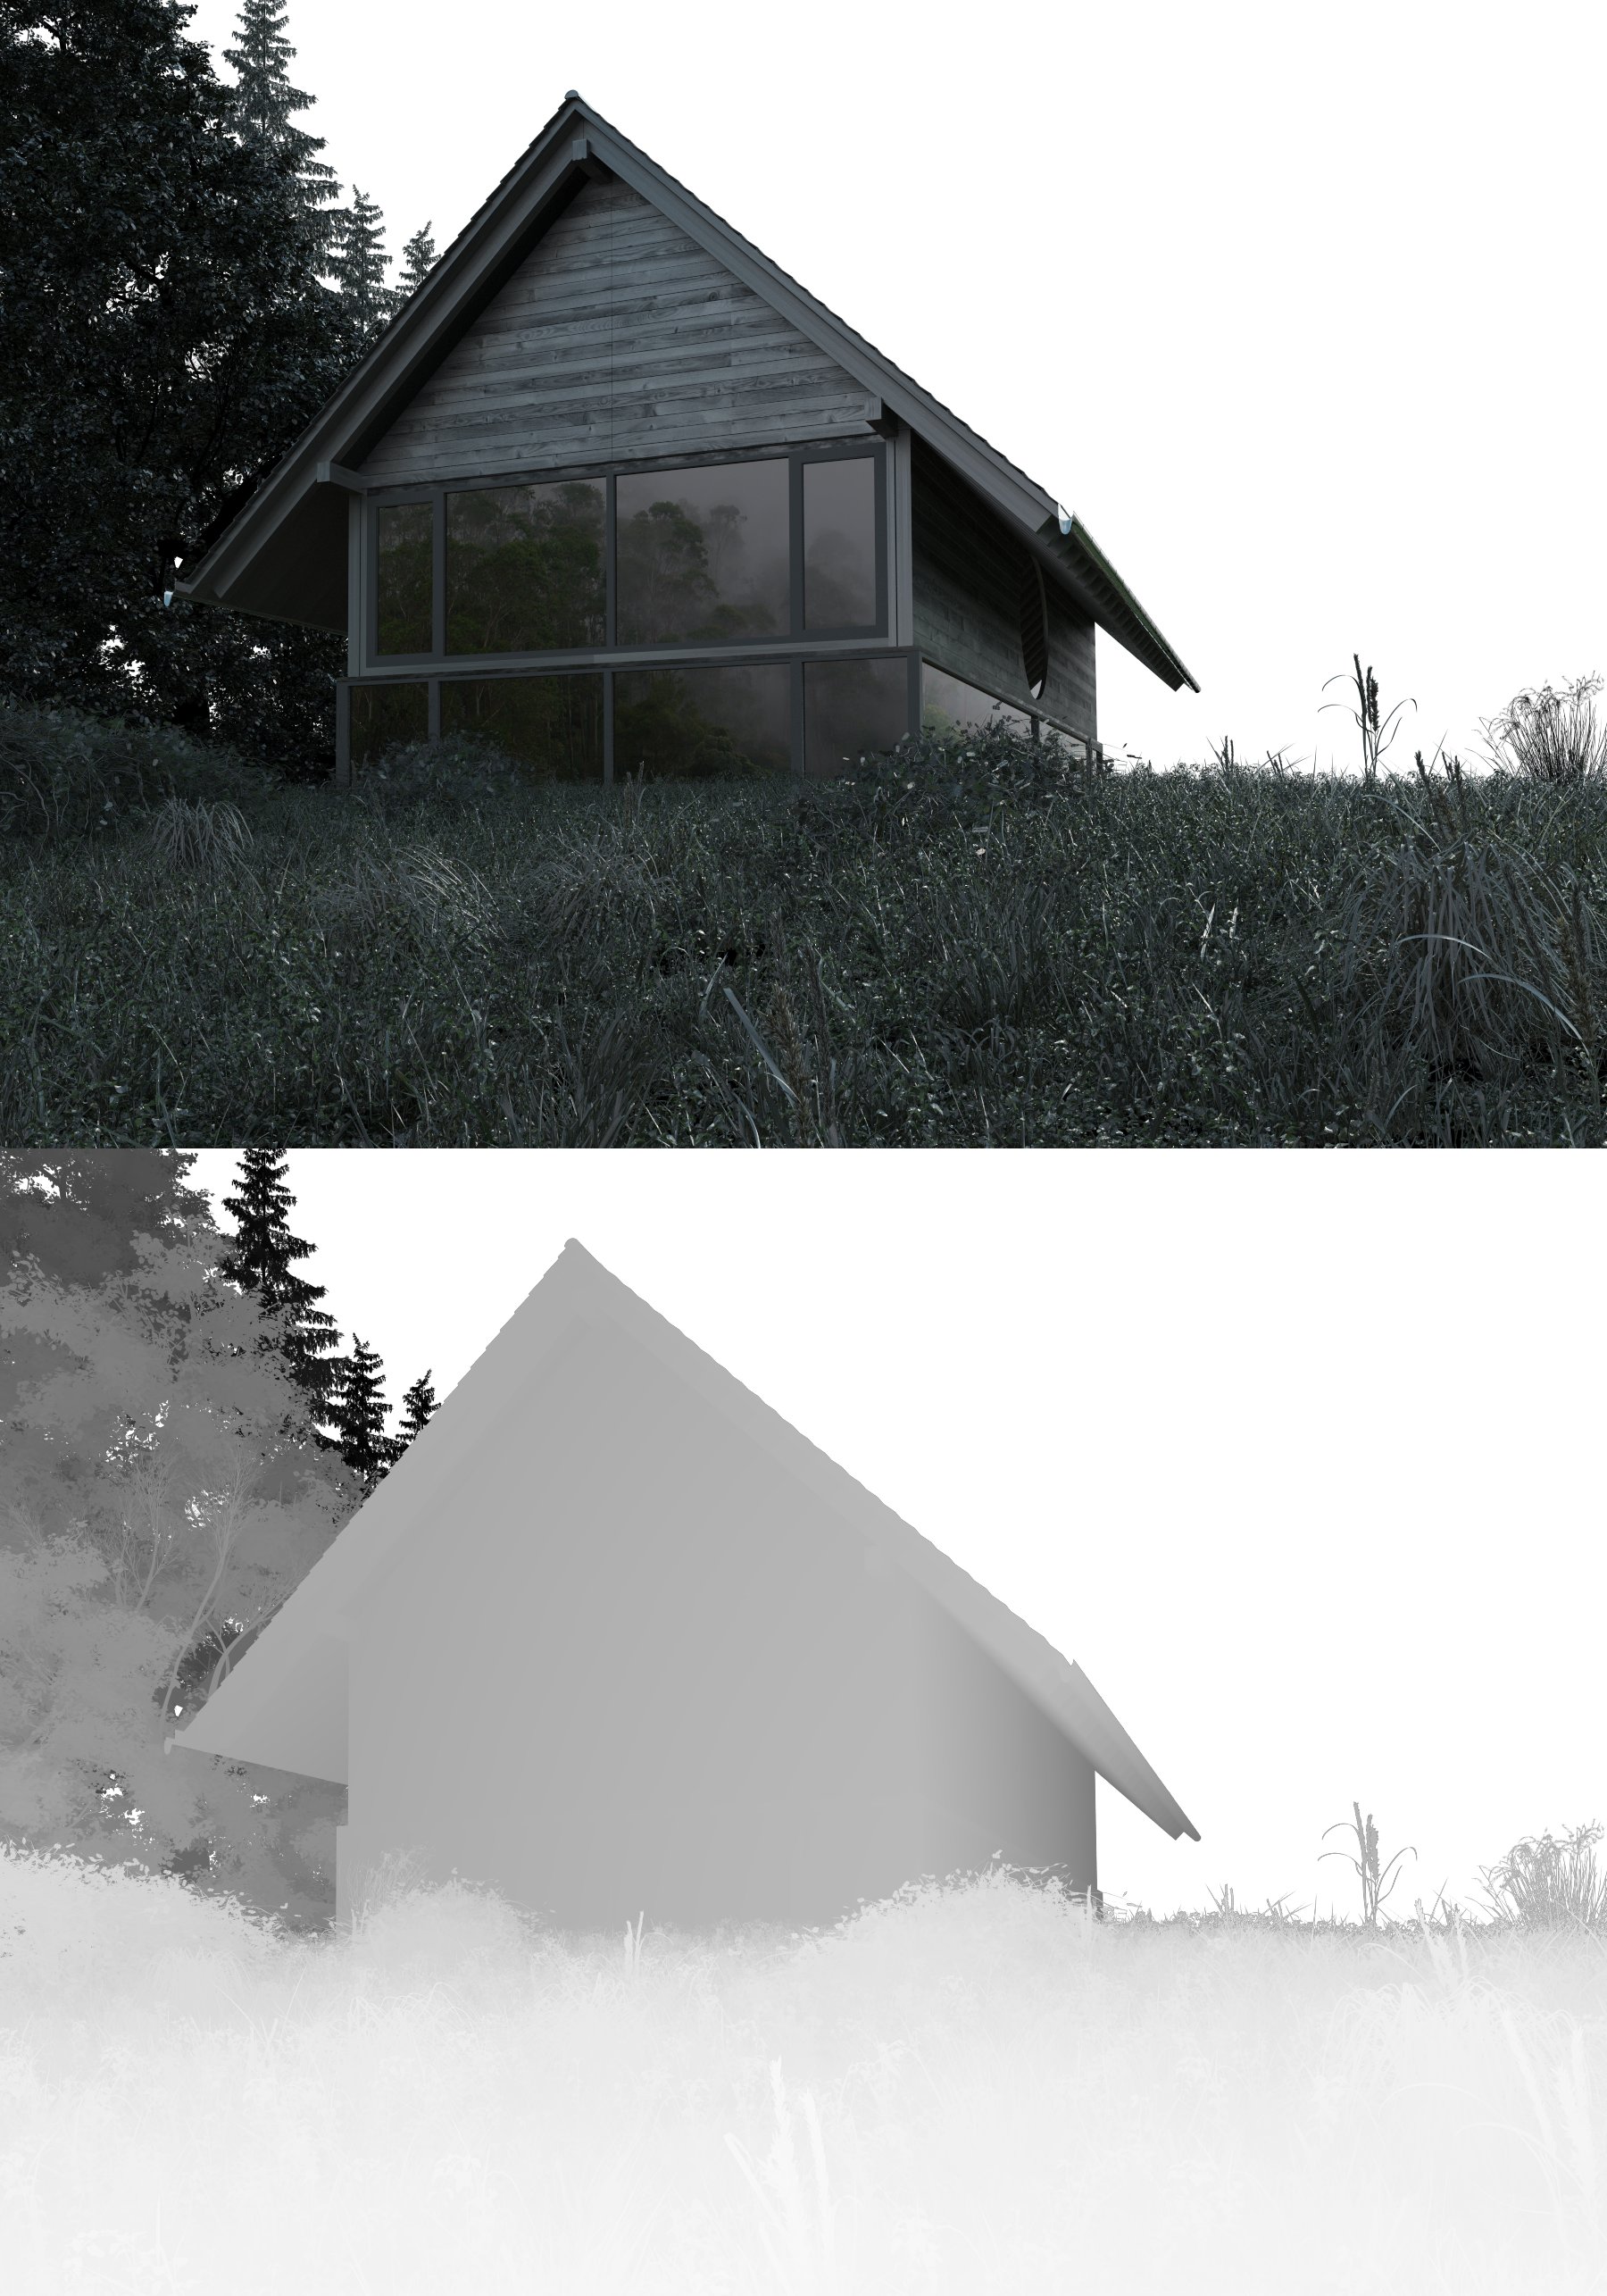
I also rendered zdepth map which helped me to simulate fog in Photoshop and reflection map which helped to tweak reflections.


Click on image to enlarge 20_reflect_zdepth_868.jpg

Zdepth.


Click on image to enlarge 21_postproduction_869.jpg

Post-production in Photoshop.


Click on image to enlarge fin_01_871.jpg

Final image 1.


Click on image to enlarge fin_02_872.jpg

Final image 2.


Click on image to enlarge fin_03_873.jpg
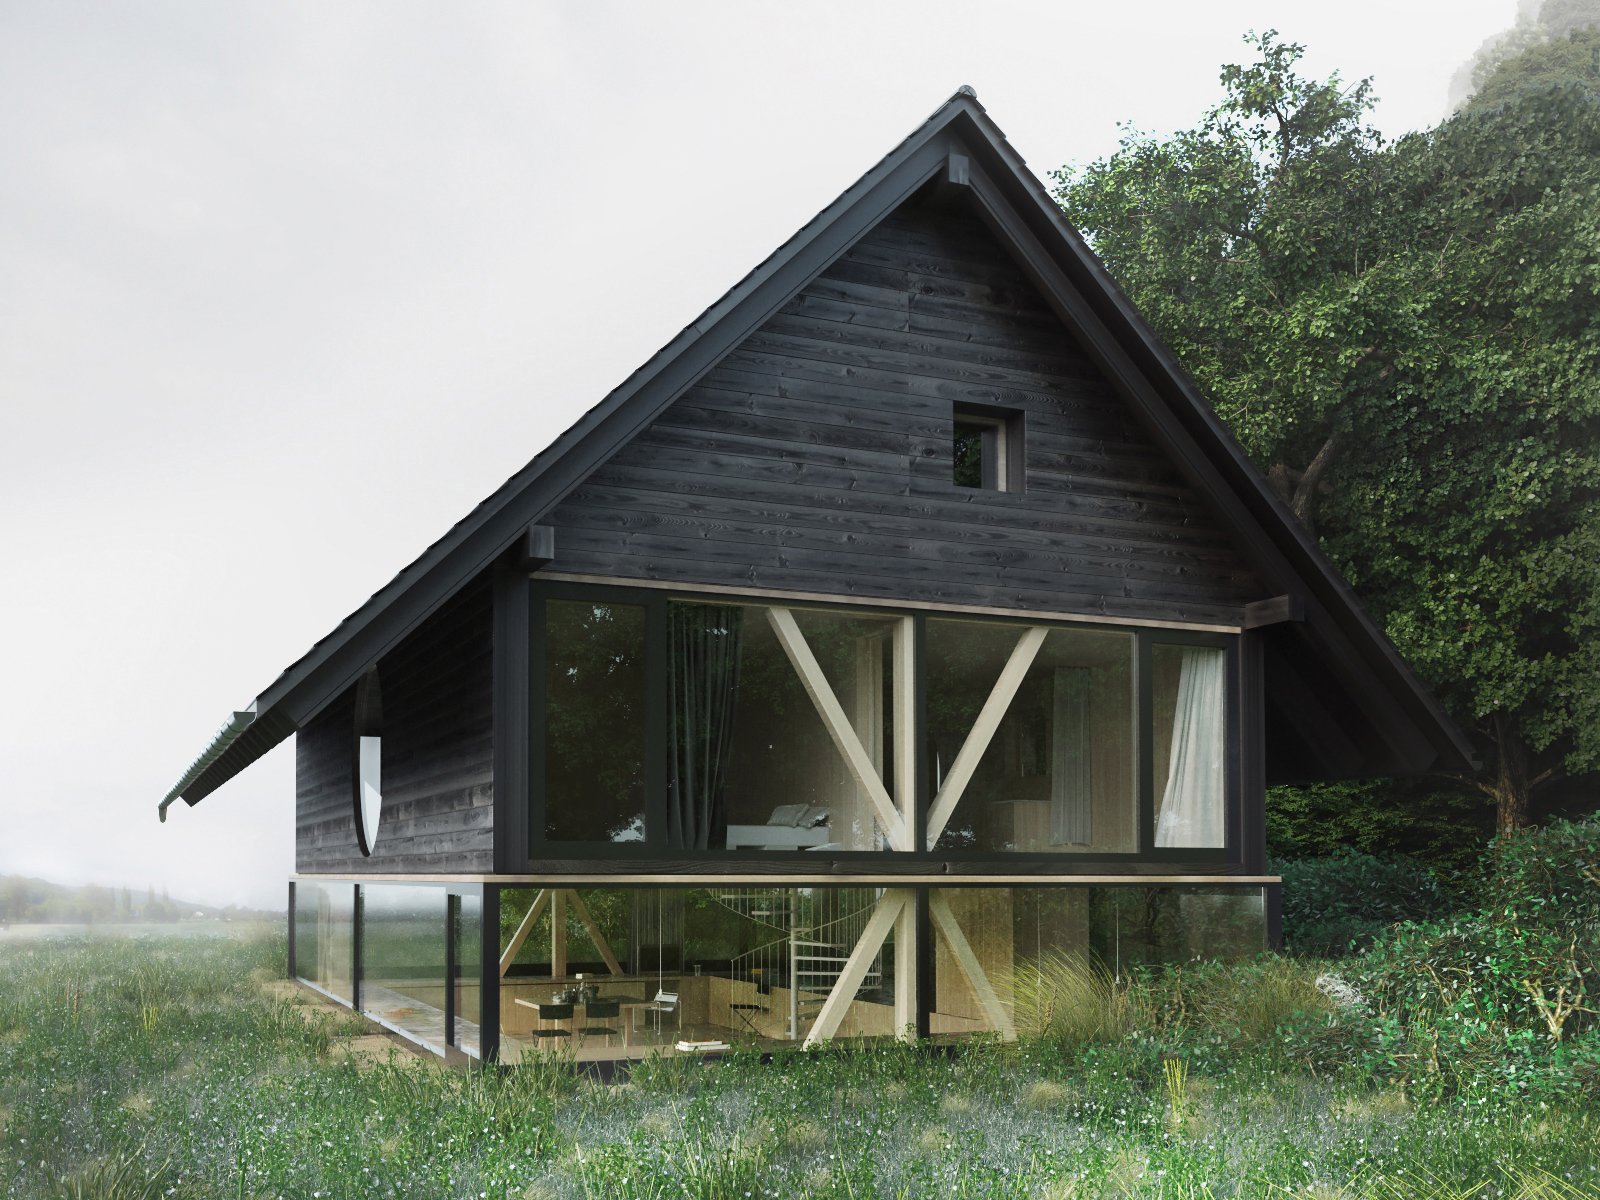
Final image 3. Thanks for reading!
Author: Anatolii Nikolaiev Editor: Michał Franczak
Tags: 3dsmax corona swisshouse anatoliinikolaiev
You may also like...
Corona Renderer alpha v6 released

Corona Renderer alpha v6 released

After 9 months of development, Corona Renderer releases new public version, called Alpha v6.
×

LEAVE A COMMENT

You need to be logged in to leave a comment. Don't have account? Register now.

stephenhughes99 11:01:10  |  29-09-2015
Great work Anatolii, I have a question - when you say "I rolled the hdri for each view for avoiding of the sharp shadows", what do you mean by 'rolled' the hdri? Which setting on the rollout do you change and how does this affect the shadows. This looks like a really useful technique so I would be keen to understand it more. Thanks, Stephen
Nikolaiev 22:41:37  |  29-09-2015
Thank you! I adjust the settings of horizontal rotation hdri.
Sult 07:55:01  |  30-09-2015
Cool making of ;) Крассава одногруппник ;) Уже мэйкинг офы выдаешь 8)
Alpenshiva 09:19:16  |  01-10-2015
Perfectly done! Congratulations. Absolutely realistic. Which background image are you using in the material editor? Thanks, Harry
aksatastudio 05:37:02  |  13-10-2015
sorry i want to ask how where can so we can mung upload tutorial as the tutorial making of Swiss house Thank you...
stapic 21:03:05  |  15-10-2015
Great work! I want to ask you about noise on glass...In your case, what is the radius and bump size? Thank you very much.
aksatastudio 06:00:53  |  20-10-2015
im sorry how to post this tutorial I have a tutorial that I want to share