Evermotion Pass 10% Off - Get Instant Access to Thousands of 3D Assets

Check Plans

Information Clause

In accordance with the art. 13 section 1 and 2 of the European Parliament and Council Regulation 2016/679 of the 27th April, 2016 on the protection of natural persons, with regard to the processing of personal data and on the free movement of such data, and repealing Directive 95/46/EC (General Data Protection Regulation), hereafter RODO, I hereby inform that:

1. EVERMOTION S.C., 8 Przędzalniana Str., 15-688 Białystok, Poland is the Administrator of your Personal Data (APD)

2. Data Protection Inspector can be reached through e-mail: iod@evermotion.org

3. Your personal data are to be processed on the basis of art. 6 section 1 letter a, b and f of RODO in order to:
a) prepare, conclude and execute the agreement and for other purposes approved by you,
b) to execute the legitimate interest like marketing of products and the agreement, claim assertion or defence against claims resulting from the law regulations.

4. Entities entitled to the reception of your personal data may be the authorised public bodies; mail providers; providers of the services covered by the agreement; responsible for debt recovery, keeping the archives, document utilization, legal consulting, technical services, IT services and accountancy.

5. Your personal data shall not be transferred to the third country, nor to the international bodies.

6. Your personal data shall be processed within the period of the agreement and upon your additional consent until you withdraw it. APD shall keep the data for the period of any civil law claim execution connected with the agreement.

7. You have the right to demand an access to your personal data, to correct or to delete the data if there is no other basis for the processing or any other purpose of such processing or to limit the processing of the data, to transfer the data to another administrator and to raise objections to the further data processing if there is no legal basis for further processing and to withdraw any previous consent.

8. You provide the personal data voluntarily, however they are necessary to conclude the agreement. The refusal of providing such data may result in the refusal of the agreement conclusion.

9. You have the right to lodge a complaint to the Personal Data Protection Office when in your opinion the data processing violates the regulations of General Data Protection Regulation of the 27 April, 2016 (RODO).

10. Your data will be automatically processed, including the form of profiling.
11. You are obligated to forward above mentioned information to your representative, especially if you appointed this person in the agreement as the contact person or as the representative for the agreement execution.

OK

Making of white kitchen - Tip of the Week

Michał Franczak 2015-06-25 11:44 tutorial  > 3ds MAX  > texturing

This scene comes from Archinteriors vol. 37.

This interior scene was made by Kamil Kuklo in 3ds Max and V-Ray. It is scene 7 from Archinteriors vol. 37. You can purchase this single scene or entire Archinteriors vol. 37 collection in Evermotion Shop. You can also purchase Archinteriors for C4D vol. 37.

Click on image to enlarge nr_AI37_007_PP_366.jpg
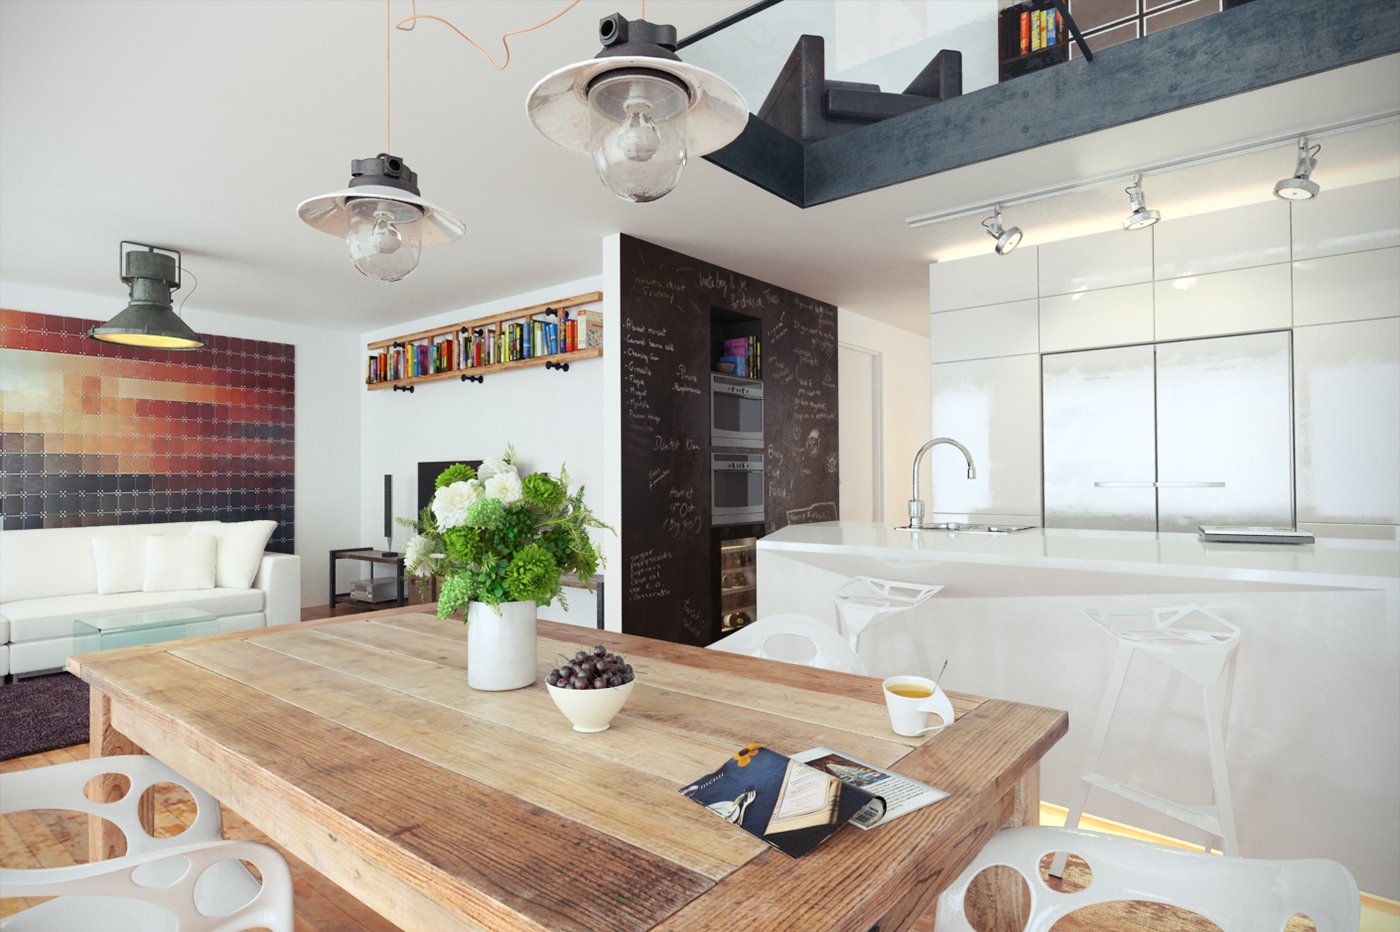
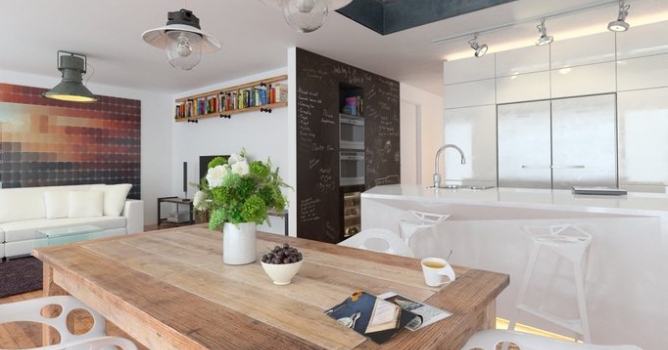
This kitchen is not ordinary one. It has a common space with a room, interesting hanging lamps, blackboard wall and nice rustical table. It's placed in a loft and it has an opening in the ceiling - the floor above is visible. It has many light sources.


Click on image to enlarge nr_AI37_007_wire_420.jpg
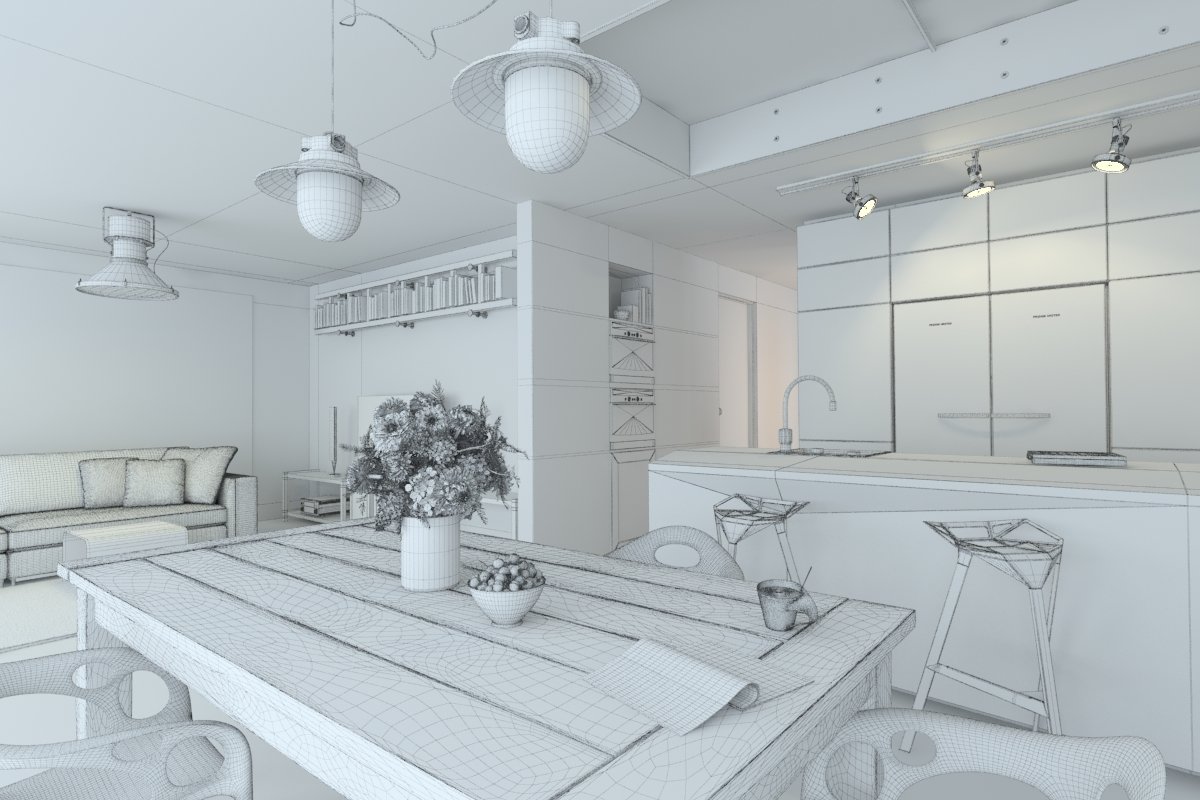
Wireframe view of the scene.


Click on image to enlarge nr_AI37S07_0056_Layer_2_416.jpg
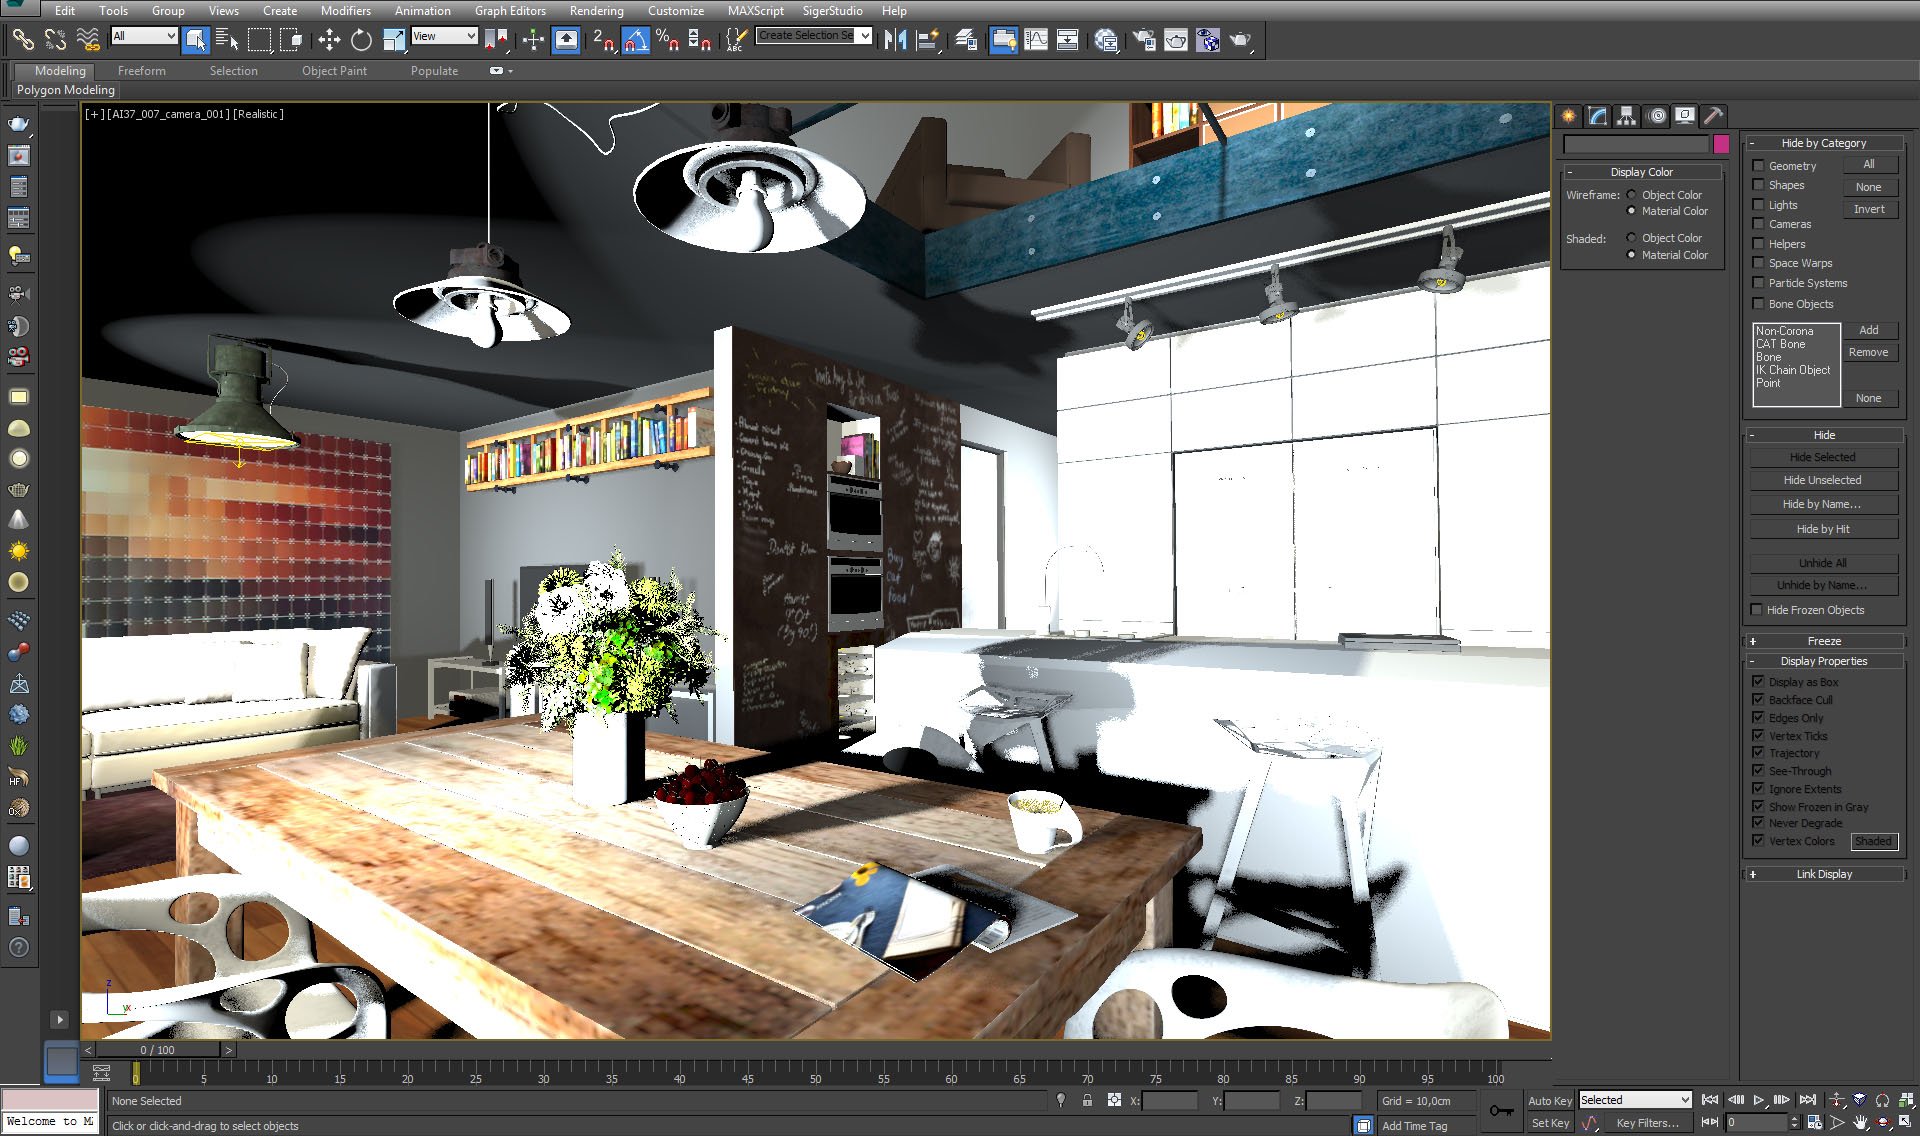
Viewport view with "realistic light" mode on. In this mode the scene looks overexposed, so we will used simple "shaded" view in the next pictures.


Click on image to enlarge nr_AI37S07_0055_Layer_3_415.jpg
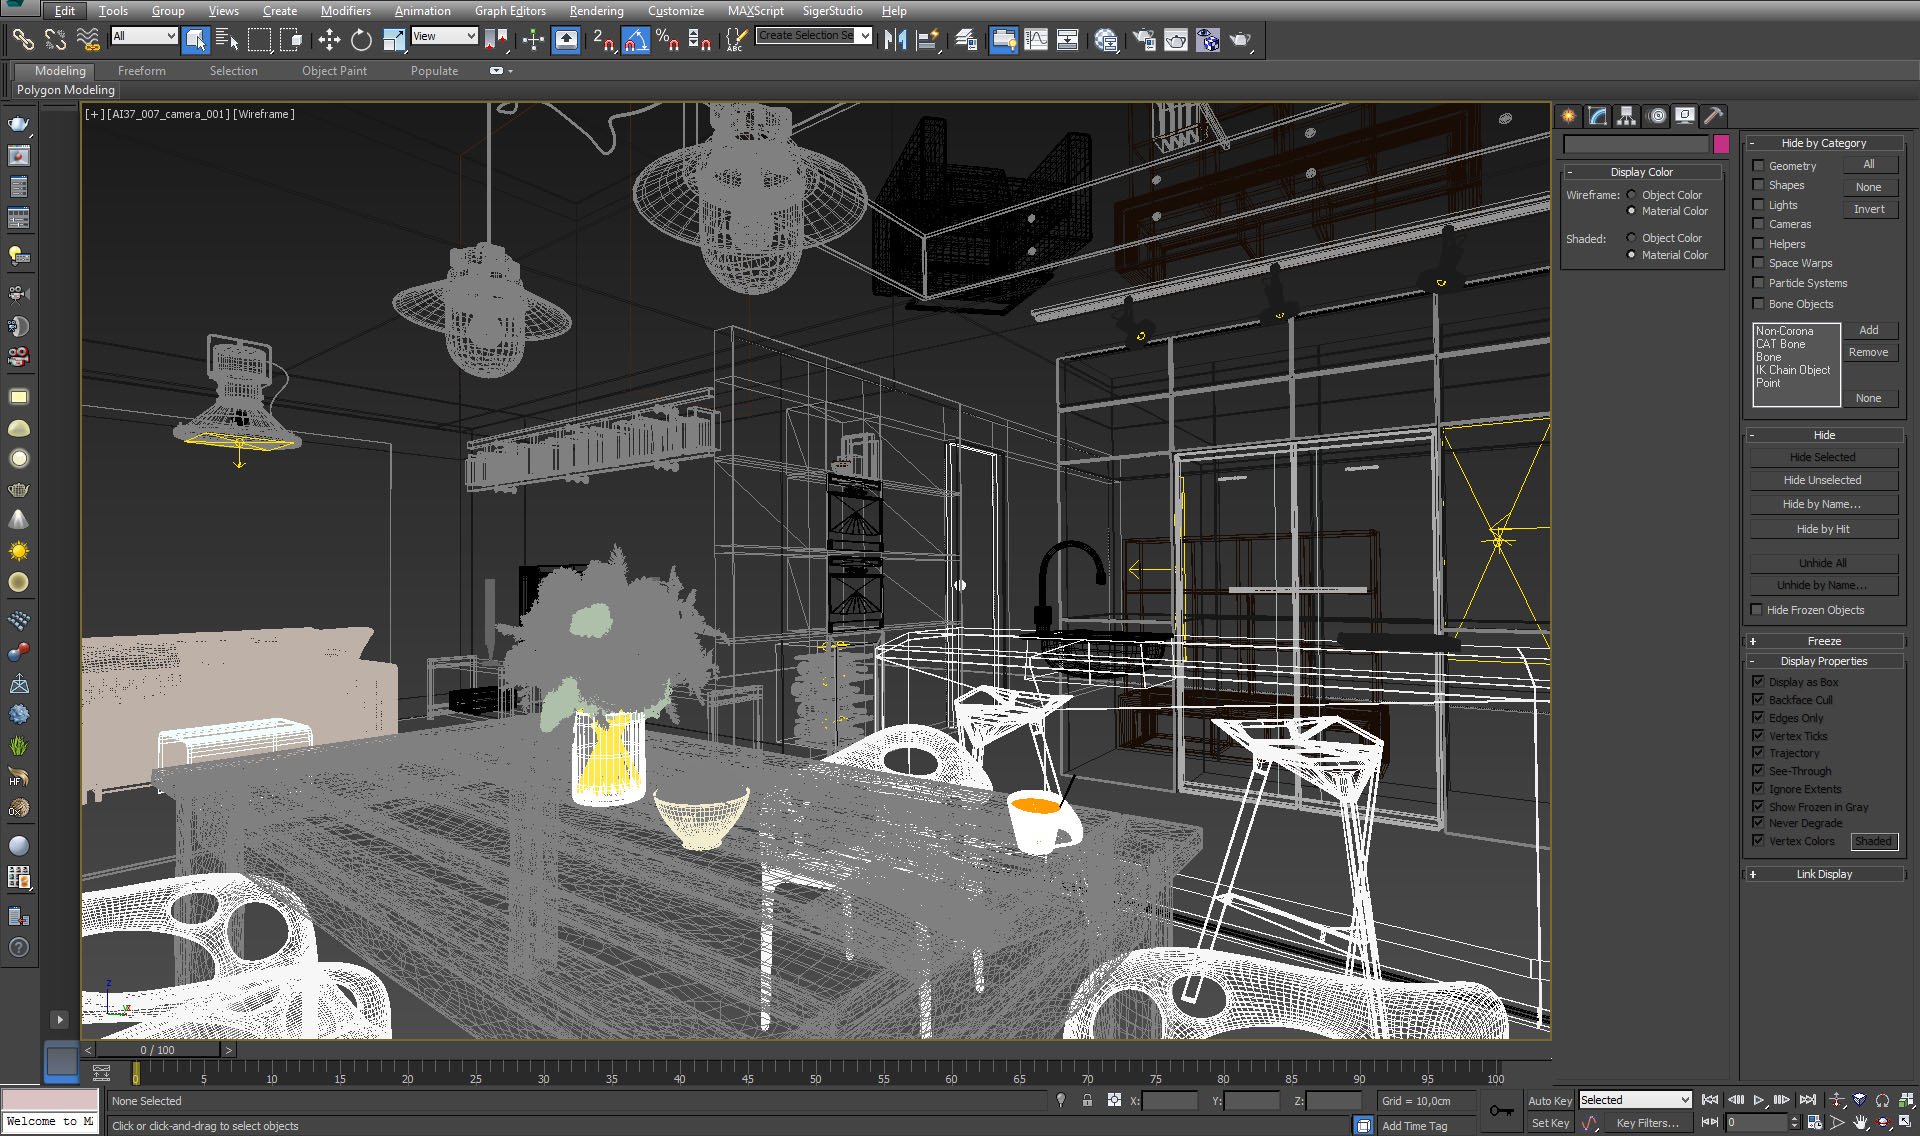
Mesh view from the camera.


Click on image to enlarge nr_AI37S07_0054_Layer_4_414.jpg
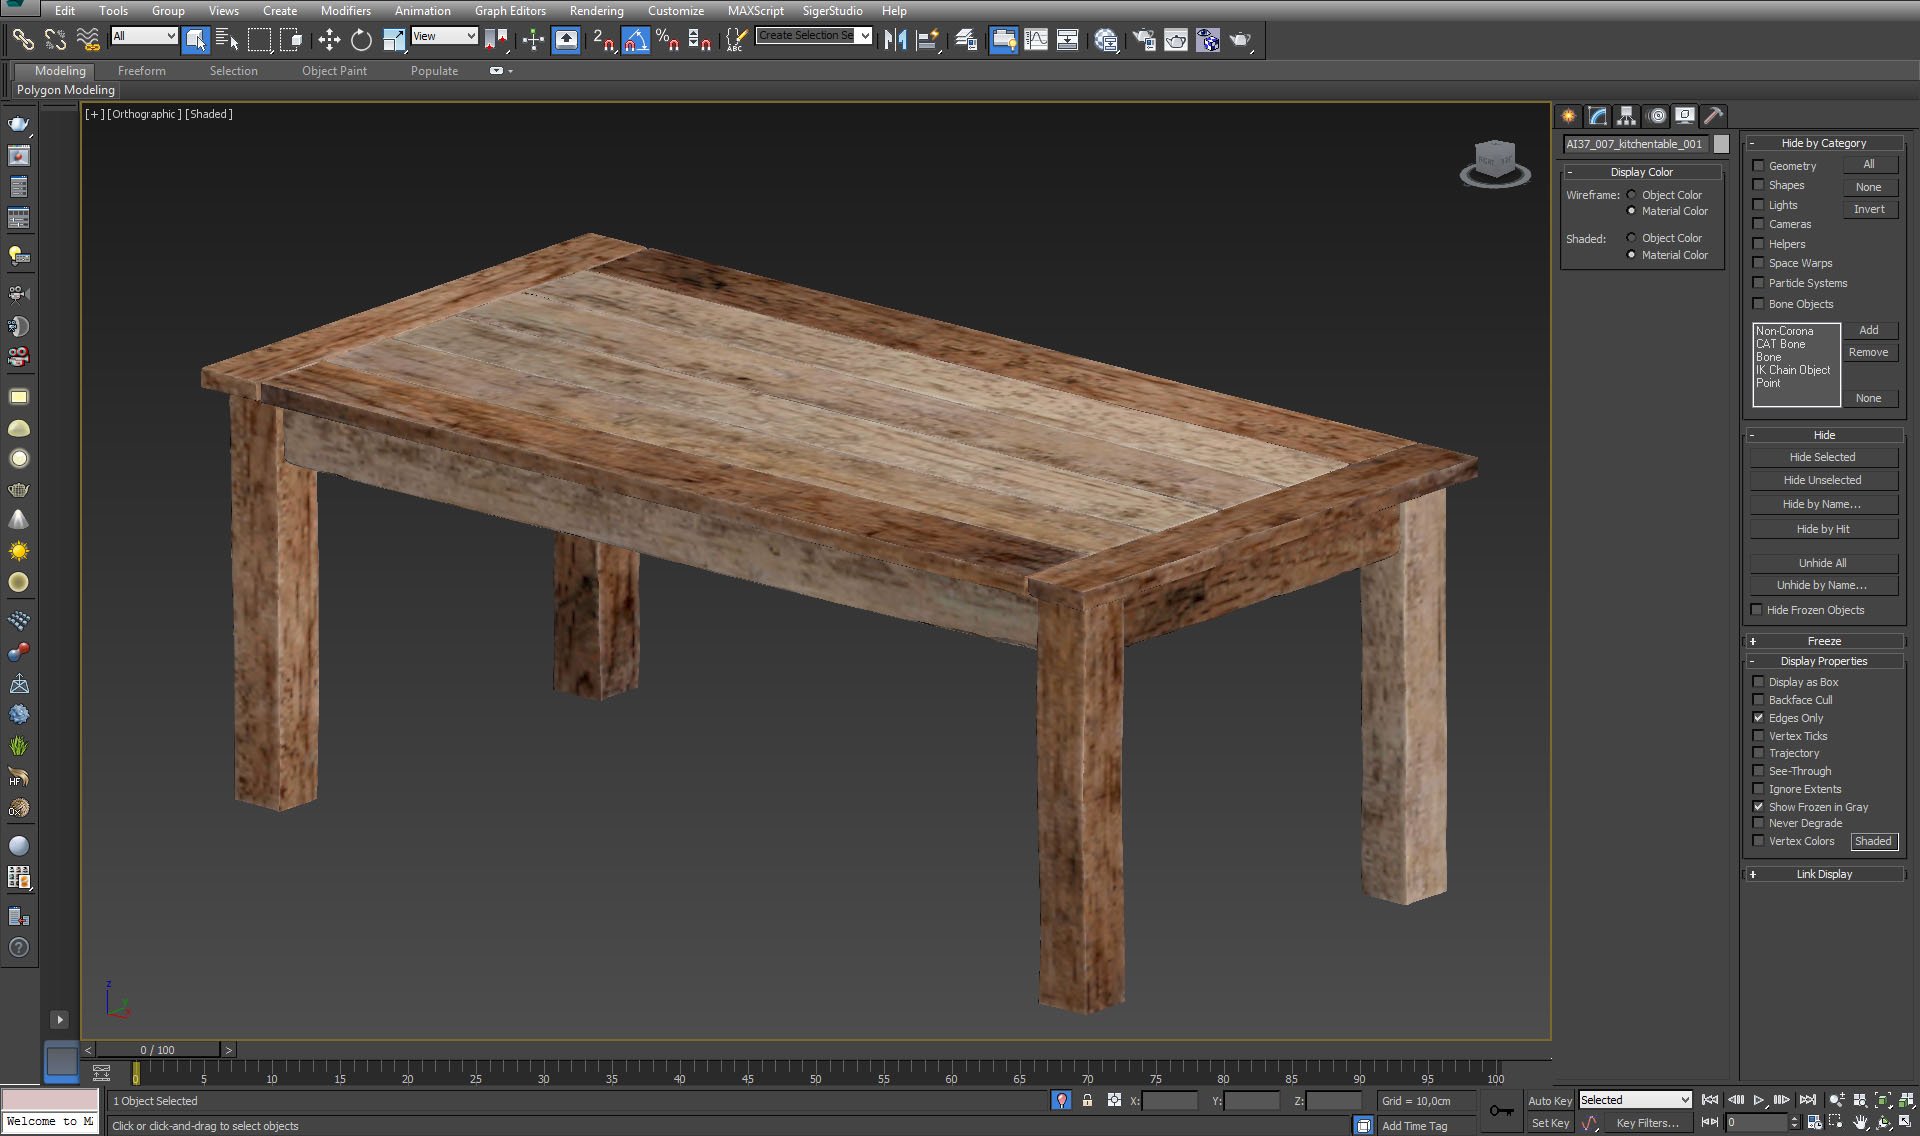
A table stands very close to the camera, so we needed high quality mesh and textures. We needed  "old, worn-out" table look - the one that was used by a family for a long period of time.


Click on image to enlarge nr_AI37S07_0053_Layer_5_413.jpg
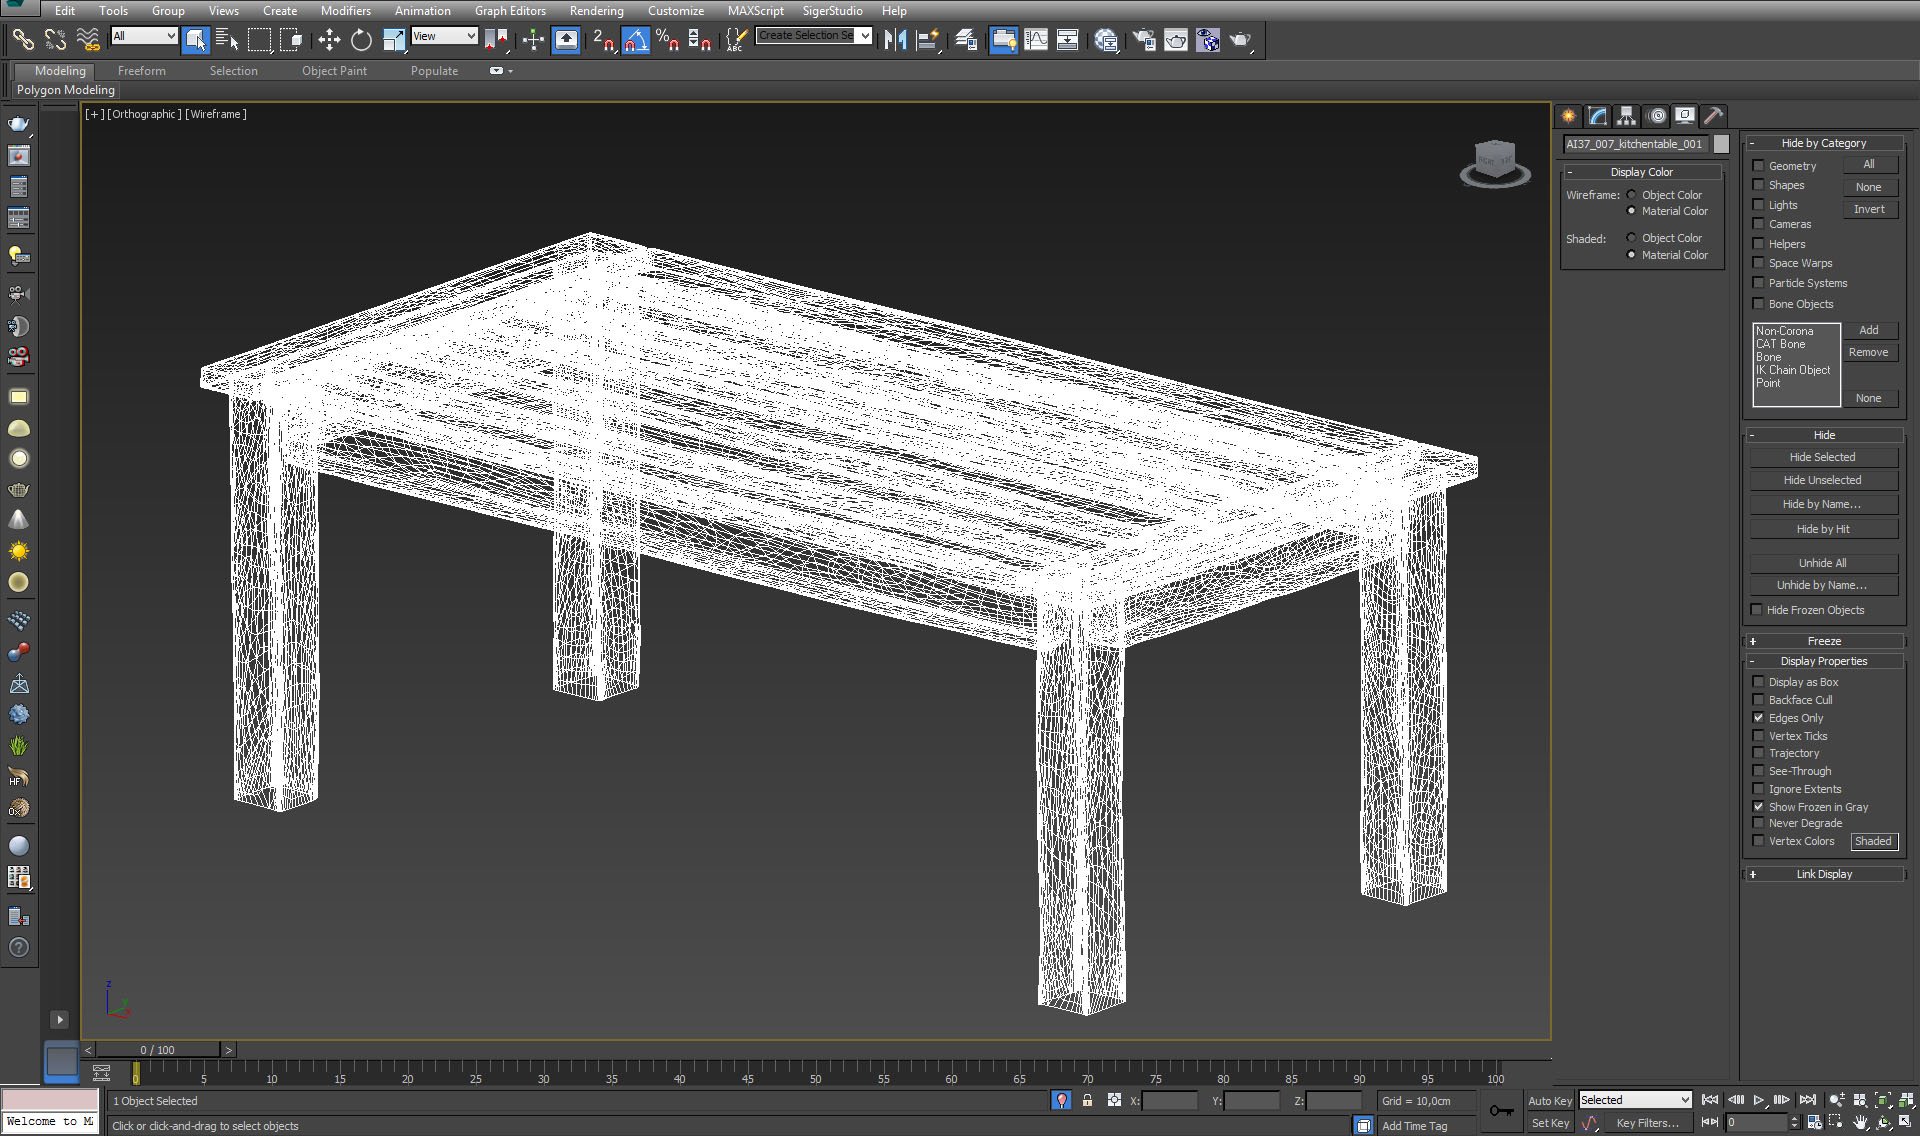
Table mesh. We needed a table with uneven surface and roundedcorners. Kamil achieved that result by using modifiers stack in Blender, smoothing and decimating model.


Click on image to enlarge nr_AI37S07_0052_Layer_6_412.jpg
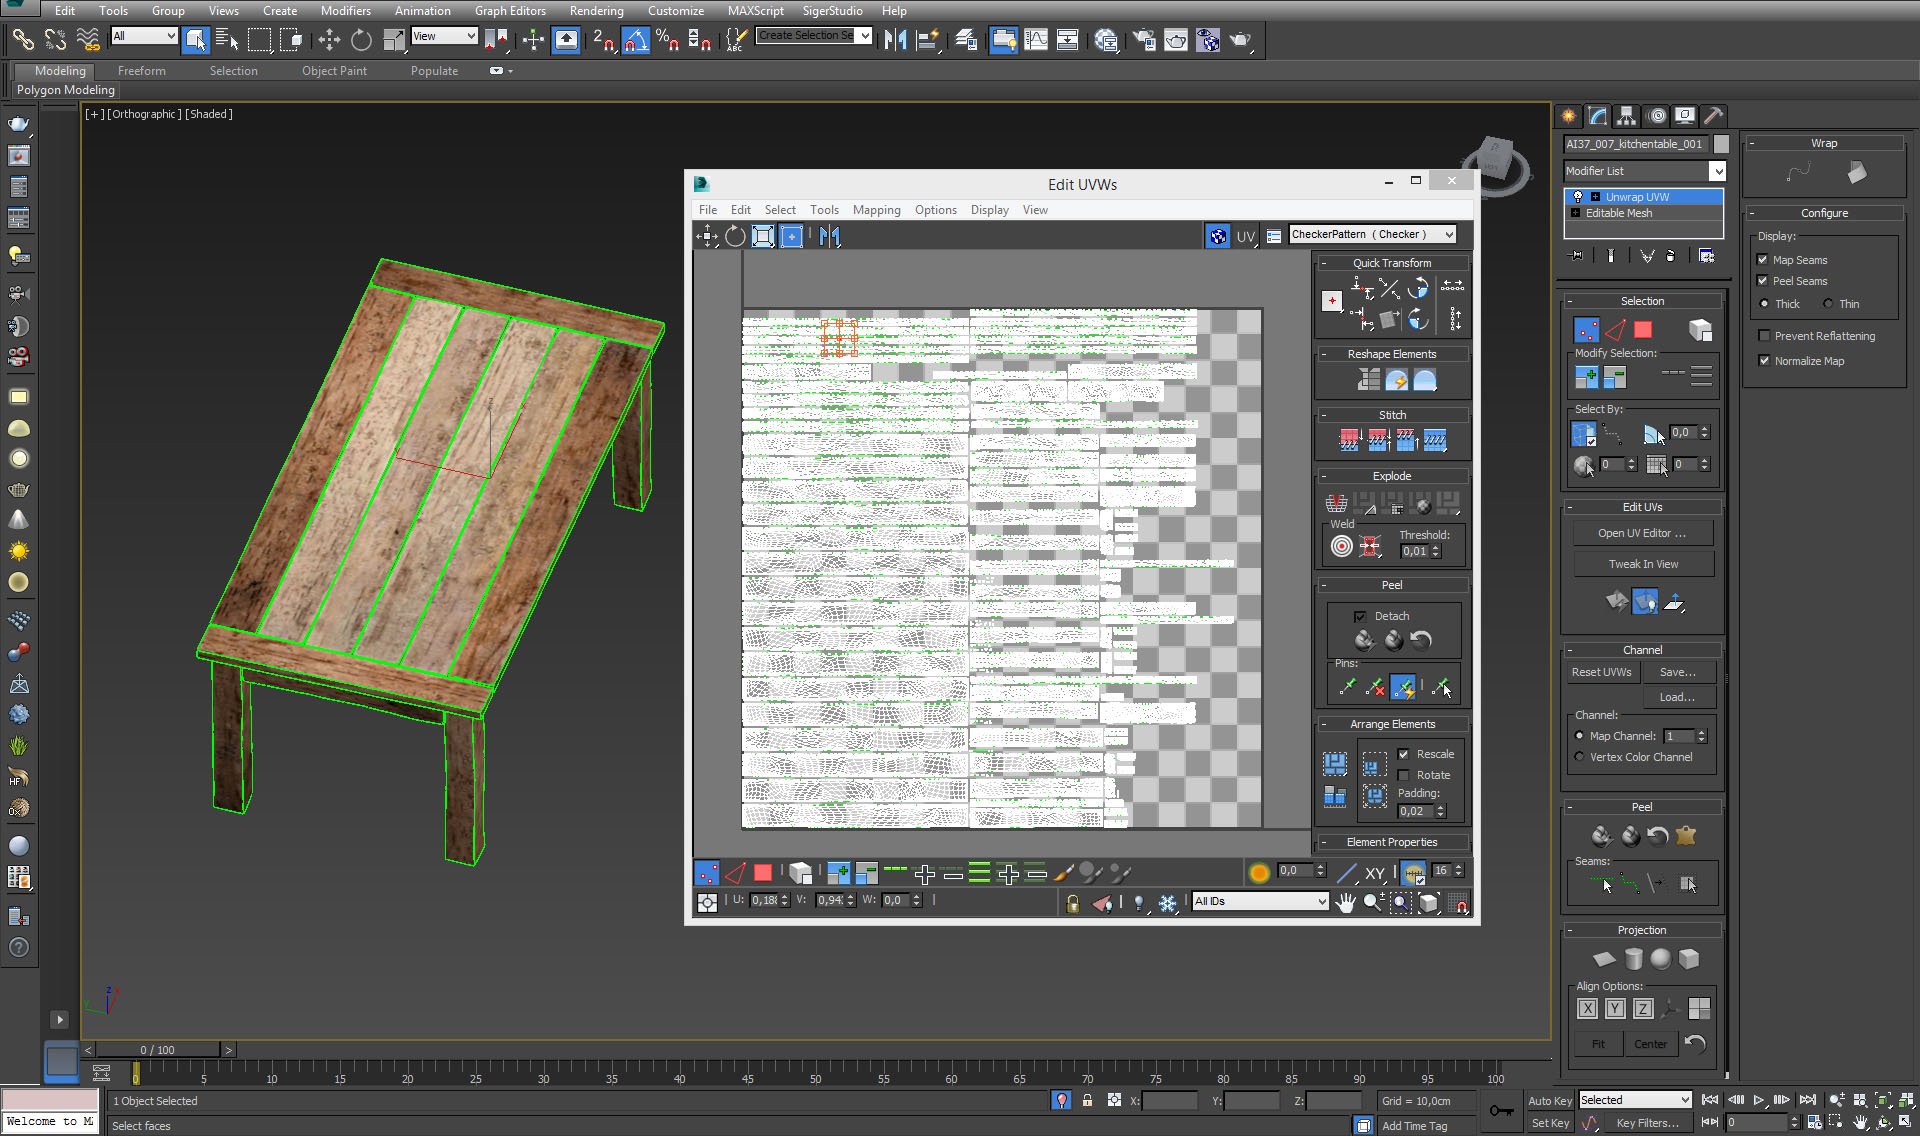
Table boards unwrapped in UV editor.


Click on image to enlarge nr_AI37S07_0051_Layer_7_411.jpg
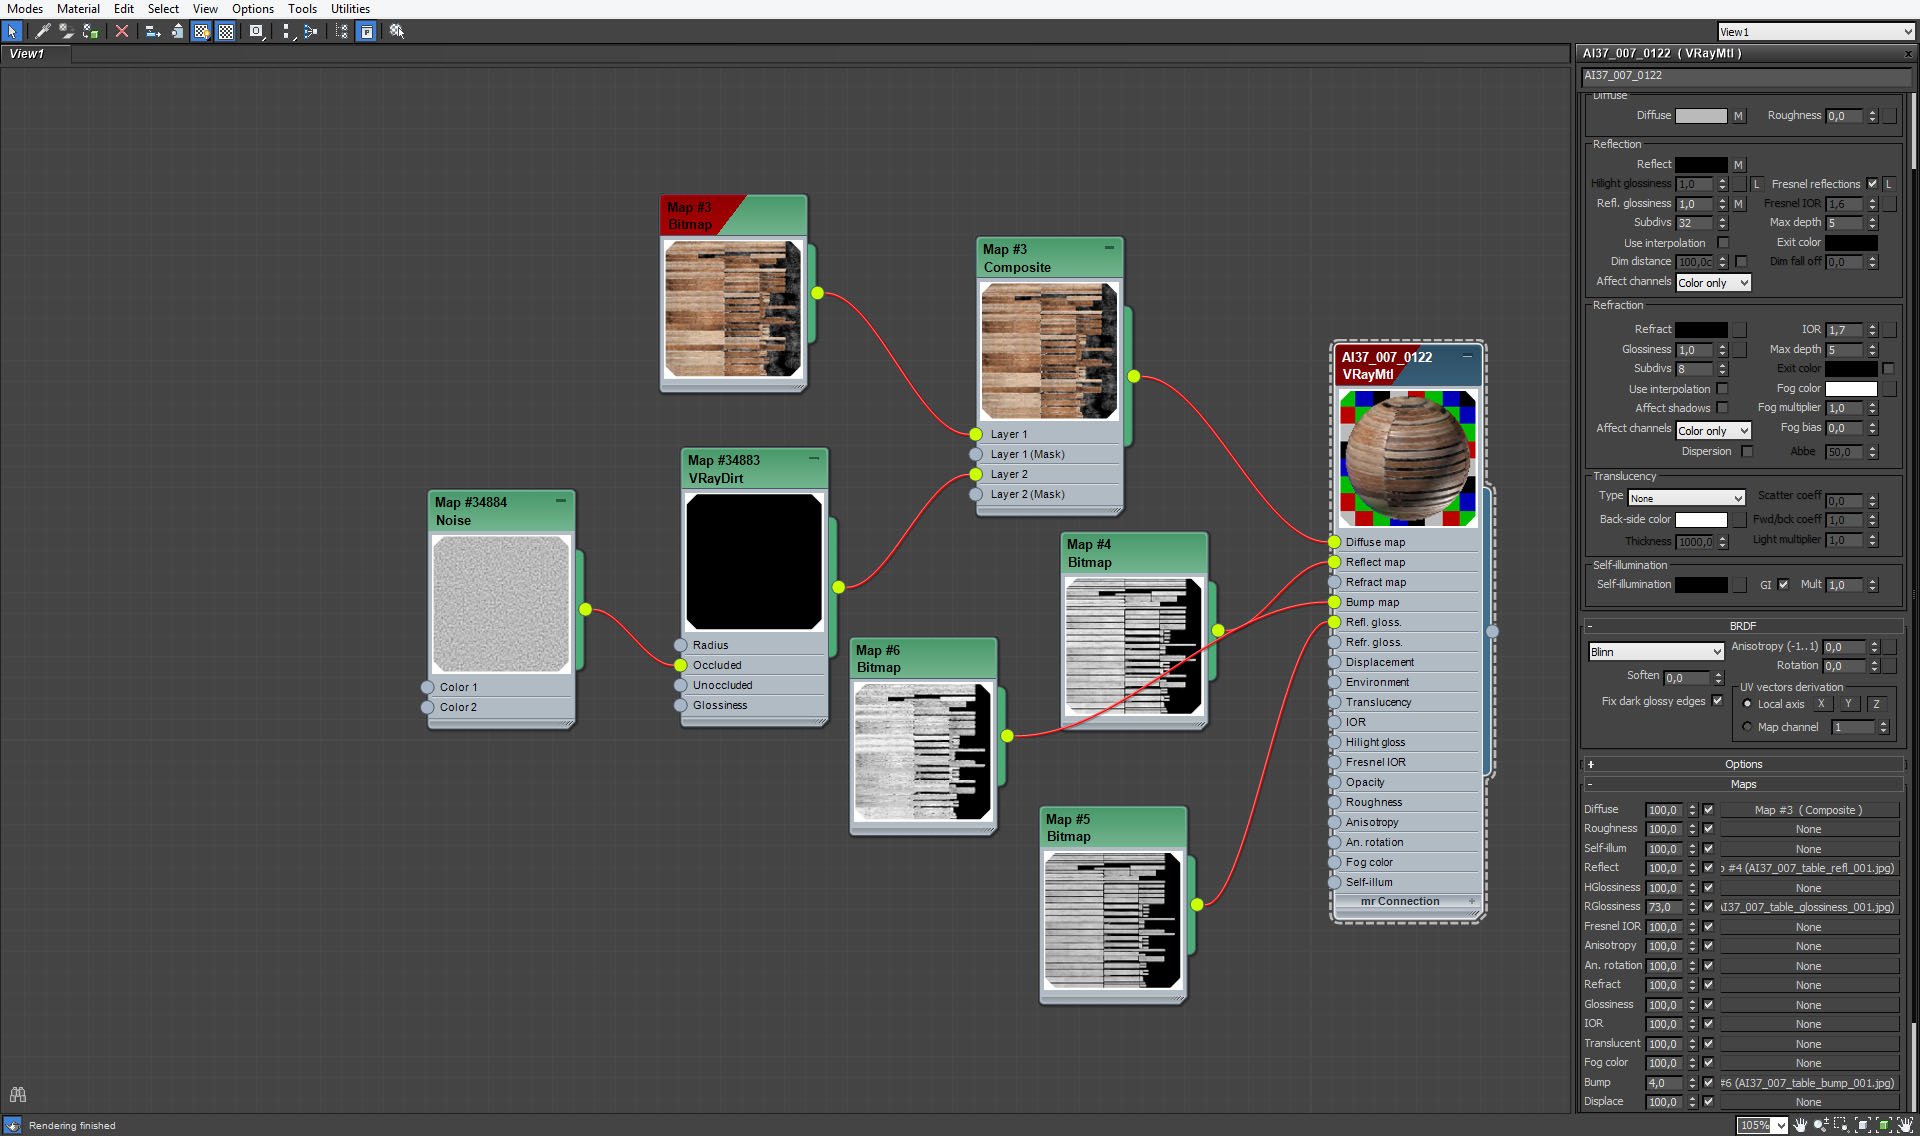
Table material settings. Reflections and glossines are controlled by bitmaps. Some dirt on the corners is made with procedural noise map and VRayDirt.


Click on image to enlarge nr_AI37S07_0050_Layer_8_410.jpg
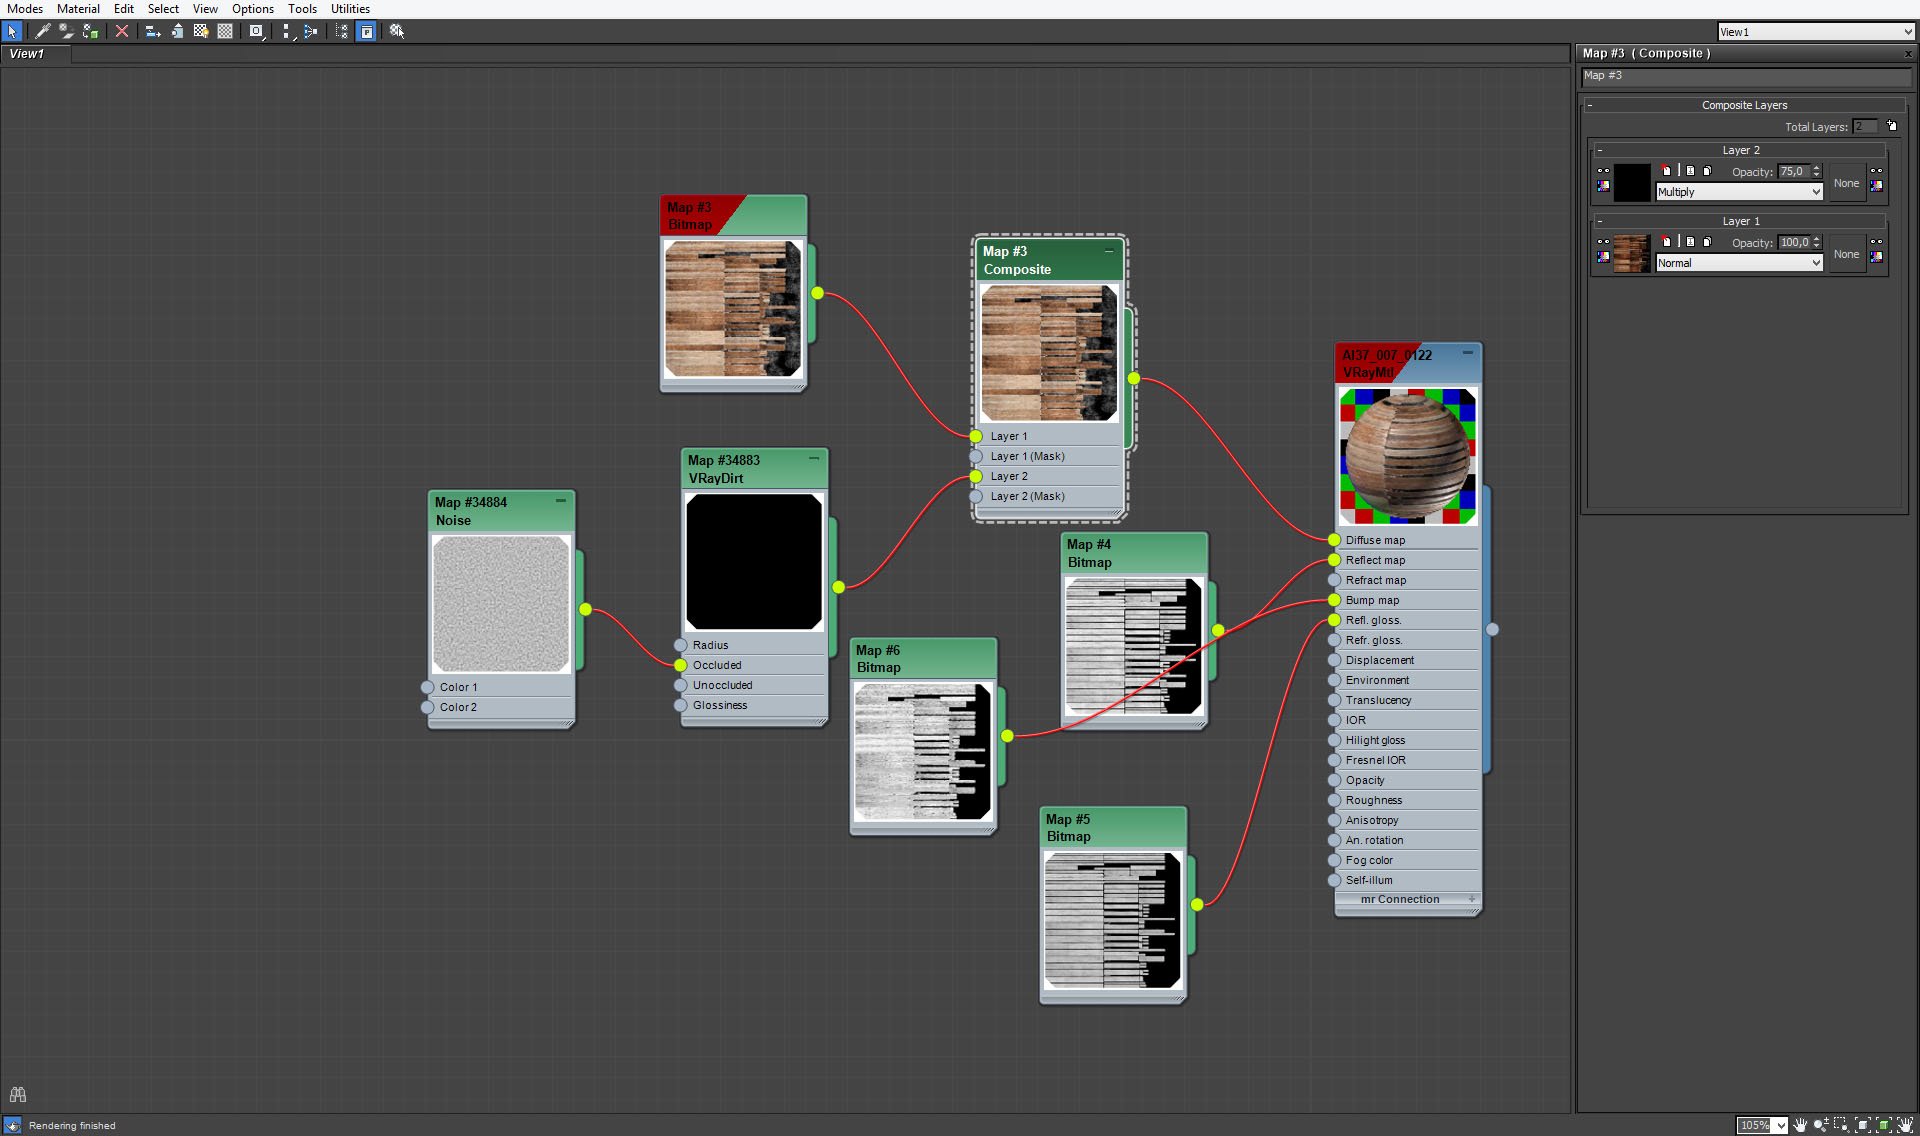
Table material - diffuse map settings.


Click on image to enlarge nr_AI37S07_0049_Layer_9_409.jpg

Table material - noise map settings.


Click on image to enlarge nr_AI37S07_0048_Layer_10_408.jpg
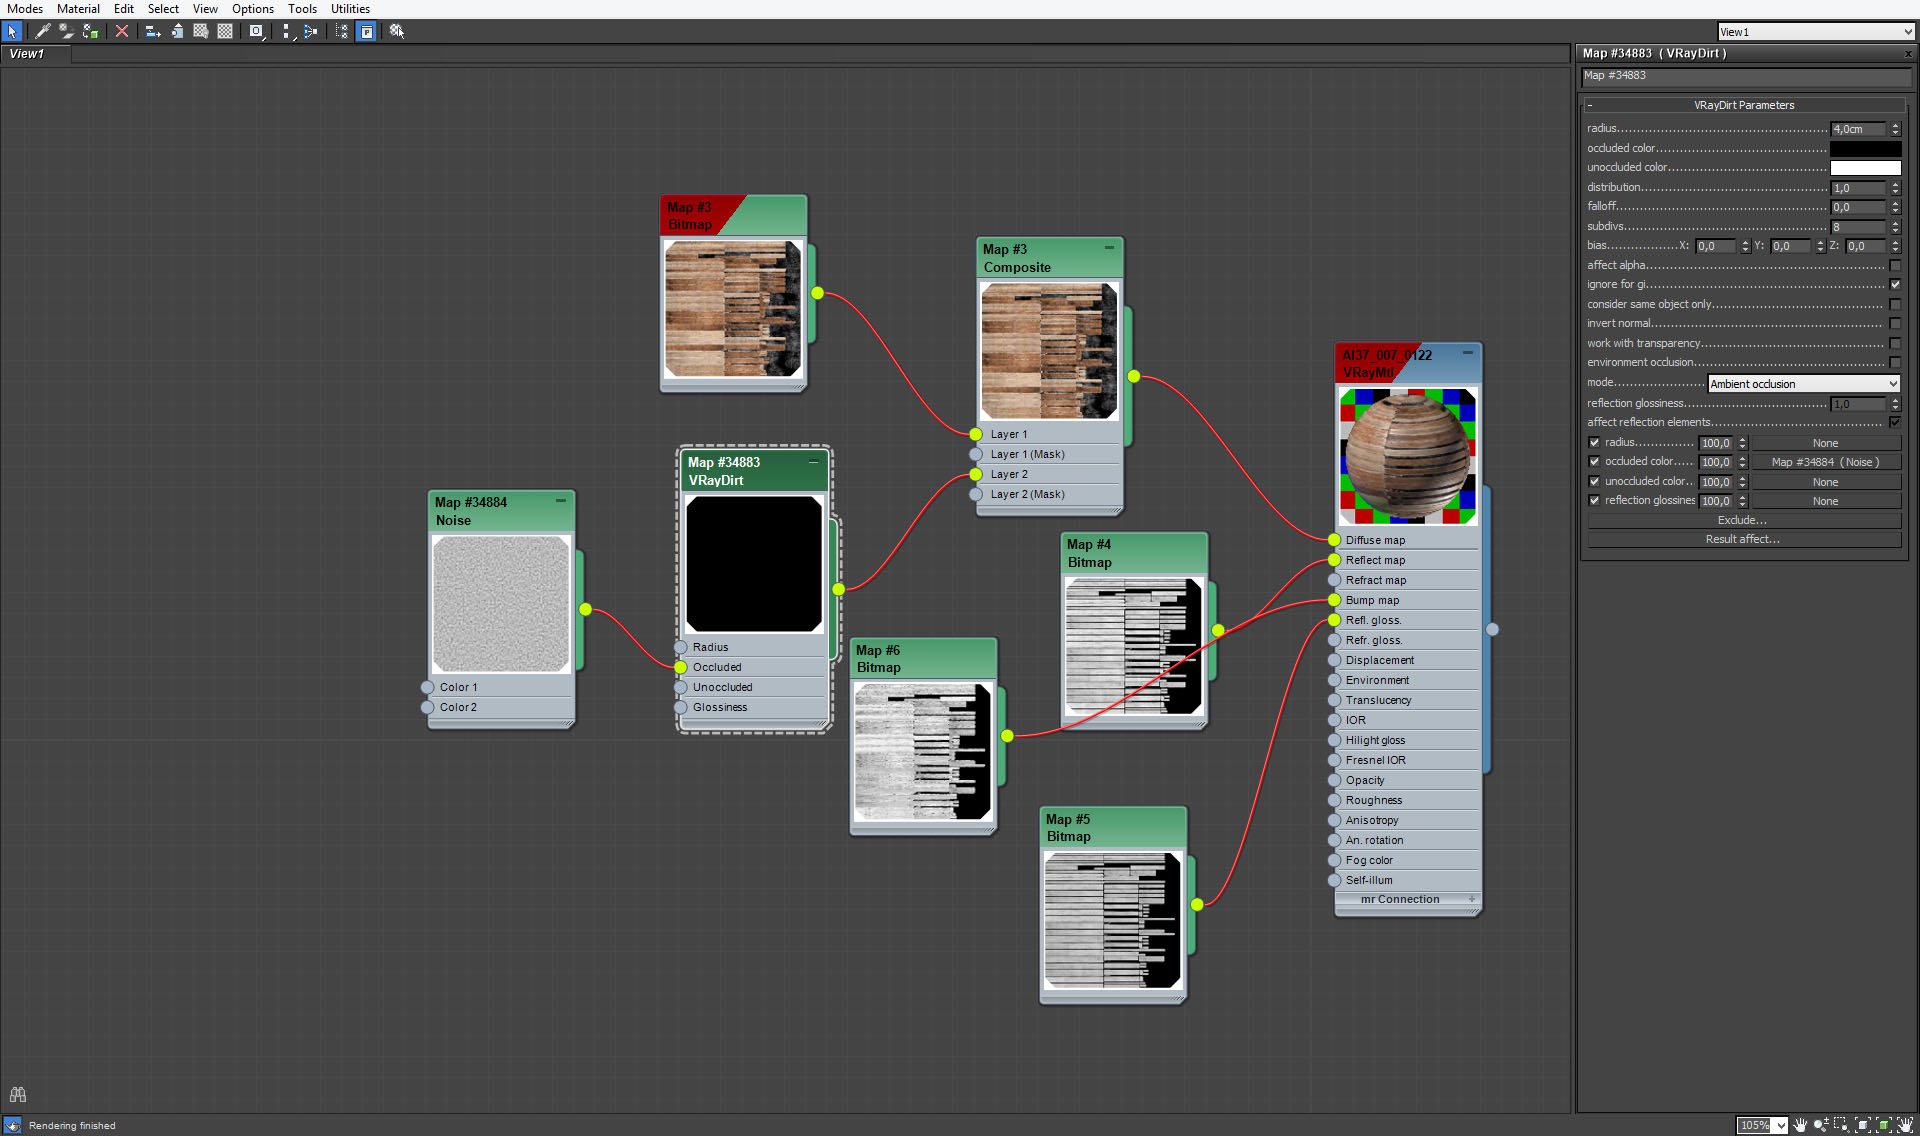
Table material - VrayDirtMap settings with small radius (4 cm).


Click on image to enlarge nr_AI37S07_0044_Layer_14_404.jpg
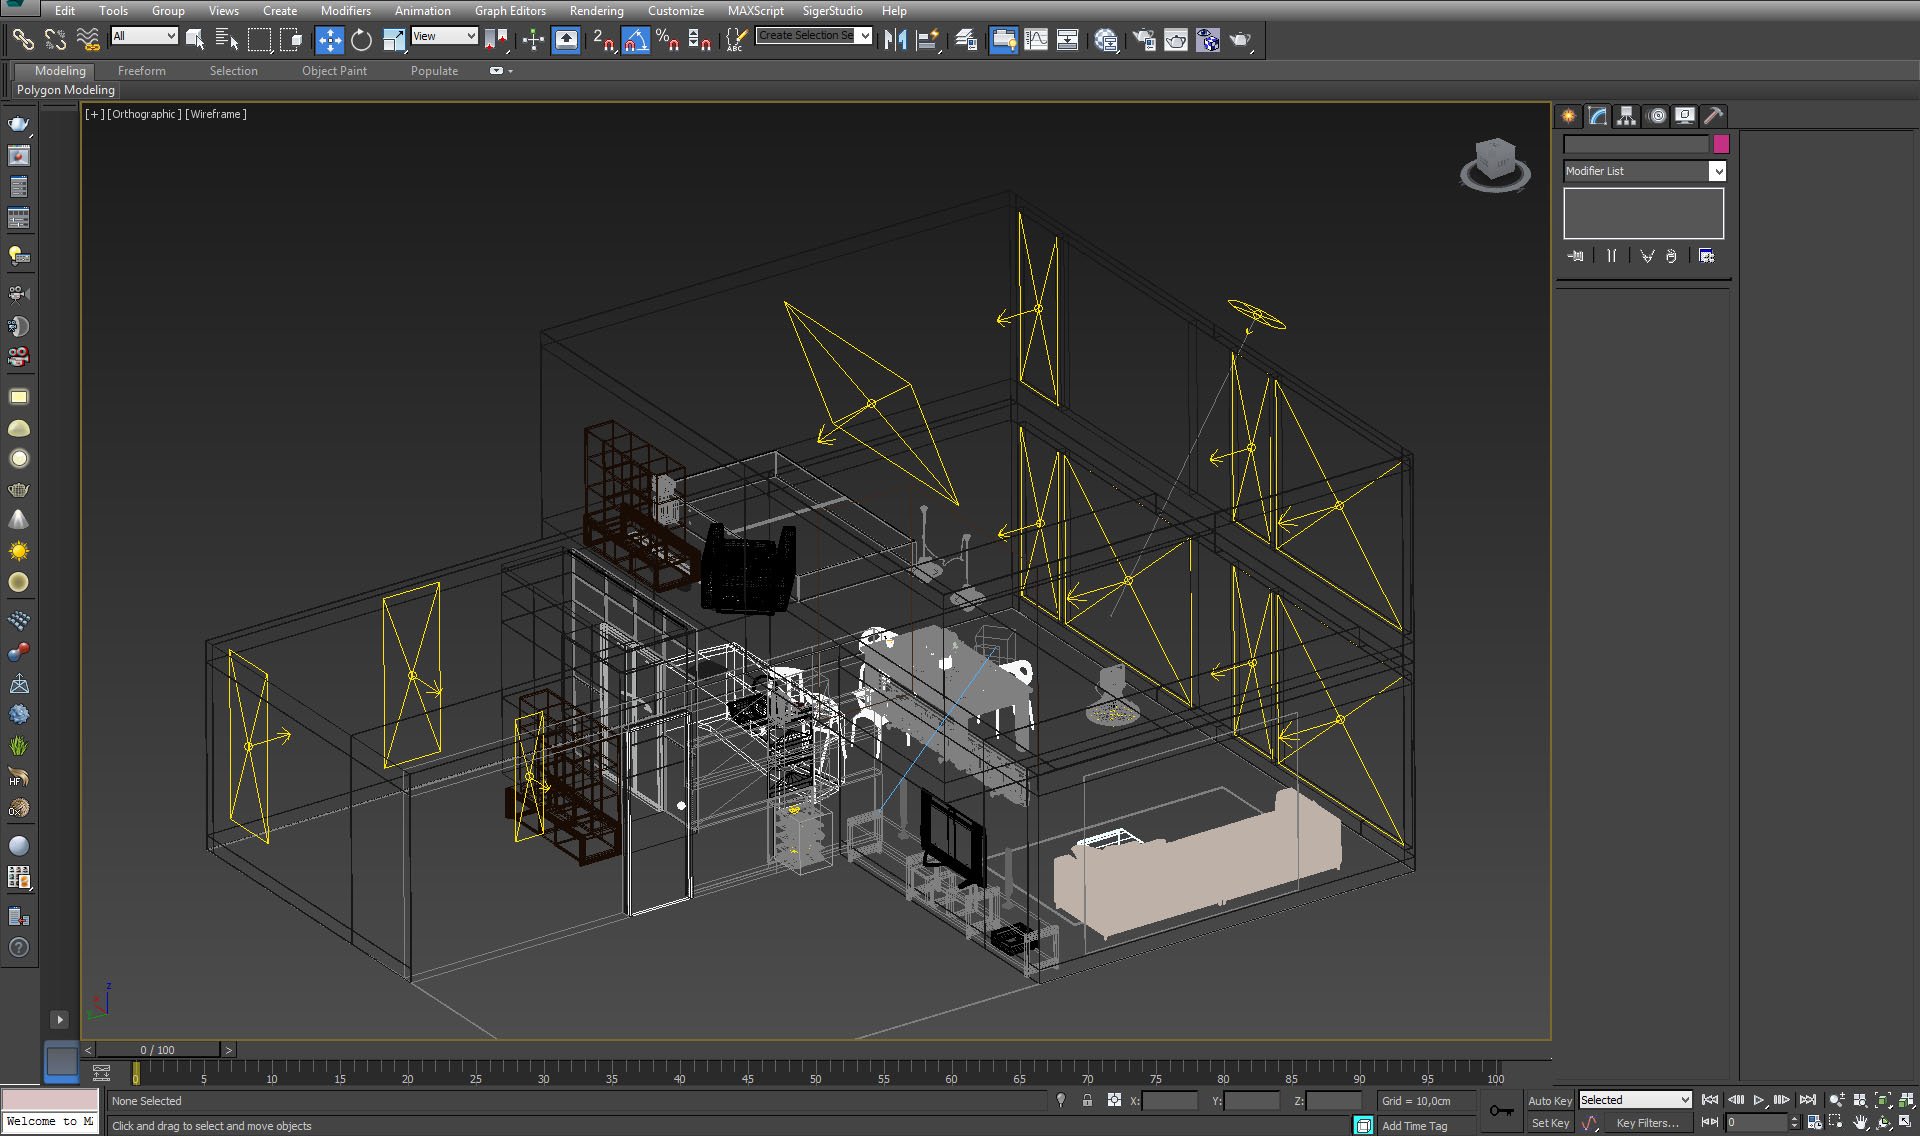
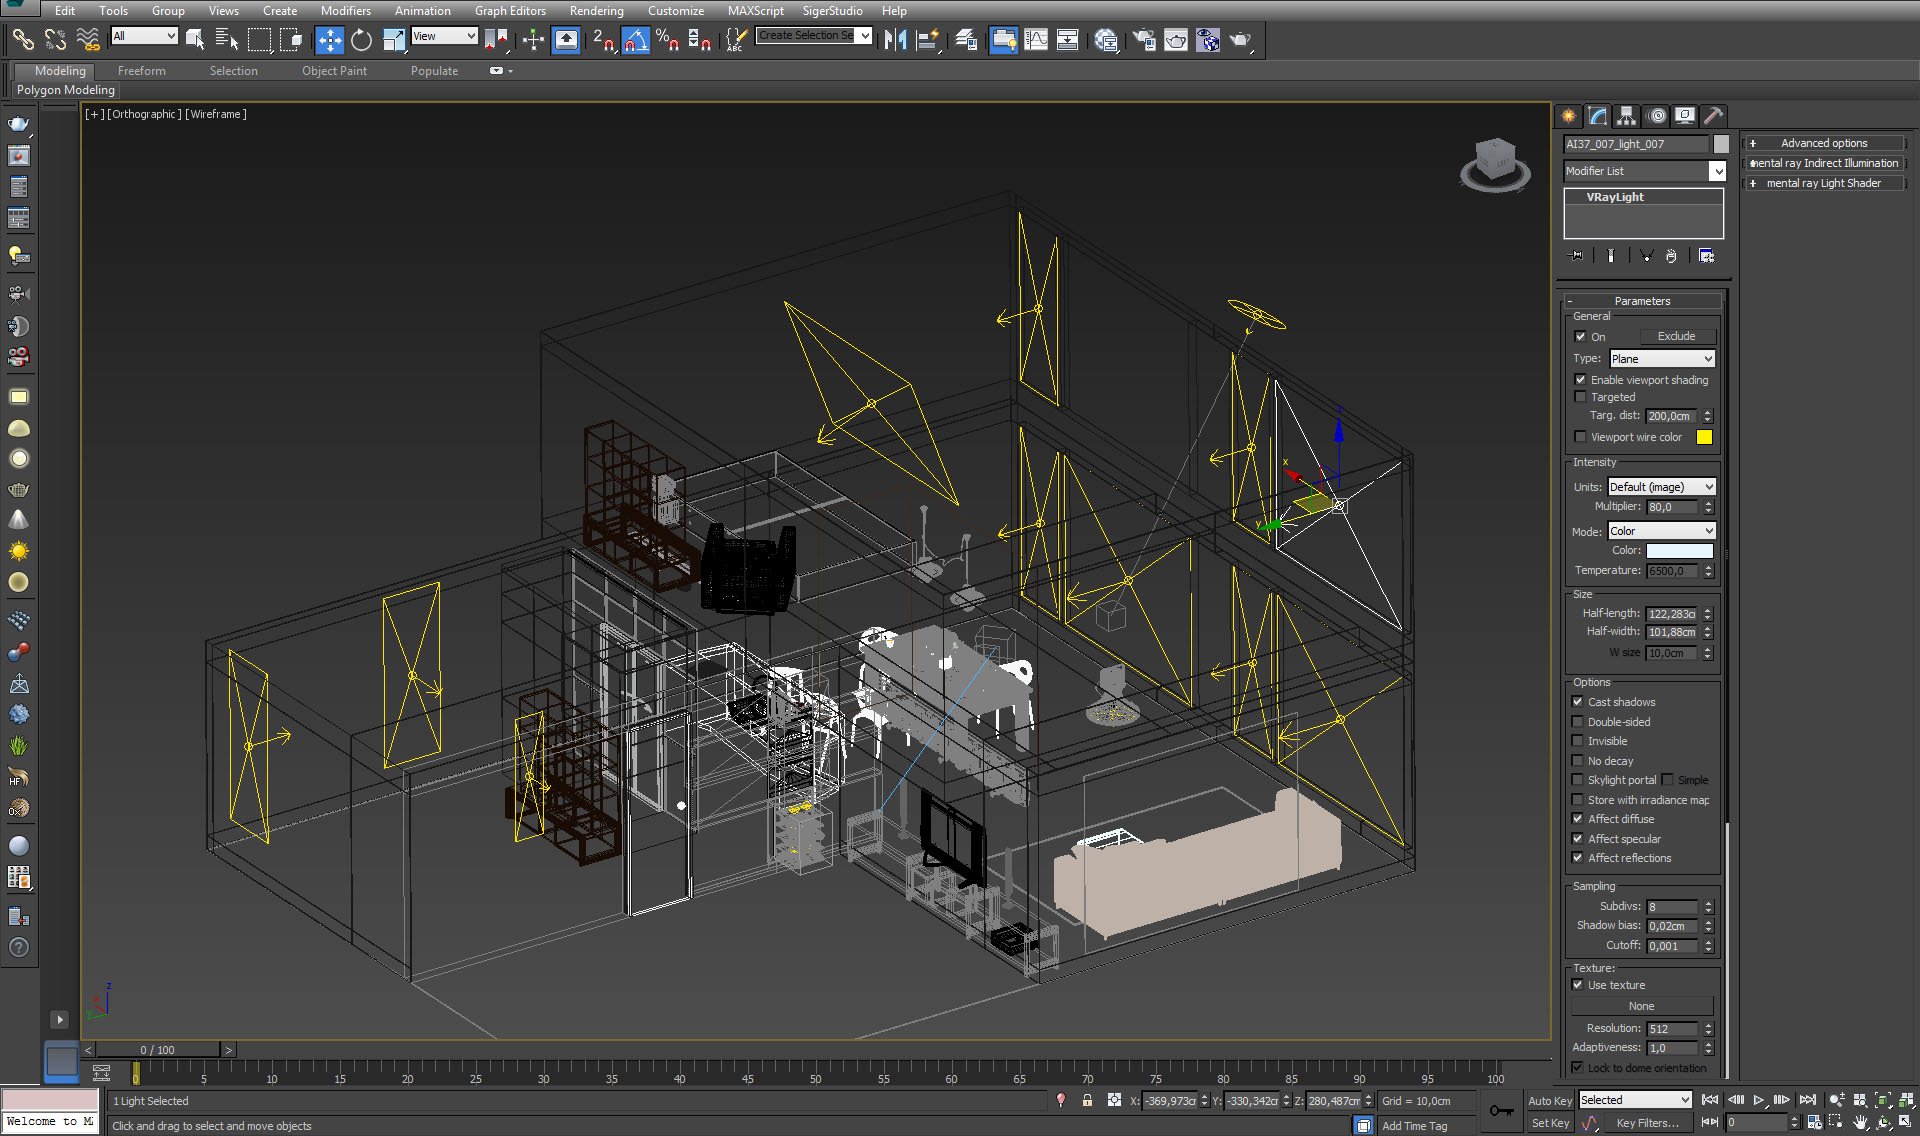
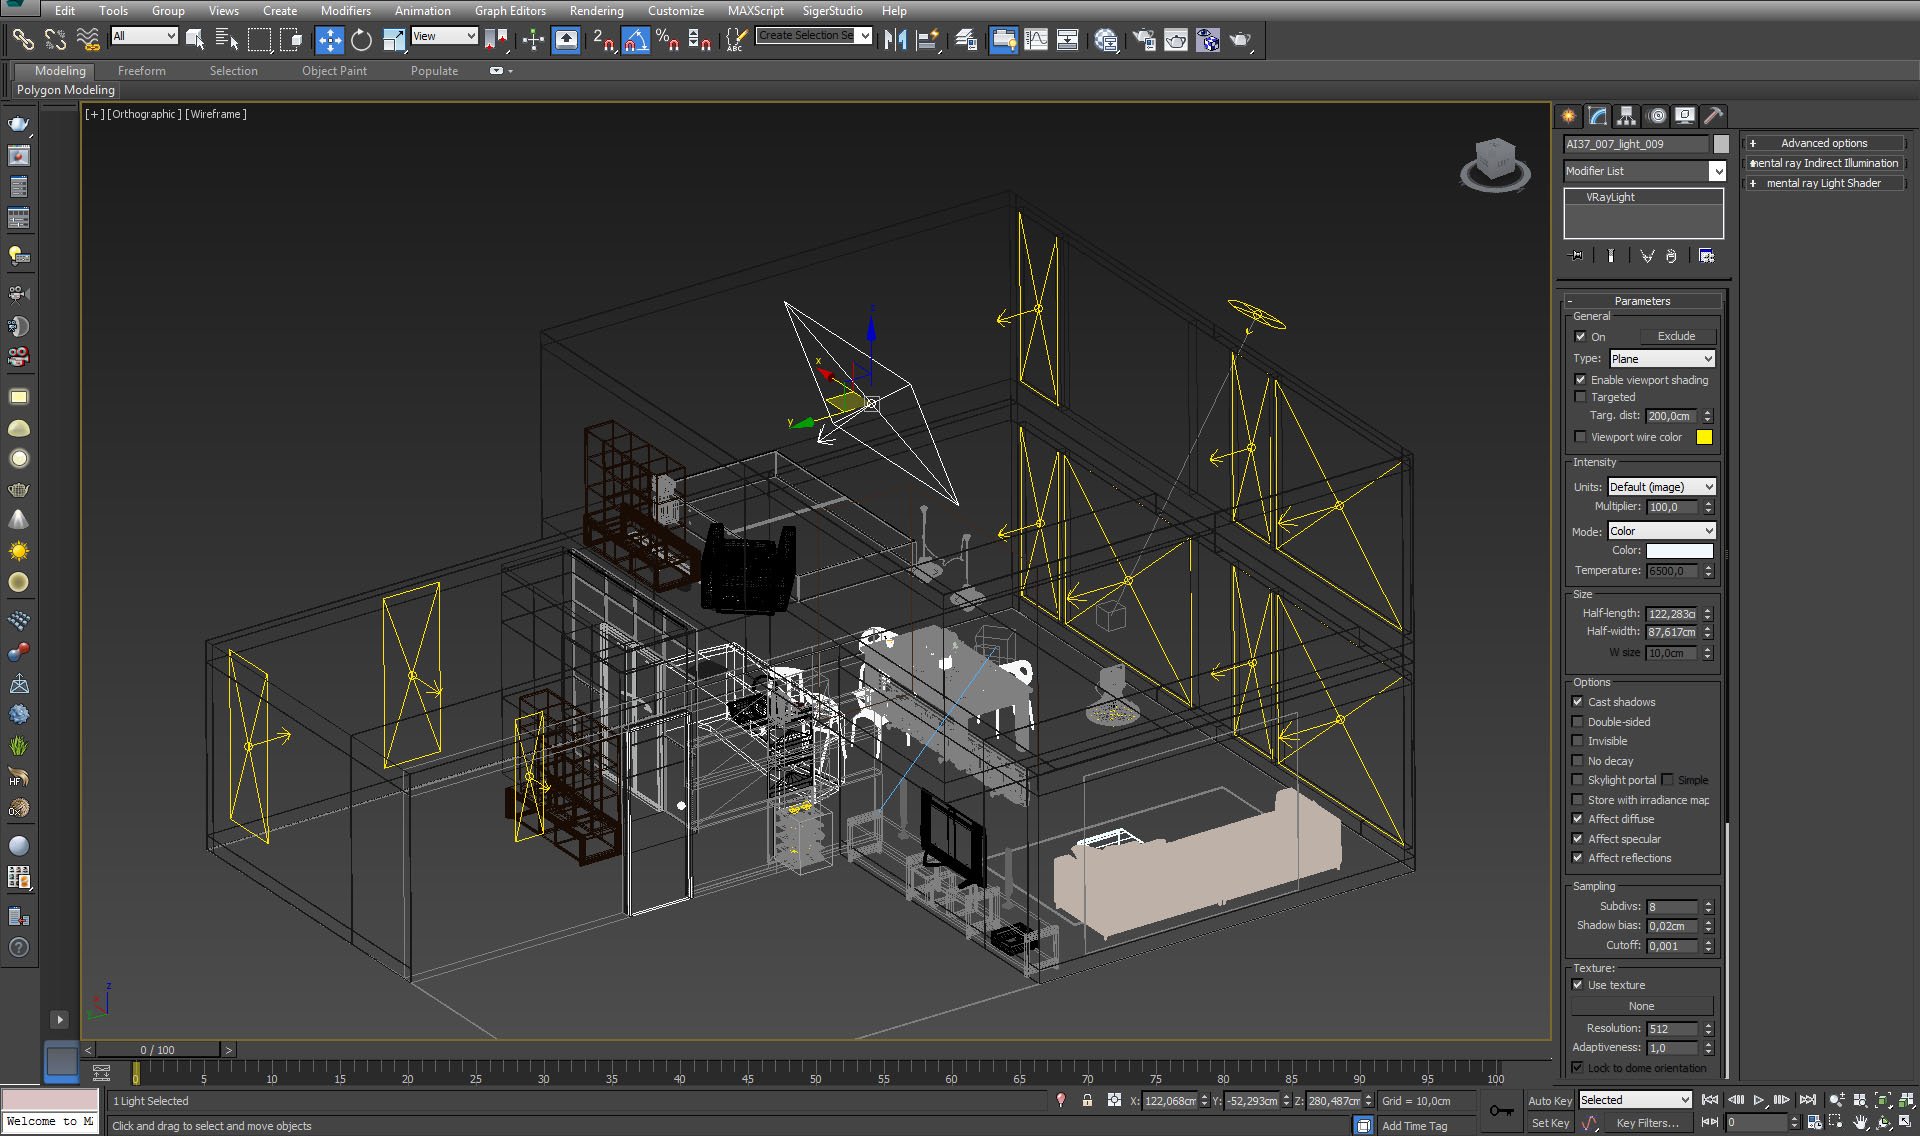
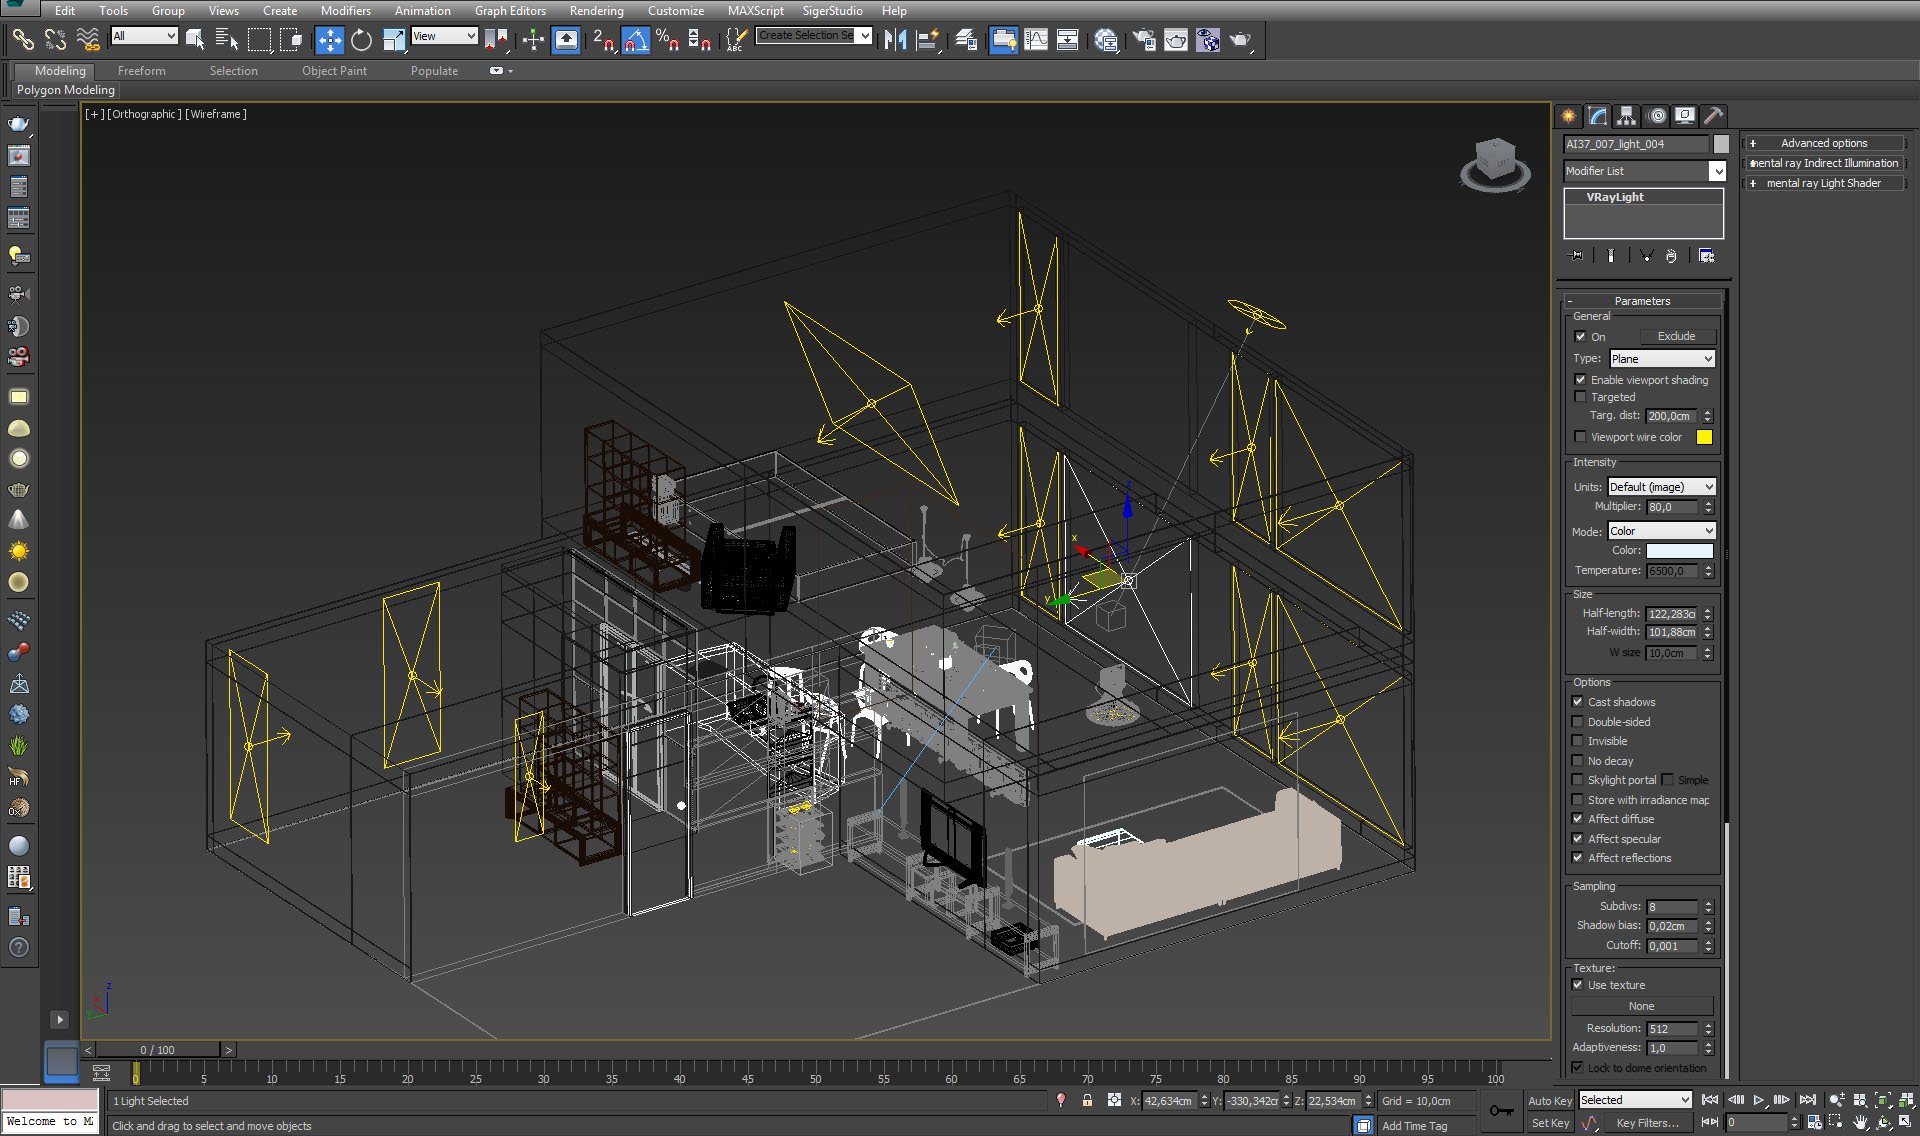
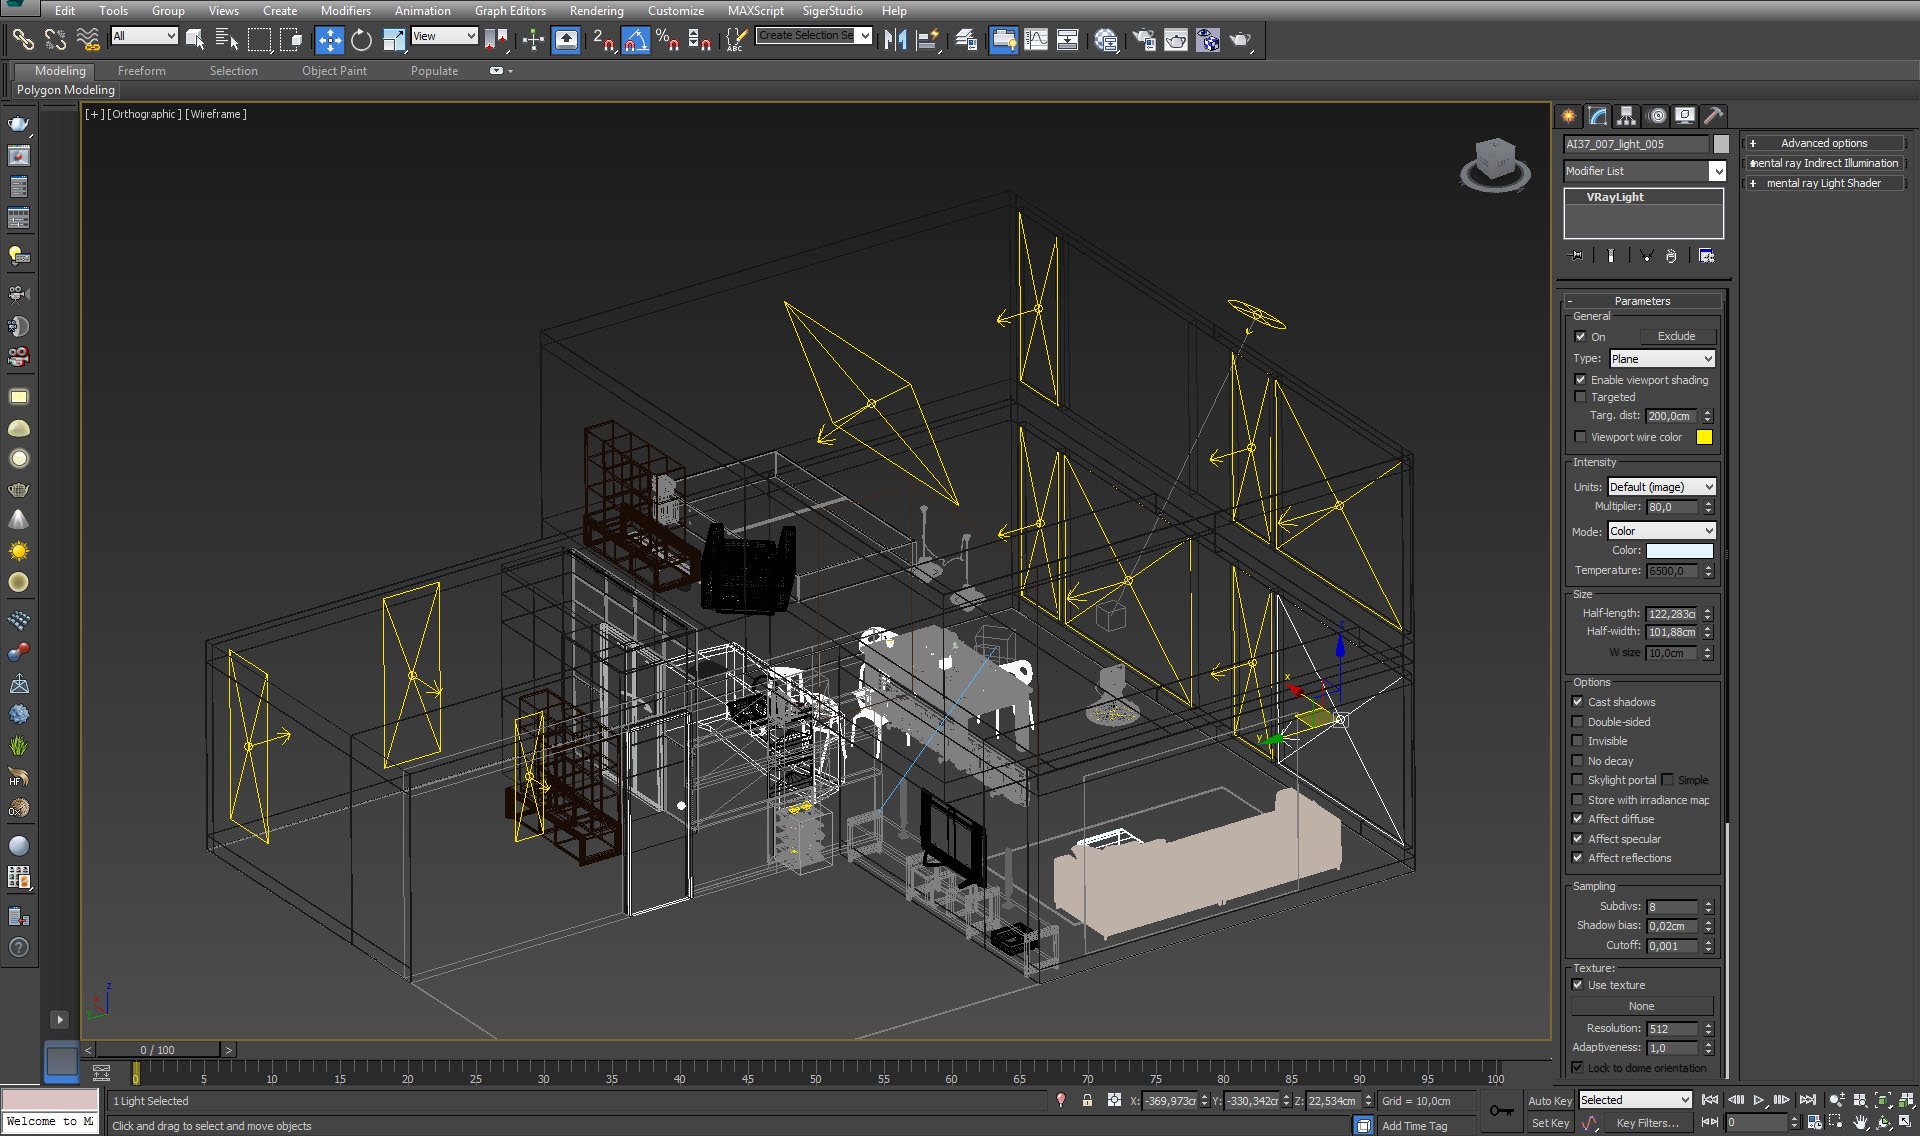
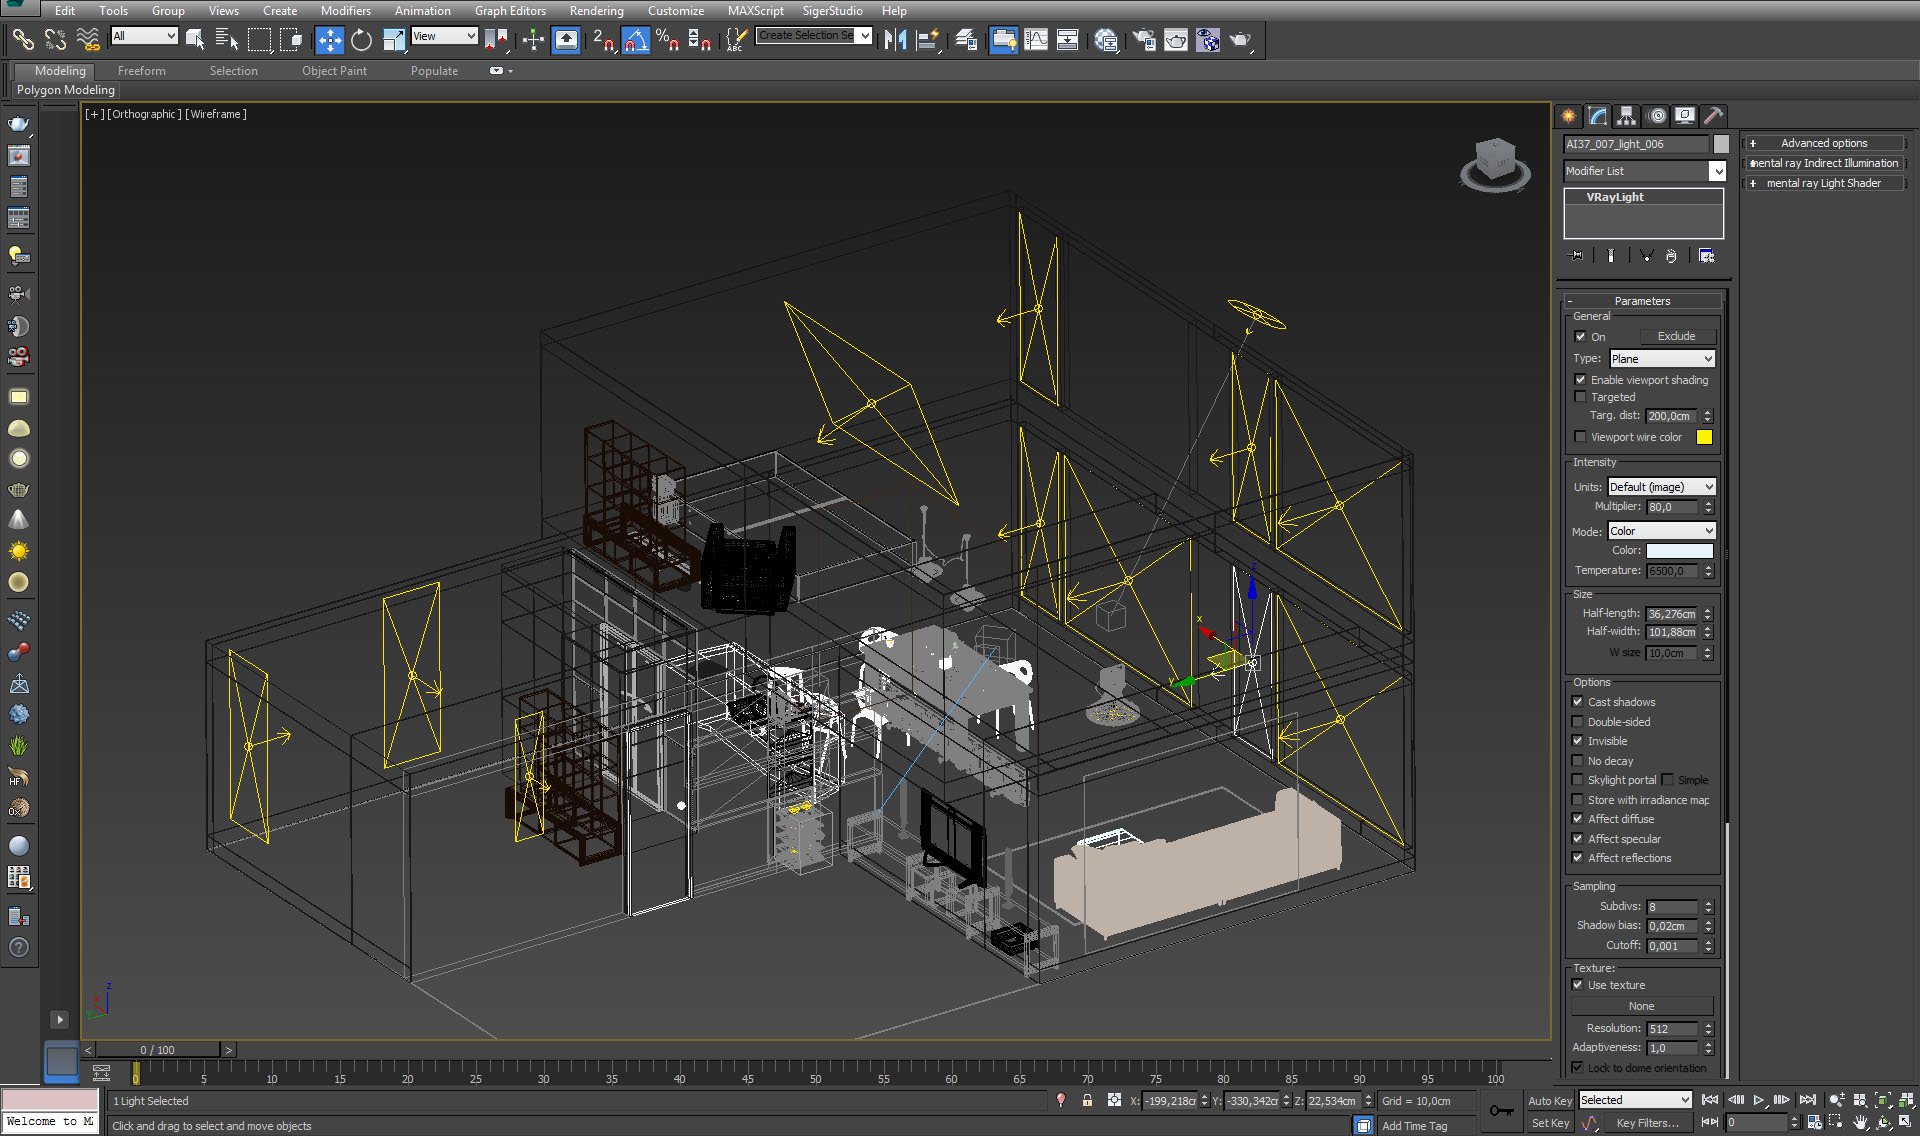
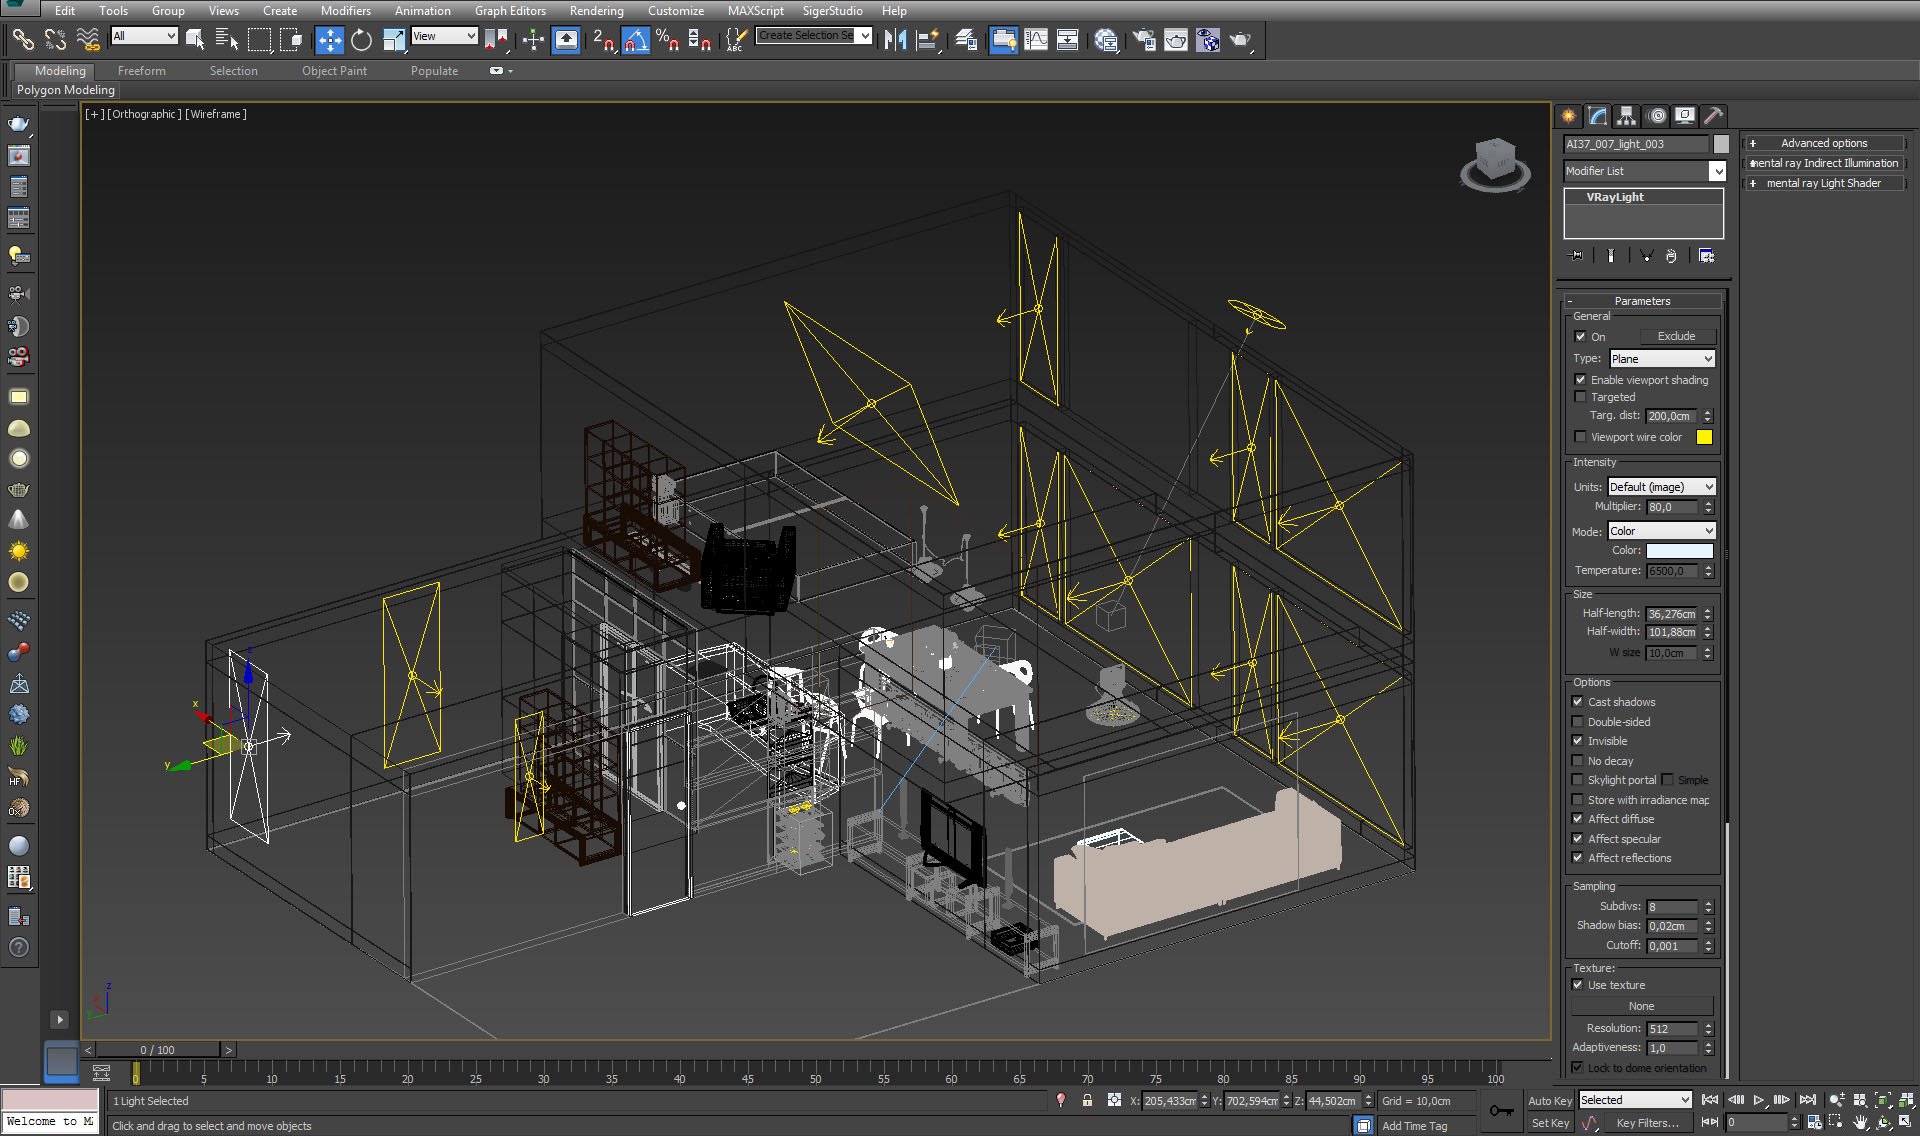
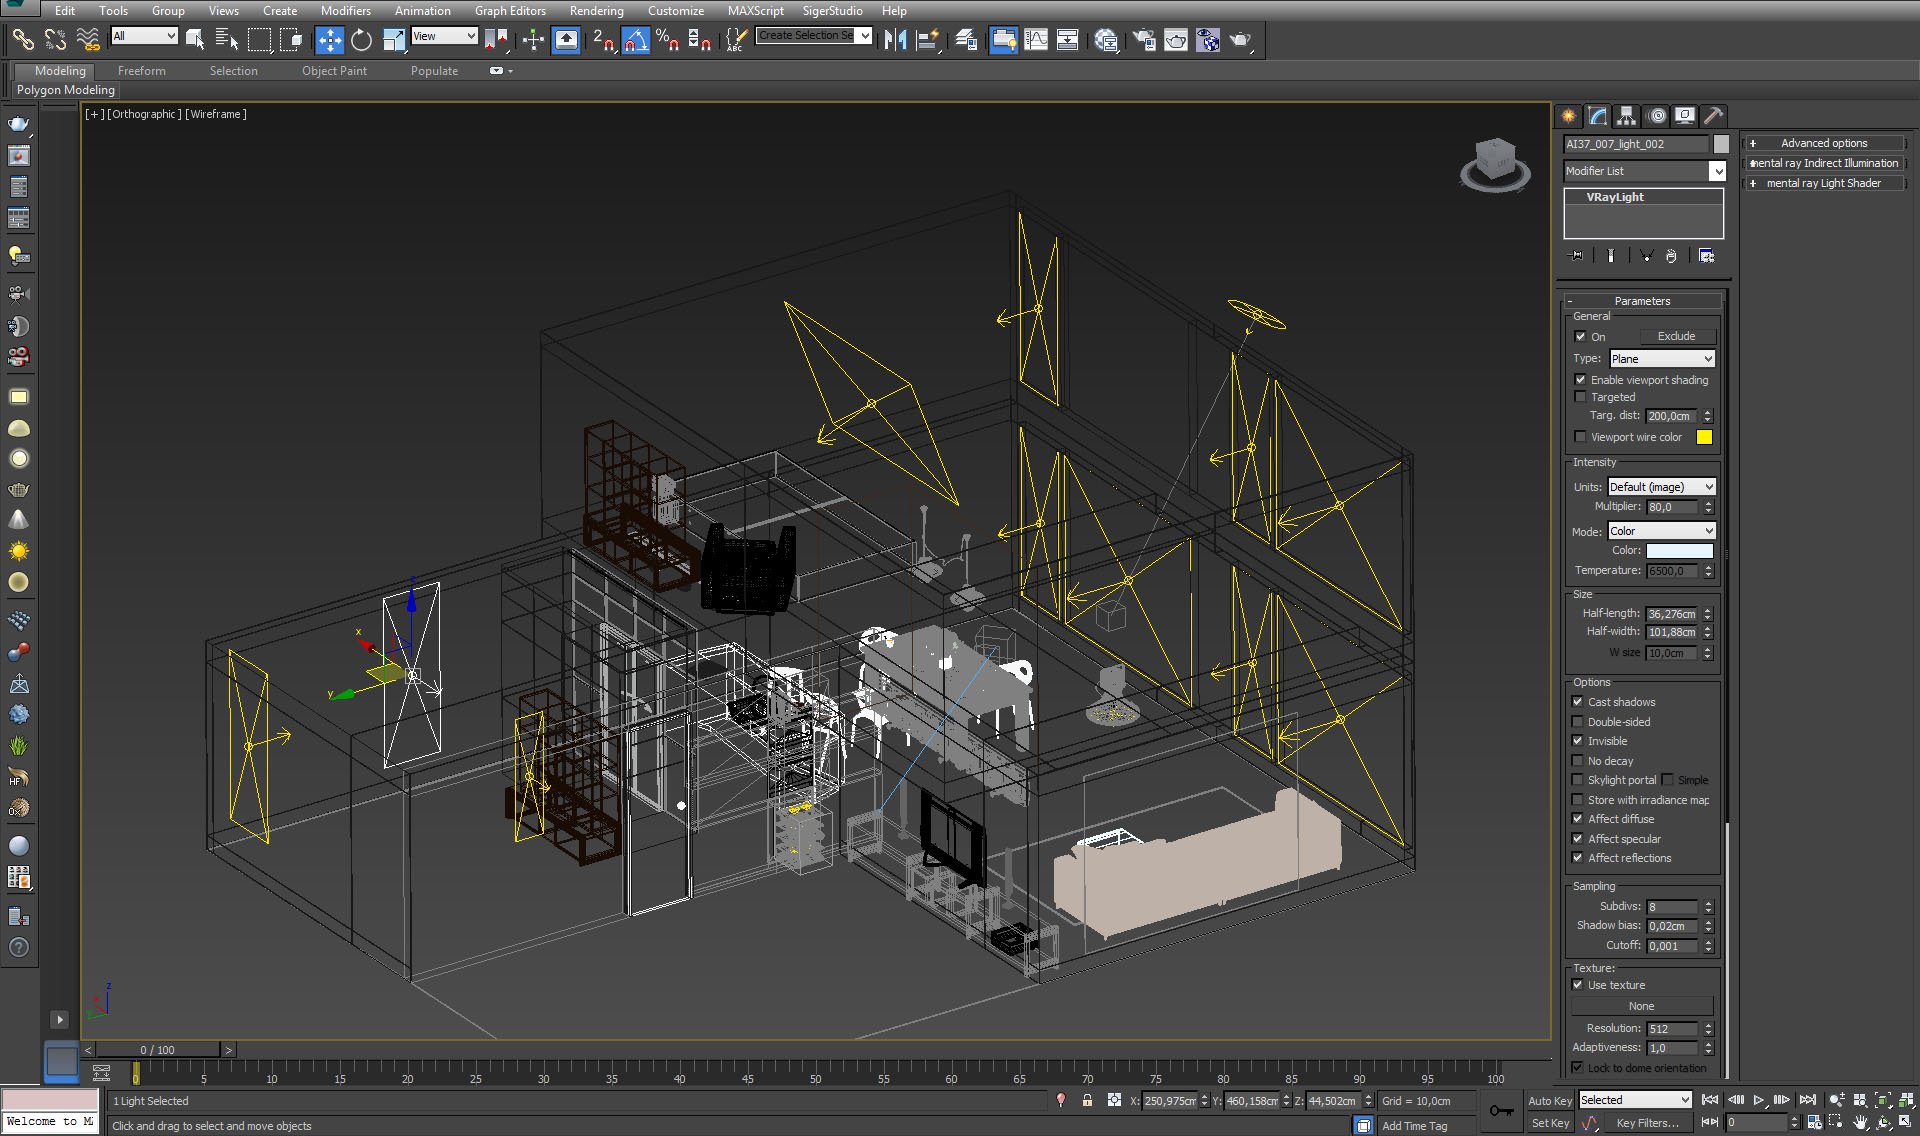
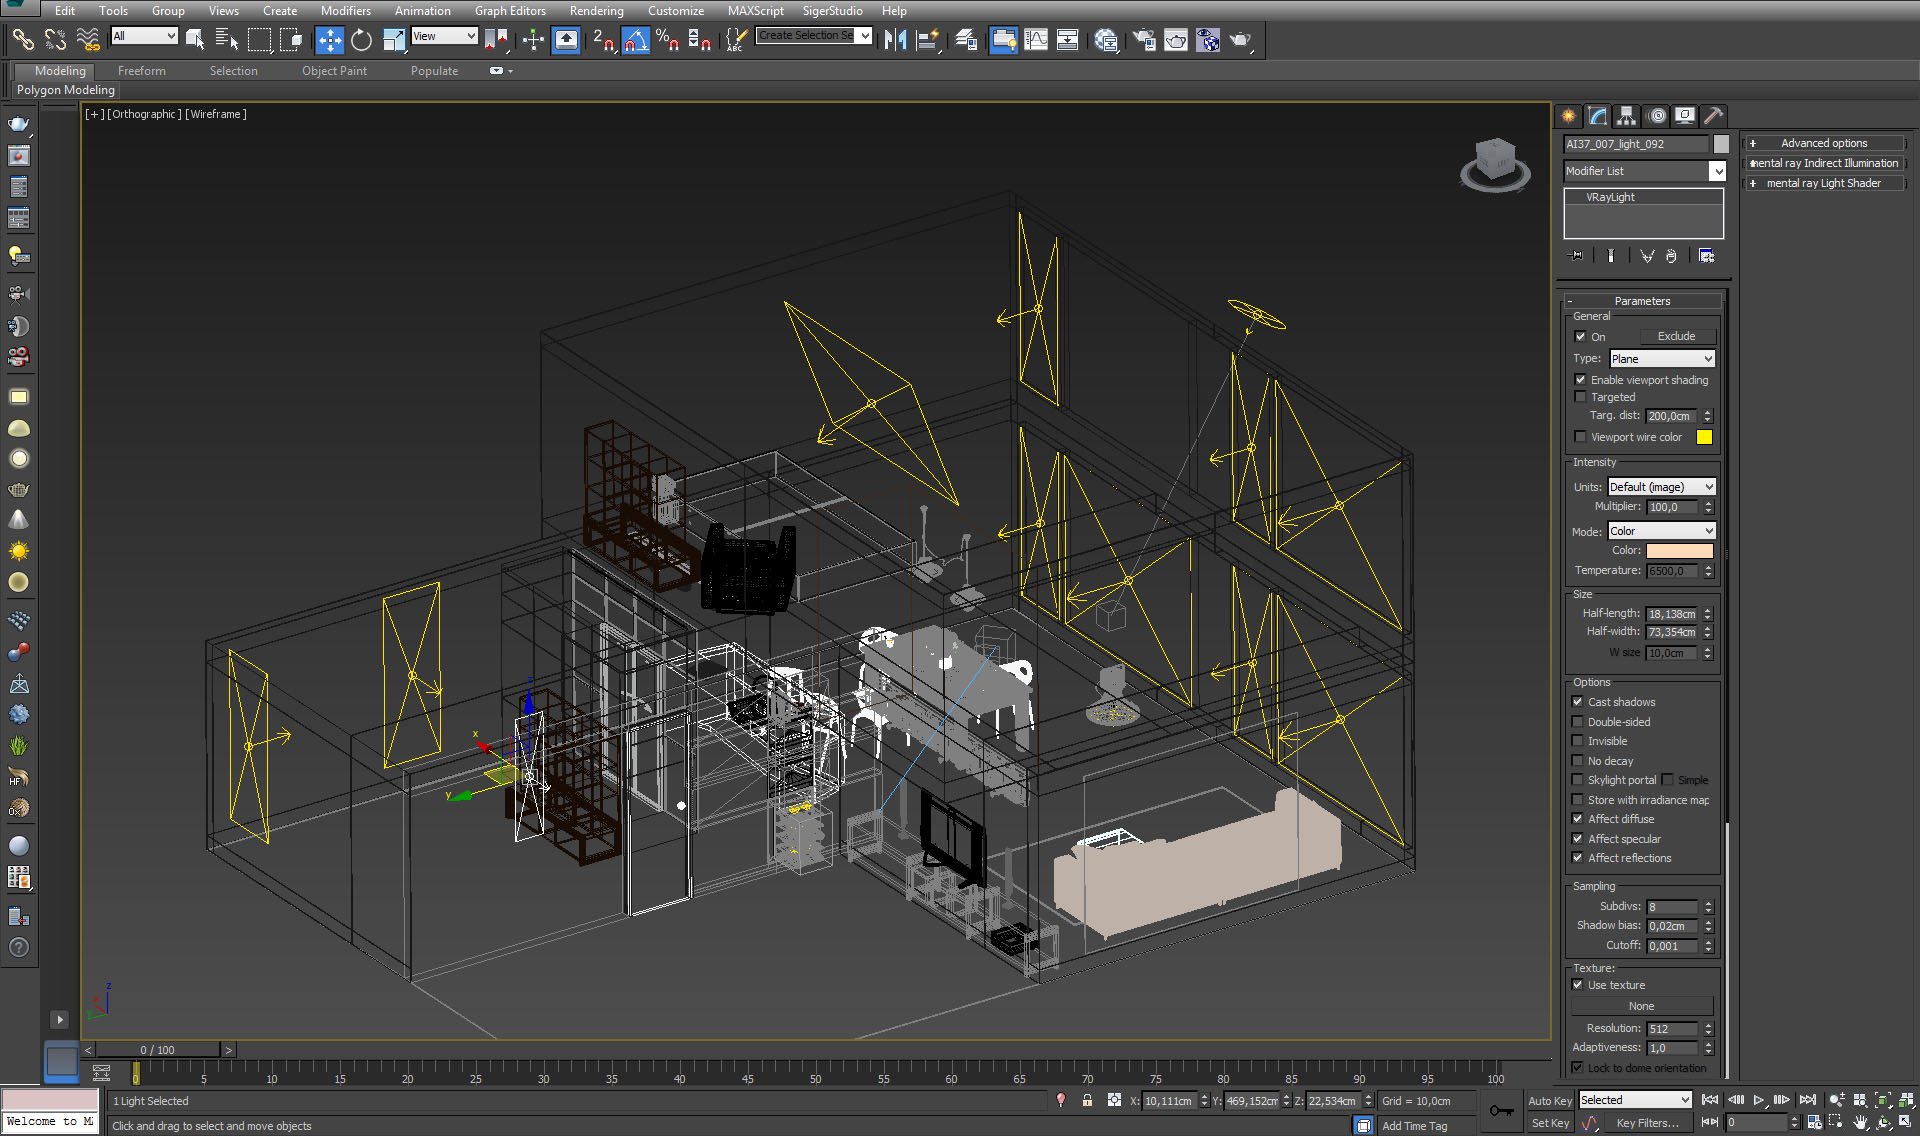
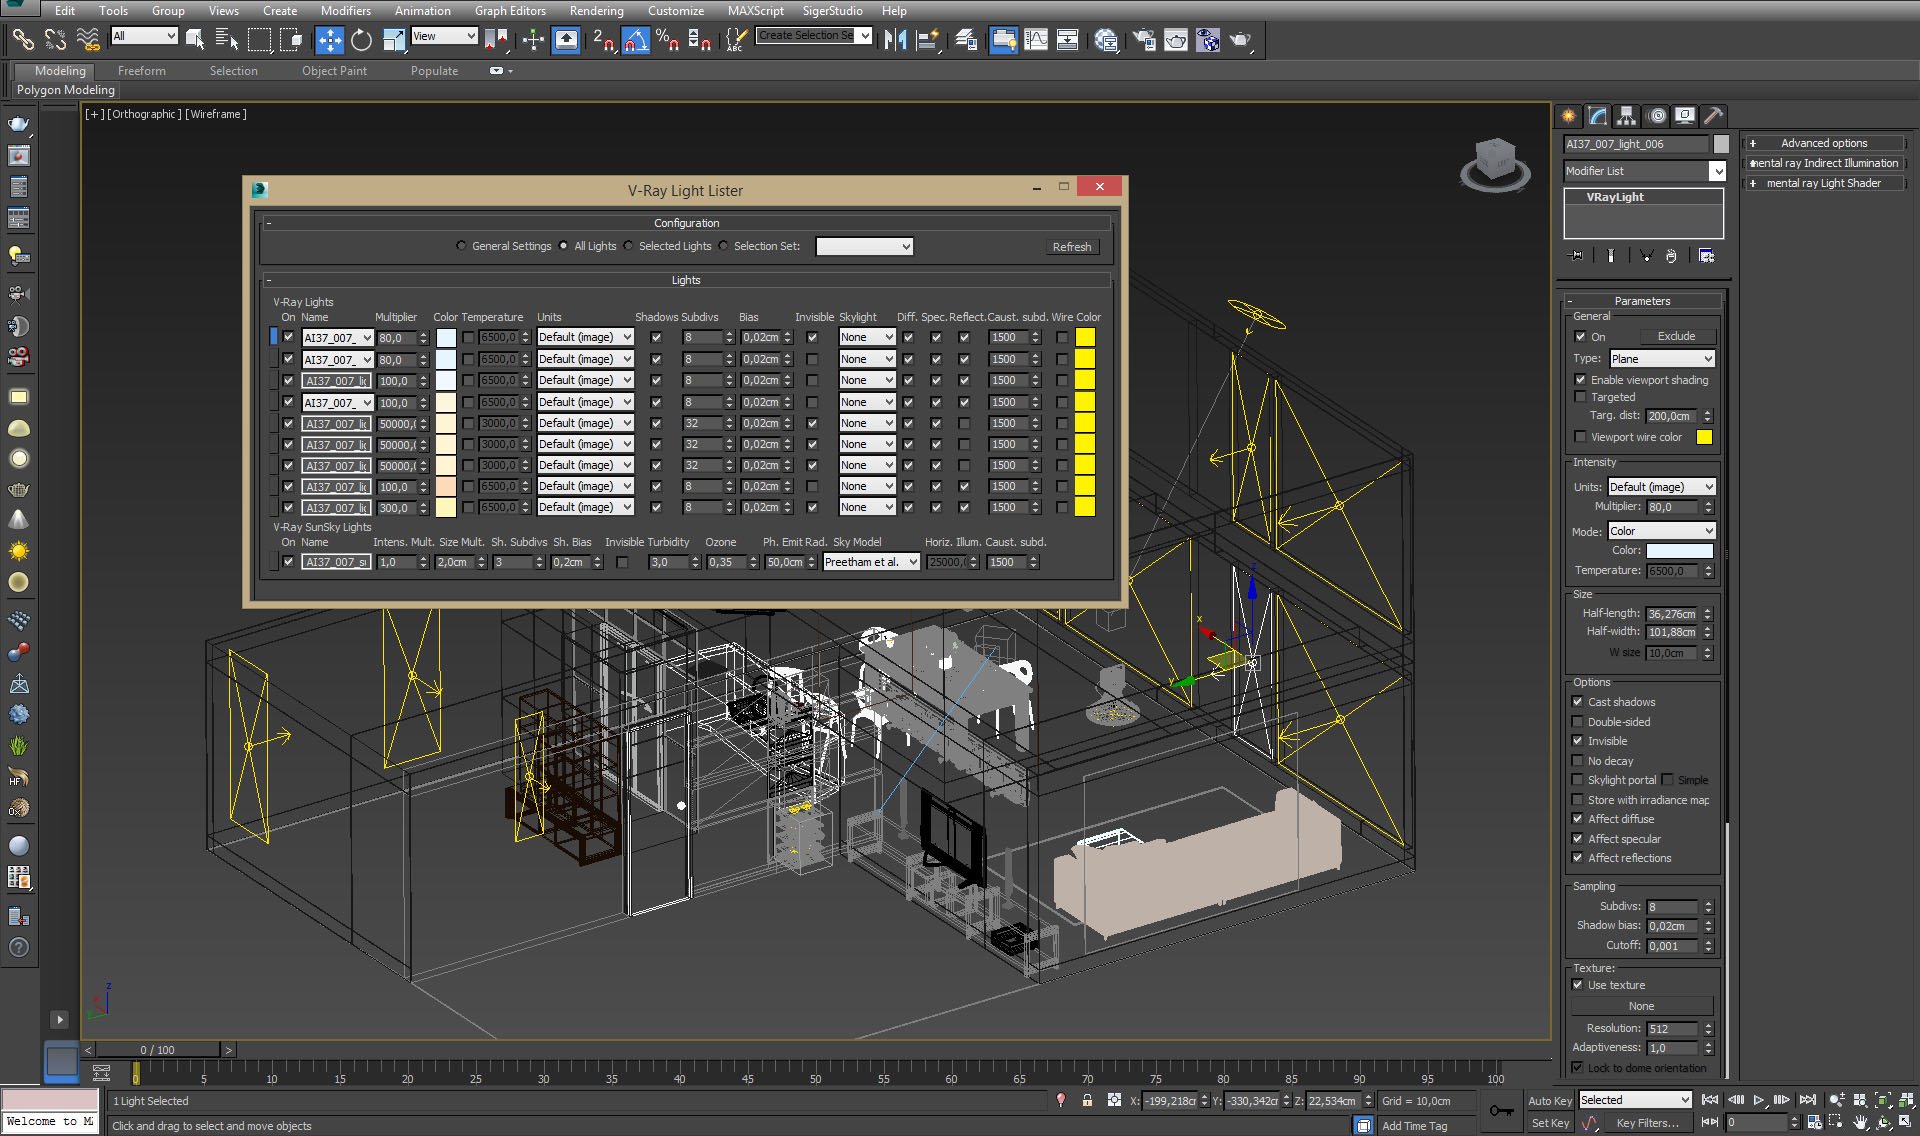
Kamil placed lights in the windows of both floors and behind kitchen wall. One light was also placed to lighten up furniture on the floor above the kitchen.


Click on image to enlarge nr_AI37S07_0043_Layer_15_403.jpg
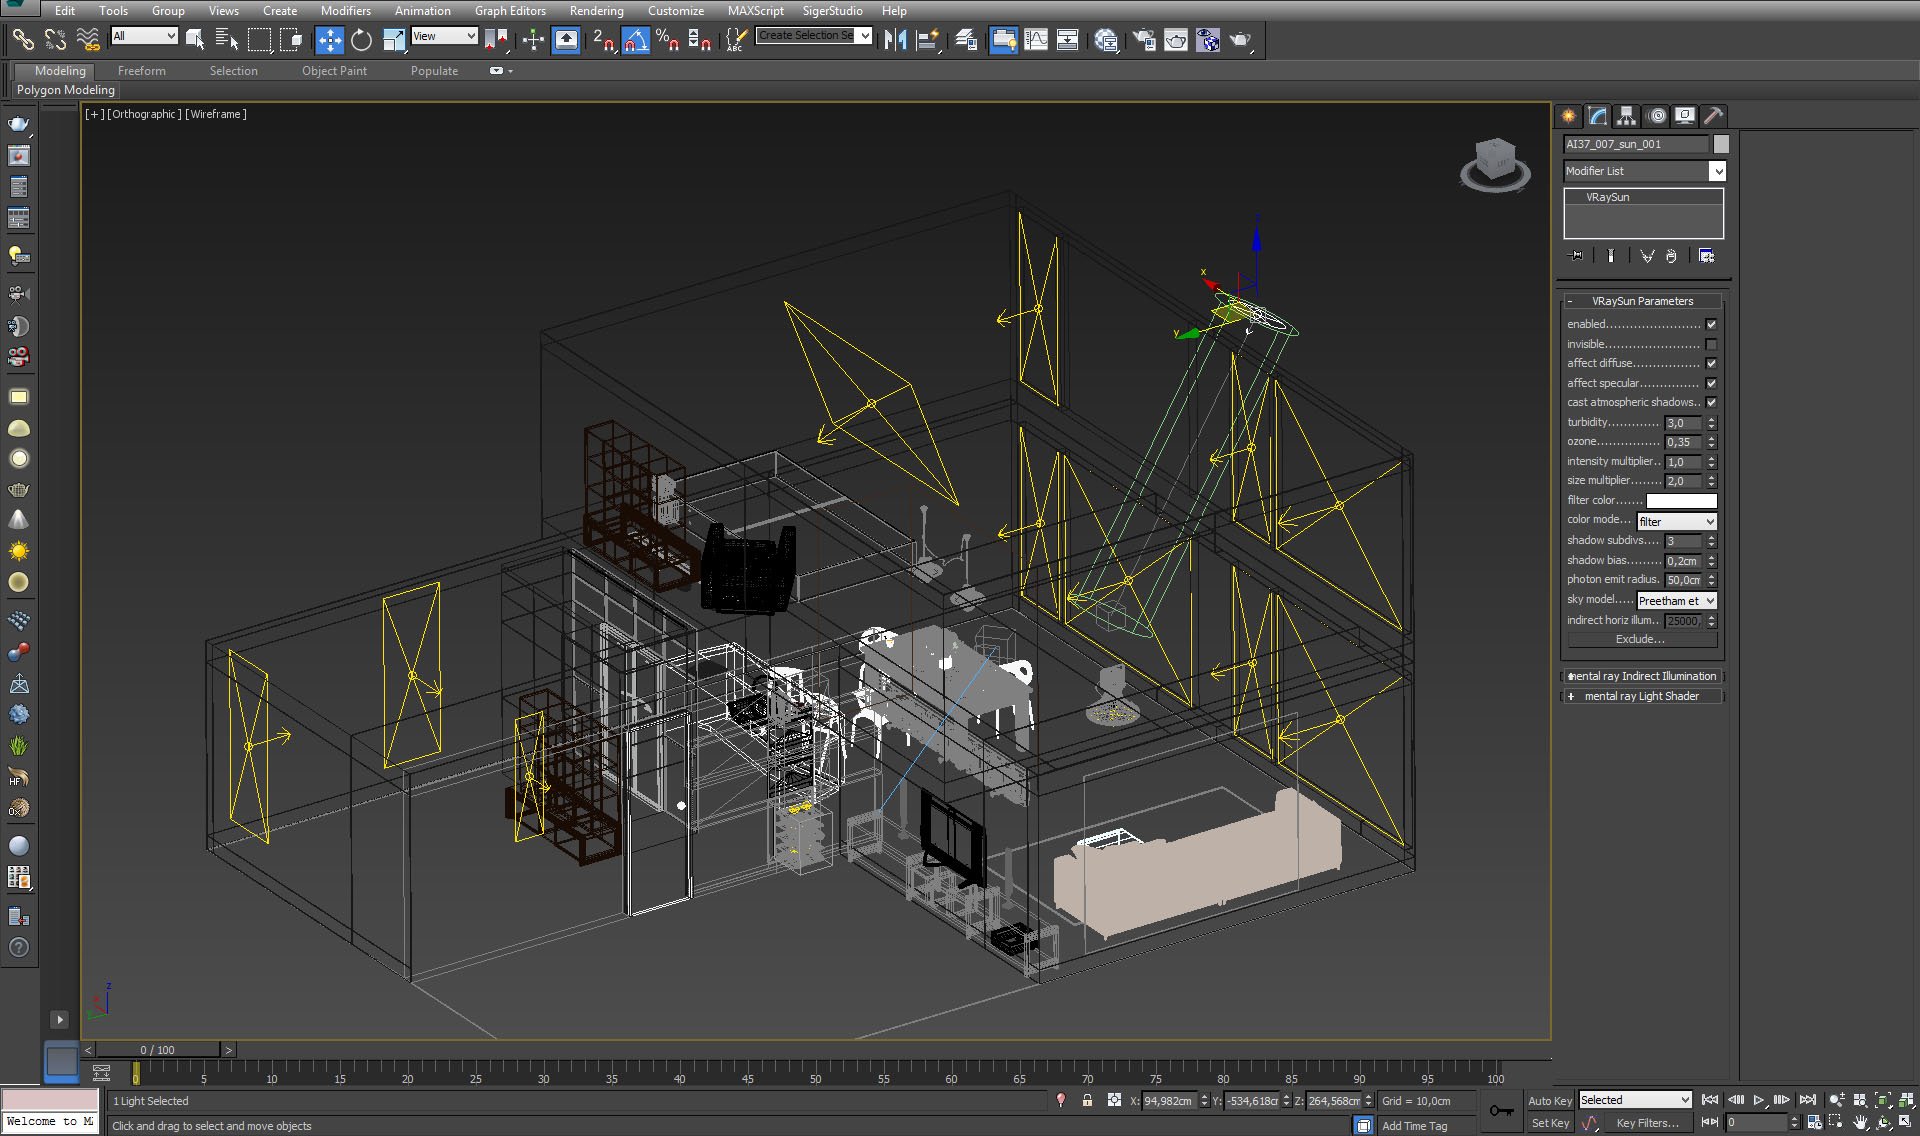
The final light is VraySun - settings are on the right.


Click on image to enlarge nr_AI37S07_0042_Layer_16_402.jpg
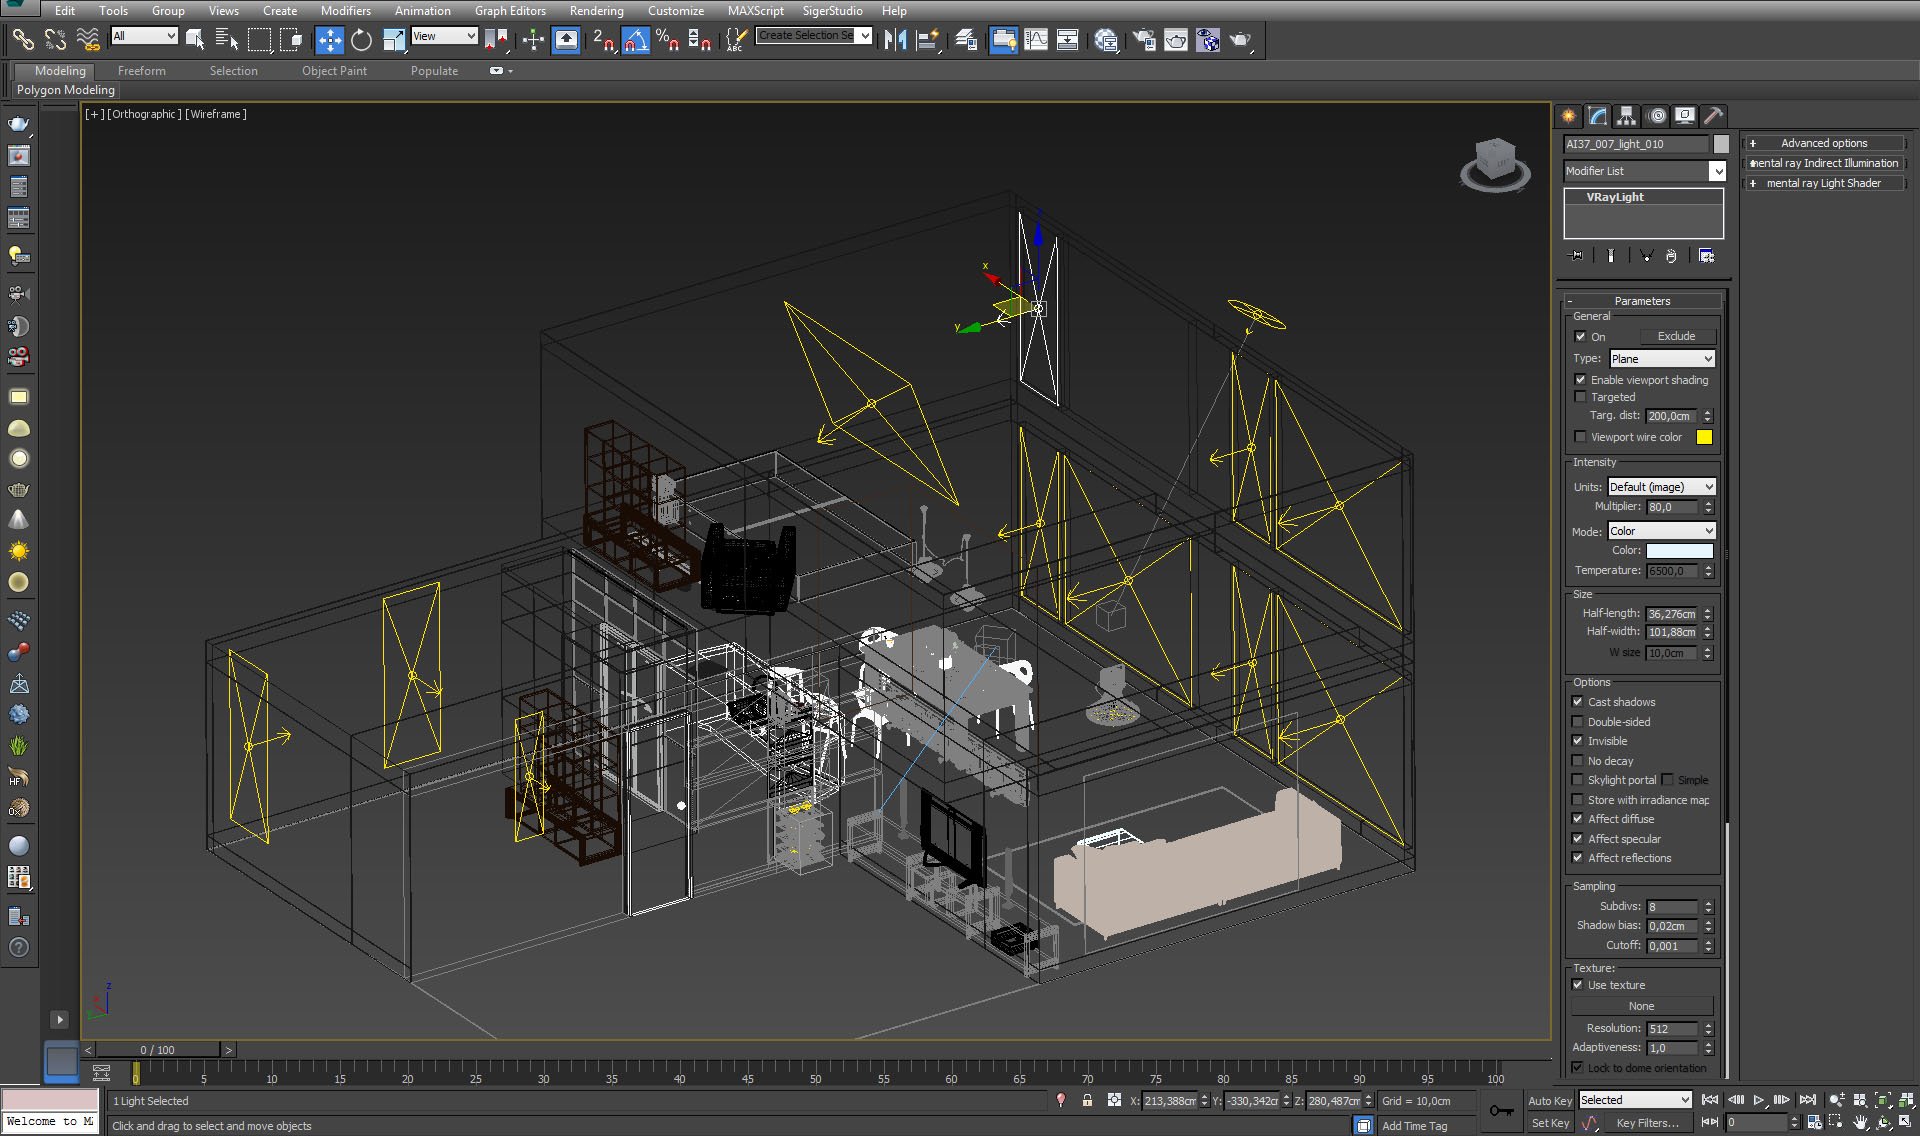
Window lights are invisible (they let dome light pass), but they are not skylight portals.


Click on image to enlarge nr_AI37S07_0041_Layer_17_401.jpg
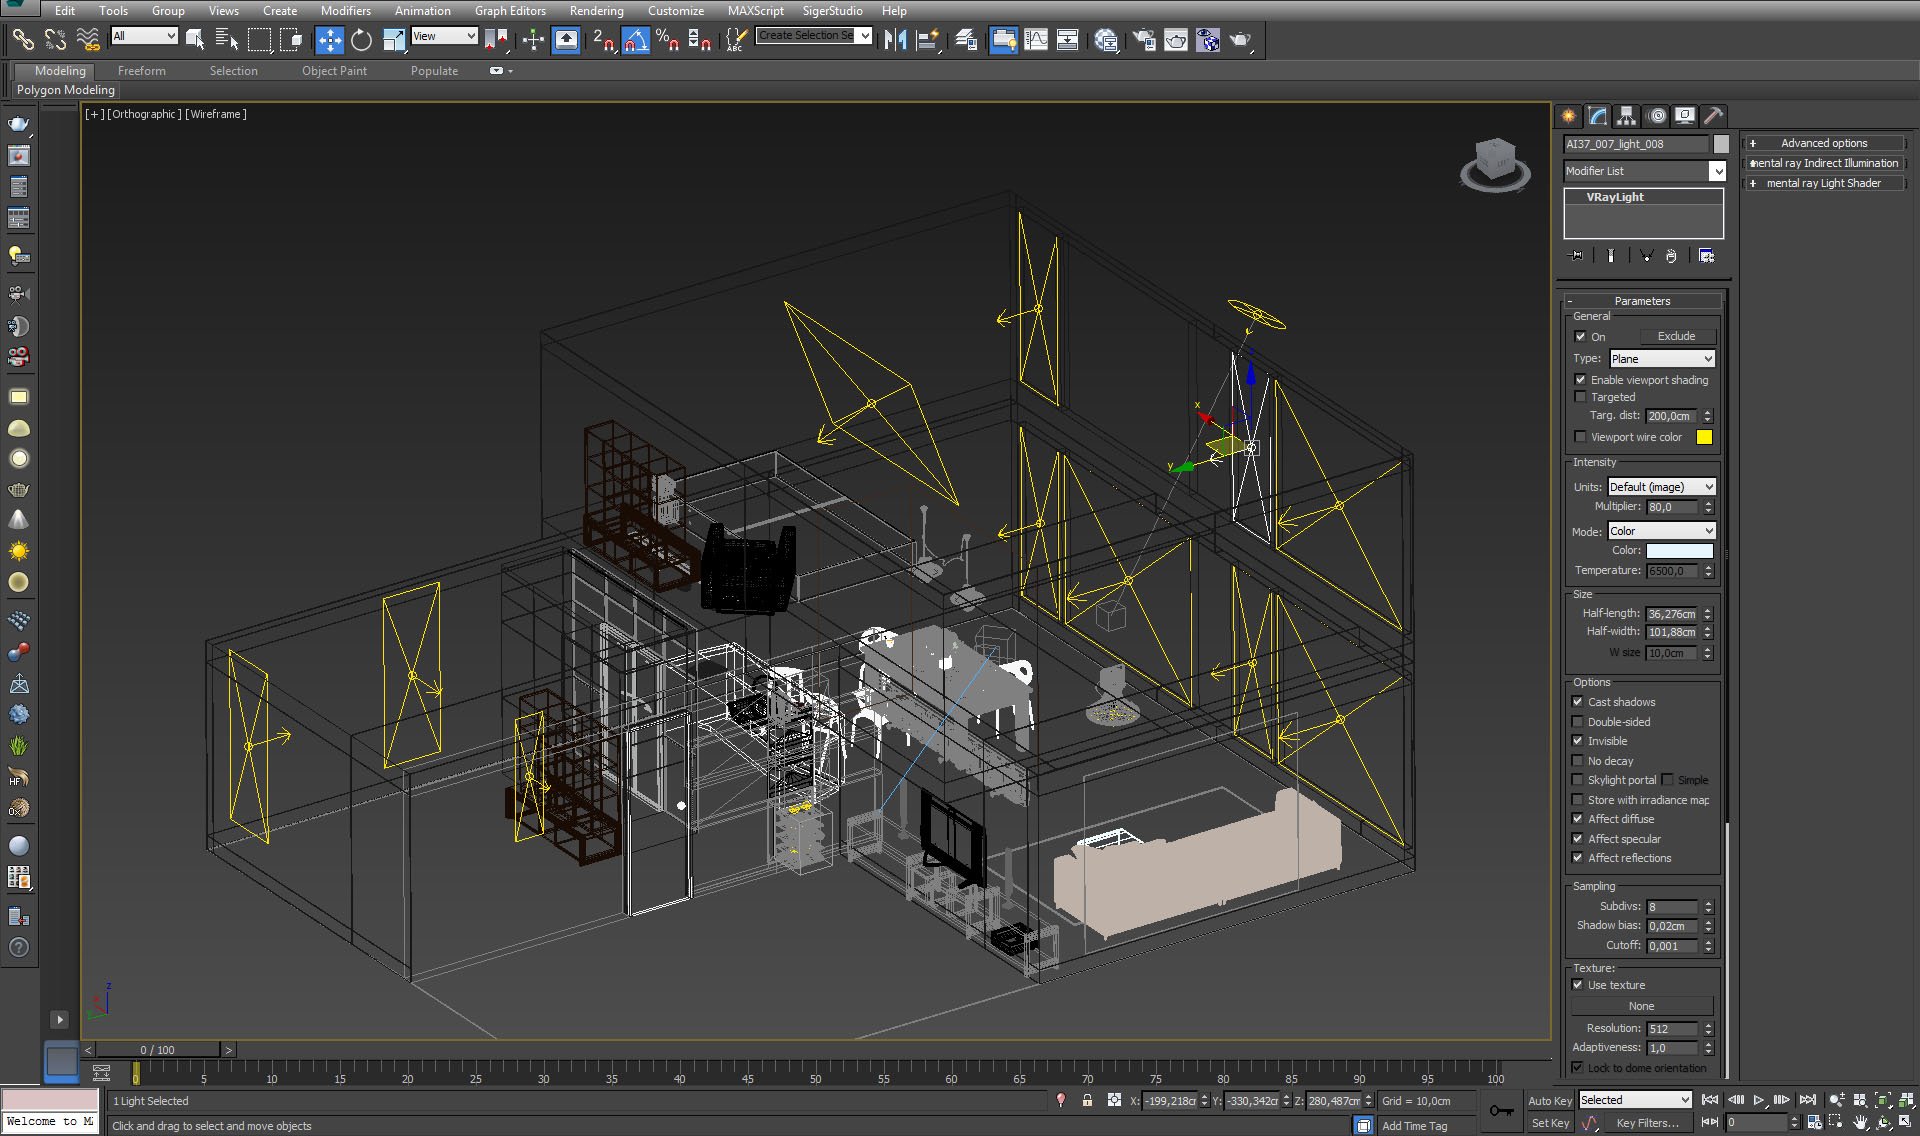
Vray Light settings.


Click on image to enlarge nr_AI37S07_0040_Layer_18_400.jpg

Vray Light settings.


Click on image to enlarge nr_AI37S07_0039_Layer_19_399.jpg

Vray Light settings.


Click on image to enlarge nr_AI37S07_0037_Layer_21_397.jpg

VrayLight settings.


Click on image to enlarge nr_AI37S07_0036_Layer_22_396.jpg

VrayLight settings.


Click on image to enlarge nr_AI37S07_0035_Layer_23_395.jpg

VrayLight settings.


Click on image to enlarge nr_AI37S07_0033_Layer_25_393.jpg

VrayLight settings.


Click on image to enlarge nr_AI37S07_0032_Layer_26_392.jpg

VrayLight settings.


Click on image to enlarge nr_AI37S07_0031_Layer_27_391.jpg

VrayLight settings.


Click on image to enlarge nr_AI37S07_0034_Layer_24_394.jpg

VrayLight lister.


Click on image to enlarge nr_AI37S07_0030_Layer_28_390.jpg

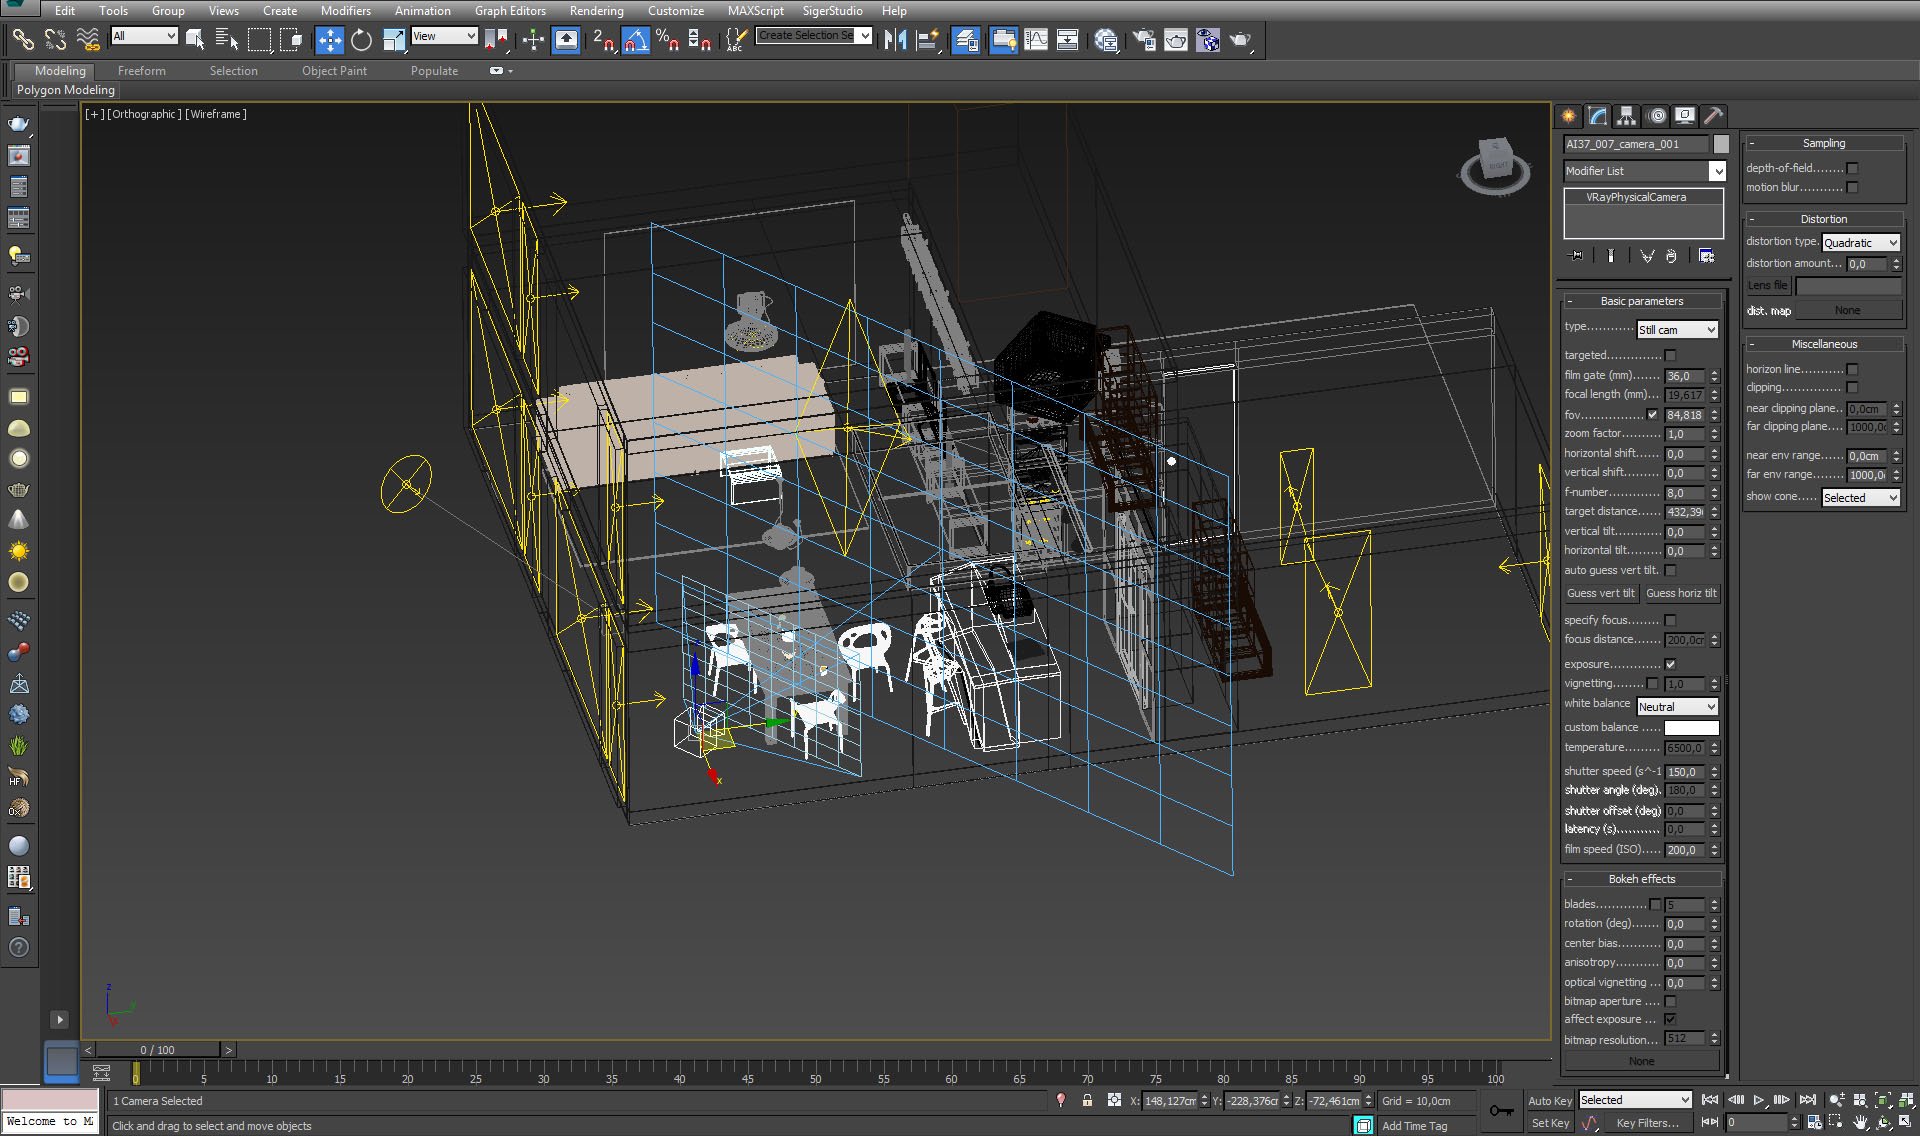
Camera settings - wide FOV (84) and neutral white balance.


Click on image to enlarge nr_AI37S07_0029_Layer_29_389.jpg
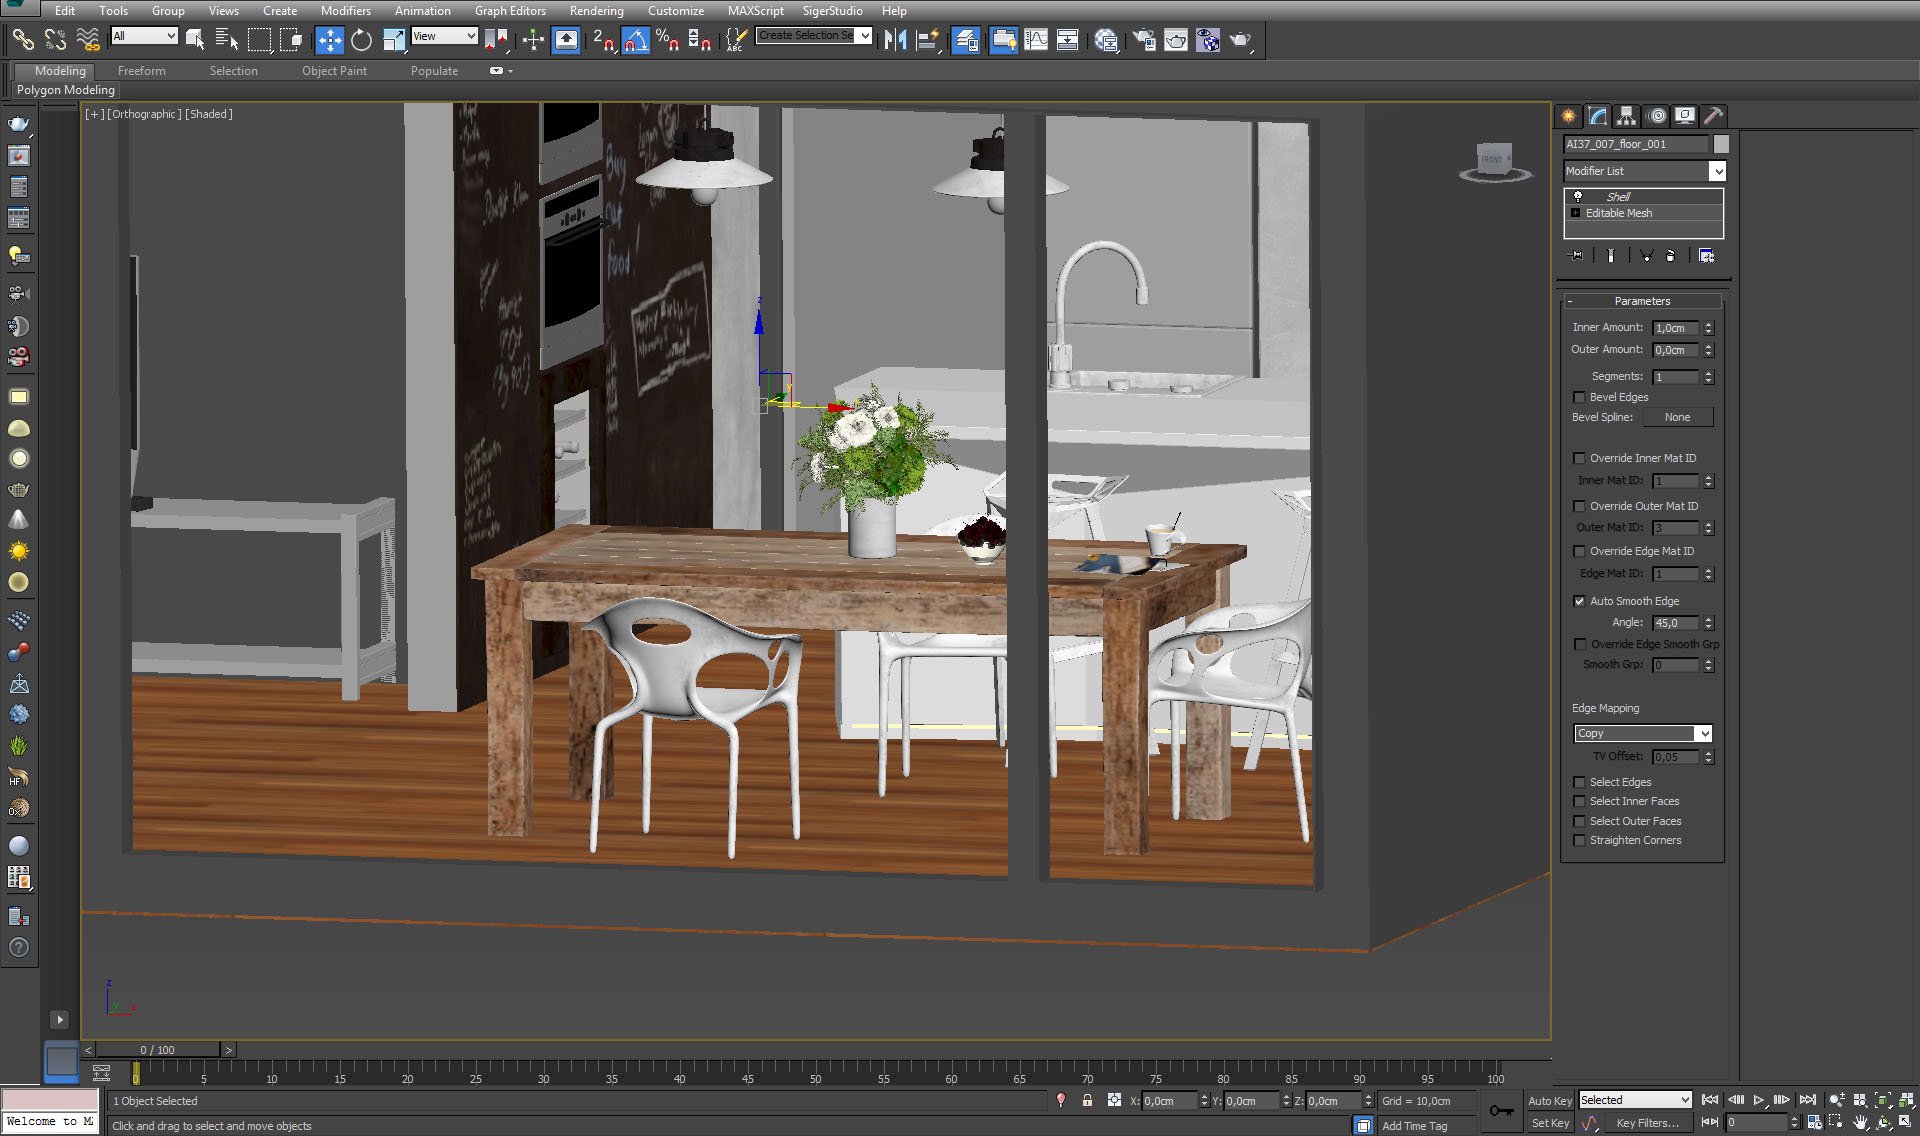
Floor is an extruded plane, it is barely visible in the camera so there was no need to make boards with floor generator.


Click on image to enlarge nr_AI37S07_0028_Layer_30_388.jpg
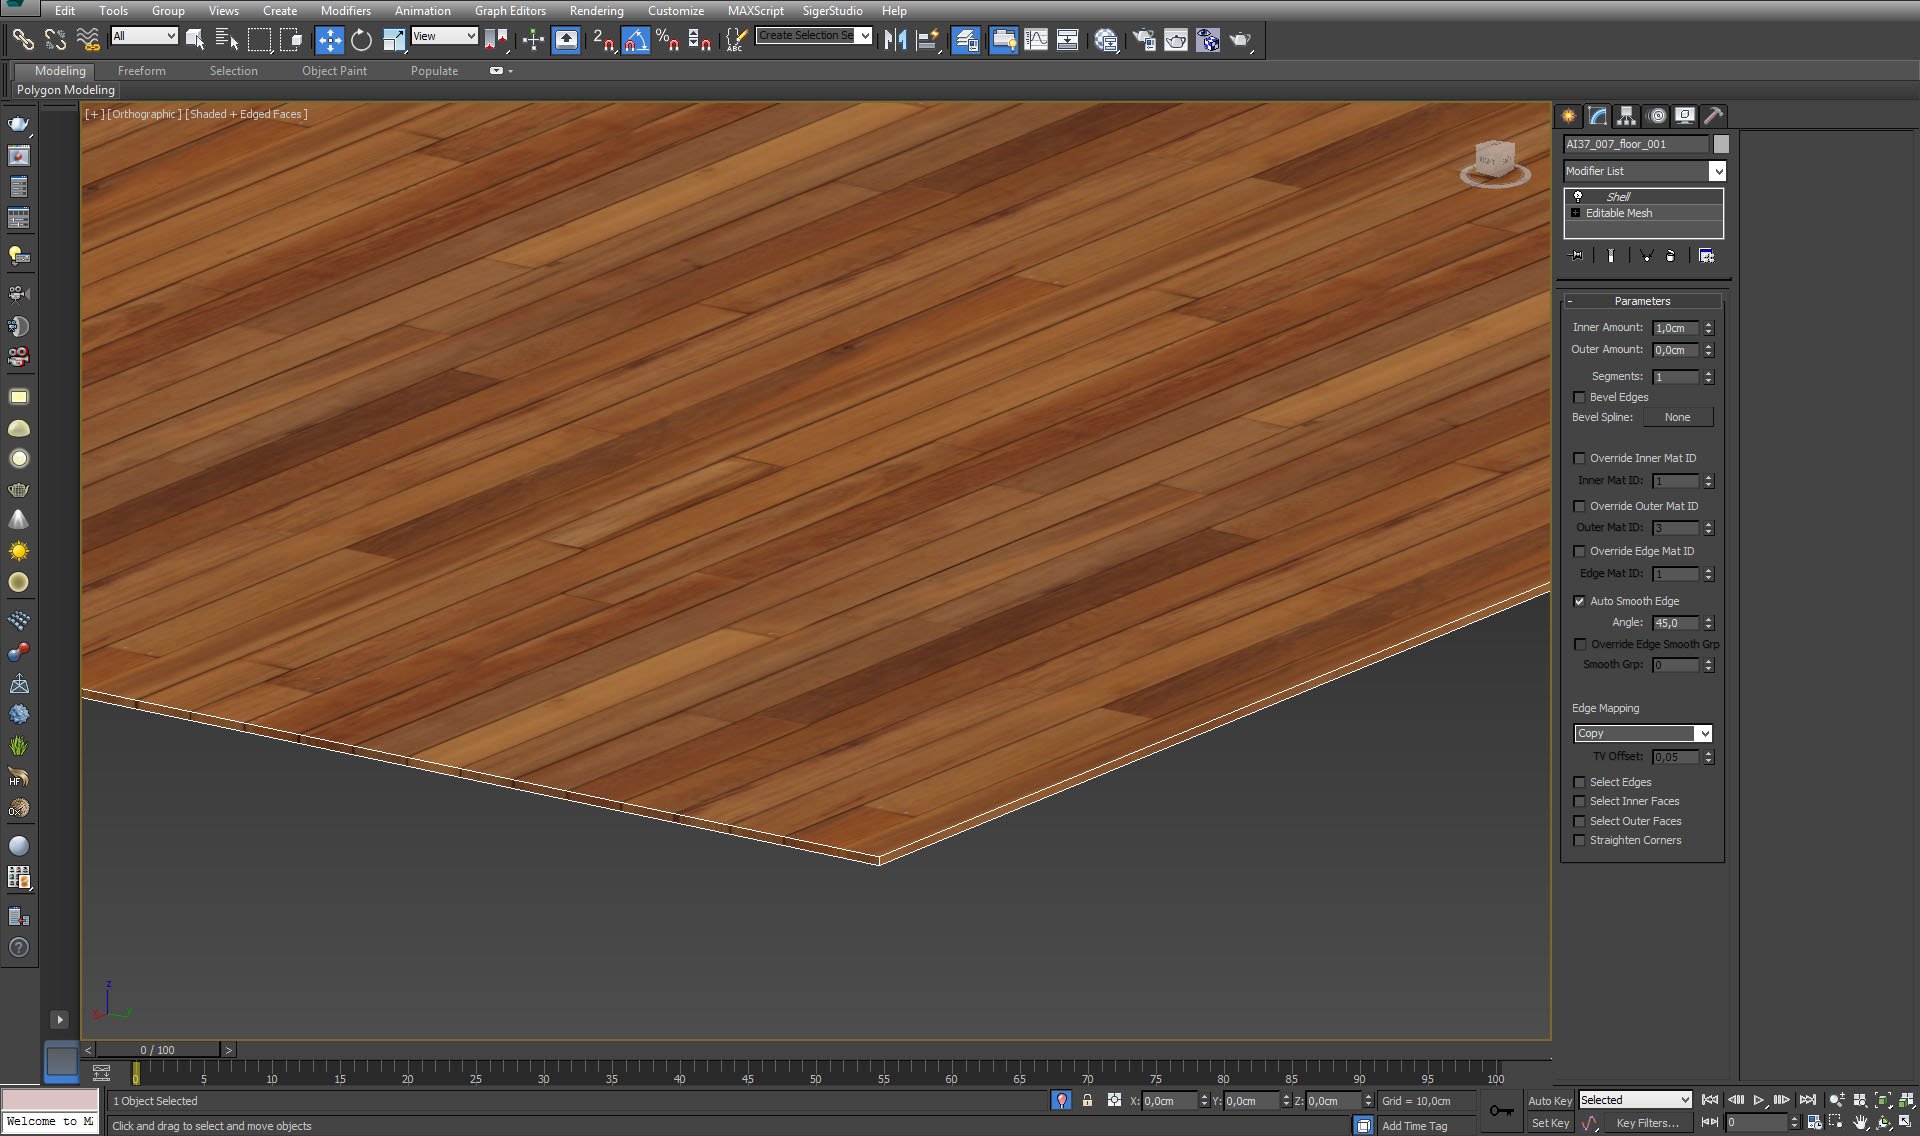
Floor box close-up.


Click on image to enlarge nr_AI37S07_0027_Layer_31_387.jpg

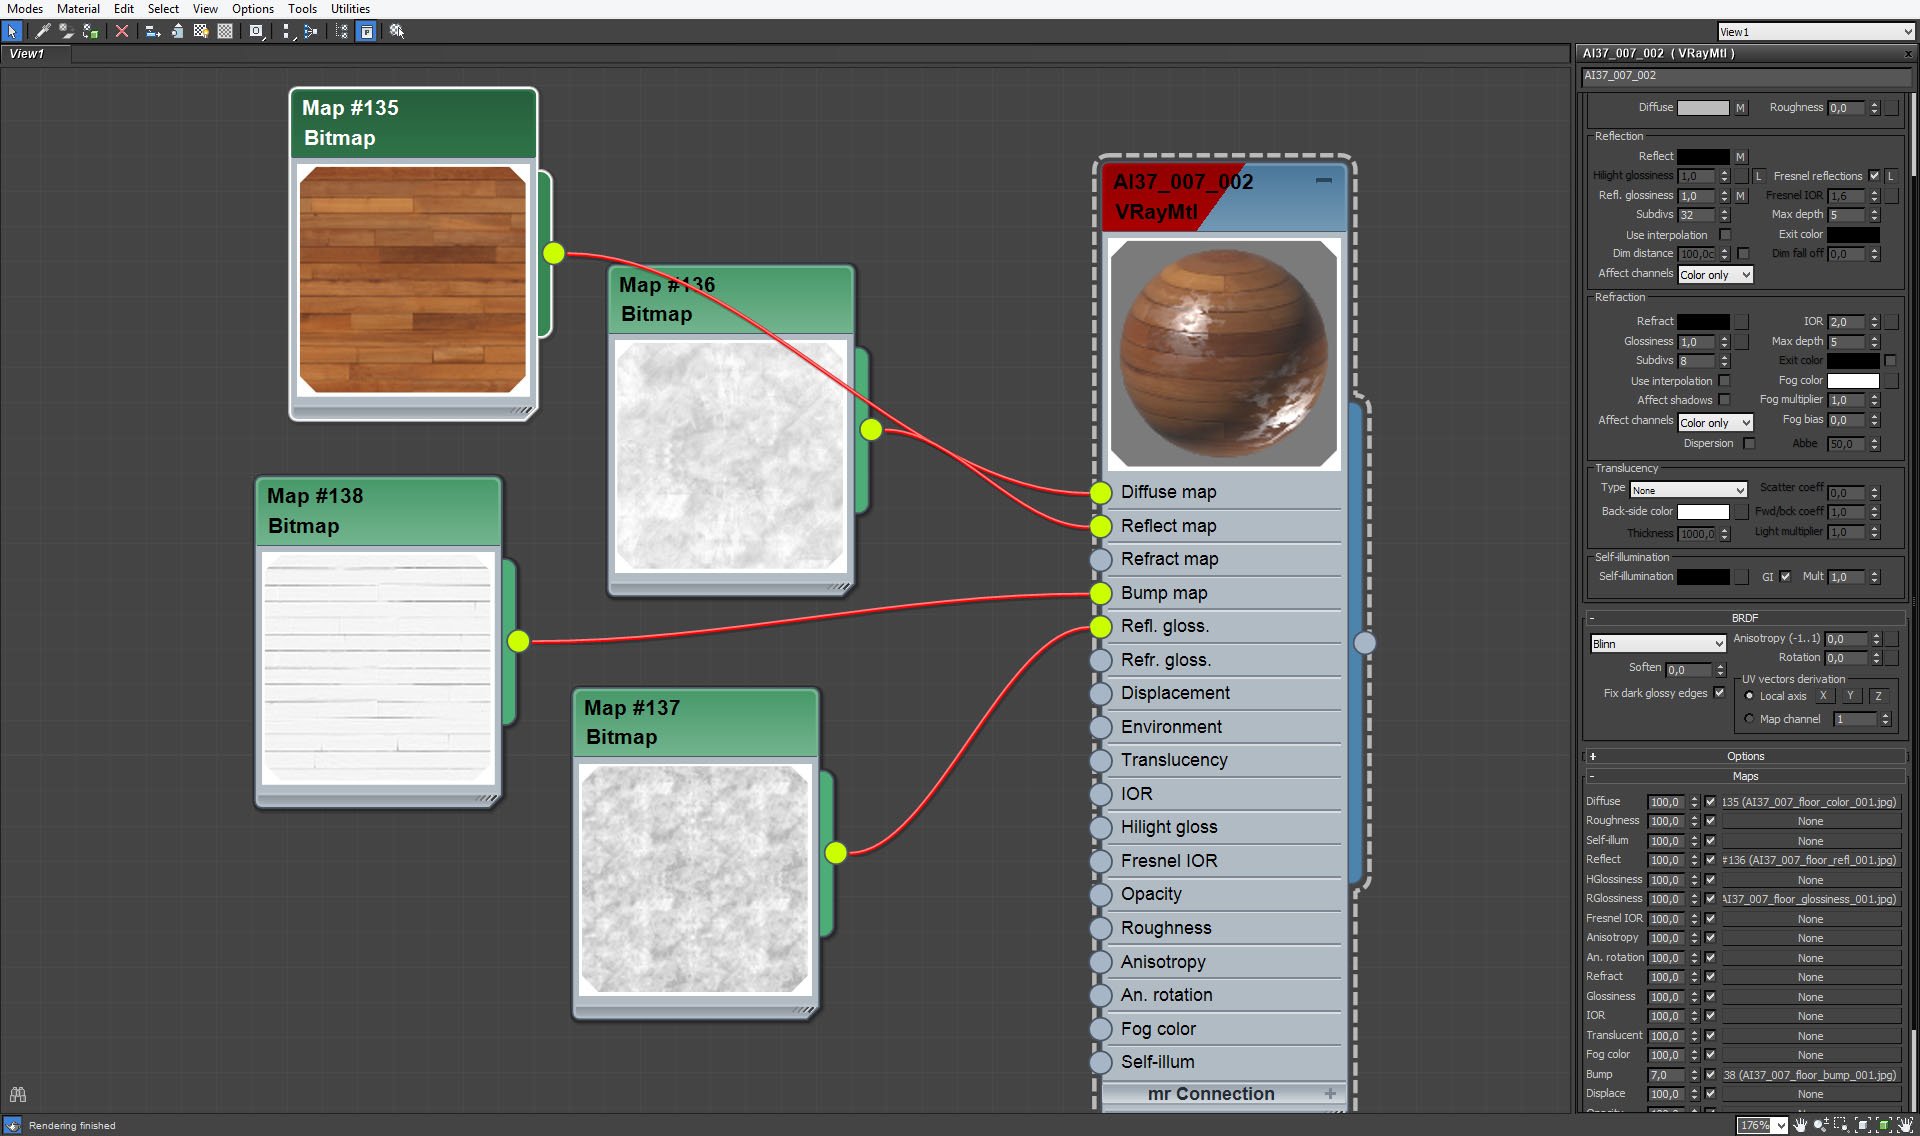
Floor material - boards are faked by bmp map, reflections are varied by bitmaps.


Click on image to enlarge nr_AI37S07_0026_Layer_32_386.jpg
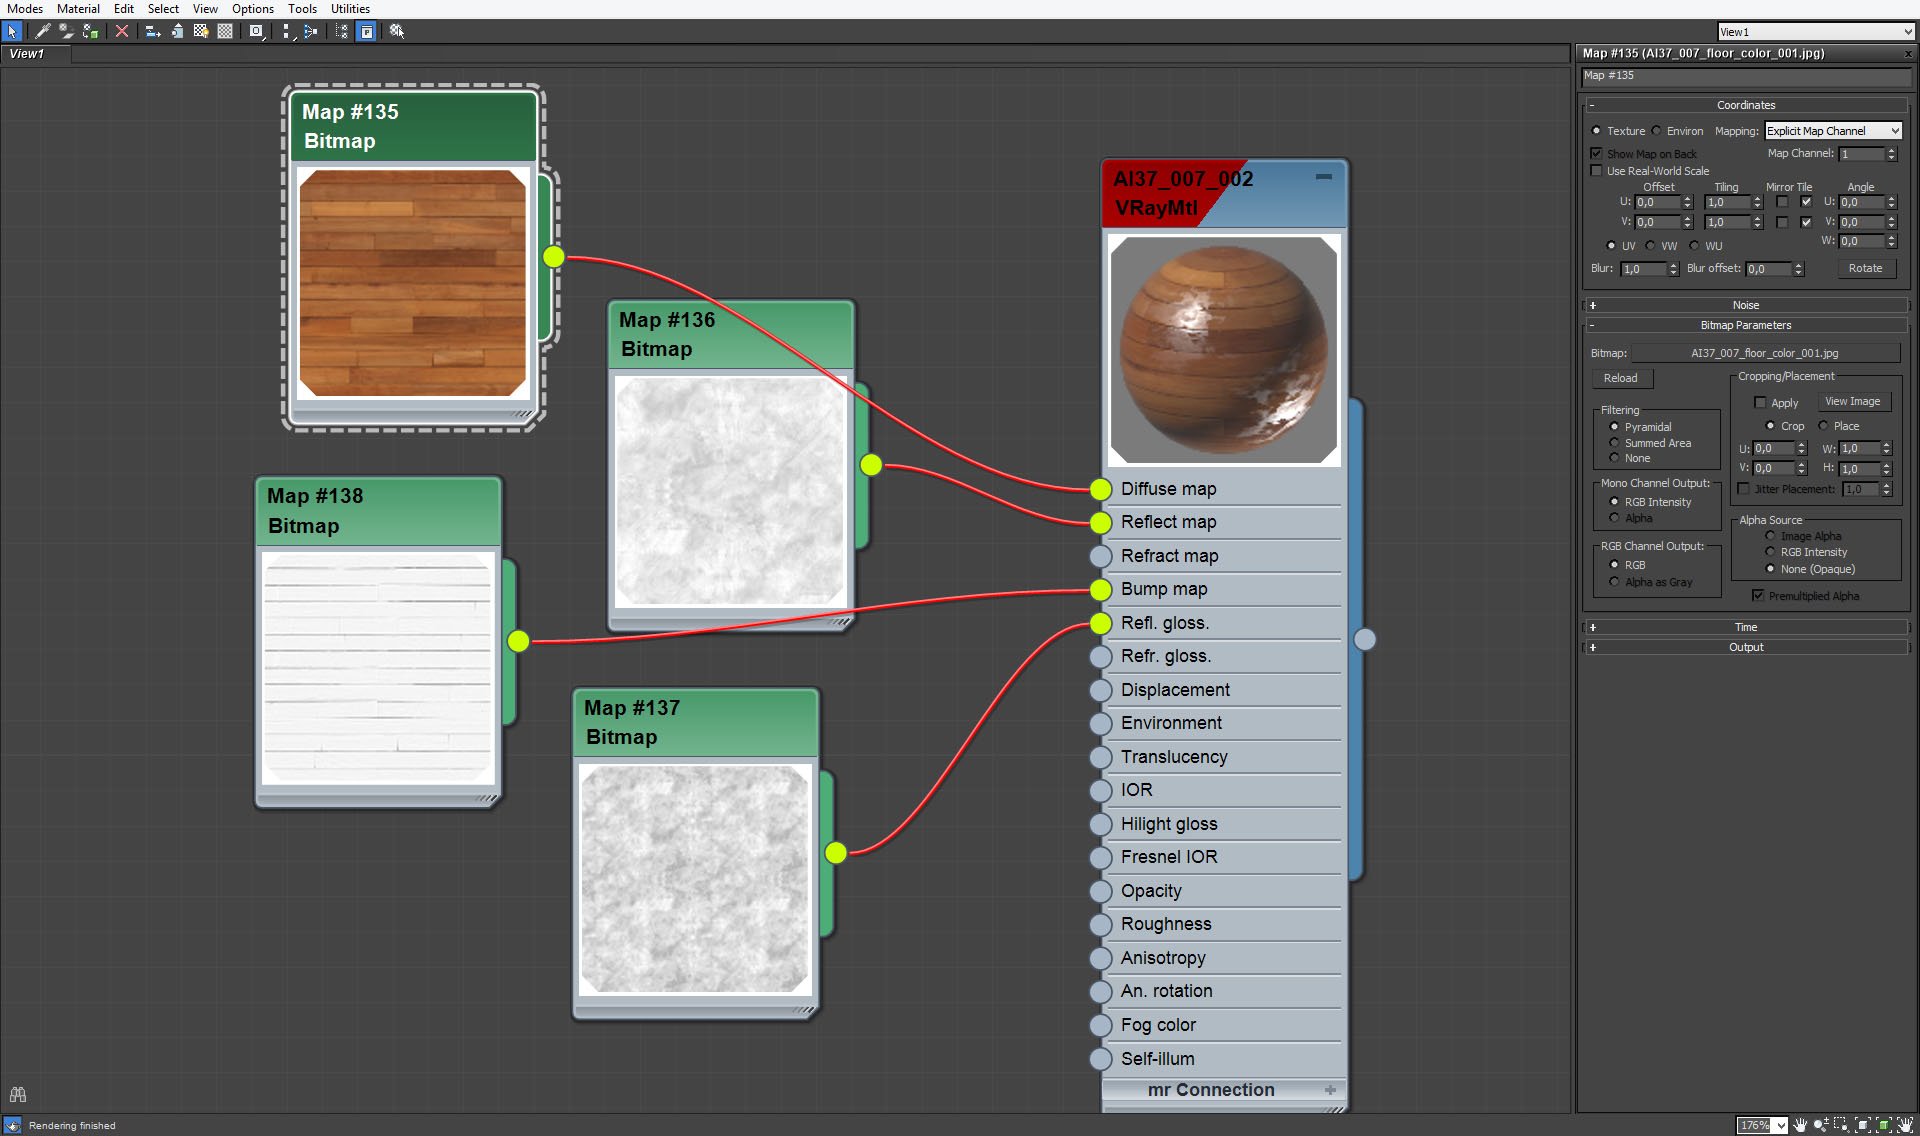
Floor diffuse map settings.


Click on image to enlarge nr_AI37S07_0025_Layer_33_385.jpg
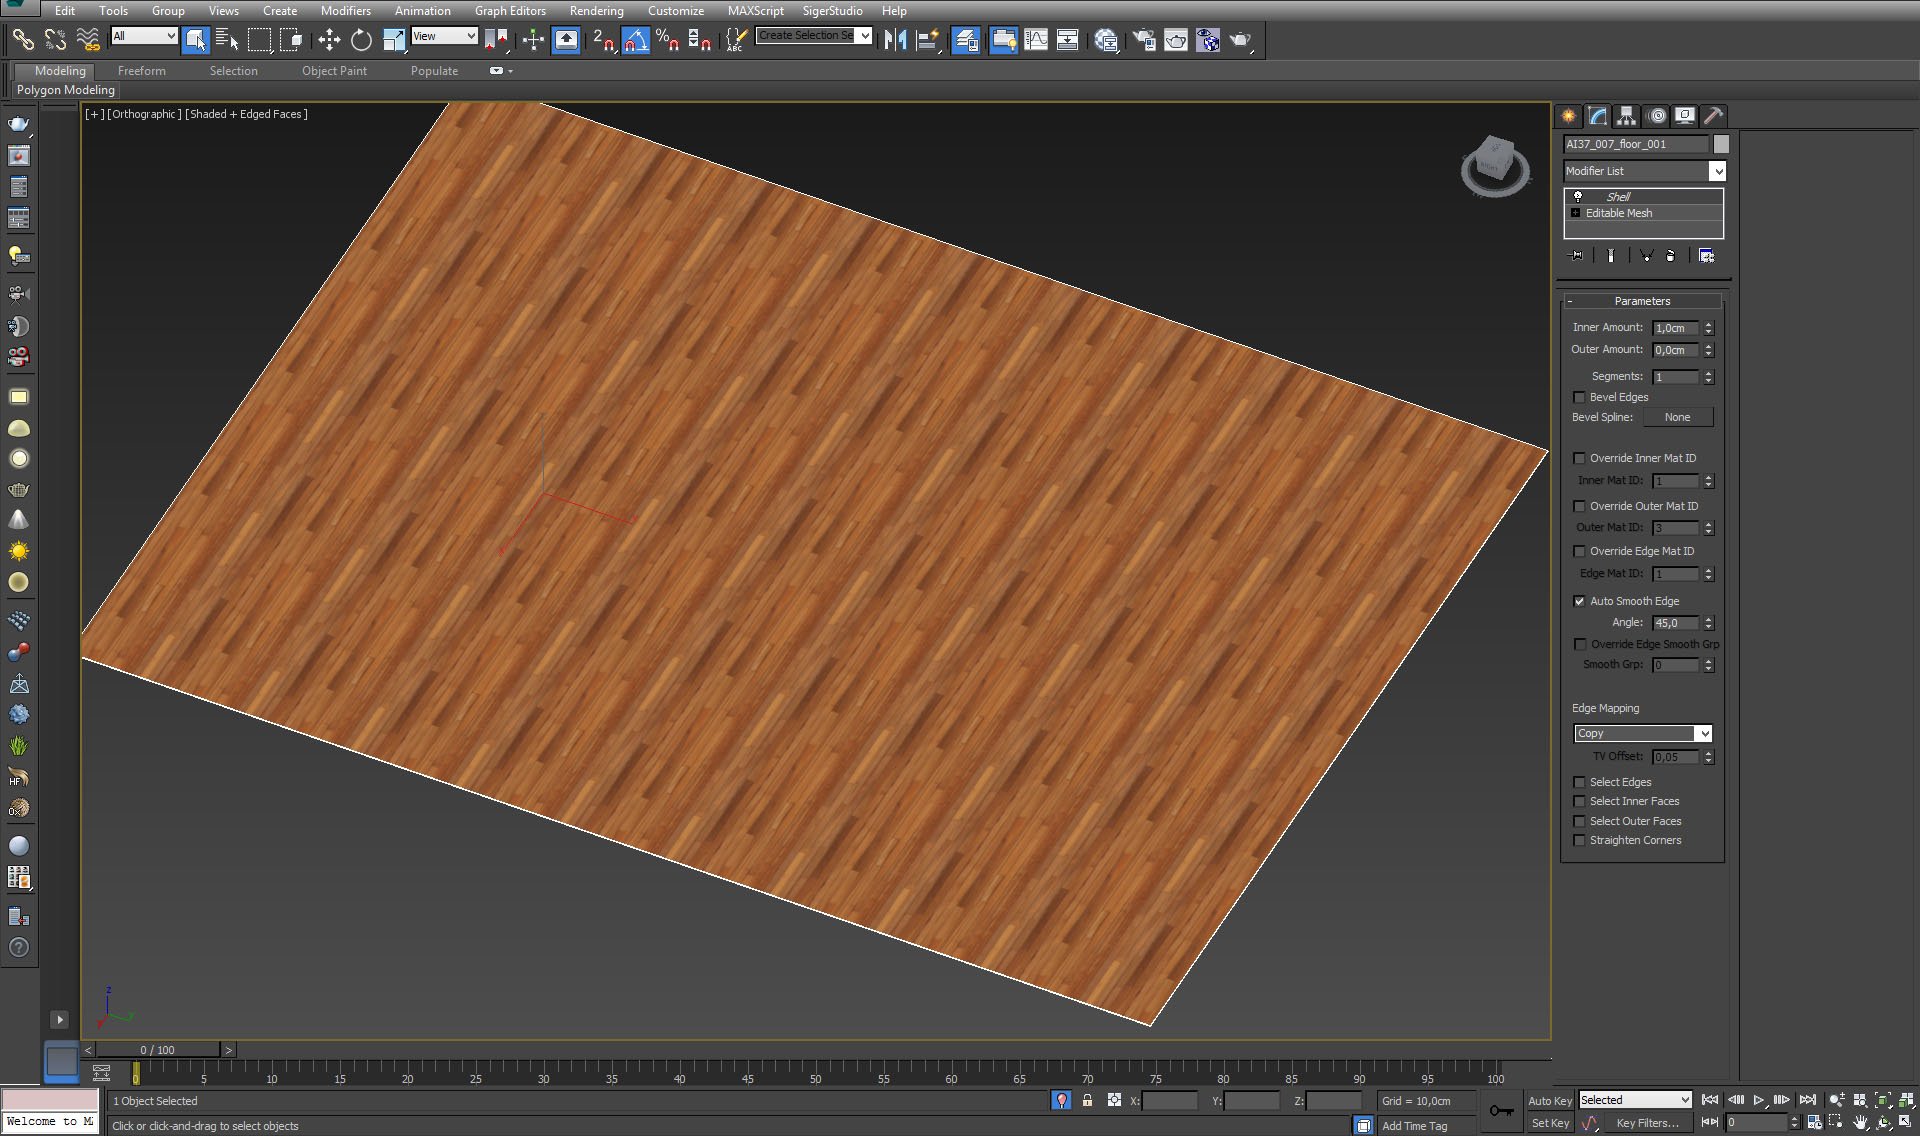
Floor texture has a tiling pattern, but it is only visible in viewport, not in camera.


Click on image to enlarge nr_AI37S07_0024_Layer_34_384.jpg
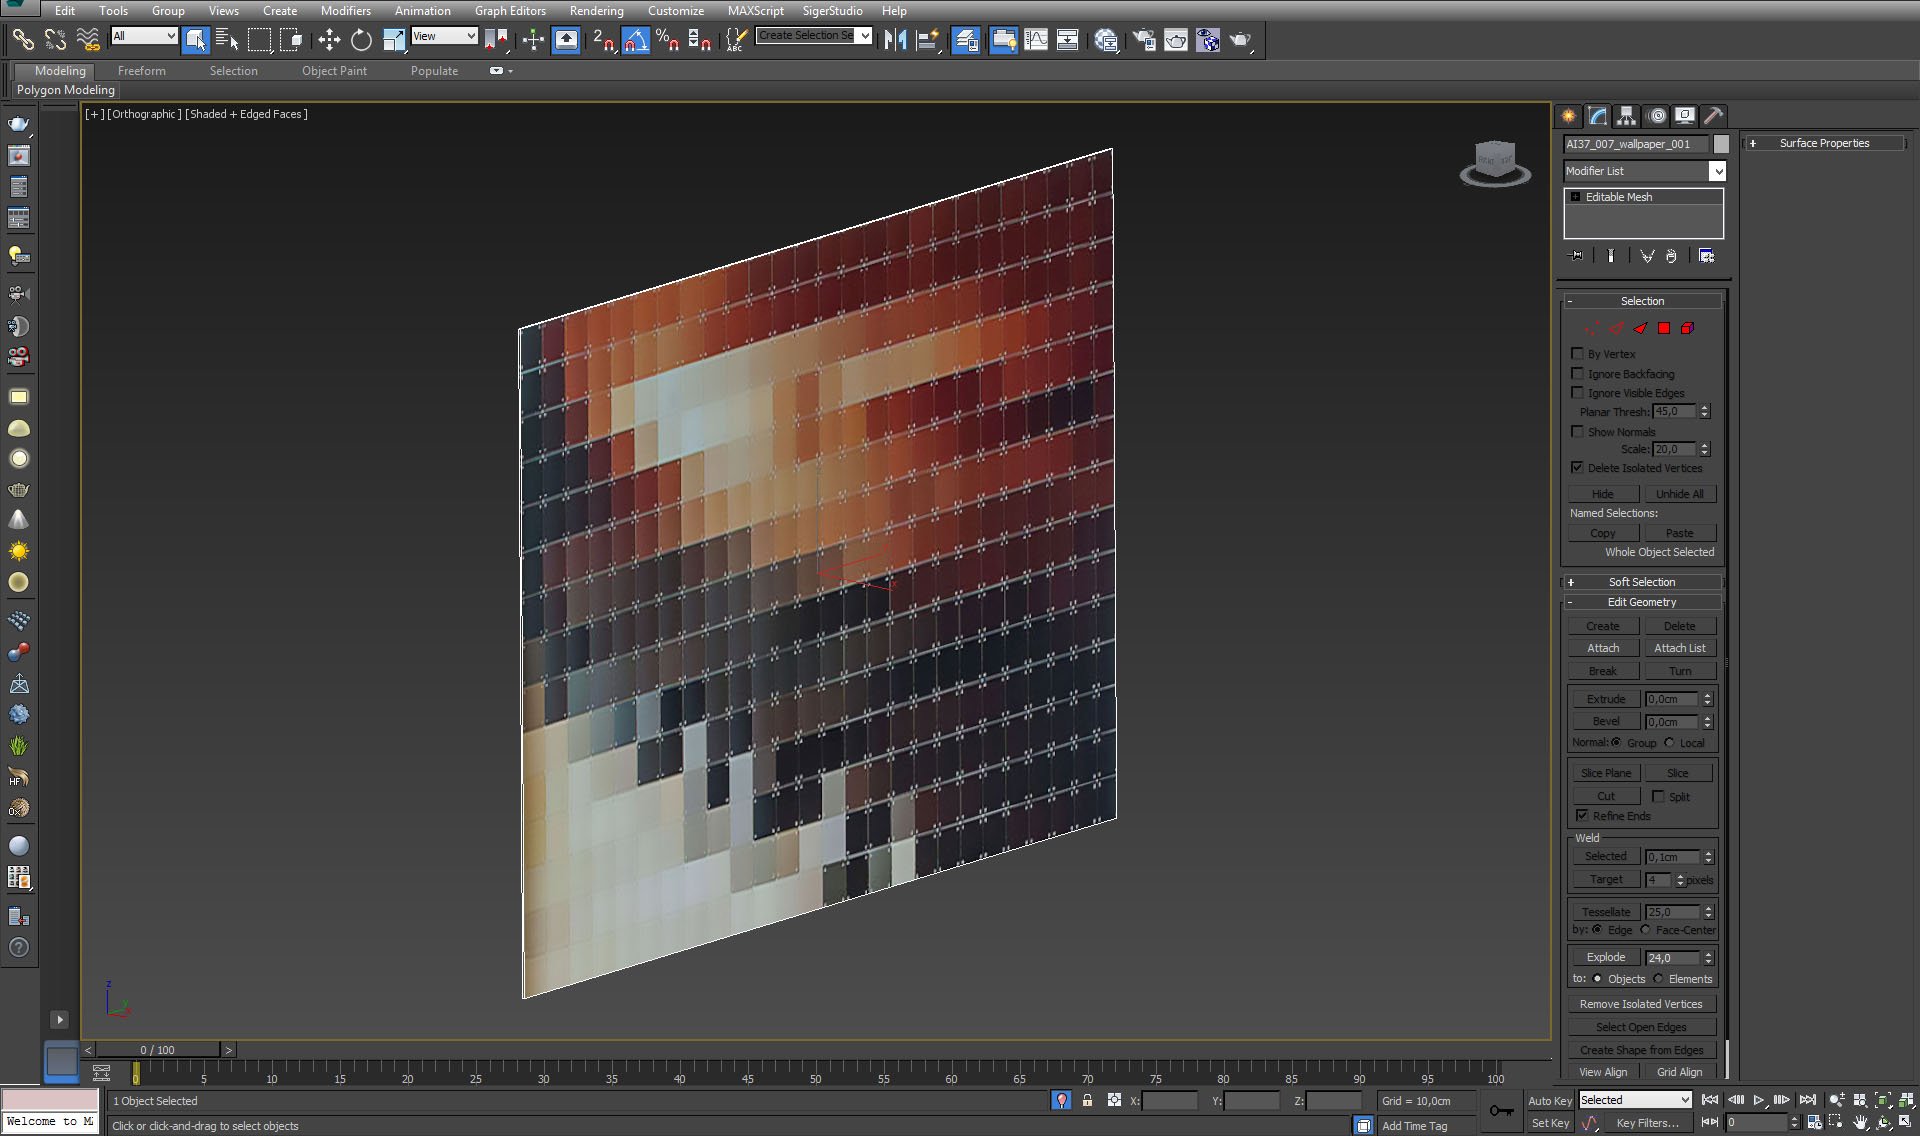
The left wall - simple box with square pattern material.


Click on image to enlarge nr_AI37S07_0023_Layer_35_383.jpg
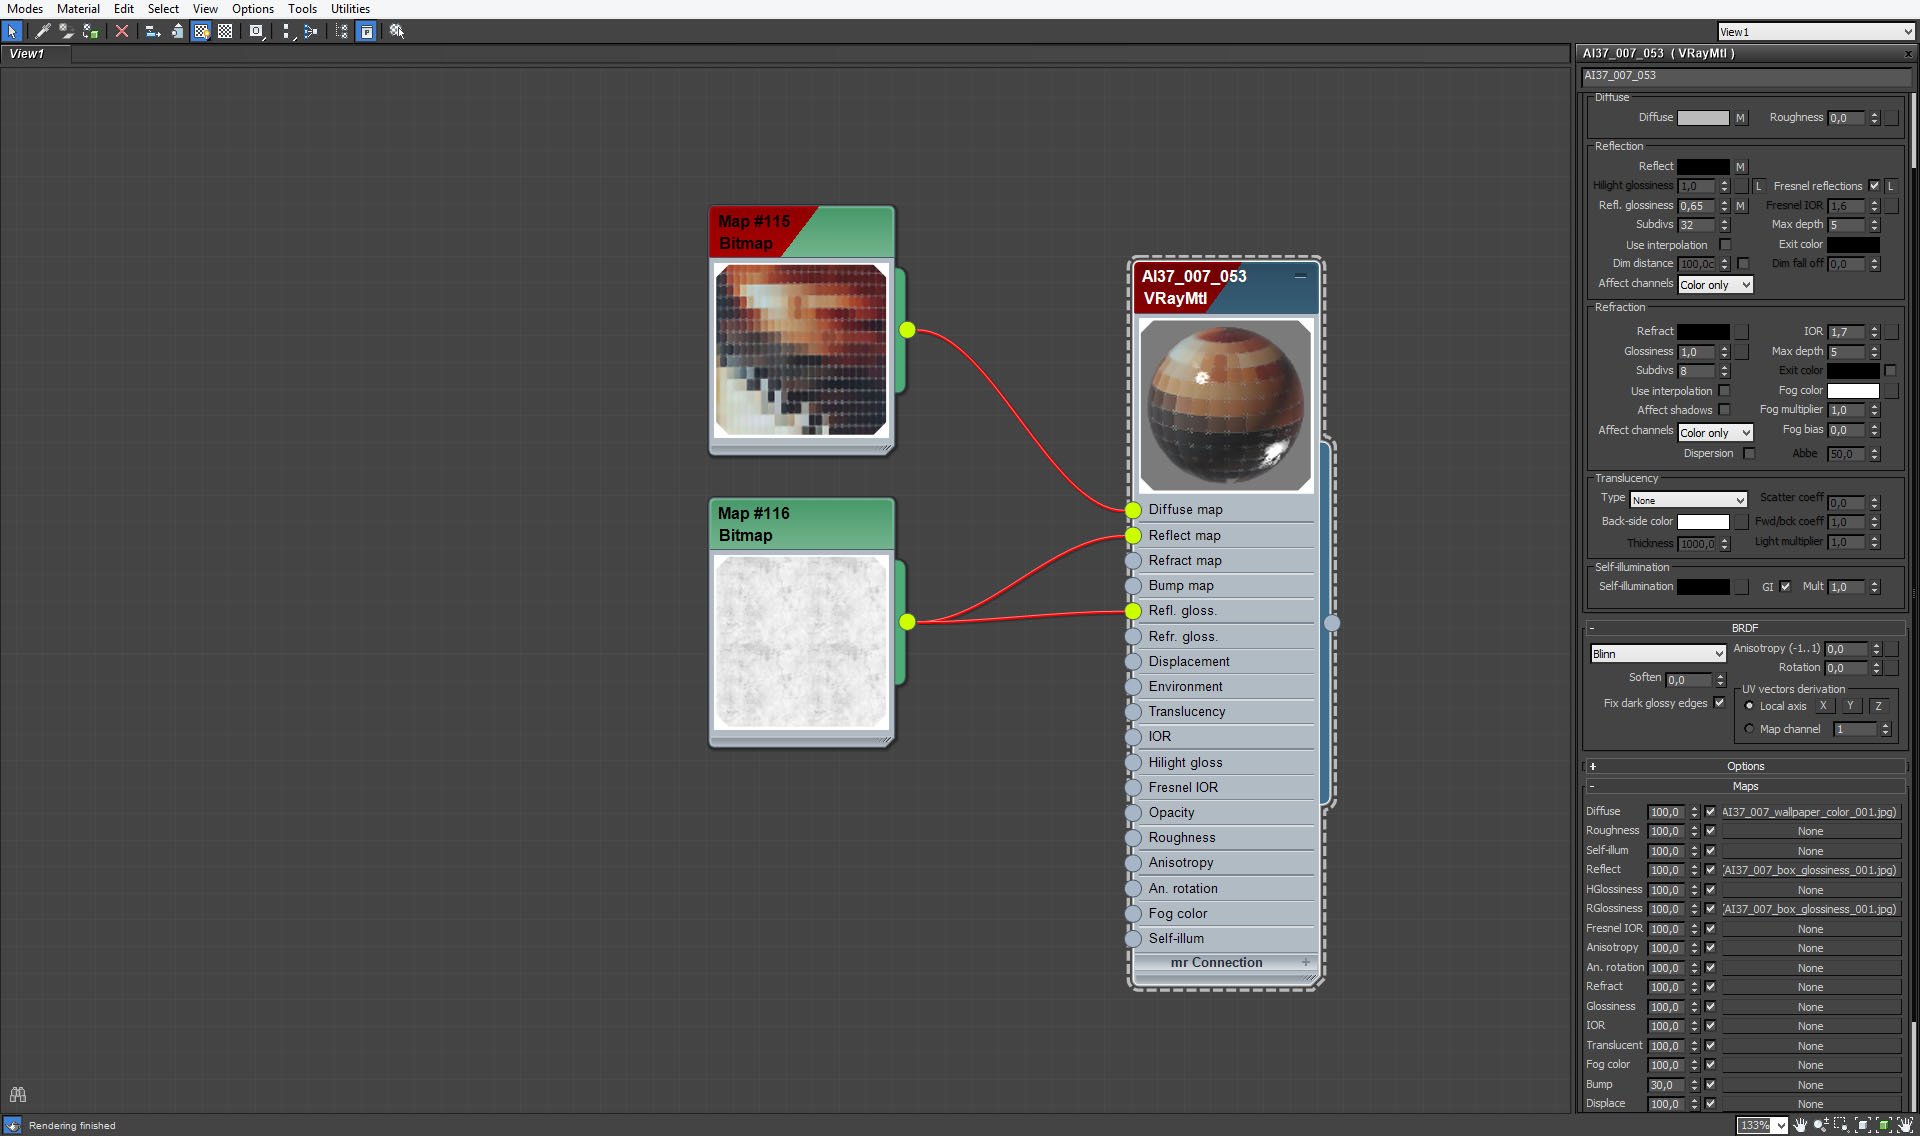
Wall material.


Click on image to enlarge nr_AI37S07_0022_Layer_36_382.jpg

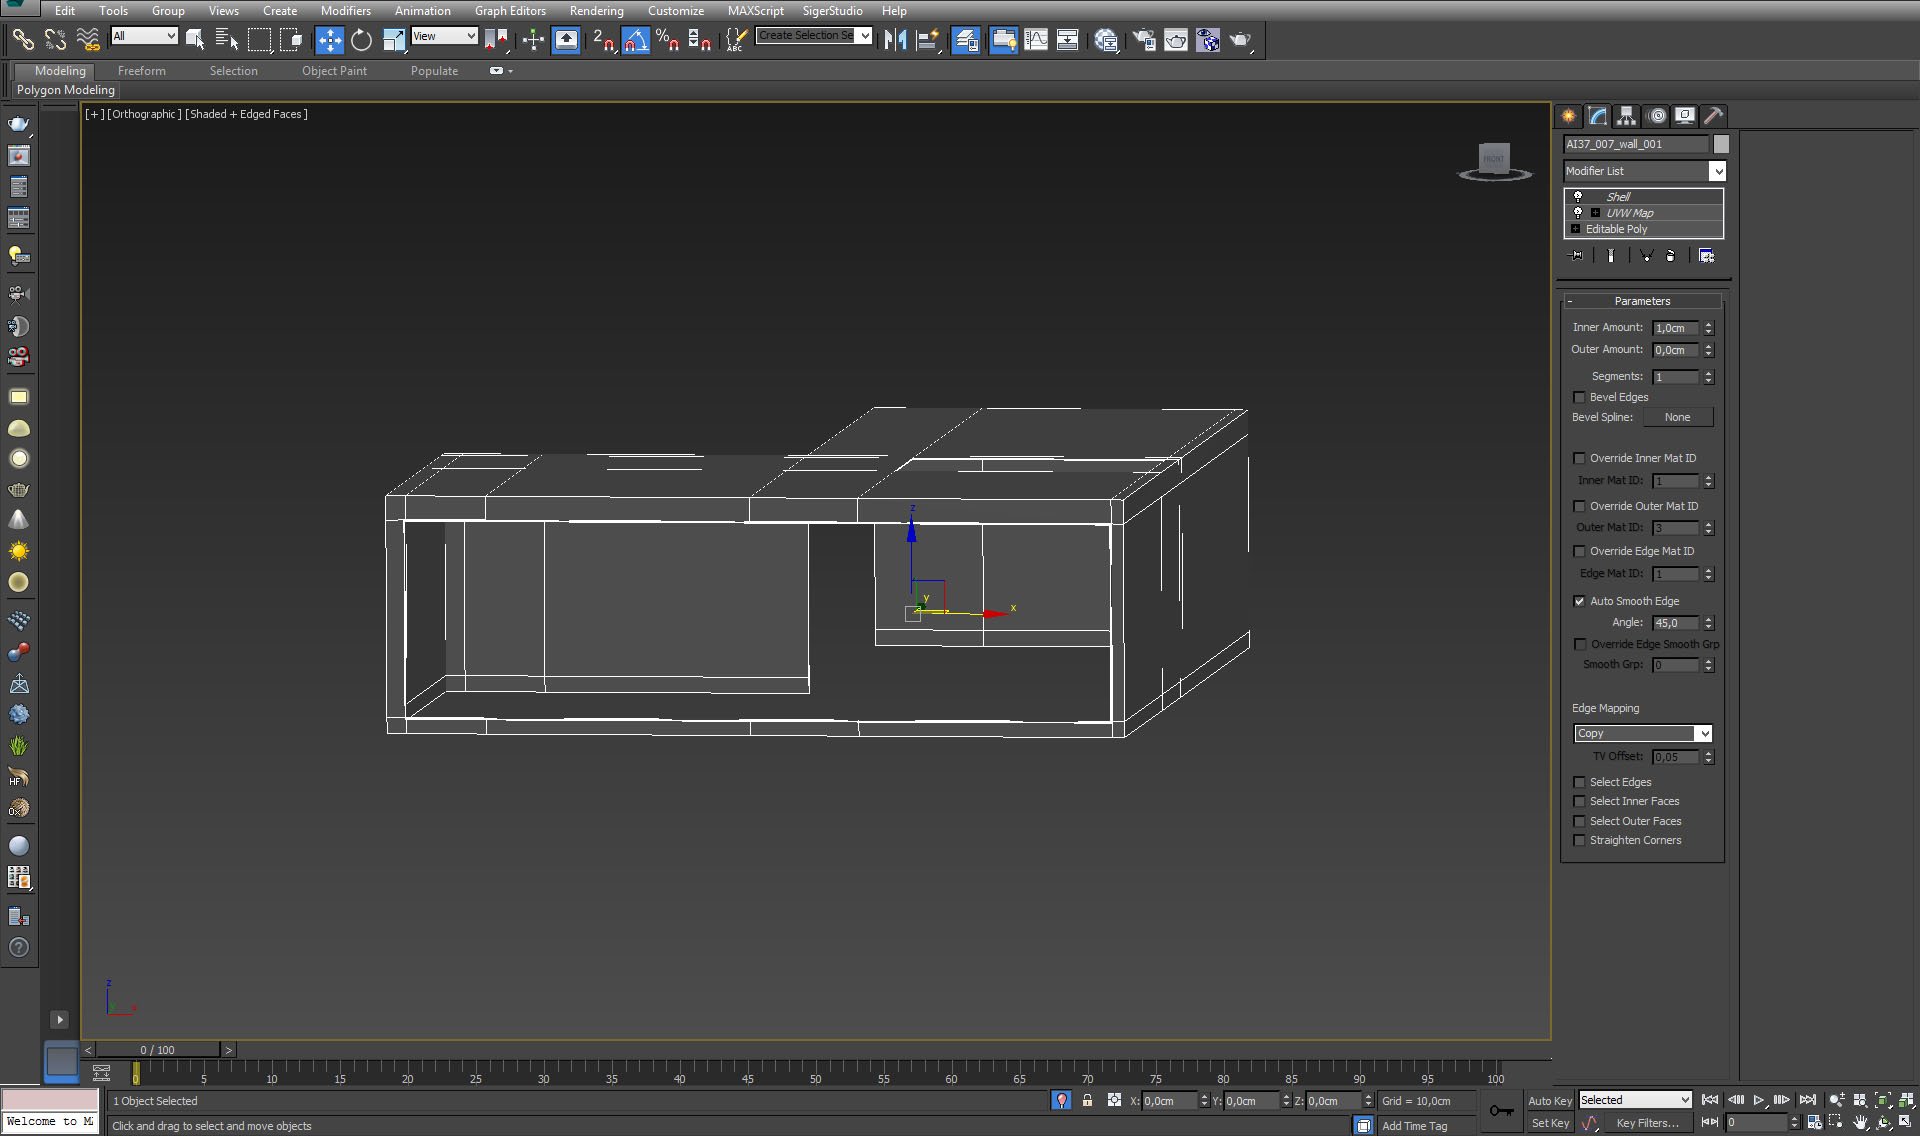
Other walls and ceiling mesh.


Click on image to enlarge nr_AI37S07_0021_Layer_37_381.jpg
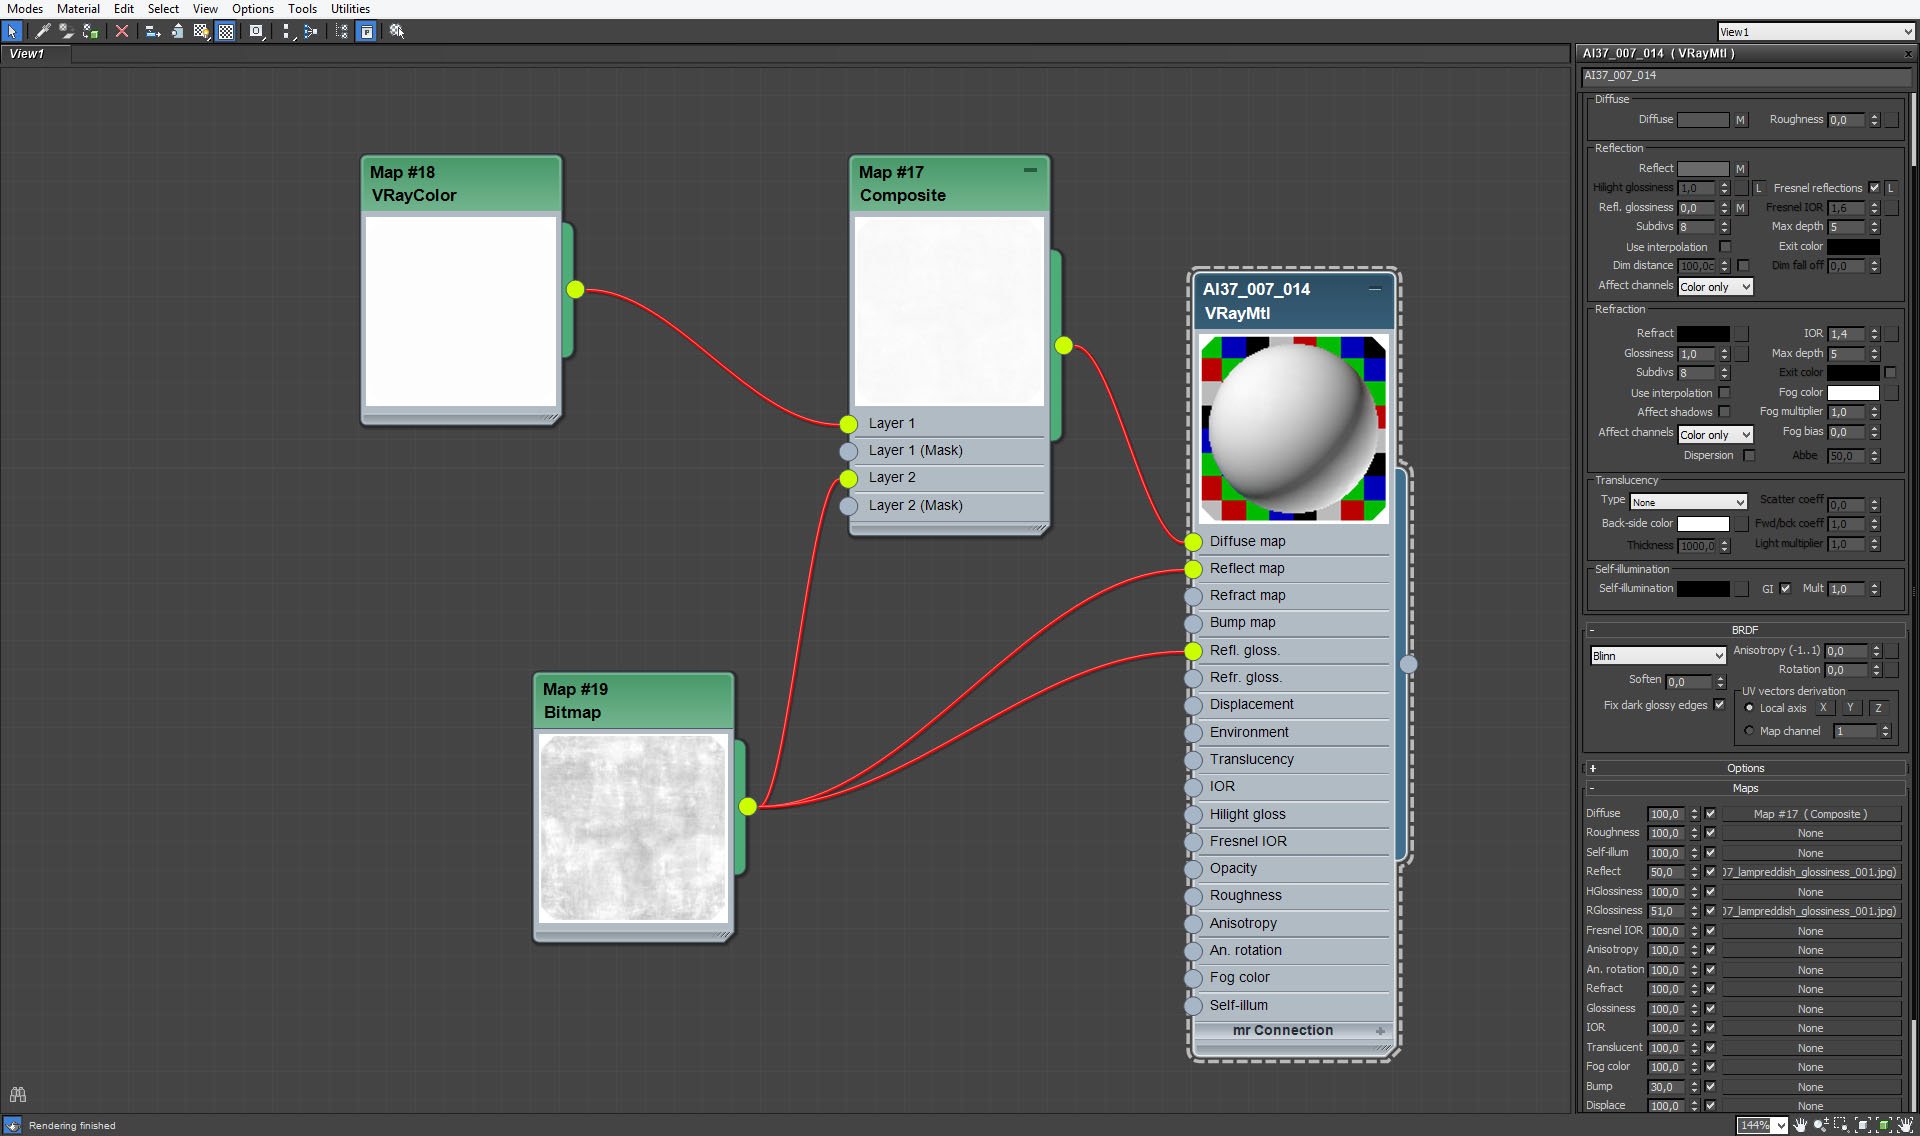
Walls material.


Click on image to enlarge nr_AI37S07_0020_Layer_38_380.jpg

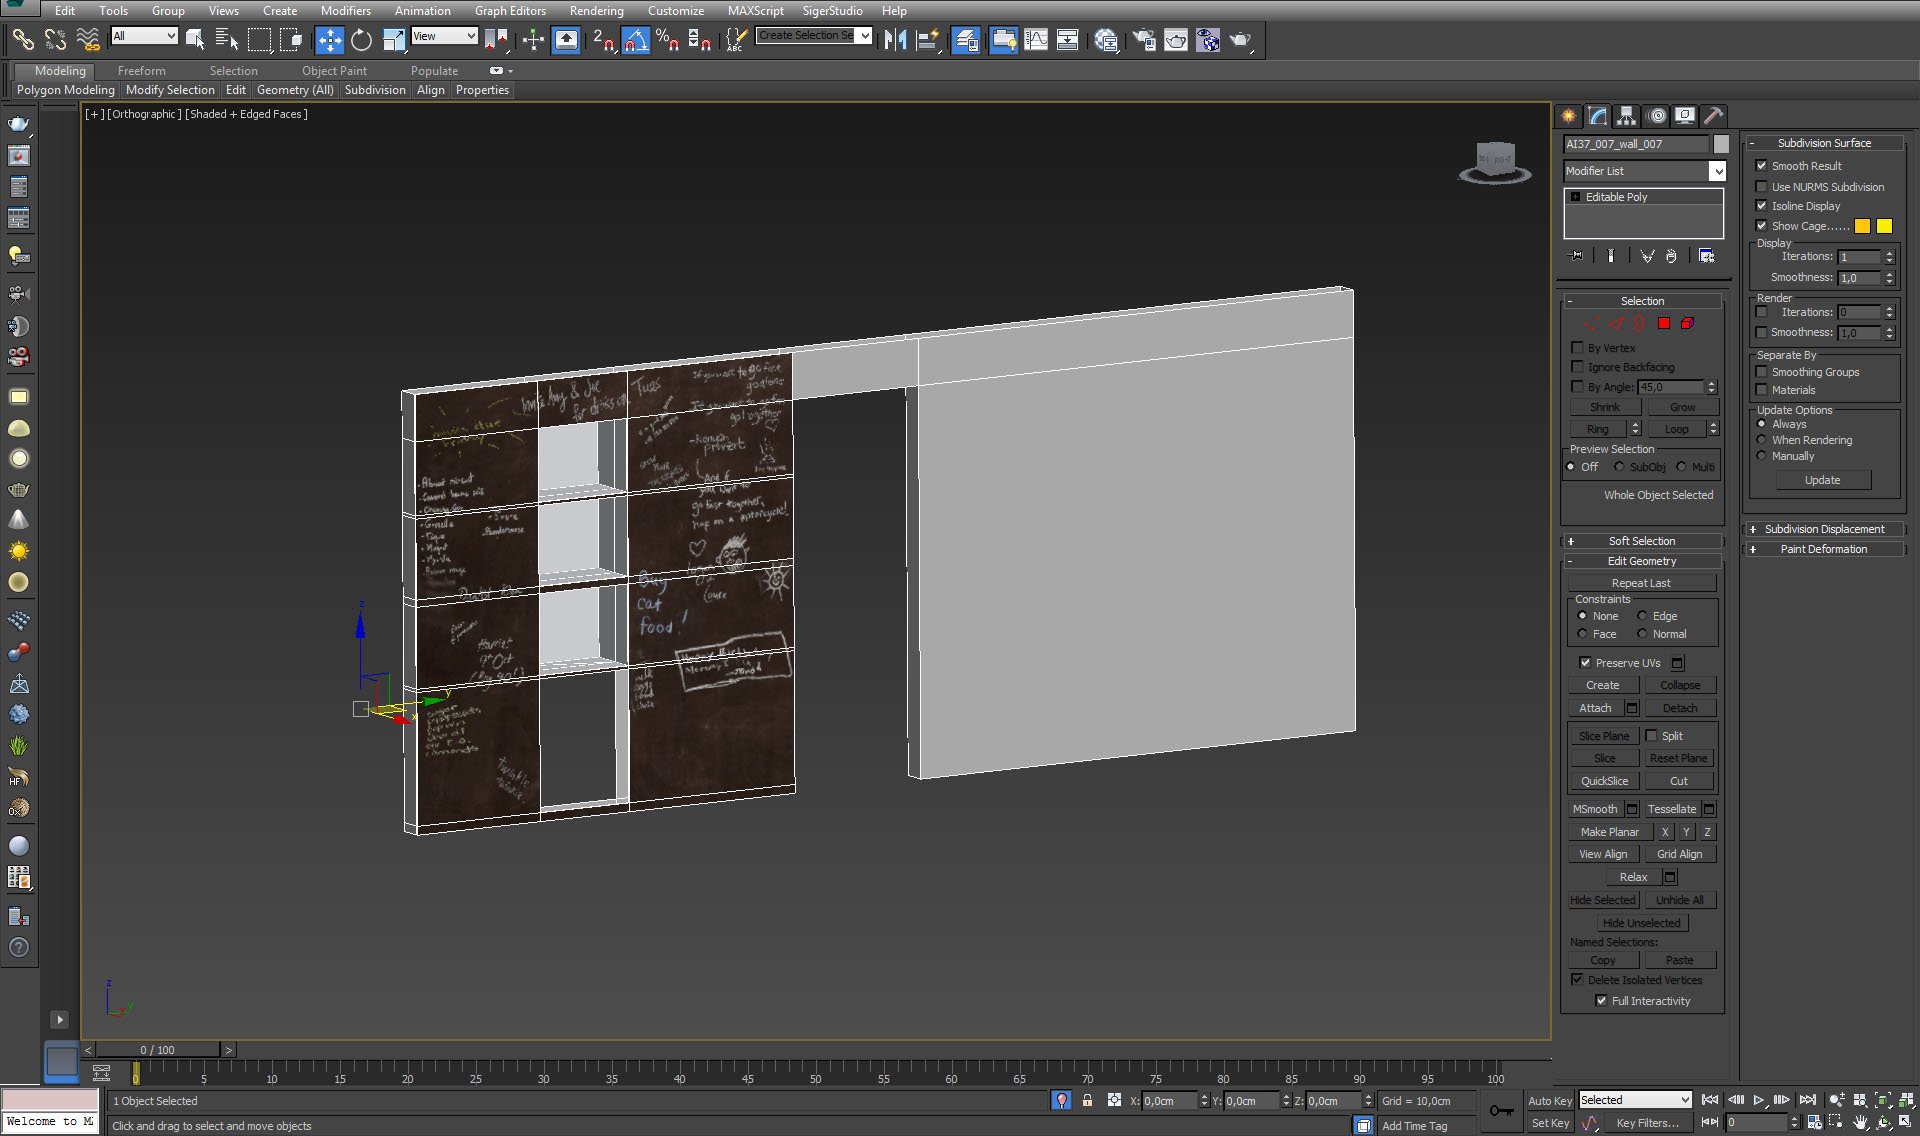
Blackboard wall gives a comfy look of a flat that is inhabited by a loving family with children.


Click on image to enlarge nr_AI37S07_0019_Layer_39_379.jpg
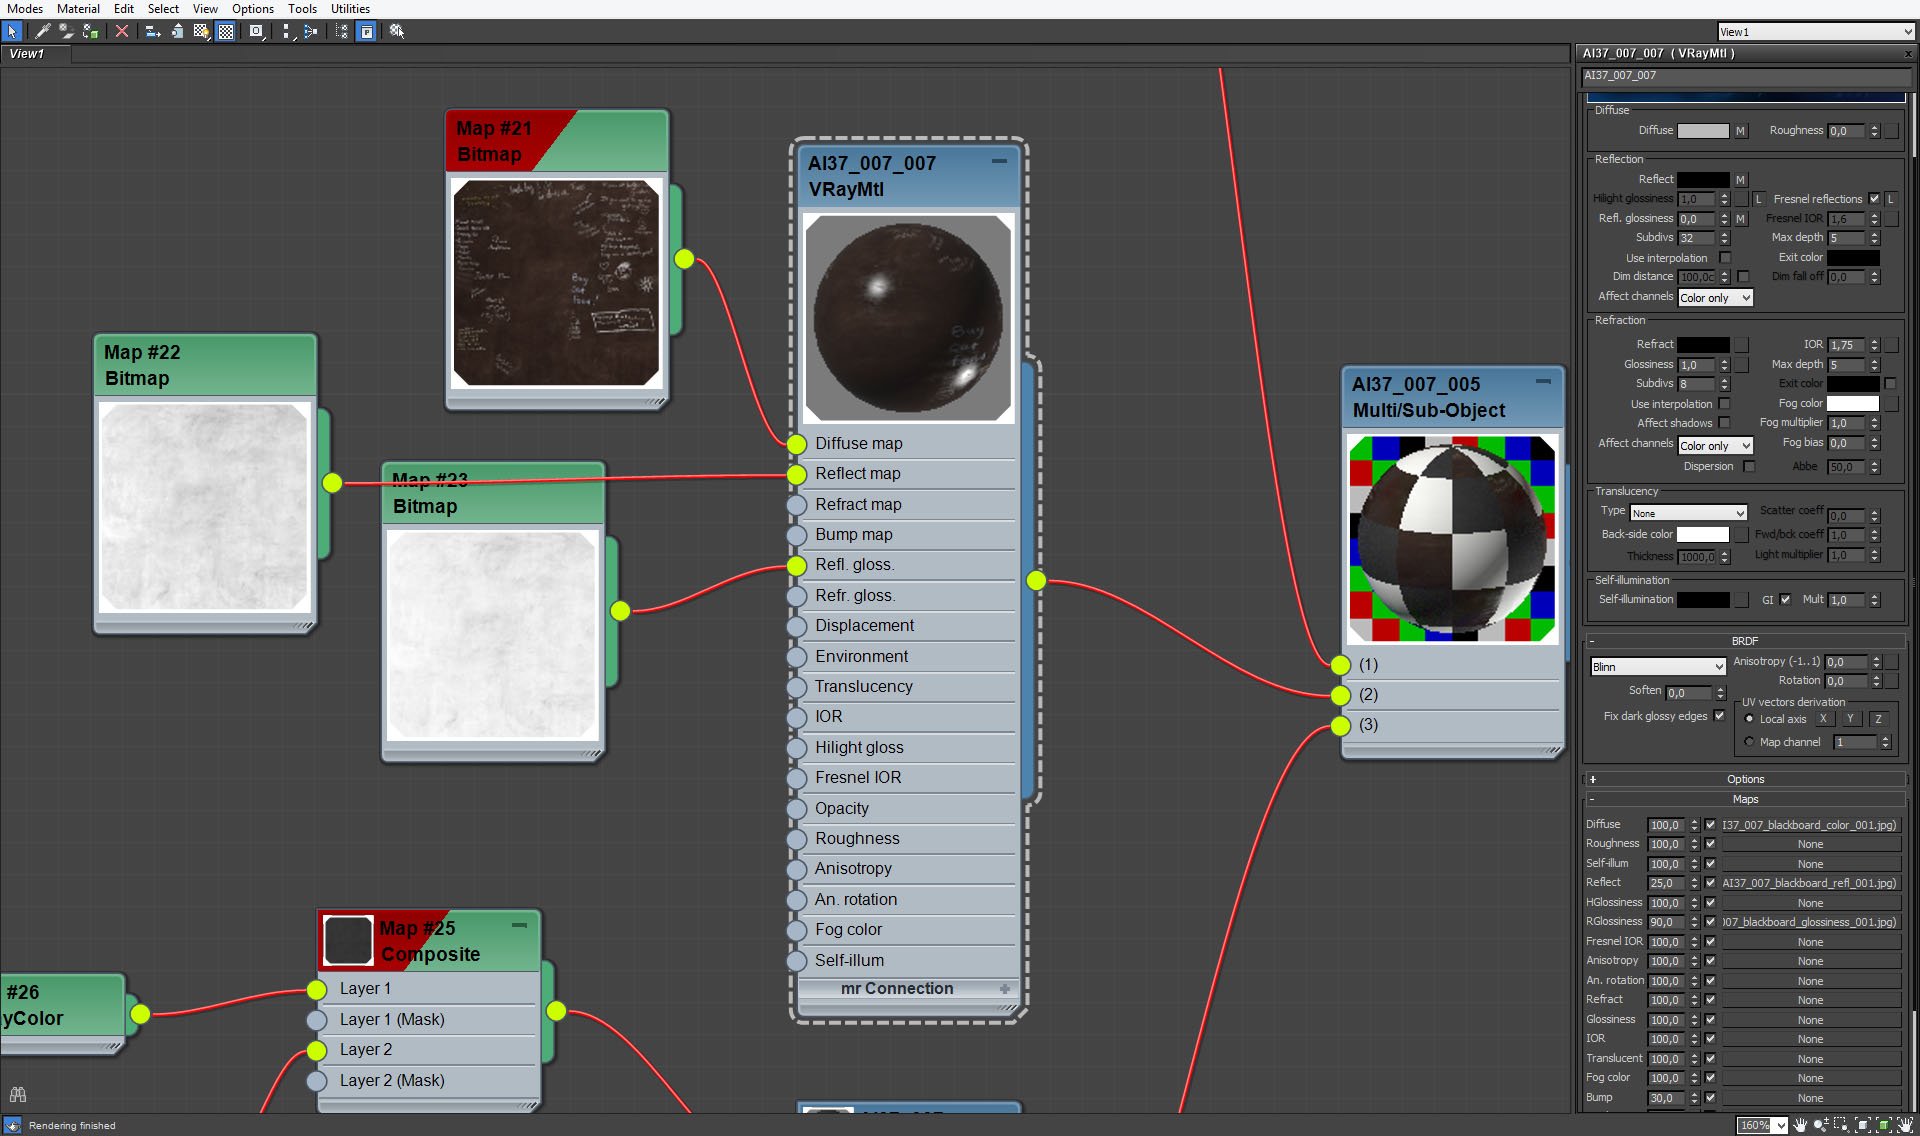
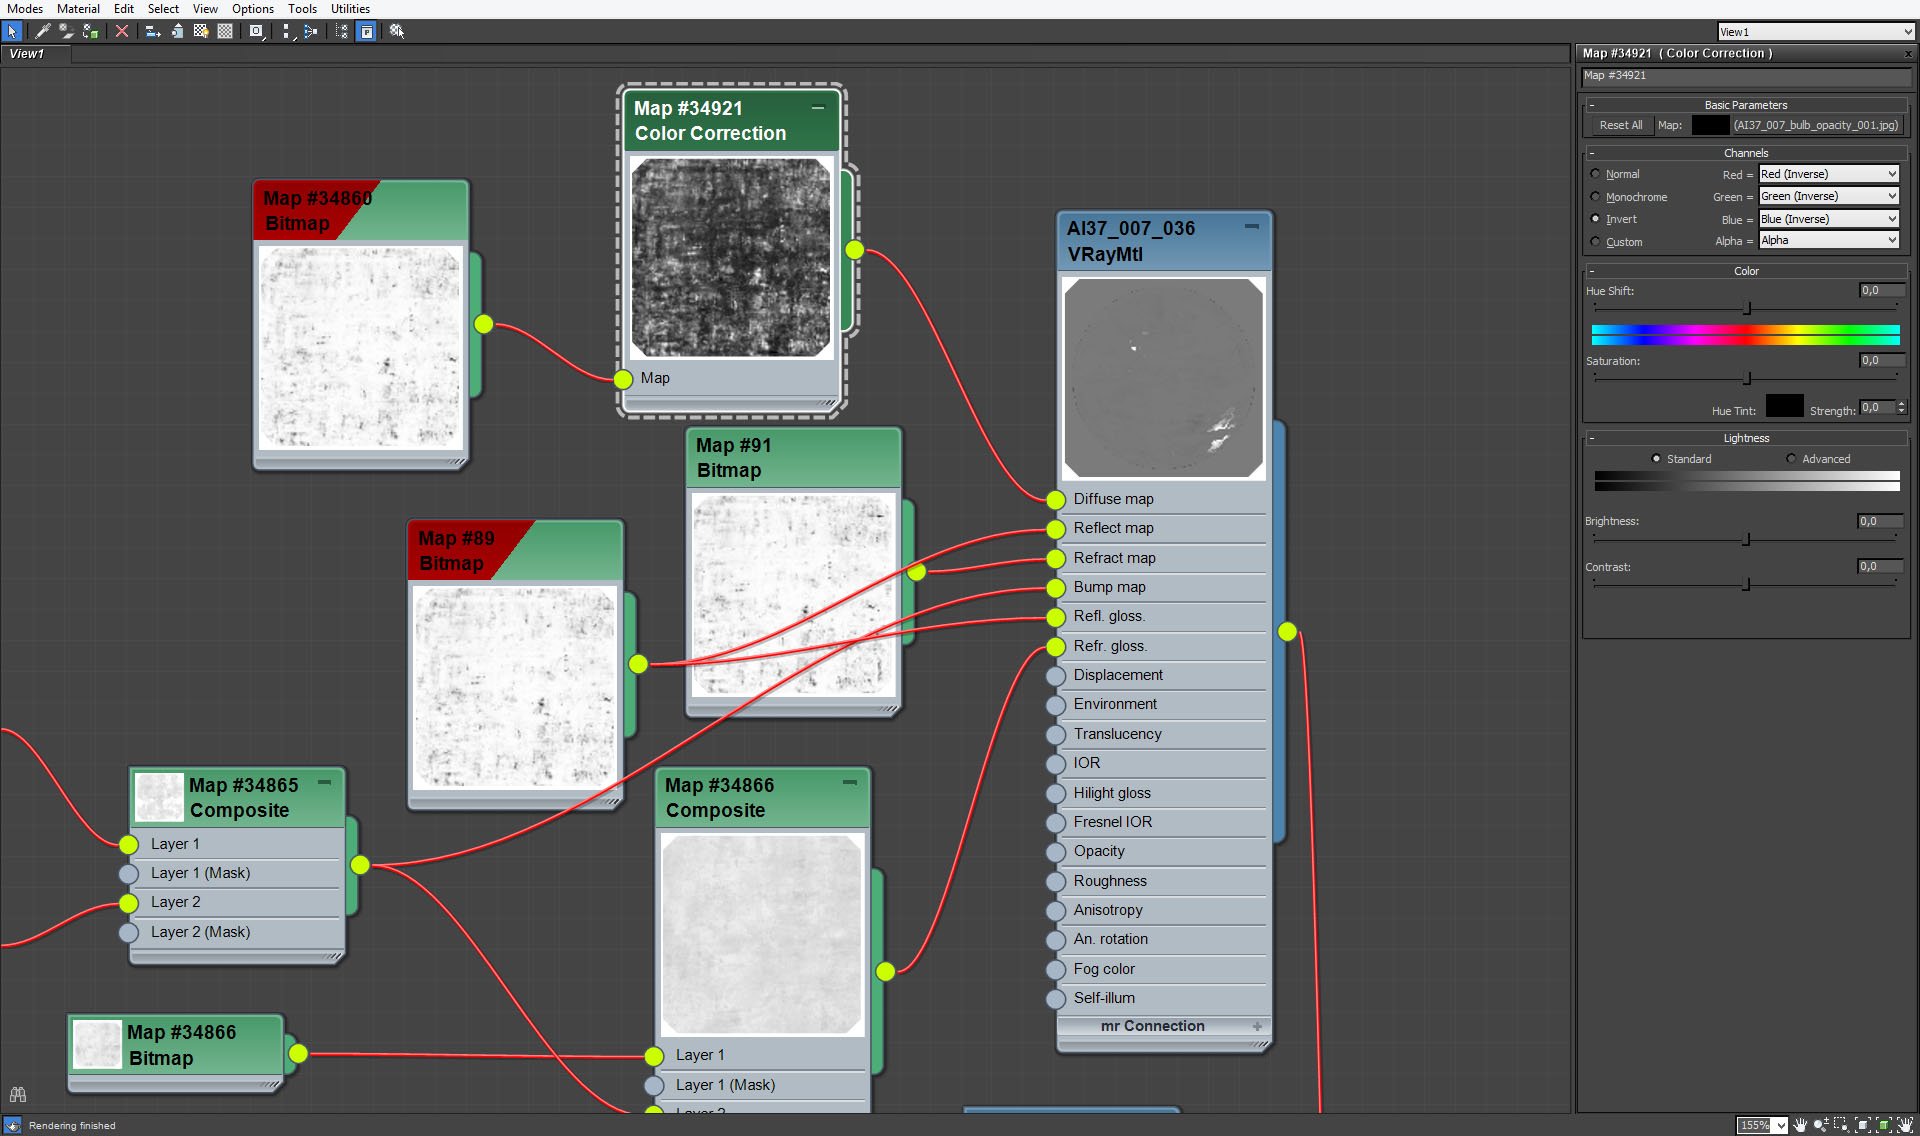
Blackboard wall material.


Click on image to enlarge nr_AI37S07_0018_Layer_40_378.jpg
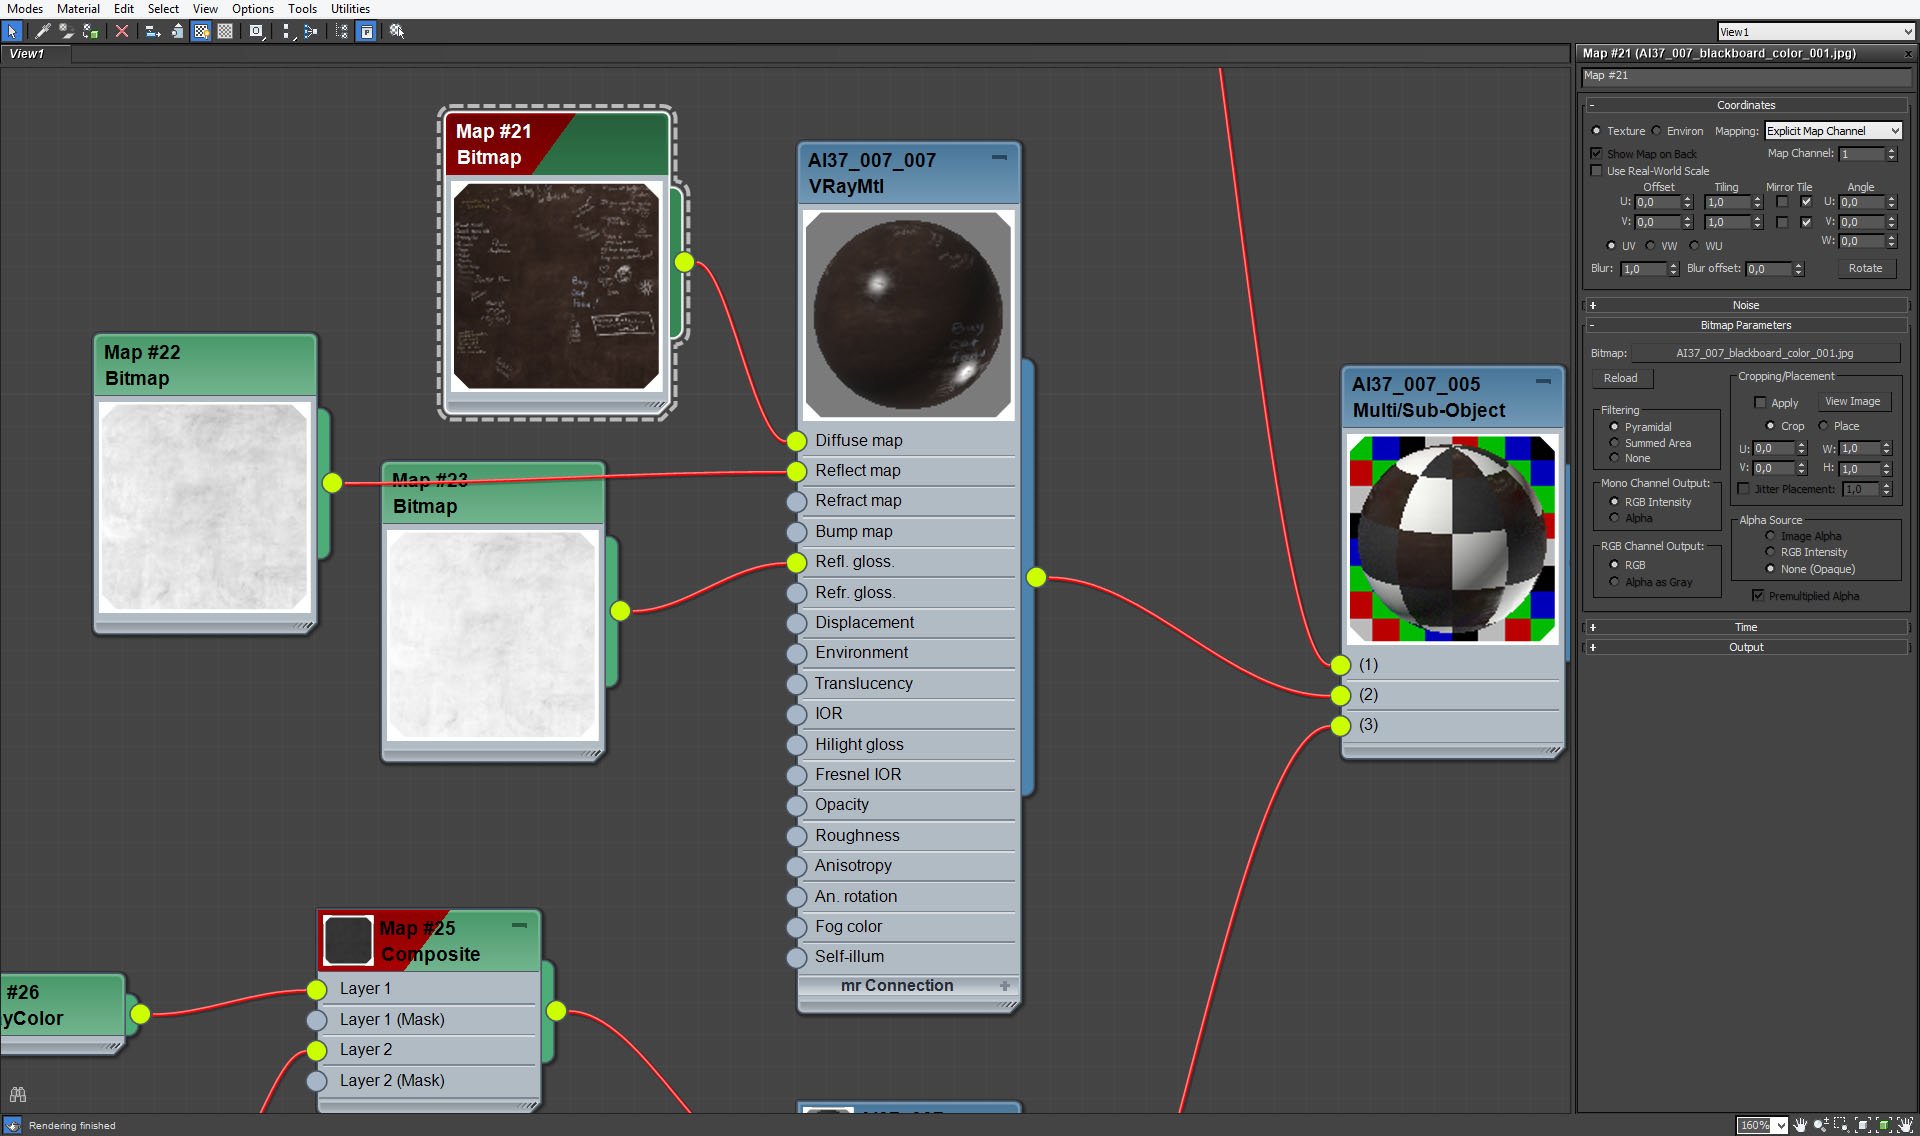
Blackboard wall material - diffuse map settings.


Click on image to enlarge nr_AI37S07_0017_Layer_41_377.jpg
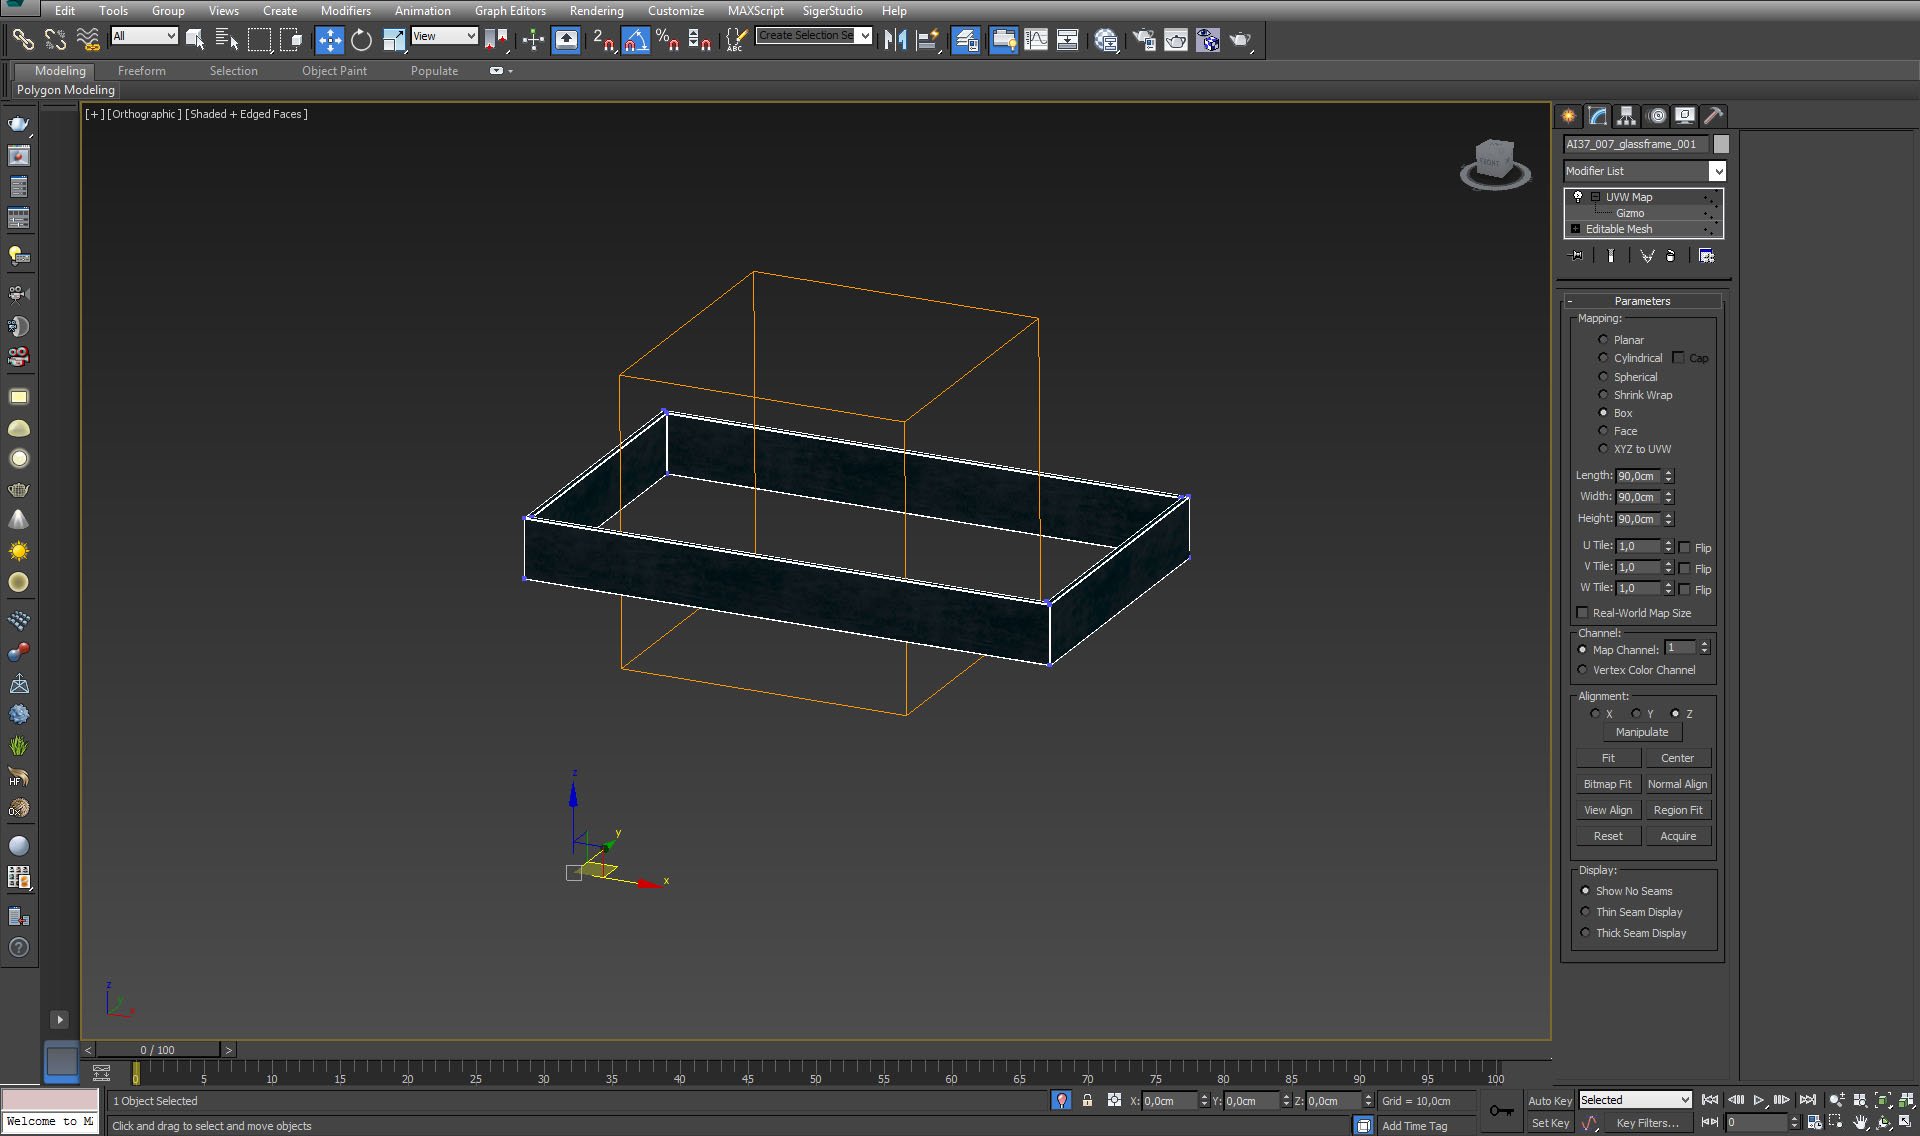
The section in the ceiling - mesh with UVW box mapping.


Click on image to enlarge nr_AI37S07_0016_Layer_42_376.jpg
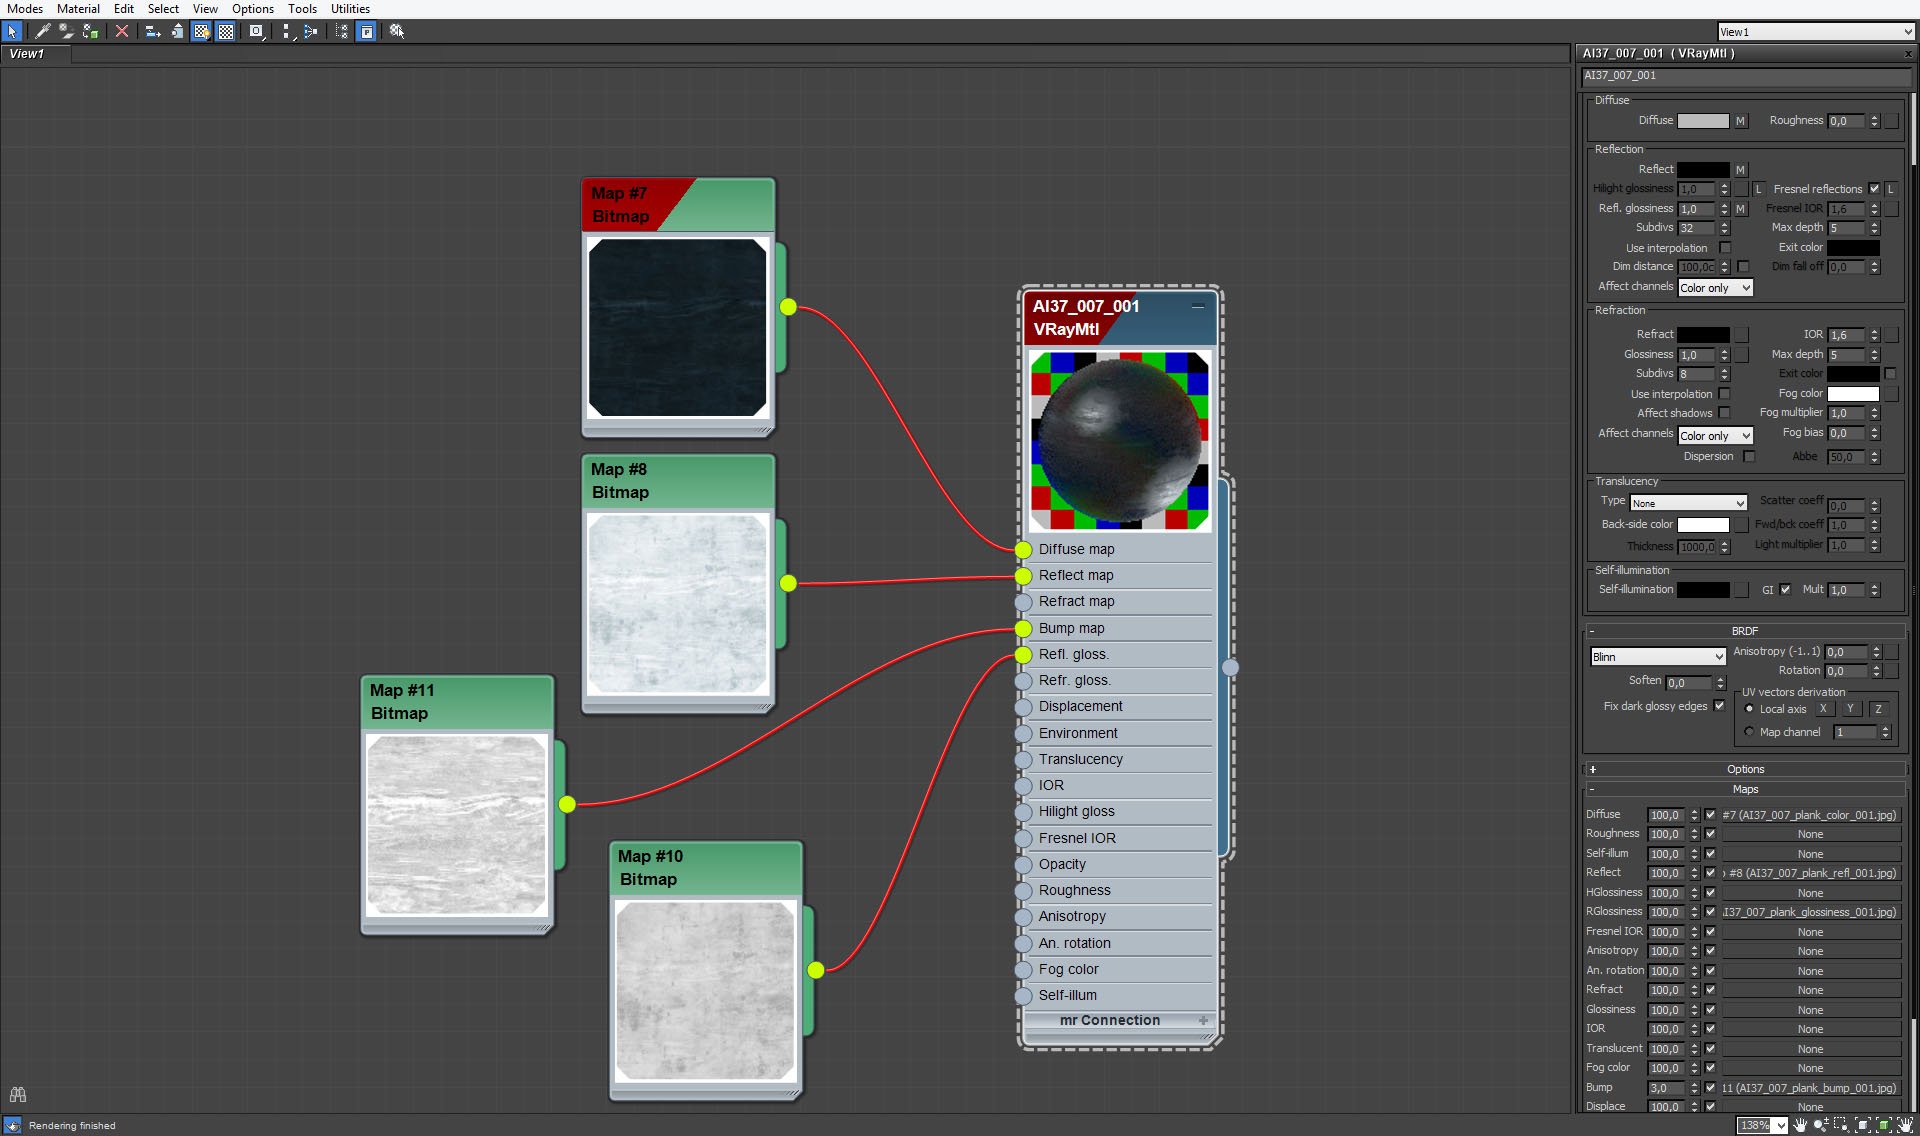
Material of ceiling section.


Click on image to enlarge nr_AI37S07_0015_Layer_43_375.jpg
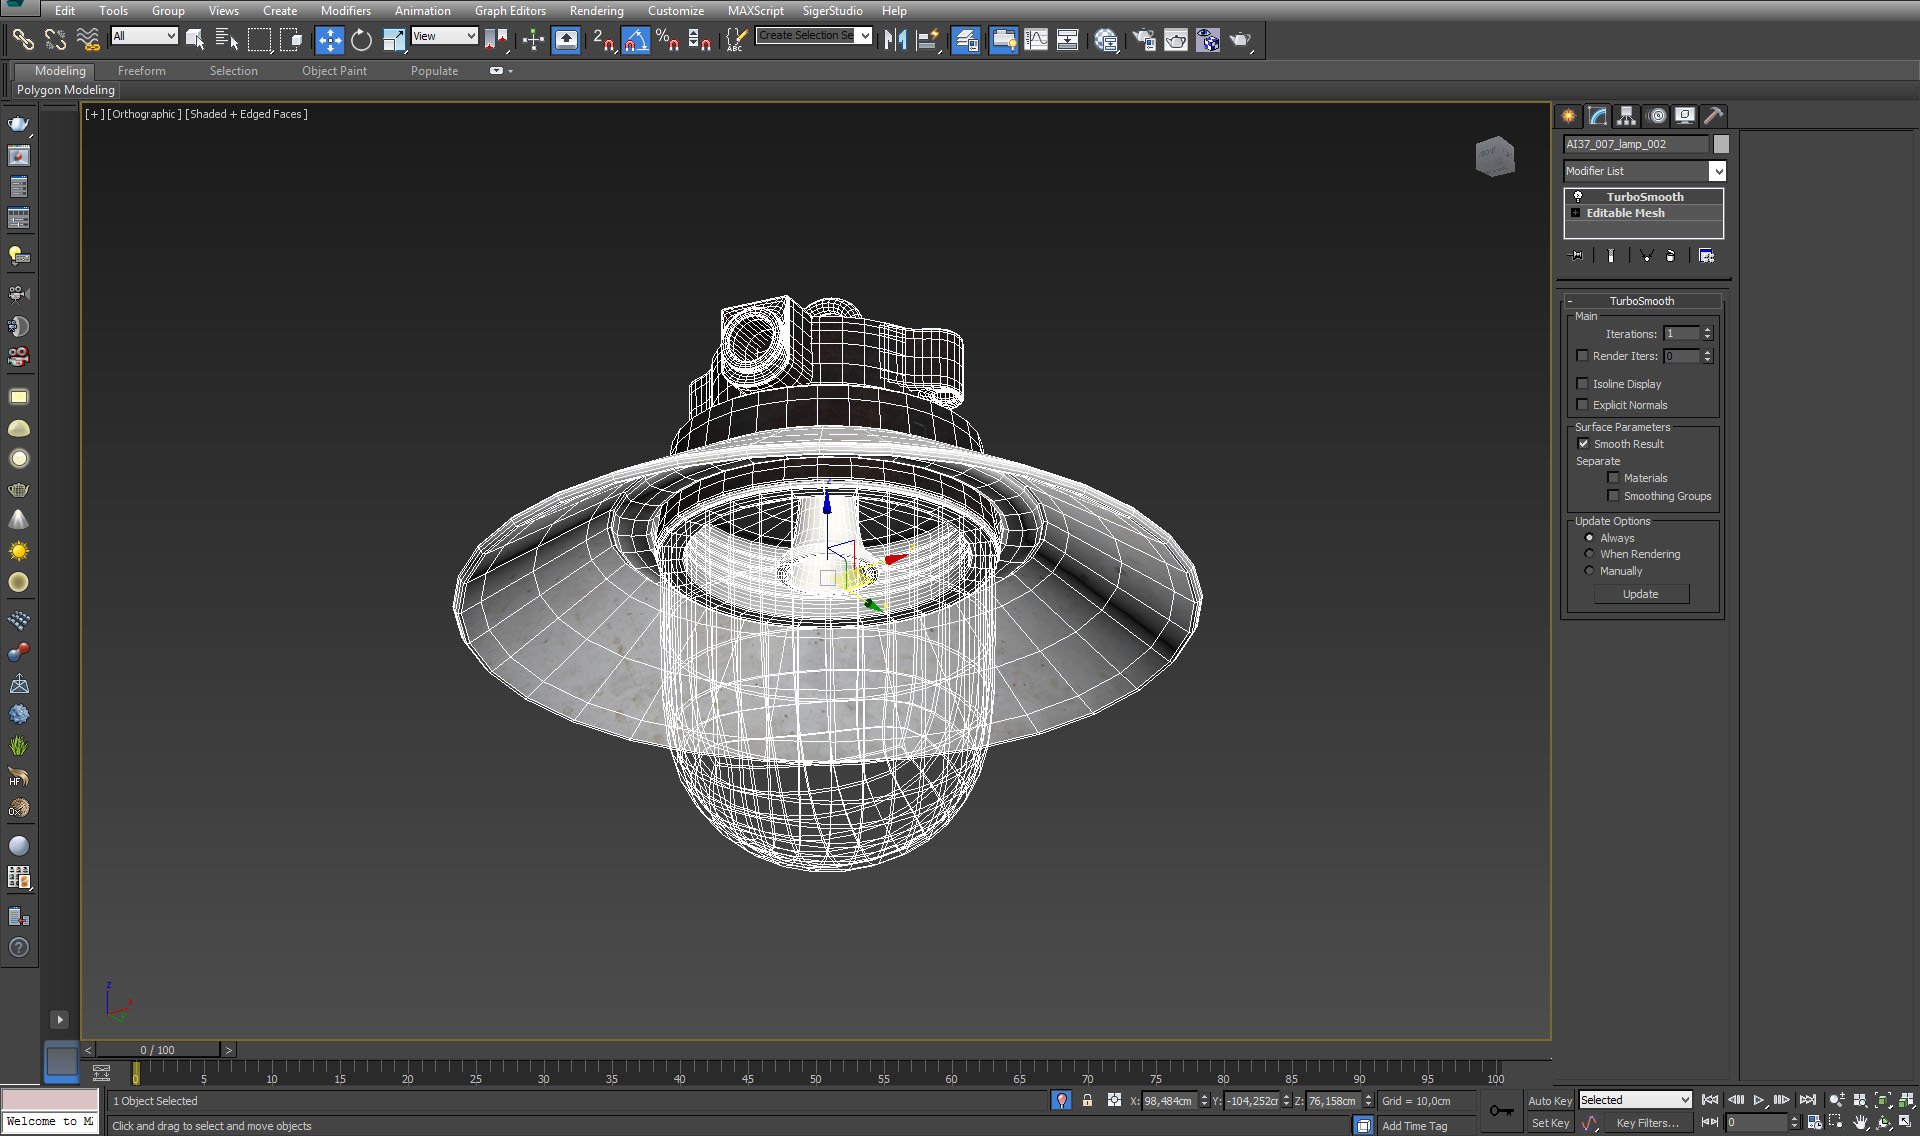
Hanging lamp in industrial style.


Click on image to enlarge nr_AI37S07_0014_Layer_44_374.jpg
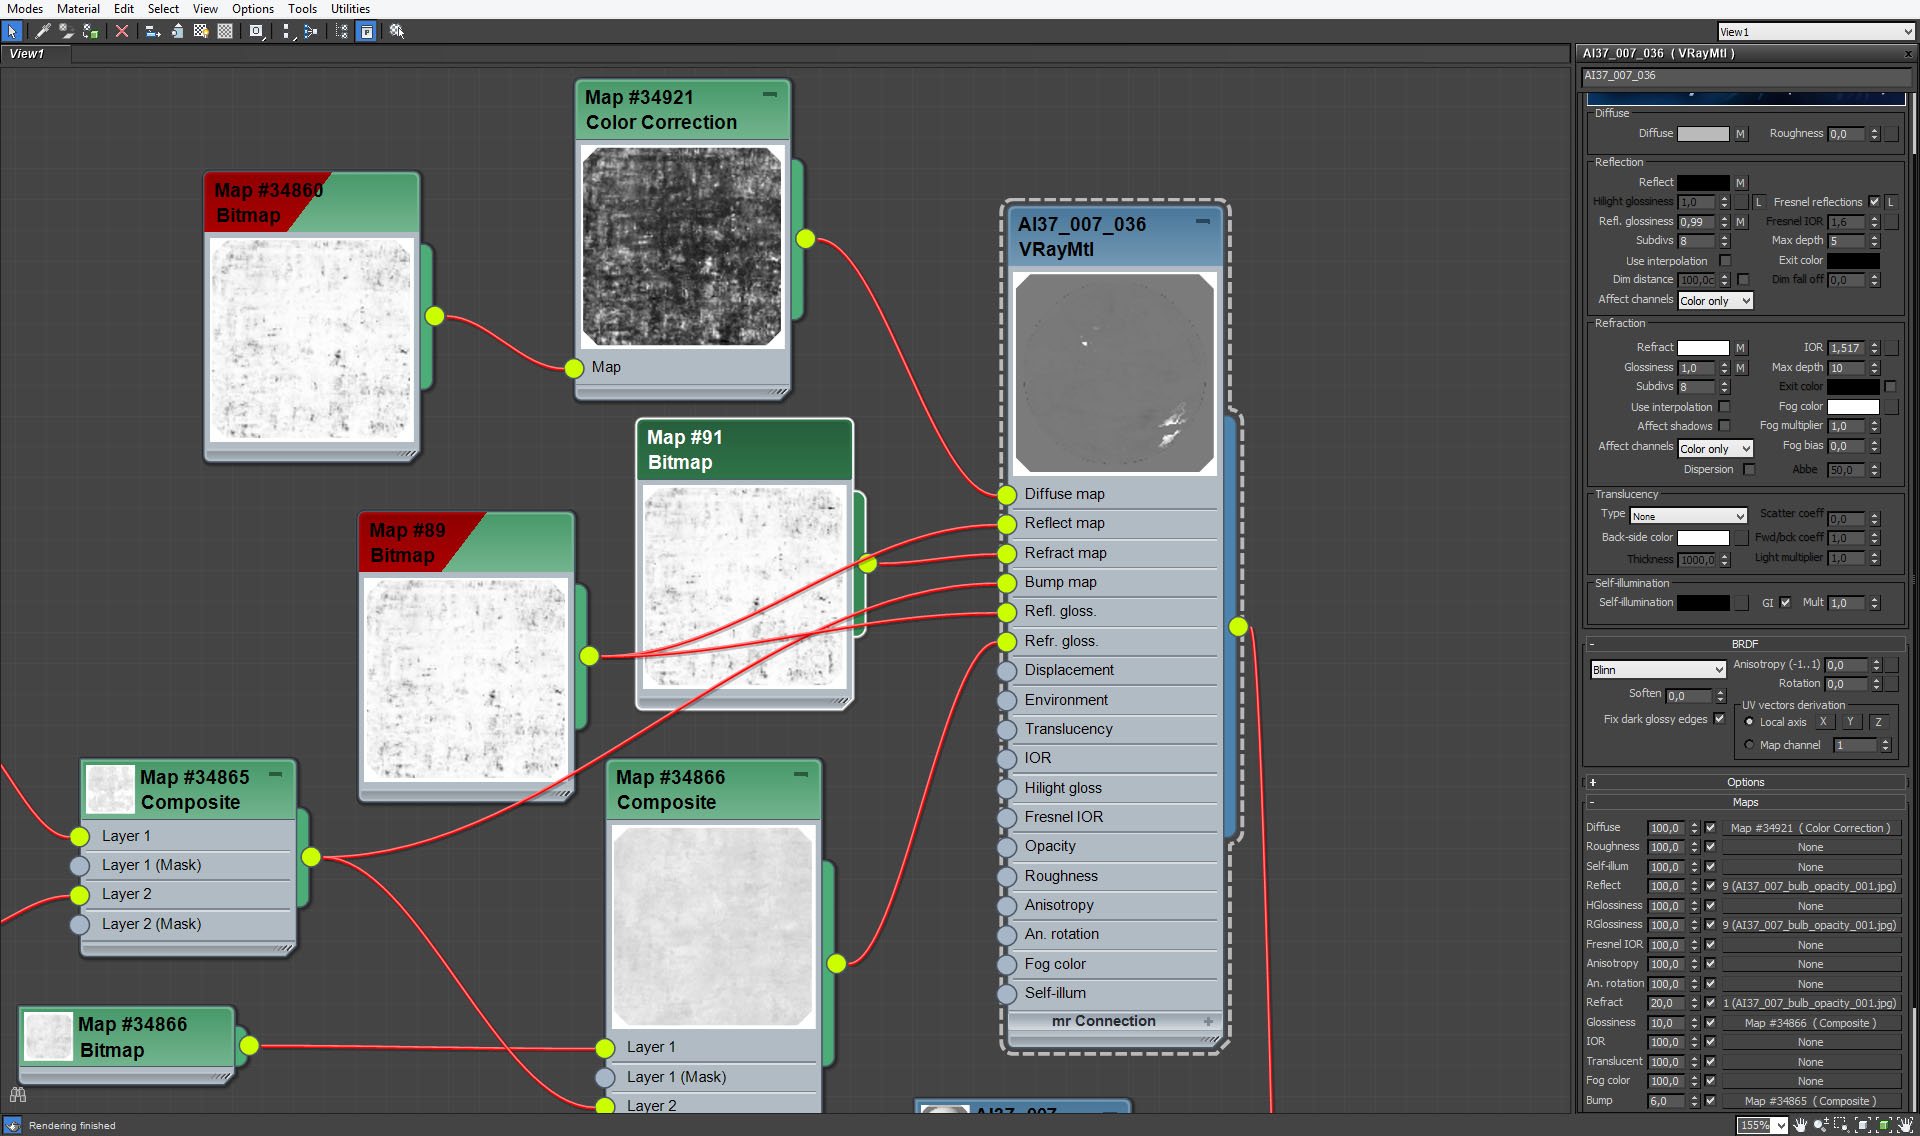
Lampshade material.


Click on image to enlarge nr_AI37S07_0013_Layer_45_373.jpg

Lamshade has to get "old and thick look" so Kamil used some noisy / dirty maps.


Click on image to enlarge nr_AI37S07_0011_Layer_47_371.jpg
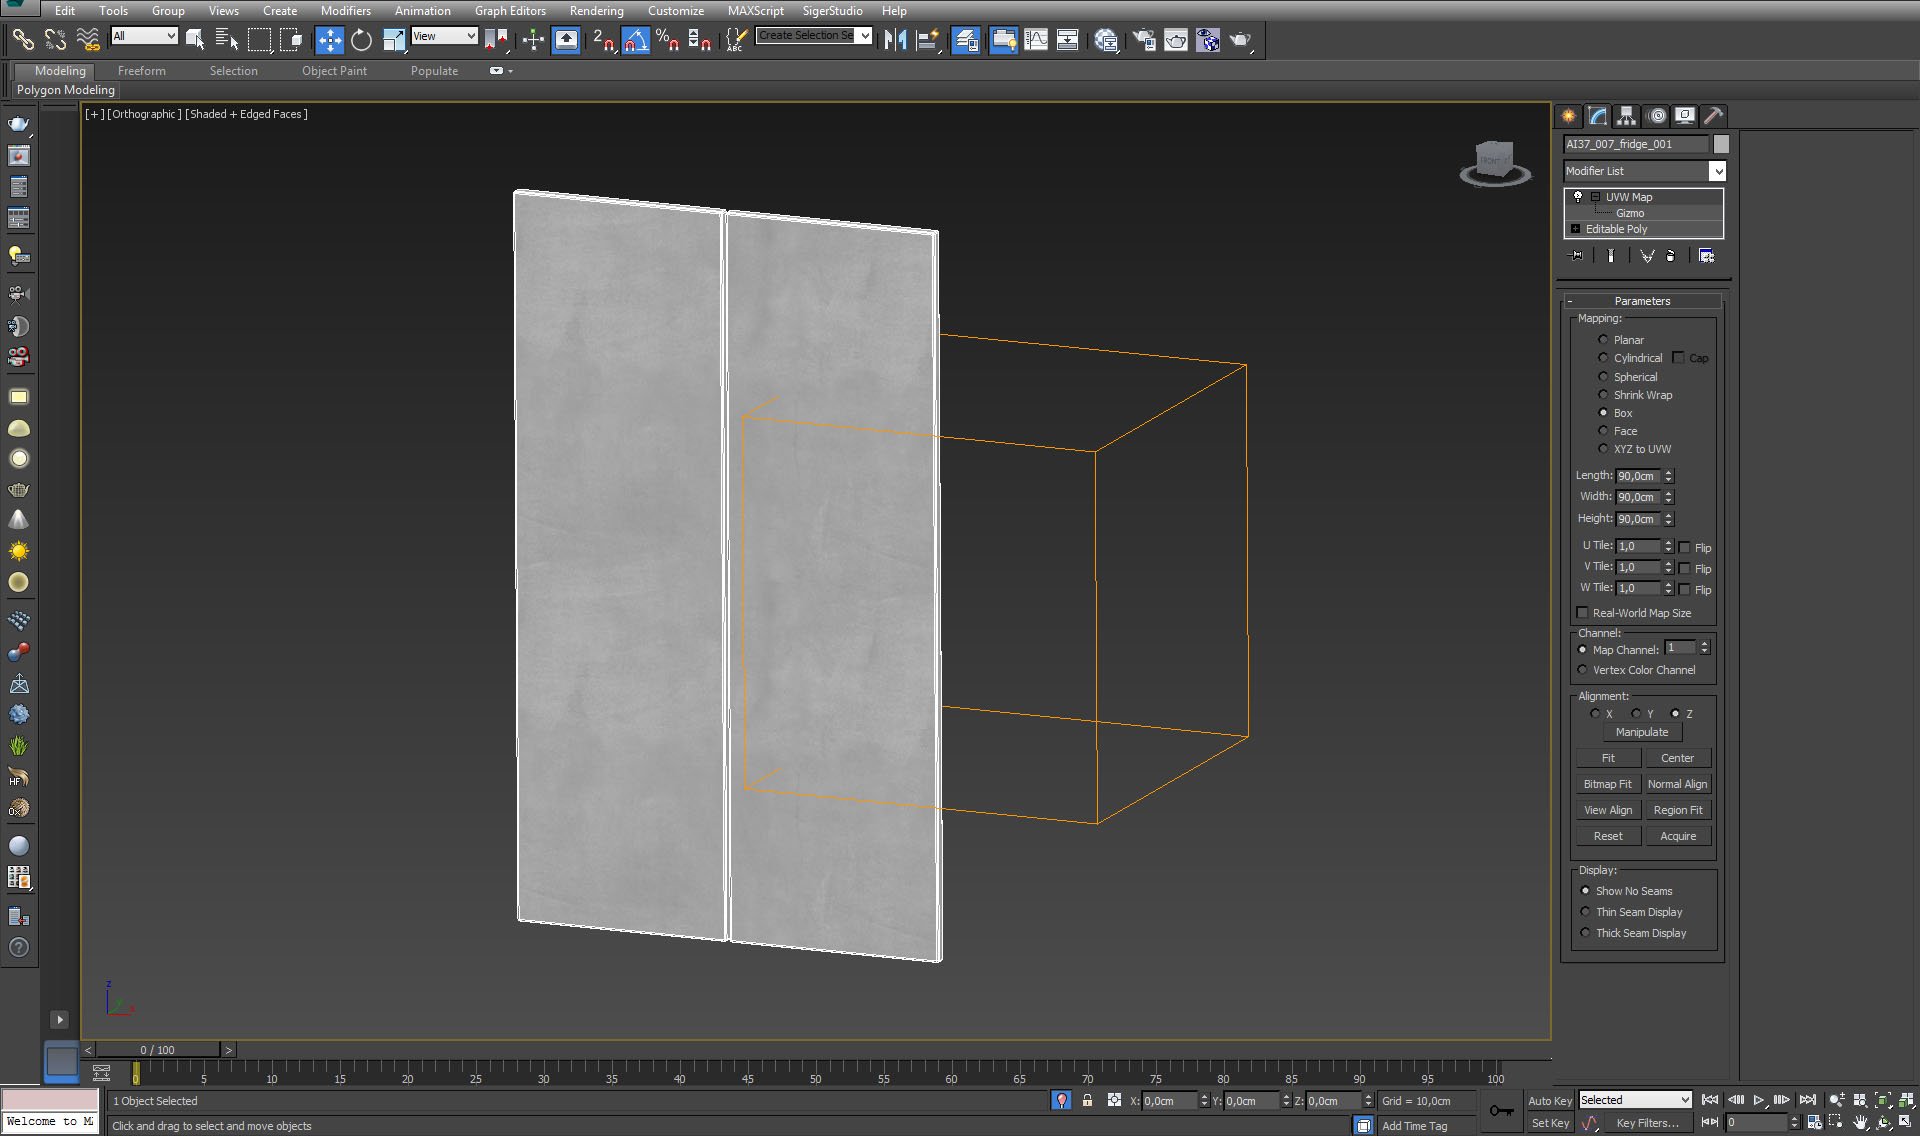
Fridge doors.


Click on image to enlarge nr_AI37S07_0010_Layer_48_370.jpg

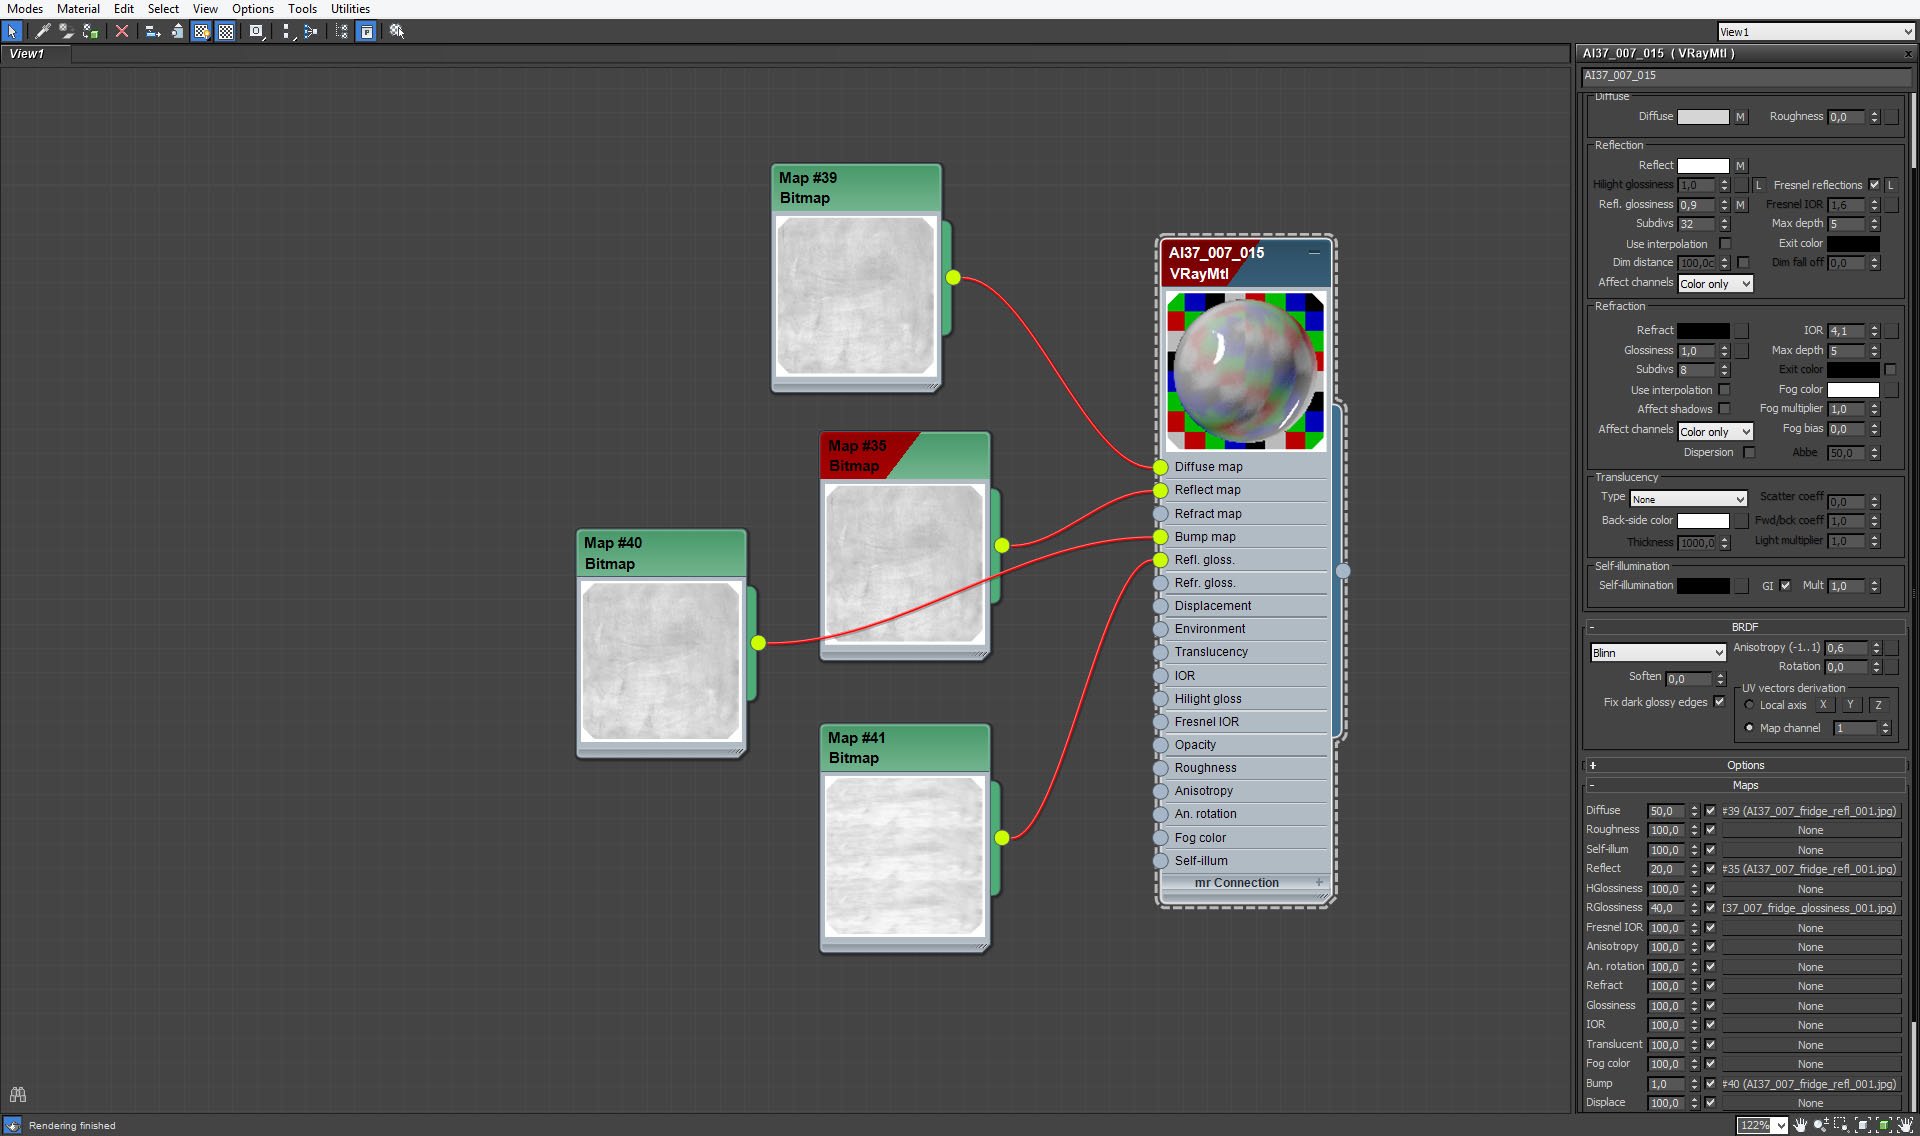
Fridge doors material.


Click on image to enlarge nr_AI37S07_0009_Layer_49_369.jpg

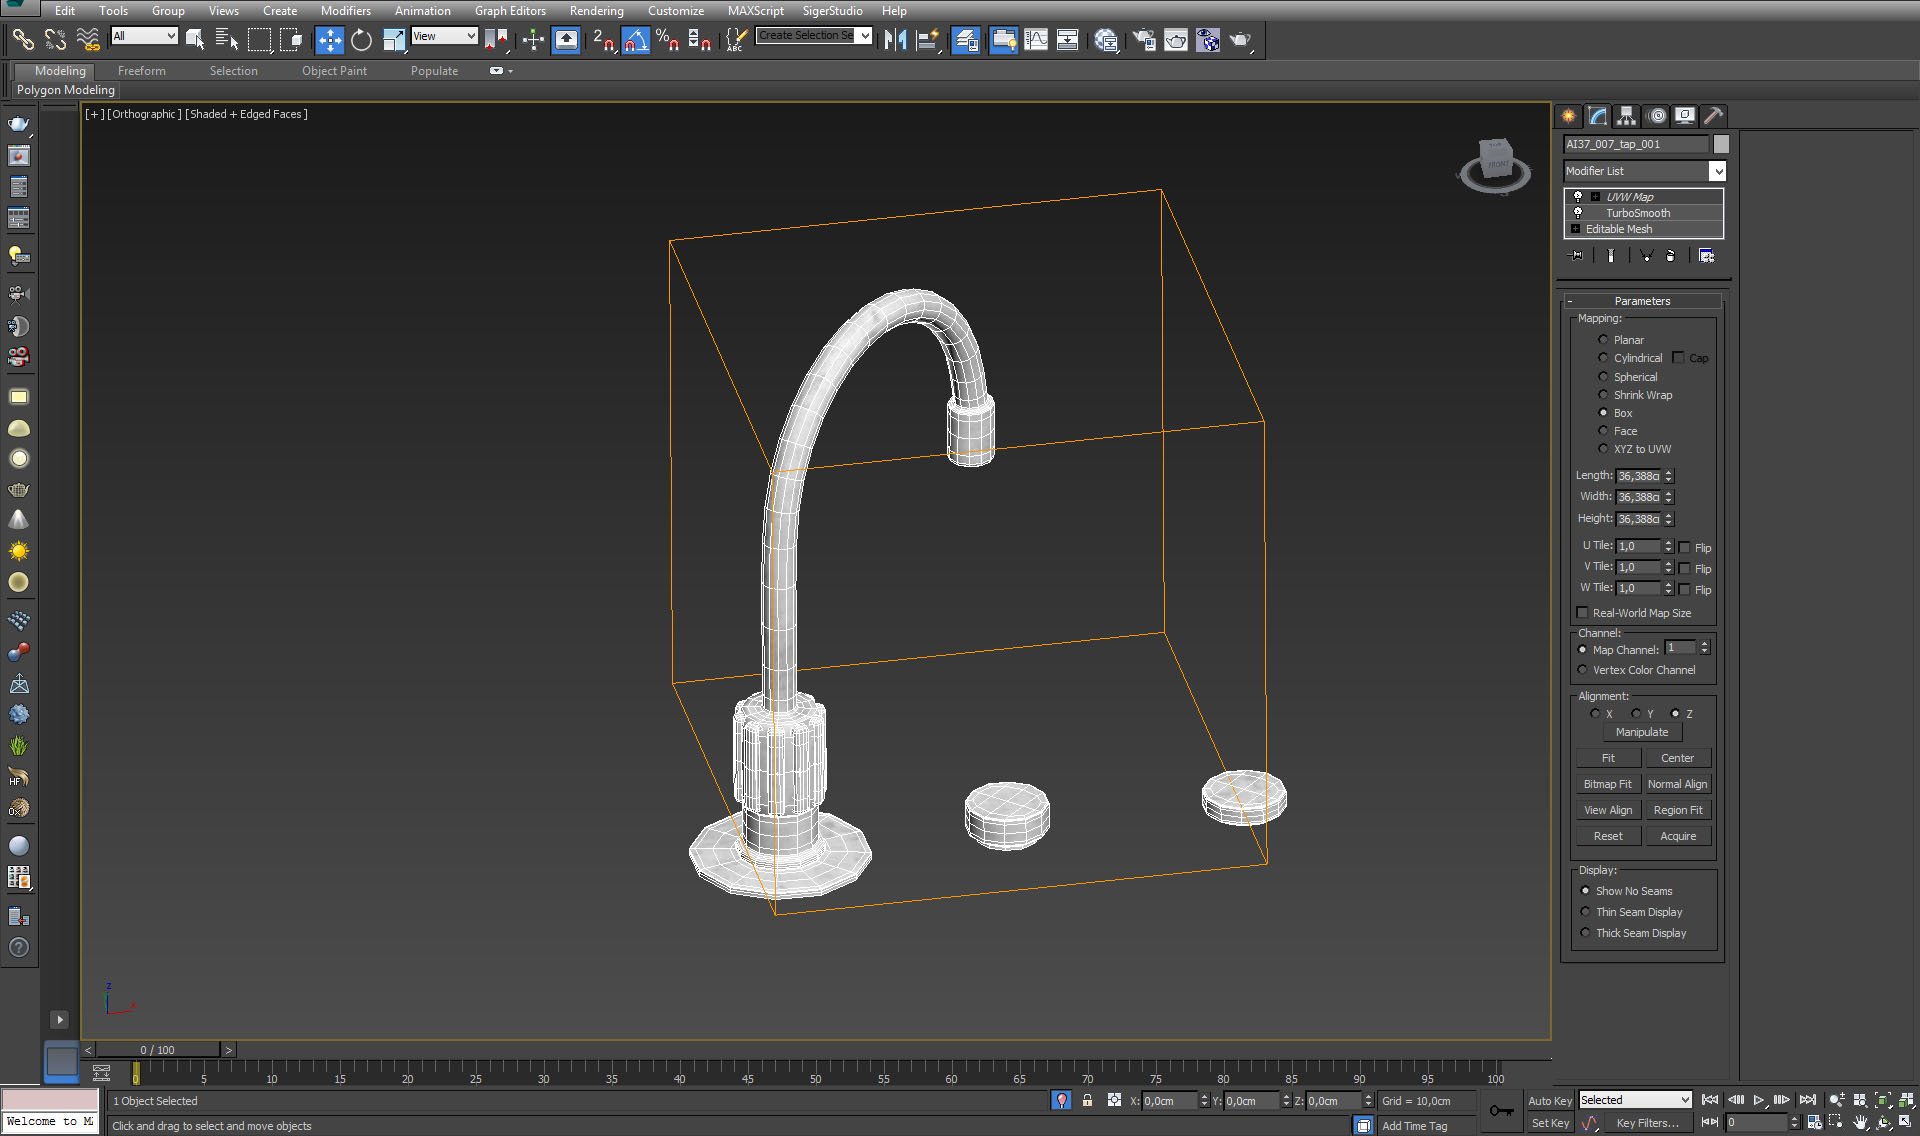
Faucet - simple mesh with turbosmooth and box UVW mapping.


Click on image to enlarge nr_AI37S07_0008_Layer_50_368.jpg
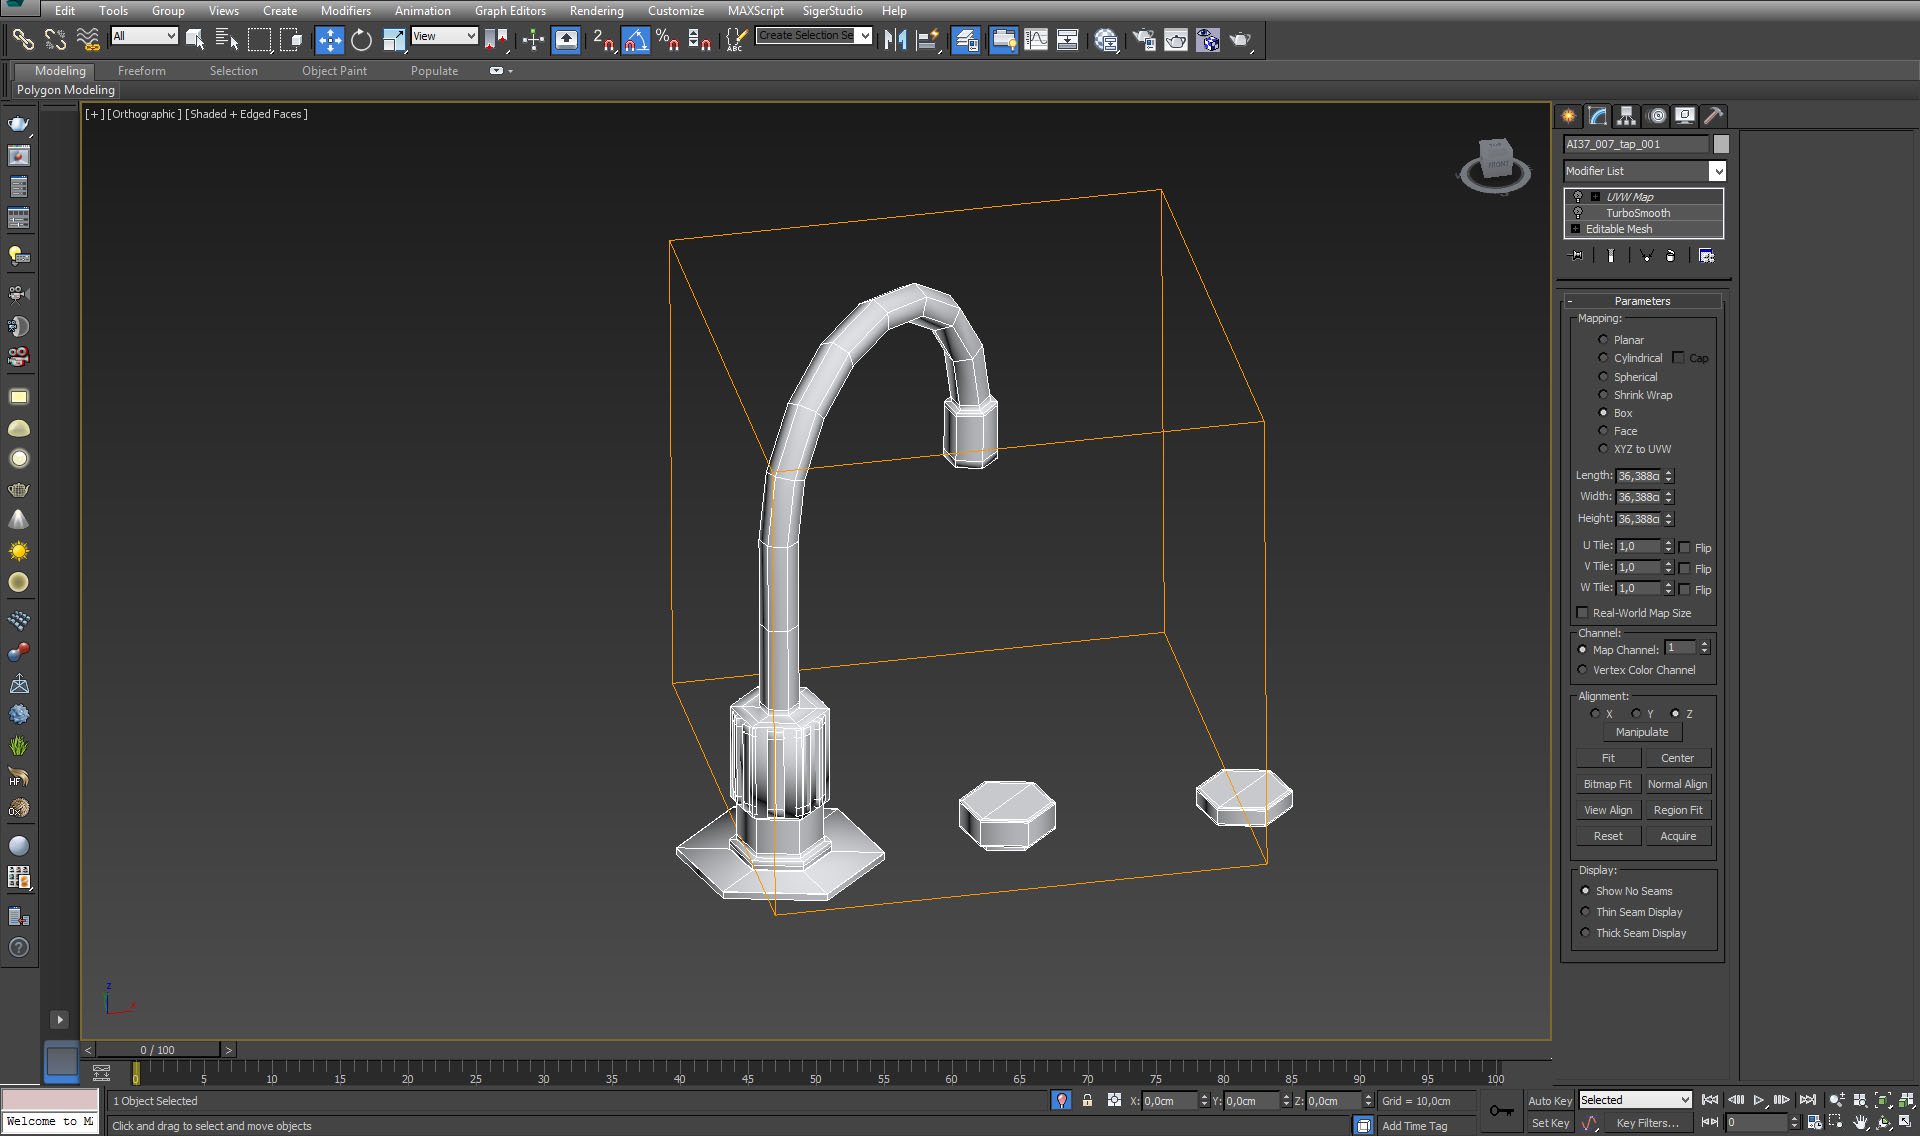
Kitchen faucet without turbosmooth.


Click on image to enlarge nr_AI37S07_0007_Layer_51_367.jpg
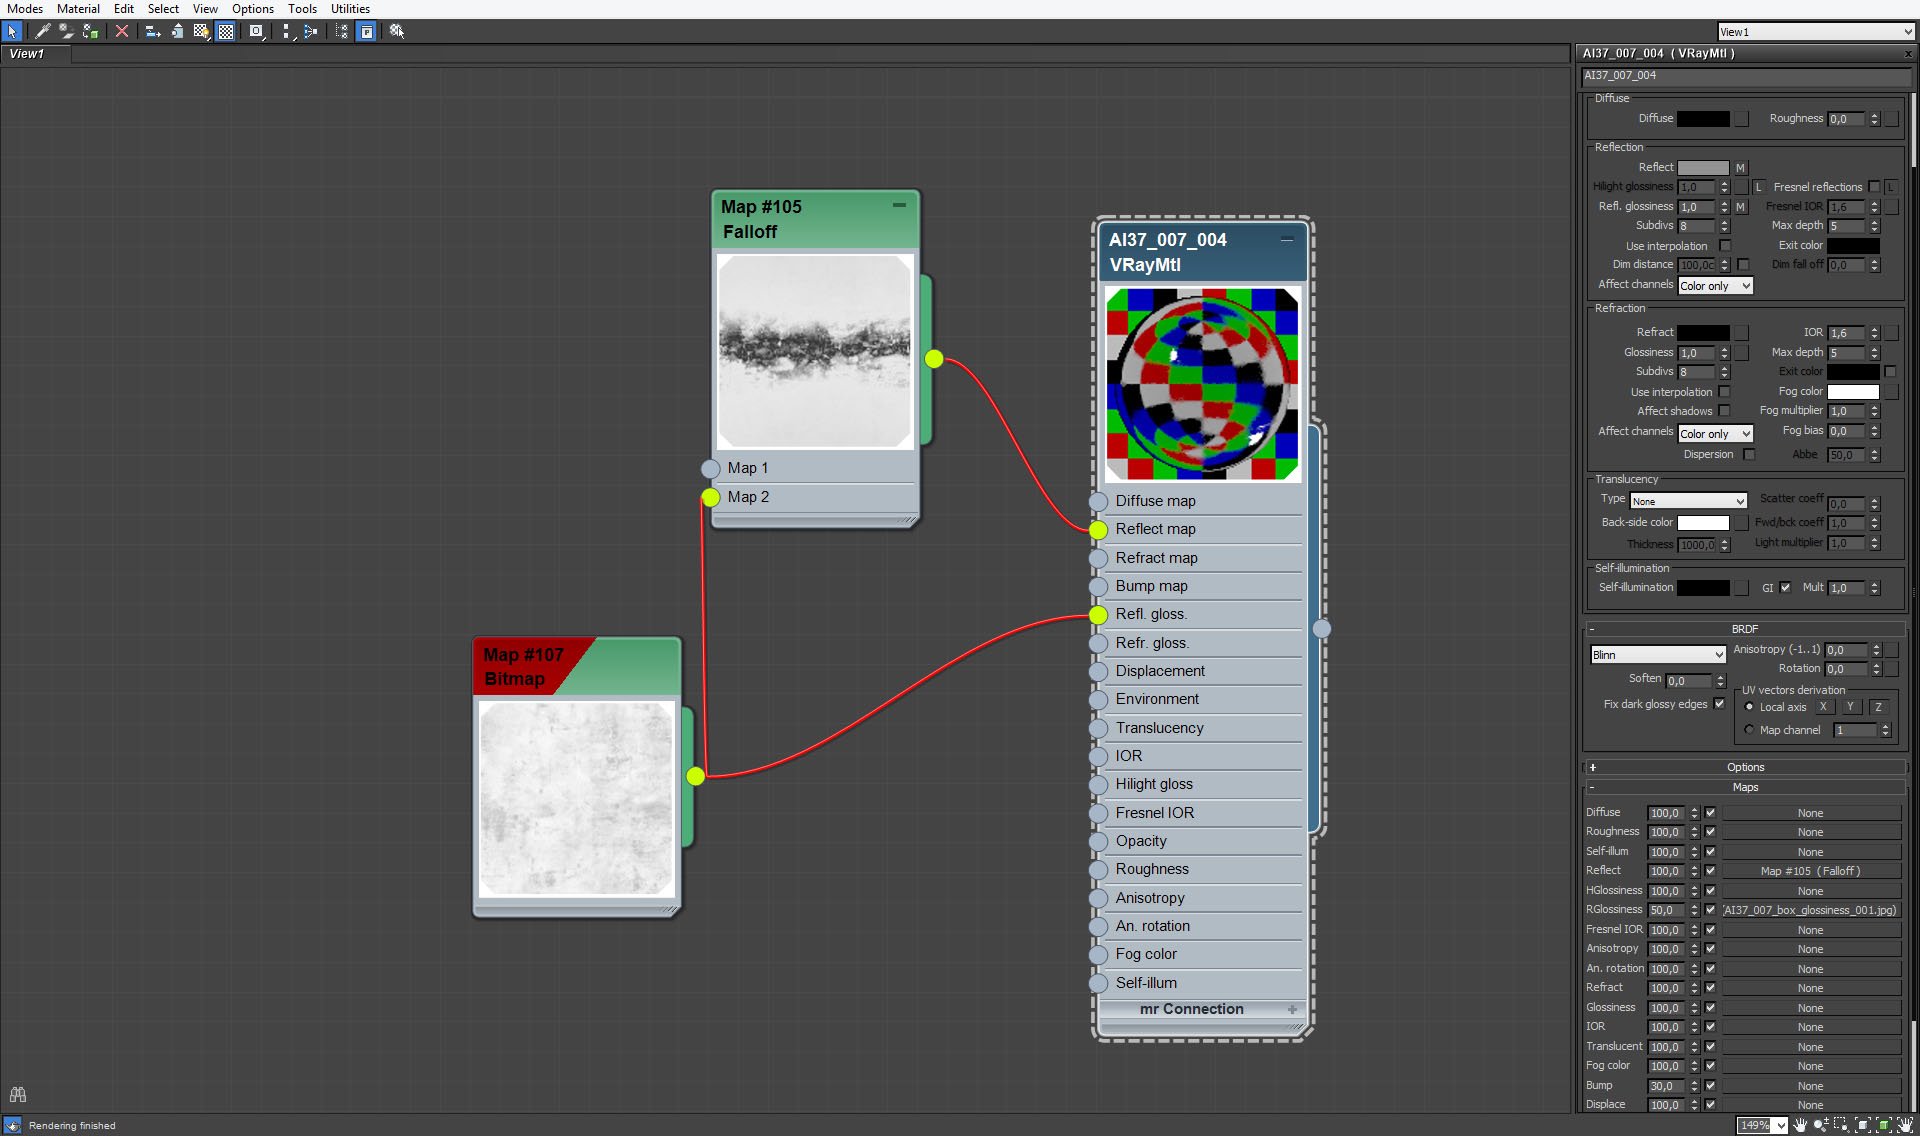
Faucet material.


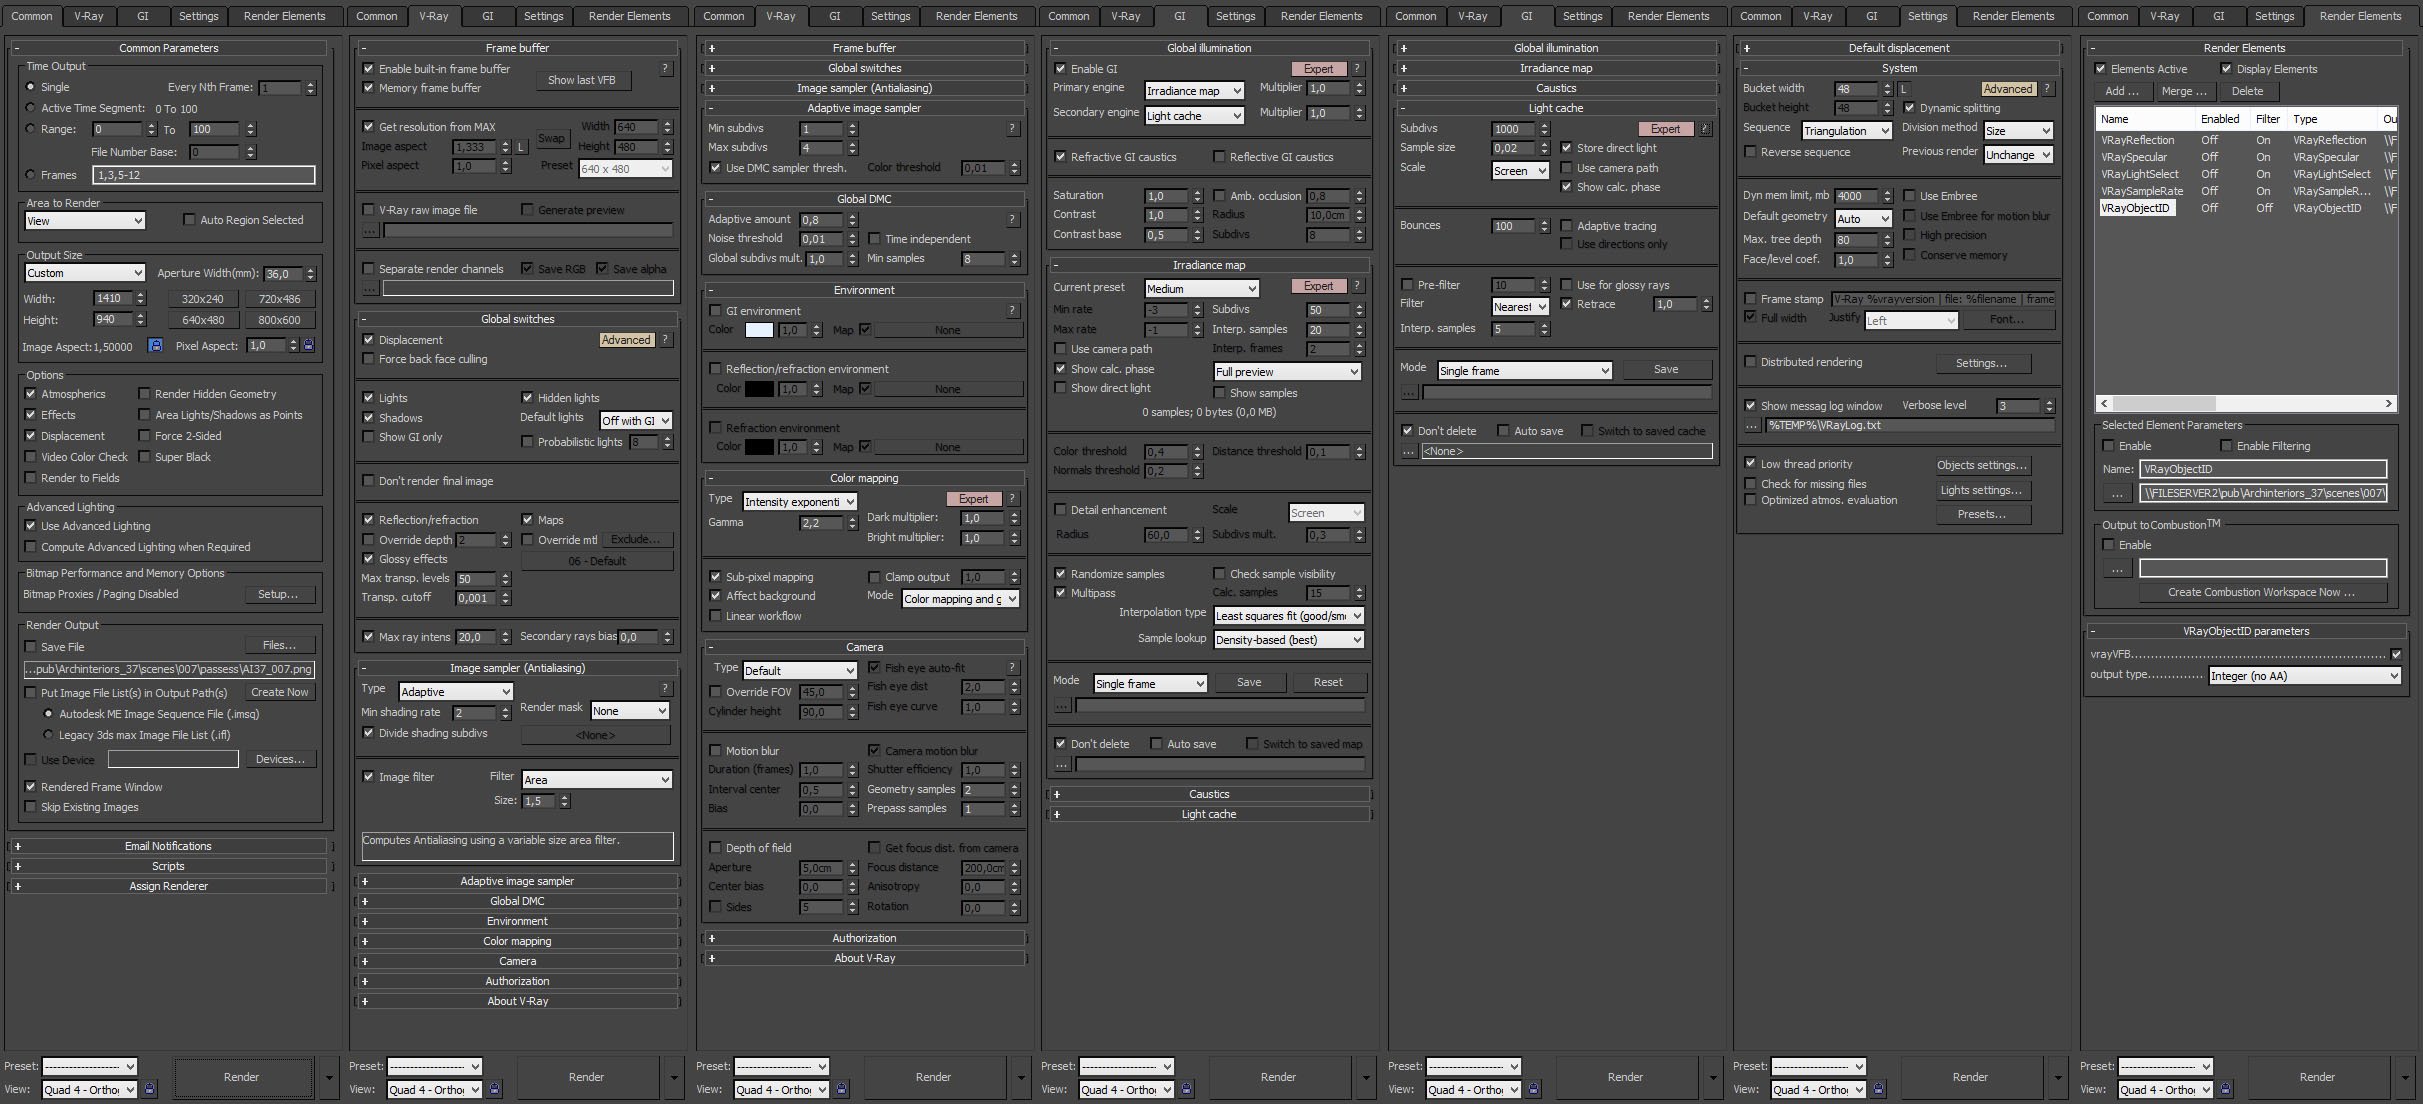
Click on image to enlarge nr_render_settings_418.jpg

Render settings.


Click on image to enlarge nr_AI37_007.RGB_color_419.jpg

Raw render without post-production.


Click on image to enlarge ps_stack_5.jpg
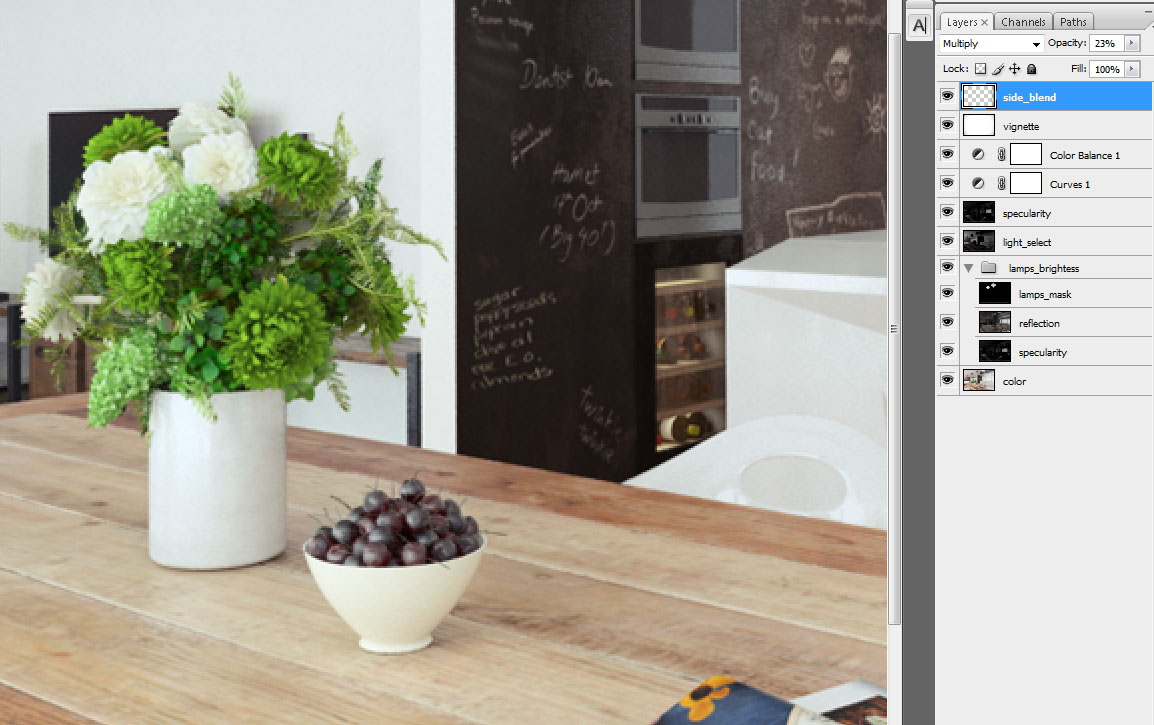
Photoshop layers. 3 layers above base layer increase lamp brightness. Light select layer increases brightness of walls, specularity (screen 50%) gives more reflections of materials. Curves and color balance get rid of unwanted yellows.


Click on image to enlarge nr_AI37_007_PP_366.jpg

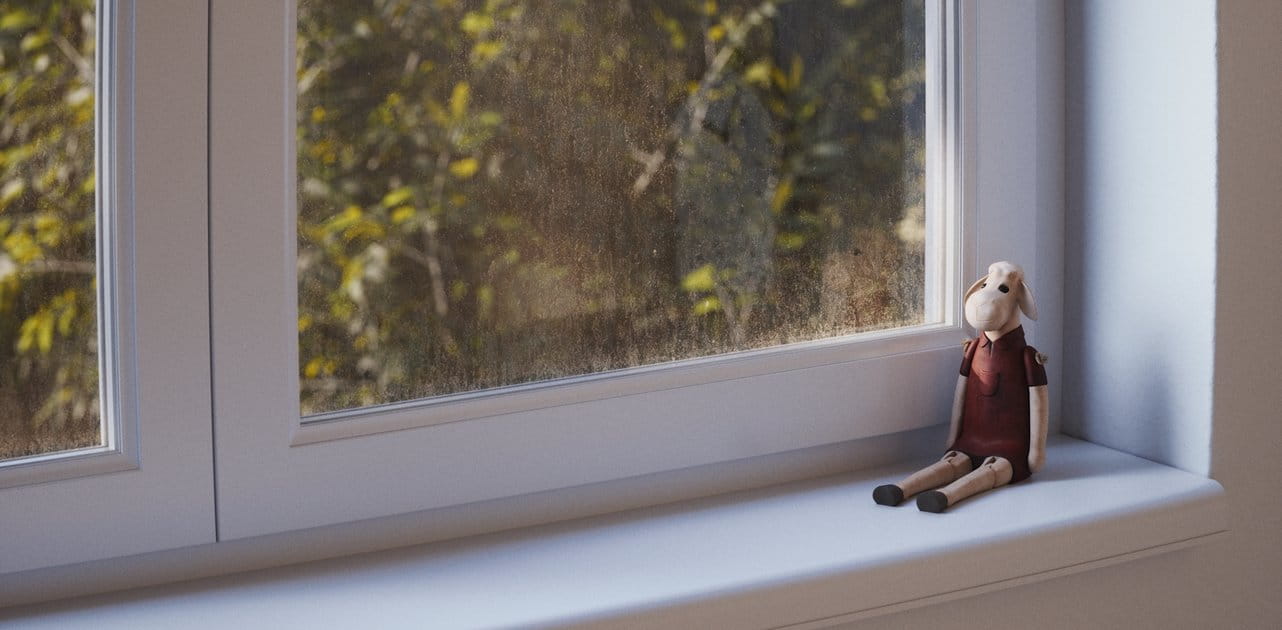
Final render after post-production. Thanks for reading! :)
 

Author: Michał Franczak Editor: Michał Franczak
Tags: vray archinteriors kitchen 3dsmax
You may also like...
Top 5 Vray Workshop - the best works of last week

Top 5 Vray Workshop - the best works of last week

Vray Workshop + Evermotion present TOP 5 VRay Workshop - selection of the best works presented during the week.
×

LEAVE A COMMENT

You need to be logged in to leave a comment. Don't have account? Register now.

ivang321 07:51:17  |  13-07-2015
Hi, very good tutorial! Thank you! Just one question: Did you use output gamma 2.2 (the default setting of 3ds max 2014) or output gamma 1.0 ??