Topology Study : How To Model Ski Googles in Blender
Using Blender modeling tools for creating realistic ski googles.


In accordance with the art. 13 section 1 and 2 of the European Parliament and Council Regulation 2016/679 of the 27th April, 2016 on the protection of natural persons, with regard to the processing of personal data and on the free movement of such data, and repealing Directive 95/46/EC (General Data Protection Regulation), hereafter RODO, I hereby inform that:
1. EVERMOTION S.C., 8 Przędzalniana Str., 15-688 Białystok, Poland is the Administrator of your Personal Data (APD)
2. Data Protection Inspector can be reached through e-mail: iod@evermotion.org
3. Your personal data are to be processed on the basis of art. 6 section 1 letter a, b and f of RODO in order to:
a) prepare, conclude and execute the agreement and for other purposes approved by you,
b) to execute the legitimate interest like marketing of products and the agreement, claim assertion or defence against claims resulting from the law regulations.
4. Entities entitled to the reception of your personal data may be the authorised public bodies; mail providers; providers of the services covered by the agreement; responsible for debt recovery, keeping the archives, document utilization, legal consulting, technical services, IT services and accountancy.
5. Your personal data shall not be transferred to the third country, nor to the international bodies.
6. Your personal data shall be processed within the period of the agreement and upon your additional consent until you withdraw it. APD shall keep the data for the period of any civil law claim execution connected with the agreement.
7. You have the right to demand an access to your personal data, to correct or to delete the data if there is no other basis for the processing or any other purpose of such processing or to limit the processing of the data, to transfer the data to another administrator and to raise objections to the further data processing if there is no legal basis for further processing and to withdraw any previous consent.
8. You provide the personal data voluntarily, however they are necessary to conclude the agreement. The refusal of providing such data may result in the refusal of the agreement conclusion.
9. You have the right to lodge a complaint to the Personal Data Protection Office when in your opinion the data processing violates the regulations of General Data Protection Regulation of the 27 April, 2016 (RODO).
10. Your data will be automatically processed, including the form of profiling.
11. You are obligated to forward above mentioned information to your representative, especially if you appointed this person in the agreement as the contact person or as the representative for the agreement execution.
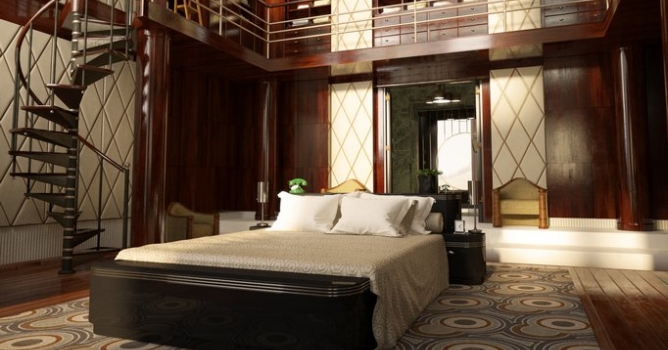

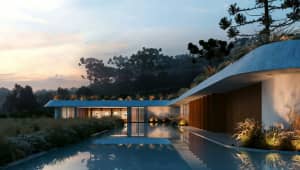
Archinteriors vol. 32 comes with a large set of art-deco scenes. As always Evermotion team made sure that its customers will purchase the very best of CG available on the market. Below you'll find the story of creating one of them that will briefly guide you through planning, modelling, texturing and rendering phase. Most of the work was done in Blender, however setting up shaders and rendering was performed in 3ds Max using V-Ray engine.
Click on image to enlarge
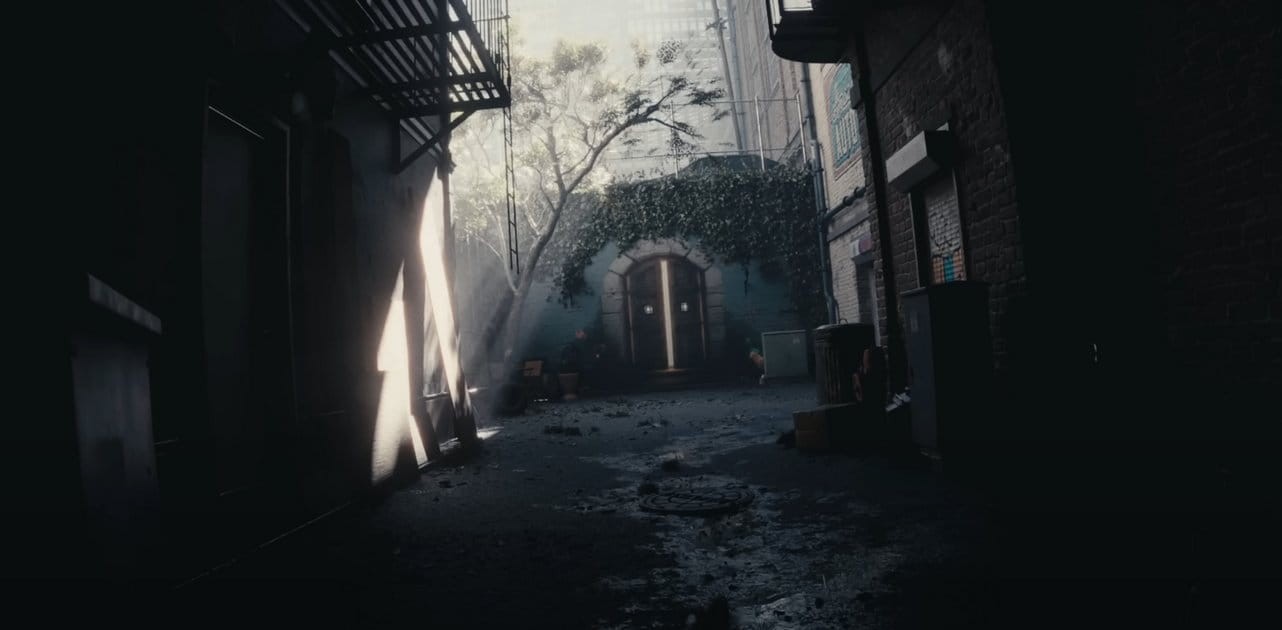
Matching reference photo with a camera in Blender
Let's start from visiting https://stuffmatic.github.io/ and downloading the latest version of BLAM. This little addon can work wonders while searching for the right focal length and camera orientation. All you need to do is load your reference image to Movie Clip Editor and draw at least two pairs of line segment strokes on two different Grease Pencil layers. Remember that they should match X and Y axis of the reference scene as exact as possible. After that press "Calibrate active camera". It will transfer focal length and position data to your camera. Set your photo as a background image and go to Camera View to start modeling phase.
Click on image to enlarge
Blocking out your scene
It's always wise to start with rather simple and rough objects. Not only it will help you to maintain control of the scene but it will also verify the results given by BLAM. Although proportions and distance between objects may seem proper in Camera View, they could be still way off while seeing from different angles. In case of such problems I suggest running Blender camera callibration toolkit once again but this time with newly drawn Grease Pencil lines. Also scaling models and therefore changing their location according to camera may finally bring expected results. Once this done you can get into details while modeling.

Be faster - use duplicates
I tend to keep my scene neat and clean, that's why I always use all kind of hacks that simplify my workflow. Whenever possible I always go for linked duplicates (Alt+D) that share the same mesh information. This way I don't have to repeat the same operations all over again but limit my work to just one object. Another great thing about duplicates is that they can carry different modifiers. This feature allowed me to easily create pillows on the walls and mirror them in relation to one Empty object placed in the middle of the scene.

Array modifier for stairs and curve as handrail
I used similar approach for spiral staircase. I modeled only one step with a bar and duplicated it using Array Modifier with helper as an Object Offset. Handrail required slightly different approach; in its case I duplicated all the steps, applied Array modifier and deleted all the vertex except the ones from the top of the bars. I connected them all together and converted newly created edge into a curve. Now all I had to do was to add some thickness using Depth value and set its Fill style to Full. Mind out that curves work well with Subdivision Surface modifier, which smoothes the final shape.
Click on image to enlarge
Cut mirrors with Knife Project
In order to create mirrors in the back I went for a Knife Project. I made two objects - circle and stripes, selected both of them, entered Edit Mode and launched a command to make a cut-out. The only problem I faced were ngons that I immediately triangulated. This way I made sure that I wouldn't have any trouble while loading such objects into 3ds Max (so called: "rats nest" alert).
Click on image to enlarge
Simulate duvet with Cloth
To simulate duvet I used Blender's physics. I set up a simple scene with fake floor and bed that would generate good looking collisions. I enabled Cloth modifier for quite heavily subdivided Plane and recorded a cache. I picked a frame I liked the most, applied Cloth modifier and entred Sculpt Mode. It was the only way to fix some errors that occured while calculating all the collisions and add some extra wrinkles at the top of the bed.
Click on image to enlarge
Unwrapping manually
As always unwrapping objects went fast using Blender's powerful toolset. Since I don't fully trust Cube/Sphere/Cylinder Projection I set all the seams manually and used conformal method for most of my models. I made sure that all the islands of wooden walls and columns were rotated according to direction of the growth rings they would soon carry. I dropped an idea of exporting UV images as I decided to hide seams and base my texturing work on tiled images.
Click on image to enlarge
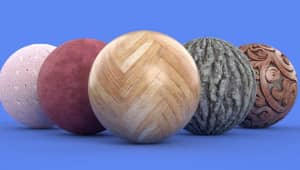
Texturing with four maps
Most of my shaders consists of four maps - diffuse, bump, reflection and glossiness. Usually they are all based on one image however I prefer to add some extra decals for the last two of them. Stains of fat, water or fingerprints are not visible as color, they all rely on rays of light hitting surface and scattering all over it. Keep in mind that seamless textures require seamless decals as well!
Click on image to enlarge
Displacement with tiled textures
Some of materials, like carpet and duvet, required a little bit of V-Ray displacement. Each time I used tiled textures therefore I dragged them from Texmap slot directly inside Material Editor and increased the number of tiling on both U and V axis. For fast but still quite accurate results I used 2D mapping (landscape) as a type of displacement.
Click on image to enlarge
Lighting the scene with V-Ray Sun
10) The main light on my scene comes from the V-Ray sun located behind the camera. Still I had no idea where all the shadows on my reference image were coming from. I failed trying to recreate windows and curtains as the render result did not match the original picture. Eventually I decided to cut a few holes in a wall that were supposed to represent uncovered part of windows. For a subtle additional reflections and bloom light I put V-Ray Light in each one of them.
Click on image to enlarge
GI settings
For my Global illumination engines I chose Irradiance map and Light Cache. I also increased the number of reflection's subdivision for some of my materials (mostly wooden and metal ones) to eliminate unwanted noise.
Click on image to enlarge
Subtle post production
Final tweaks were added during post production. I made subtle color changes with a Photo Filter, added bloom effect and darkened lower part of my image using blend mask.
Click on image to enlarge


LEAVE A COMMENT


|

|

|

|

|


COMMENTS