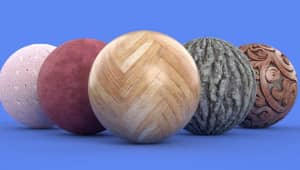
Create Dirty Windows - material tutorial
New tutorial by RenderRam.


In accordance with the art. 13 section 1 and 2 of the European Parliament and Council Regulation 2016/679 of the 27th April, 2016 on the protection of natural persons, with regard to the processing of personal data and on the free movement of such data, and repealing Directive 95/46/EC (General Data Protection Regulation), hereafter RODO, I hereby inform that:
1. EVERMOTION S.C., 8 Przędzalniana Str., 15-688 Białystok, Poland is the Administrator of your Personal Data (APD)
2. Data Protection Inspector can be reached through e-mail: iod@evermotion.org
3. Your personal data are to be processed on the basis of art. 6 section 1 letter a, b and f of RODO in order to:
a) prepare, conclude and execute the agreement and for other purposes approved by you,
b) to execute the legitimate interest like marketing of products and the agreement, claim assertion or defence against claims resulting from the law regulations.
4. Entities entitled to the reception of your personal data may be the authorised public bodies; mail providers; providers of the services covered by the agreement; responsible for debt recovery, keeping the archives, document utilization, legal consulting, technical services, IT services and accountancy.
5. Your personal data shall not be transferred to the third country, nor to the international bodies.
6. Your personal data shall be processed within the period of the agreement and upon your additional consent until you withdraw it. APD shall keep the data for the period of any civil law claim execution connected with the agreement.
7. You have the right to demand an access to your personal data, to correct or to delete the data if there is no other basis for the processing or any other purpose of such processing or to limit the processing of the data, to transfer the data to another administrator and to raise objections to the further data processing if there is no legal basis for further processing and to withdraw any previous consent.
8. You provide the personal data voluntarily, however they are necessary to conclude the agreement. The refusal of providing such data may result in the refusal of the agreement conclusion.
9. You have the right to lodge a complaint to the Personal Data Protection Office when in your opinion the data processing violates the regulations of General Data Protection Regulation of the 27 April, 2016 (RODO).
10. Your data will be automatically processed, including the form of profiling.
11. You are obligated to forward above mentioned information to your representative, especially if you appointed this person in the agreement as the contact person or as the representative for the agreement execution.

Hi Everyone!
First of all I'd like to thank Evermotion for this opportunity and for the Evermotion Future Home Challenge 3rd place. It was an awesome experience! I’ve enjoyed every minute of it!
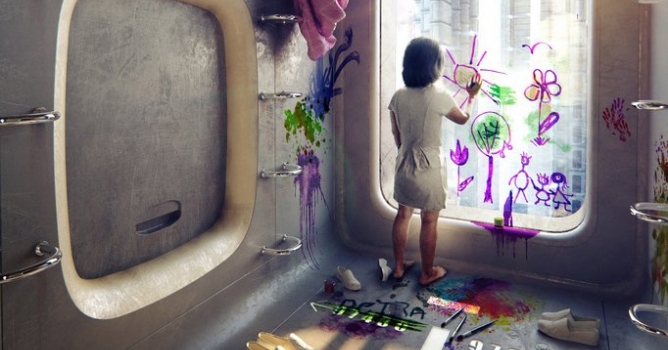
Csaba Banati's work "Capsule homes" was awarded with 3rd place in Evermotion Challenge 2013 - Future Home Design. You can see all winners' works here. You can see the contest works gallery here - (editor's note)
Click on image to enlarge 
Concept
I think it's always important to have a good, mature concept. I mean it's not the idea itself the most important for me. It can be a very simple and silly idea. The main thing is to give yourself enough time to "live" in your fictional world and to develop feelings for it. If you have it then you can start working.
Click on image to enlarge 
Stages
Before breaking down the parts of the work it's important to mention "sketching". This is a very significant part of my workflow. Keeps me away from unnecessary work and often reveals the fact that what you first had in mind is not always what you really want to see at the end. Helps to find the mood and in addition it keeps you constantly thinking and developing your concept further.
Click on image to enlarge 
Modelling
I made everything with simple box modelling technique. I didn't want to make too complicated scene in terms of geometry, instead I wanted to focus on details to attach viewers' attention a little longer. At the end if you can manage that, it's a success. When you work on interior scenes it's nice to use backface culling. Makes your work much faster.
Click on image to enlarge 
Click on image to enlarge 
The one of the biggest mistake you can do is to ignore the problem of sharp edges. It is important if you want to have good reflections and AO. If you want sharpness, use small chamfer but never leave them as they are.
Click on image to enlarge 
Click on image to enlarge 
Click on image to enlarge 
Click on image to enlarge 
Click on image to enlarge 
Click on image to enlarge 
Click on image to enlarge 
Click on image to enlarge 
There aren't much accessories in this scene. The duck and shoes are Evermotion Archmodels with modified materials.
Click on image to enlarge 
The blanket was a little trickier to make. It's always a kind of a trial and error stuff but there are a few things you can do for the success. My method is to create a single plane with not too much vertices (to keep the cloth simulation fast). Turn it to some random position. Create a dummy object for collision and before the cloth simulation create some uvw map.
Click on image to enlarge 
Run the cloth simulation. This is the trial and error part for me. Unfortunately I don't have any universal settings. Change them till you are satisfied with the result.
Click on image to enlarge 
If your mesh falls into the dummy, you should ask yourself: will it be visible? I know it's a bit sloppy but I've learnt it the hard way. I've used to tweak things for long hours, nevertheless, this work was barely visible in the final images. Usually it's enough to move it a little further from the collision object by hand - at least it's enough for me.
After that I like to make a snapshot of the mesh - just to keep things clean. Apply shell, turbosmooth and a noise for some randomness. And I always keep the original objects on a hidden layer just in case.
Click on image to enlarge 
Click on image to enlarge 
Background capsules.
It's again a very simple chamfered box with a glass sides, multiplied with Clone modifier. I love this powerful tool (I currently work in 3ds Max 2011).
Click on image to enlarge 
Click on image to enlarge 
Click on image to enlarge 
Materials
Materials are very simple. It's mainly because of the post production that I plan to make.
Click on image to enlarge 
Click on image to enlarge 
Click on image to enlarge 
Click on image to enlarge 
I used two UVW map for the blanket. One for the bump and another for displacement for more wrinkles. I can't emphasize enough how powerful the displacement is. Use it whenever you can.
Click on image to enlarge 
Click on image to enlarge 
Click on image to enlarge 
Click on image to enlarge 
Lights
This is the part I like the most. It decides whether your picture will be good or bad. Lights affect the mood, ephasise the subject. So always take your time when you are at this stage! I think this is the best advice I can ever give to anyone. There's no secret here. Just render tons of previews and compare them. Sometimes the first render is the best, sometimes the last.
I used a dome light, a vraysun, two vrayIES and a vray mesh light.
Click on image to enlarge 
Click on image to enlarge 
Click on image to enlarge 
Click on image to enlarge 
There's just one little trick I developed during this project. The little girl and the paintings on the window is obviously post and I didn't want to spend much time on painting shadows. So I decided to create two invisible planes at the right place. In these objects' properties I turned off Visible to Camera and Visible to Reflection/Refraction because I'll do these things in post.
Click on image to enlarge 
Click on image to enlarge 
Rendering
Environment Effect: I used VrayEnvironmentFog with a huge box gizmo. Here is the setup

Unfortunately I ran out of time so I had to render in just 1600x2000 pixels. If I had had more time it would have been 3200 pixels on the longer side. I don't like small pictures because you lost all the details but I didn't have choice. My PC is not very up to date, to say the least.
One thing I’ve forgotten to mention is that I use linear workflow. I know there are a lot of people who don't like it and a lot of people who think that you can't make a nice picture without it. In my opinion it doesn't really matter how you work if the output is great. It's just a question of workflow.
Click on image to enlarge 
Click on image to enlarge 
Post production
The other stage I love! This is where the magic happens and where you can finally get a glimpse of your final work!
If your picture scaled to thumbnail size does not punch you in the face after a simple curves correction (and maybe some vignetting), you must go back to max and tweak the lights and/or the textures. Anything else - at least in my workflow - is just polishing and detailing.
Click on image to enlarge 
I usually do two things in post: I adjust the picture with levels, curves, color balance, etc. and insert elements. For example the little girl, textures, flares, etc.
First, I do some adjustments to see if my picture is good enough for post work. After this I turn this layer off and start adding the elements. You should work on them until they blend well.
I always do the post as non-destructive as I can to have the opportunity to dynamically change anything whenever I want. Keeping that in mind, I use masks (don't erase layers), lot of folders (or groups) with masks and I don't use merge! I encourage you to keep your psd file clean because at the end of the day it can go crazy and a simple change can easily be a nightmare! I know that this way the size of your file can be huge but I think it's worth it! If the file is really that big, one thing I do - more and more these days - is turn off Maximize Compatibility at saving in PS. It can reduce your file size dramatically. I can do this because I always use Photoshop and never open it with older software.
I won't show you all the elements and adjustments because it's very boring. Instead I'll try to round up some tips I use a lot.
Masks
First of all, as I mentioned before I never erase. Masks are everywhere! If I paint some shadow I use a solid color fill and a mask. This way if you find your shadow too black and want some blue tint into it, you can simply change the value of the color fill.
Masking again
Clipping masks: You have a layer and want to apply some kind of adjustment on it you can put e.g. a level above it and alt+click on the line between these layers. This way the top layer only affects your underlying layer. So you don't need to copy the mask whenever you tweak it.
Levels (or curves) for shadows
It's not really a whole different tip but I found it very useful. If you paint a shadow then paint a mask for a level adjustment layer and tweak this. It will be more natural because it uses its own color palette.
Groups
Just use it and you'll never get lost in your own file.
Blending in
It is very important and very hard to blend all your post elements into your render. Use sharp, blur, noise, hue, levels, color balance, anything. I don't have a formula for this but trust your eyes and your guts. Don't let the elements "fall off" your picture. If something is weird with one off your elements then you should work on the blending.
Thumbnail and flip
If you see your work a lot (and you do see during the process) sometimes let your eyes rest a bit. Watch tv for some seconds, go out for a walk, stare out of the window and analyize again. Trust me, it works!
If you can't afford this luxury here's a few things you can do. Rotate or flip your whole picture horizontally or even vertically and zoom out. It will surely give you a new perspective and sometimes helps to spot some issues.
Flare
Never overuse flare! There are some cases when you can, but mostly you shouldn't. I usually do a black layer and apply the knoll light factory plugin on it. I can freely resize and move it wherever I like.
Chromatic Aberration
Same as flare. You should use it but avoid exaggeration. If you see it, probably it's too much.
Render masks
Almost everything is rendered-out-mask with one of the best scripts on the world: RenderMask. (https://www.scriptspot.com/3ds-max/scripts/rendermask) I know I could’ve set up render elements for this and sometimes elements are more precise but I'm too lazy and not far-sighted enough to see what I'm going to need. Setting up elements takes some time and if you do this for a not that important element, it's a waste of time.
I know it's a long post but I hope you've found it interesting and useful! Thank you very much for reading!
Click on image to enlarge


LEAVE A COMMENT


|

|

|

|

|


COMMENTS