Topology Study : How To Model Ski Googles in Blender
Using Blender modeling tools for creating realistic ski googles.


In accordance with the art. 13 section 1 and 2 of the European Parliament and Council Regulation 2016/679 of the 27th April, 2016 on the protection of natural persons, with regard to the processing of personal data and on the free movement of such data, and repealing Directive 95/46/EC (General Data Protection Regulation), hereafter RODO, I hereby inform that:
1. EVERMOTION S.C., 8 Przędzalniana Str., 15-688 Białystok, Poland is the Administrator of your Personal Data (APD)
2. Data Protection Inspector can be reached through e-mail: iod@evermotion.org
3. Your personal data are to be processed on the basis of art. 6 section 1 letter a, b and f of RODO in order to:
a) prepare, conclude and execute the agreement and for other purposes approved by you,
b) to execute the legitimate interest like marketing of products and the agreement, claim assertion or defence against claims resulting from the law regulations.
4. Entities entitled to the reception of your personal data may be the authorised public bodies; mail providers; providers of the services covered by the agreement; responsible for debt recovery, keeping the archives, document utilization, legal consulting, technical services, IT services and accountancy.
5. Your personal data shall not be transferred to the third country, nor to the international bodies.
6. Your personal data shall be processed within the period of the agreement and upon your additional consent until you withdraw it. APD shall keep the data for the period of any civil law claim execution connected with the agreement.
7. You have the right to demand an access to your personal data, to correct or to delete the data if there is no other basis for the processing or any other purpose of such processing or to limit the processing of the data, to transfer the data to another administrator and to raise objections to the further data processing if there is no legal basis for further processing and to withdraw any previous consent.
8. You provide the personal data voluntarily, however they are necessary to conclude the agreement. The refusal of providing such data may result in the refusal of the agreement conclusion.
9. You have the right to lodge a complaint to the Personal Data Protection Office when in your opinion the data processing violates the regulations of General Data Protection Regulation of the 27 April, 2016 (RODO).
10. Your data will be automatically processed, including the form of profiling.
11. You are obligated to forward above mentioned information to your representative, especially if you appointed this person in the agreement as the contact person or as the representative for the agreement execution.

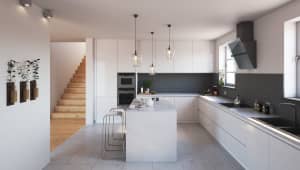
Hi, I`m Marcin Białecki from Evermotion. Most freelancers need good universal scene for rendering small objects like furniture etc.
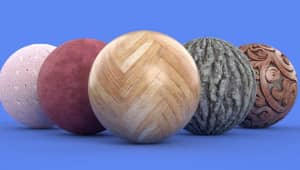
In this "making of" you will see how to create useful studio for Vray. Most well shadered and textured models look really good when put in this scene. I used great shadered and textured models from Archmodels vol. 134 collection, made mostly by Jawor (Evermotion Team).
Let`s get started. 
At first, you need to configure your V-ray Settings (F10), Preference Settings (Gamma 2,2) and Nitrous display driver.


Build your studio, whatever size and shape you need. Put holes in the walls for windows and leave two walls open" (just delete them) to let HDRI work fine.

Adjust size and settings of Vray lights. Put them in windows. (see image). Add one more key light - Vray dome light. Remember to add HDRI map to "use texture" slot for better and more complex reflections.


Now, you need to change settings of this HDRI:

You need to make some test renders for best result.
TIP: Make mirror material and put to the "override mtl" in V-ray: global switches slot to see clear-mirror reflection in all objects in scene. You can also add this material just to one of the main objects for quicker result.
Add camera to scene. Remember to check "depth-of-field" and adjust number of subdivisions in subdivision field. If your "Global subdivs multiplier" (SETTINGS) is higher than "1", value of "depth-of-field" will be higher as well.

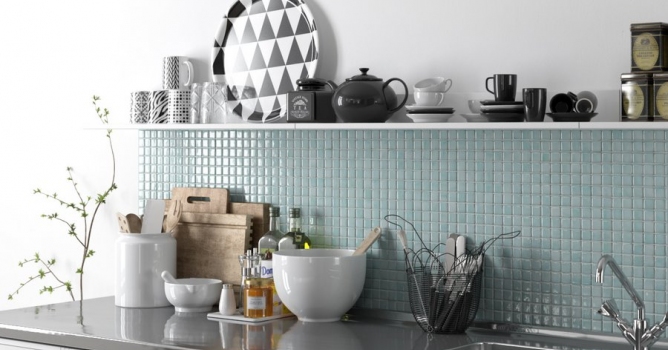
The only thing I modeled myself in this scene are tiles. Easy job :) You can see on images quick way to create mesh and nice shader. If you are using nitrous (see image) you can easily see all effects like reflect, bump, displacement etc. in viewport straight away by checking "SHOW REALISTIC MATERIAL IN VIEWPORT" option (wait for refresh).


Now, let`s see the difference between render with & without DOF (Depth of Field). For the purpose of this tutorial I have rendered two shots. You can easily see which one is better.


And now - the same scene with V-Ray DOF:

Additional shot with V-Ray DOF:

One more TIP: Photoshop DOF (from zdepth) is fake and will never look too good if you have reflections or refractions in your scene. Render time with Vray DOF (4:42:25) can take more time than applying fake DOF in Photoshop but it will give you much better results!
The final scene:


LEAVE A COMMENT


|

|

|

|

|


COMMENTS