This tutorial is not intended to teach you how to model, texture, illuminate and render, but it will show You what techniques You can use to match photo and 3d mesh and how to handle hi-poly models in viewport. Let's get started...
Click on image to enlarge
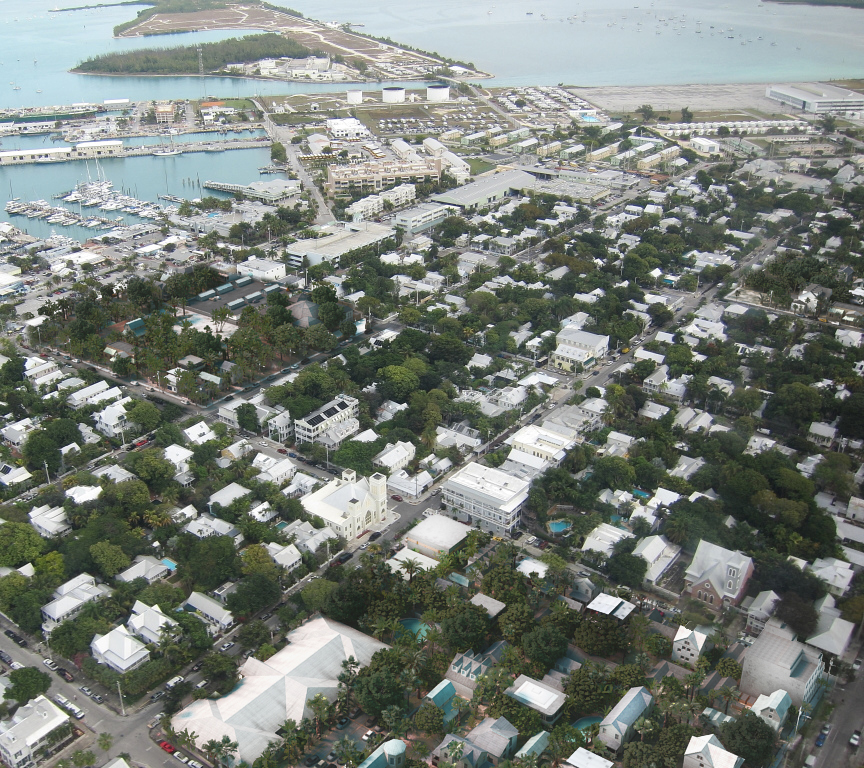
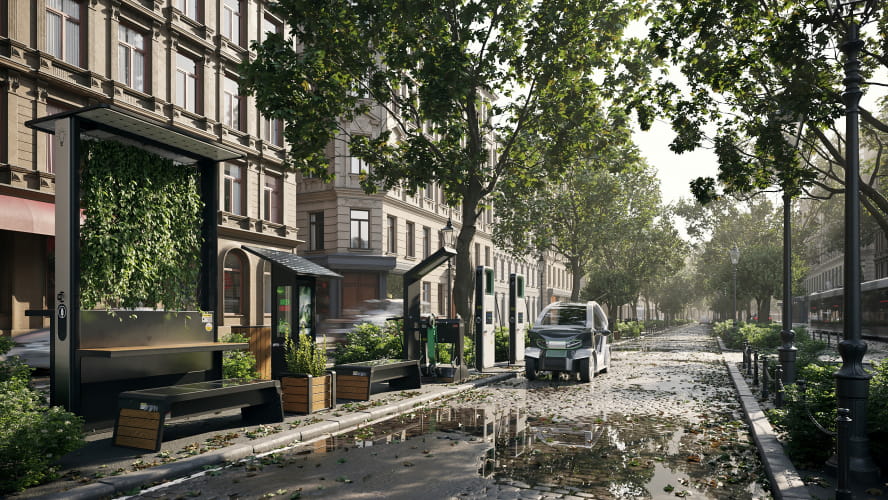
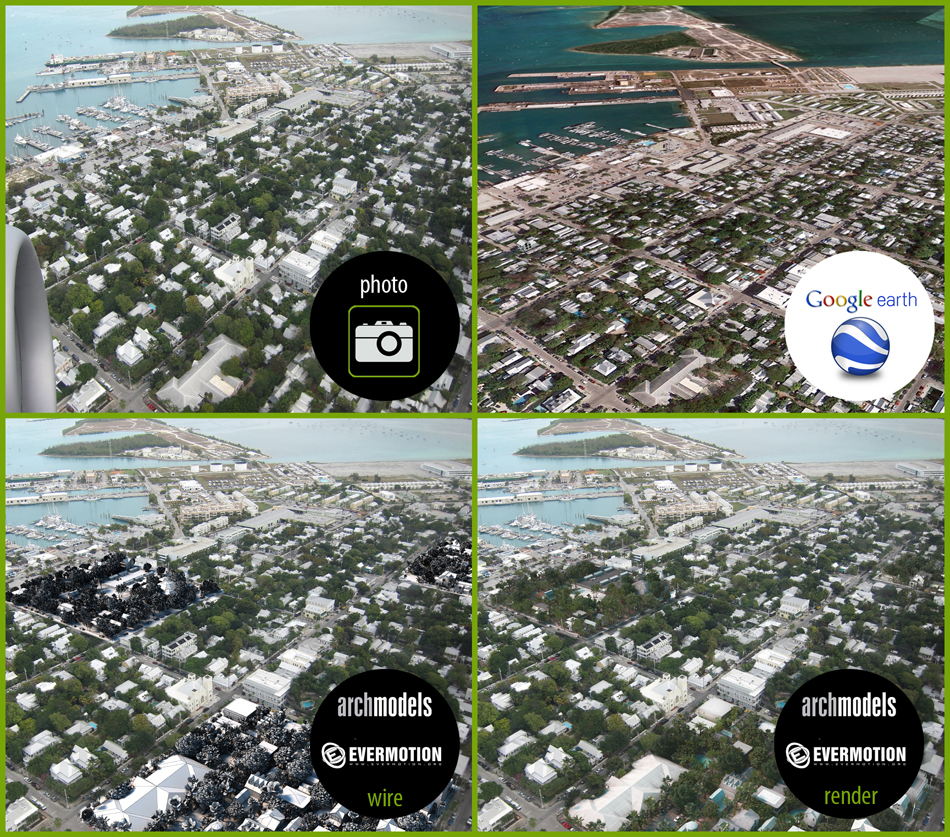
This is the final stage of our work - some city blocks are 3d mesh, some are real photo. Can You tell which is which? :)
Click on image to enlarge
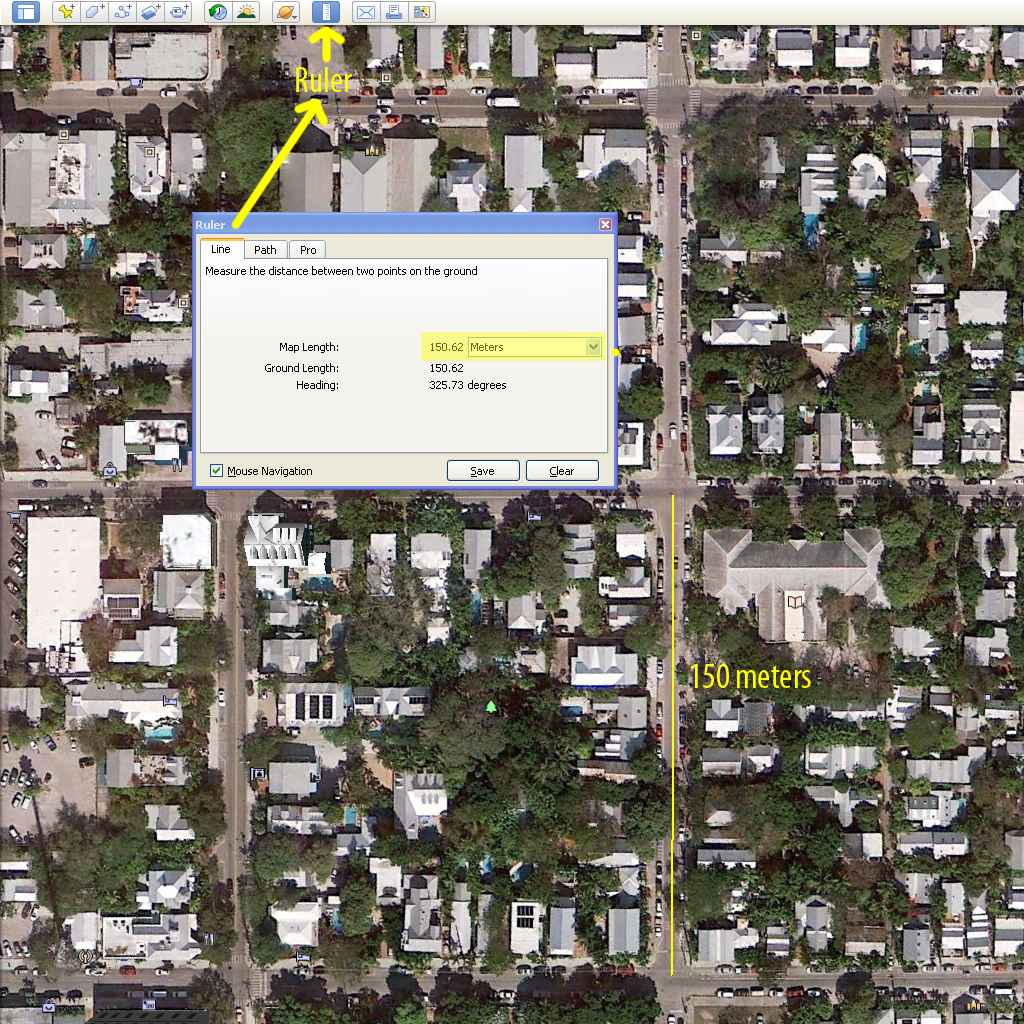
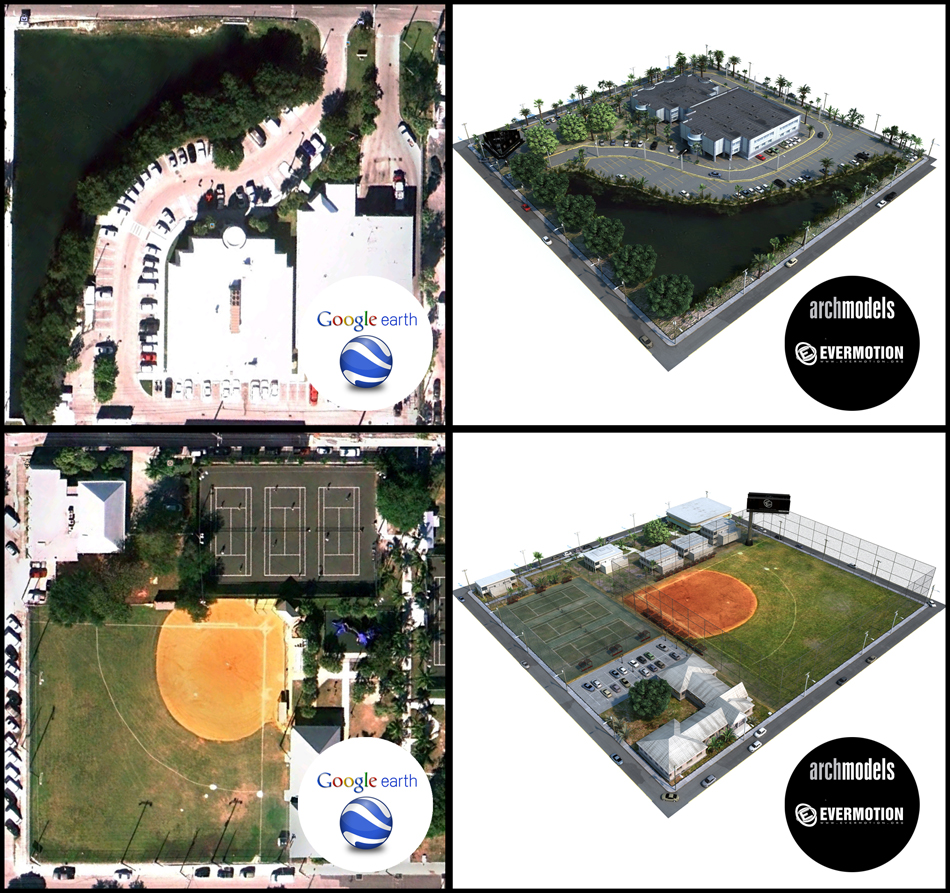
At the beginning find interesting image or use the one that customer gave in the project materials. Then use Google Earth. Find the city and the exact street of the place. Use a ruler to determine the scale - this is very important.
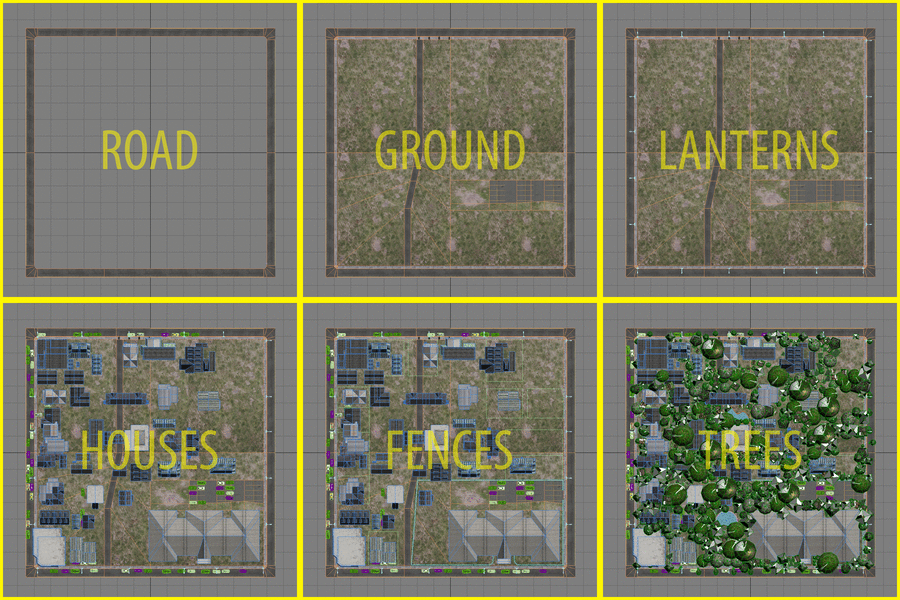
Each city or town is made up of basic elements such as: streets, roads, pavements, parks, lawns, lanterns, cars, houses, skyscrapers, buildings generally, fence, trees and people of course :)
Click on image to enlarge
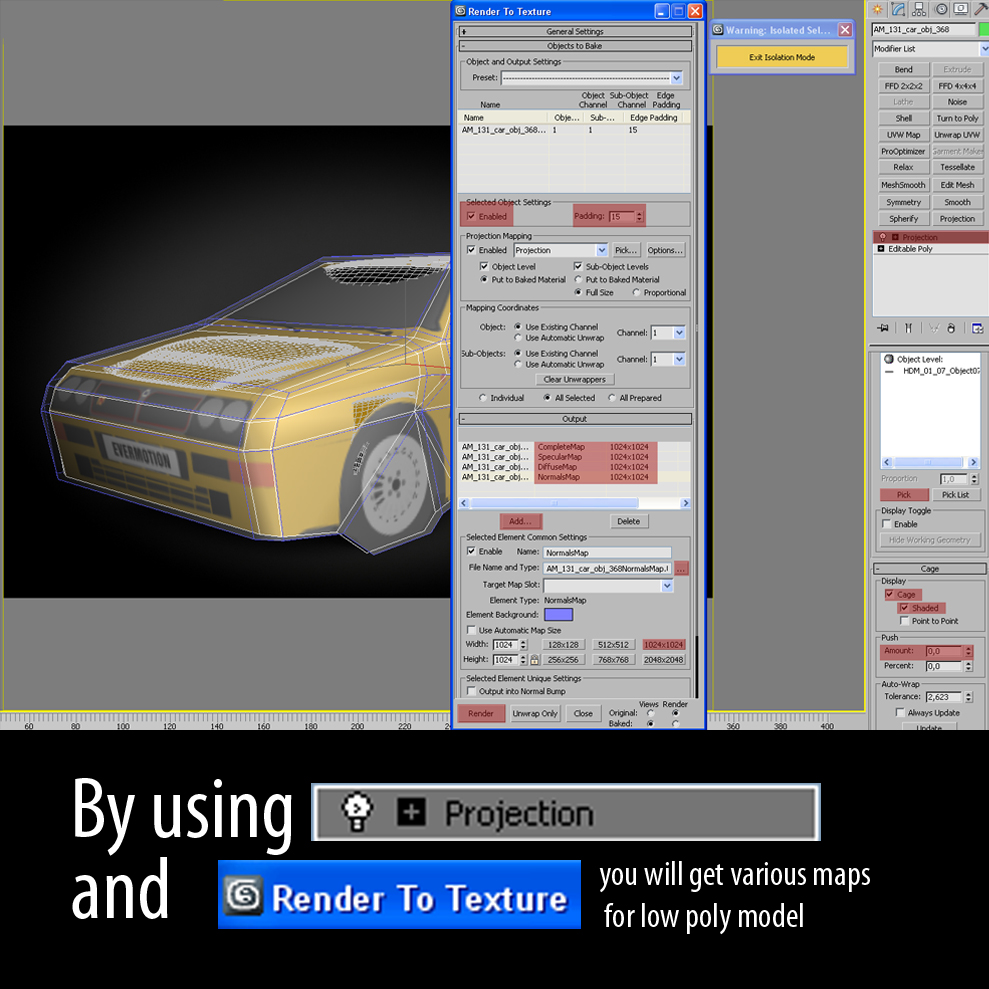
Working with large scale exteriors can slow even the most powerful computer, so You have to remember to use some tips that will allow You to navigate the viewport fluently. One of them is rendering to texture (baking). On the image above You can see hi-poly car. We are going to bake its texture.
Click on image to enlarge
Use "Projection" modifier and then render to texture. On the image above I highlighted all steps that I used for baking this model.
Click on image to enlarge
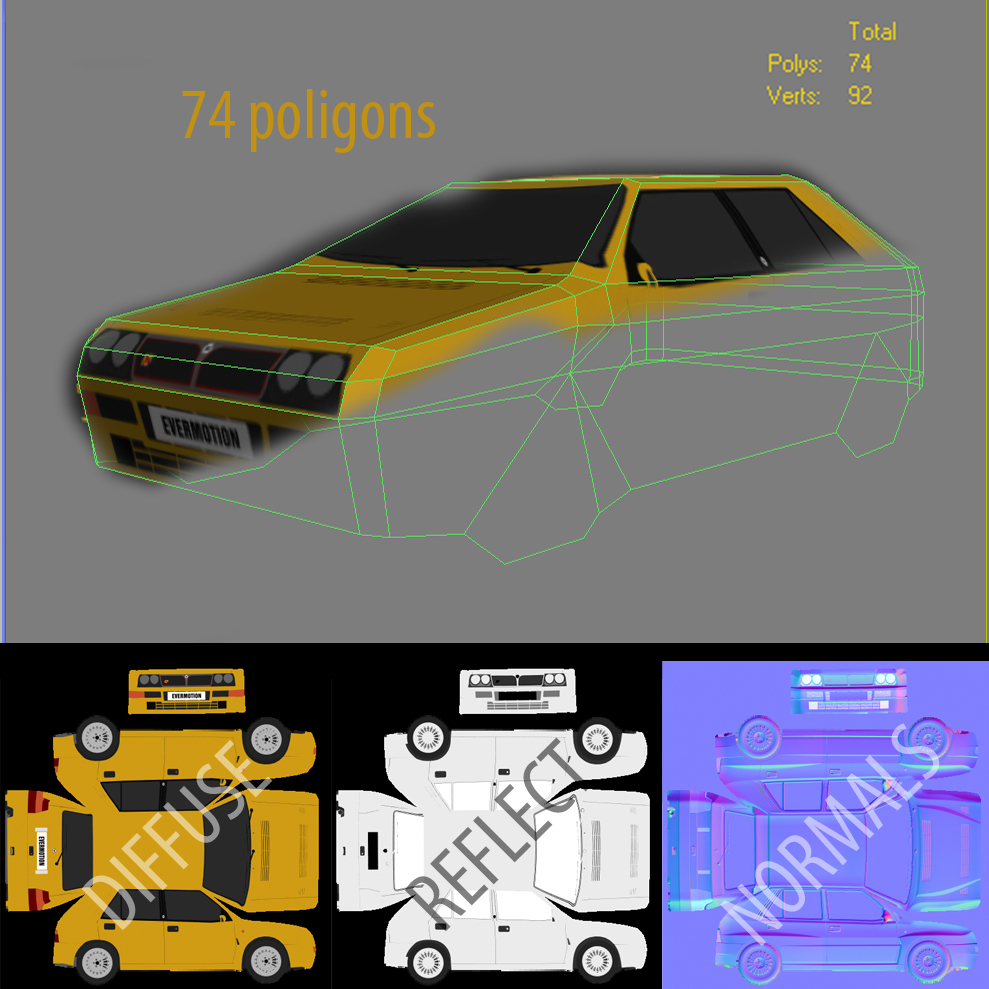
And final low-poly car has only 74 polygons. We are good to go! :)
Other things You may use to speed the viewport are:
- remember to work on layers
- often freeze and hide objects
- use proxies
- try to avoid instancing. Maybe they are better when rendering, but more instances = slower viewport refreshing
- if possible, merge (attach) polygons into one object (Multi/Sub-Object material needed)
- use adaptive degradation
- if possible, keep your textures resolution low
- optimize or use Pro Optimize modifier in 3ds max
- use plugins that speed up viewport (for example "polyspeed")
- If you work on heavy scenes, change Auto Backup from 5 min to 15 min
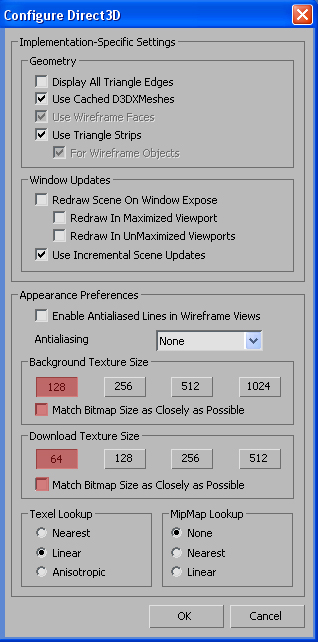
- Change bacground texture size in the viewport (extremely important!) Customize > Preferences > Viewports > Configure Driver> (see image below):
- using Xref Objects, Xref Scenes and Container also improve scene performance (Archmodels vol. 131 are made with XRef)
Click on image to enlarge
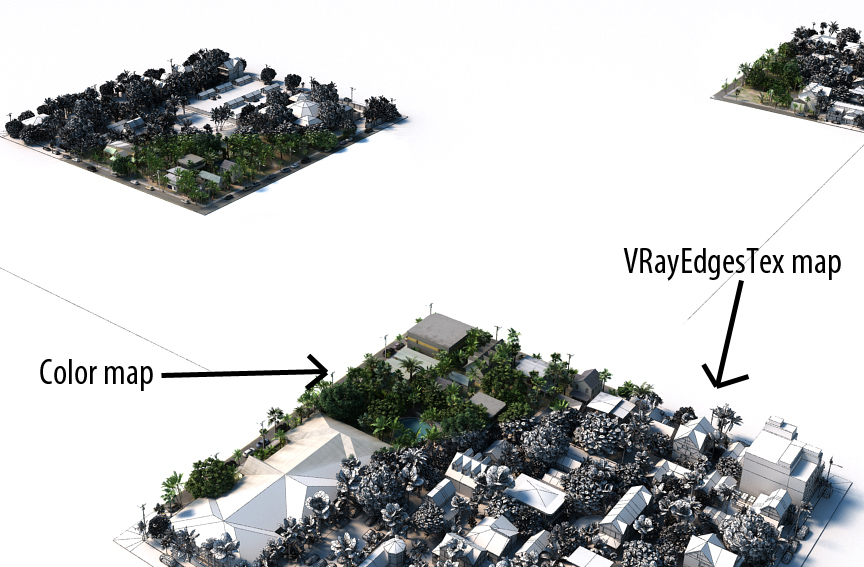
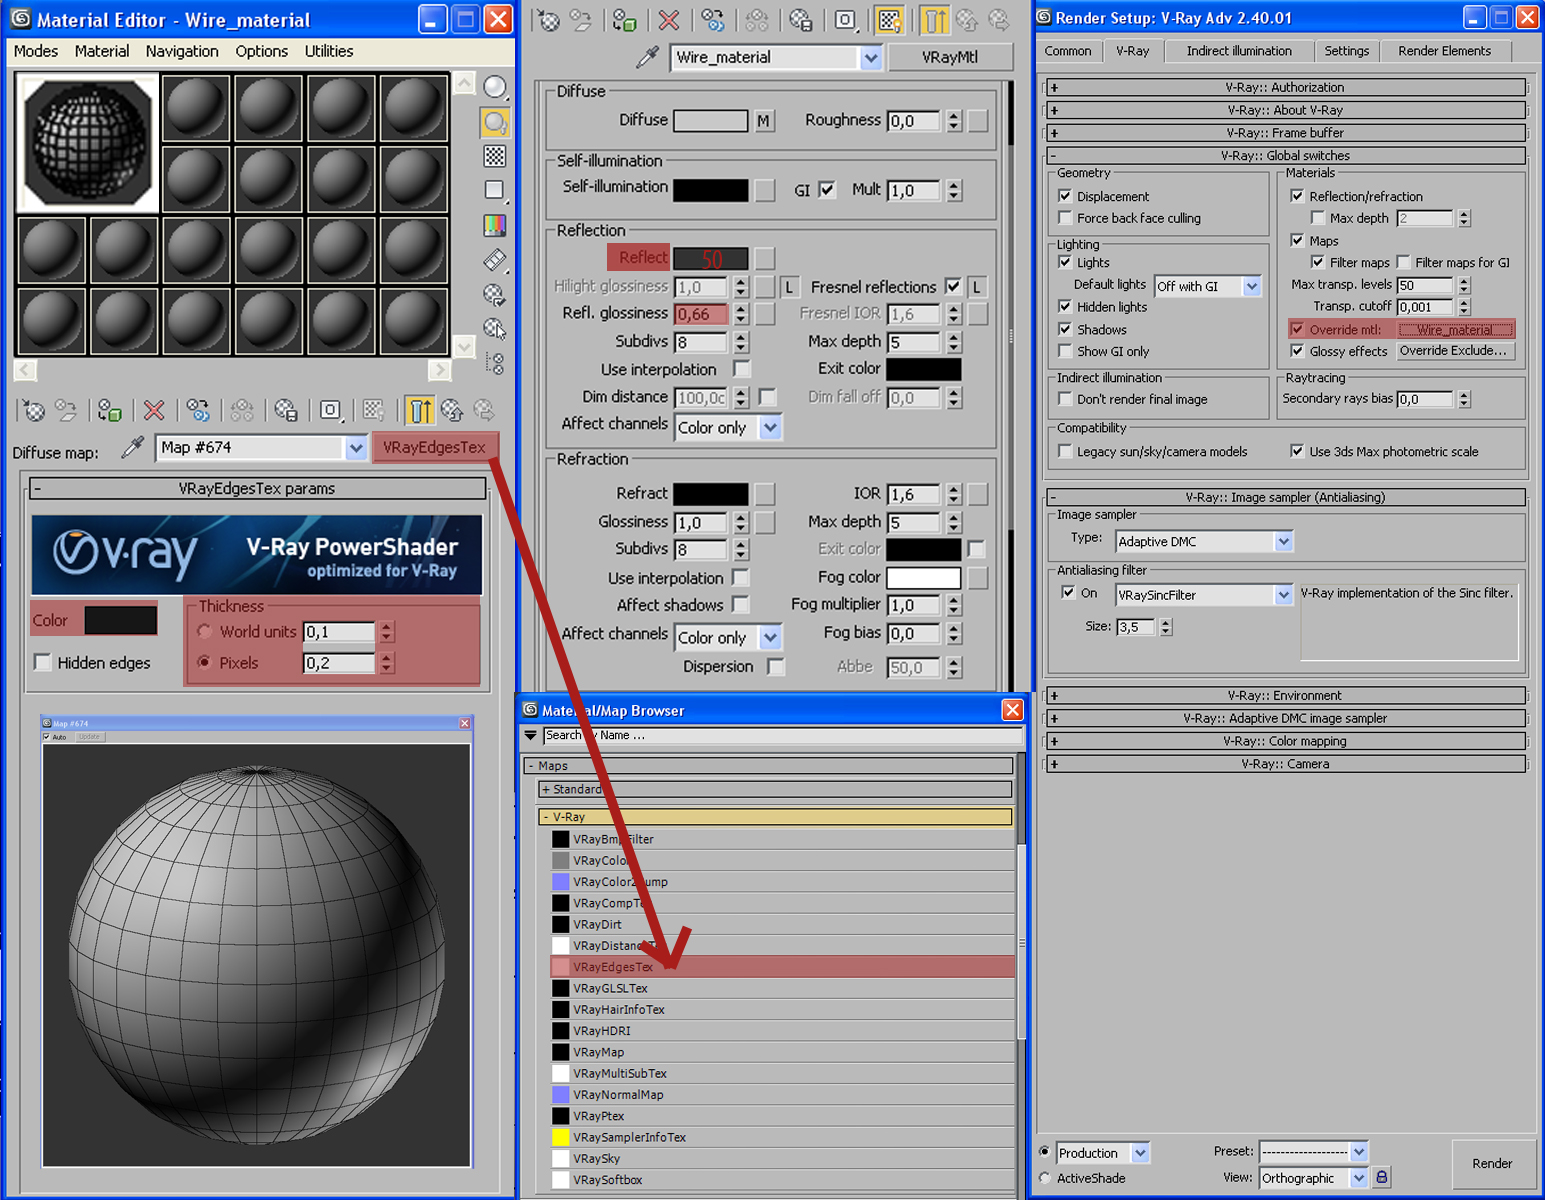
Before we will match our scene, here is one more tip: to quickly show wireframe You can use VRayEdgesTex map. This can also be used as a bump map. This gives the illusion of rounded edges.
Click on image to enlarge
The quick way to to preview the result of our work or just lighting and shadows is to use Override material. Achieve best results when you apply no reflection and no refraction material.
Click on image to enlarge
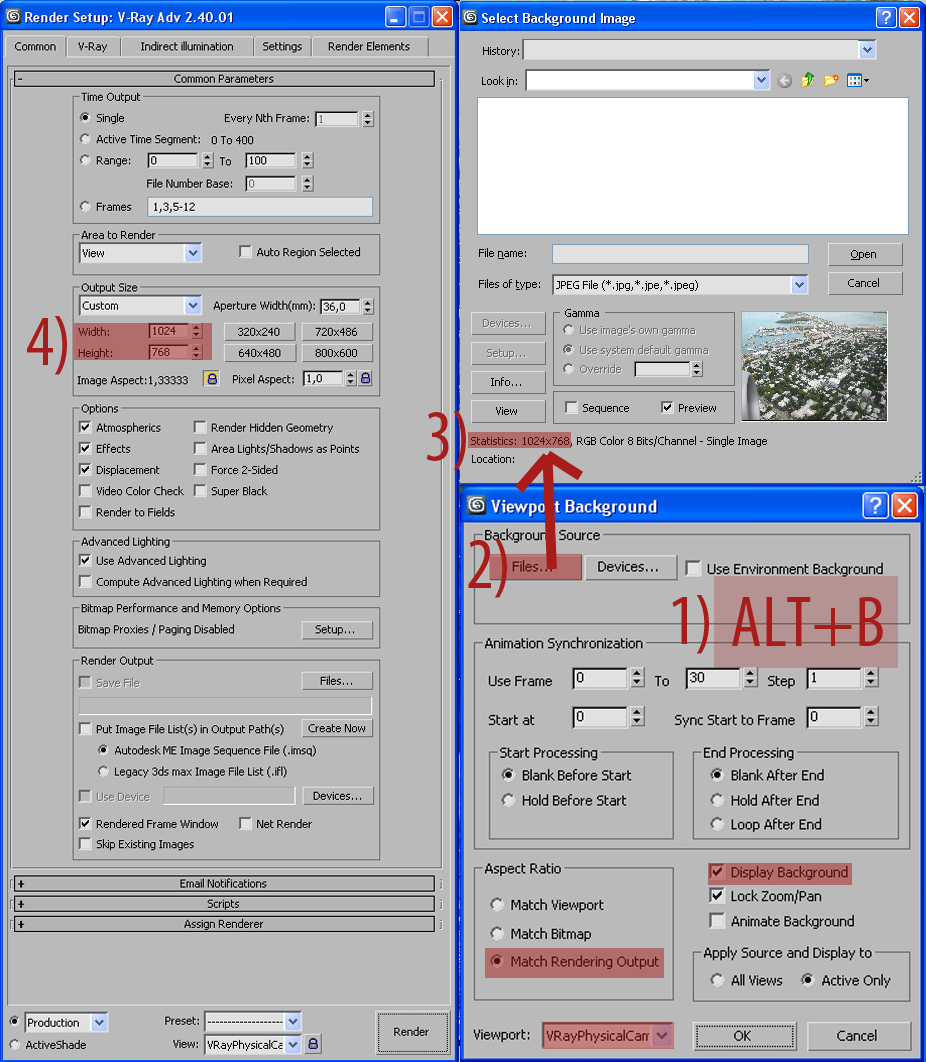
To adjust our meshed part of city to photo we need to bring this referense to our viewport. How to do this? First - hit ALT+B (Viewport Background). Load photo, remember photo resolution and type it in render output. Remember: to see the photo properly you must check "Display Background" and "Match Rendering Output" boxes. And now comes the hard part...
Click on image to enlarge
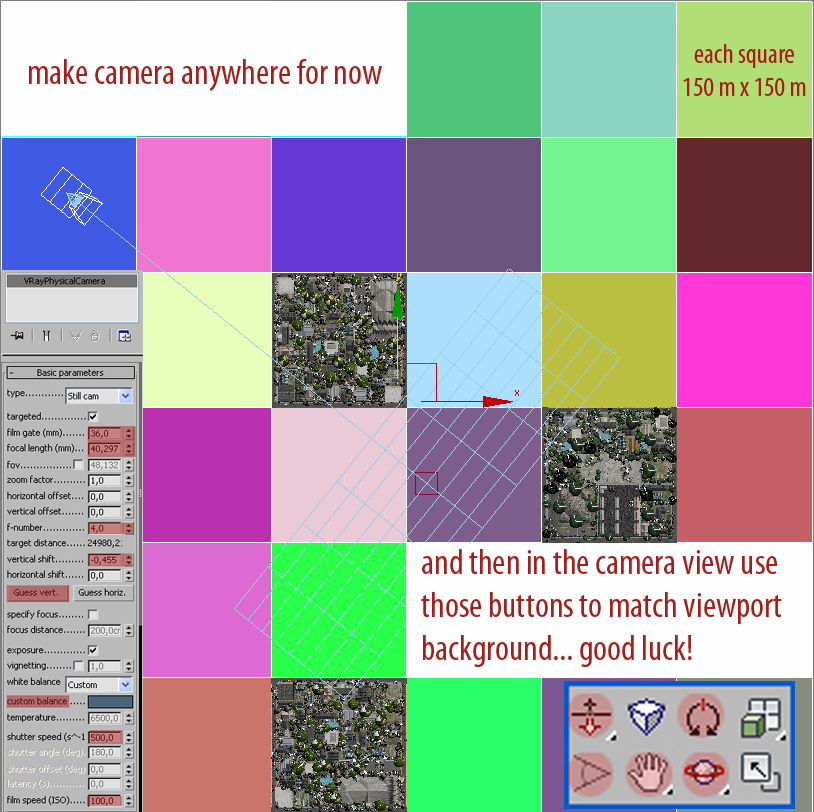
Create camera, go to camera view and by trail-end-error method try to position it to match the photo.You will need to use navigation tools, vertical shift and camera basic parameters.
Click on image to enlarge
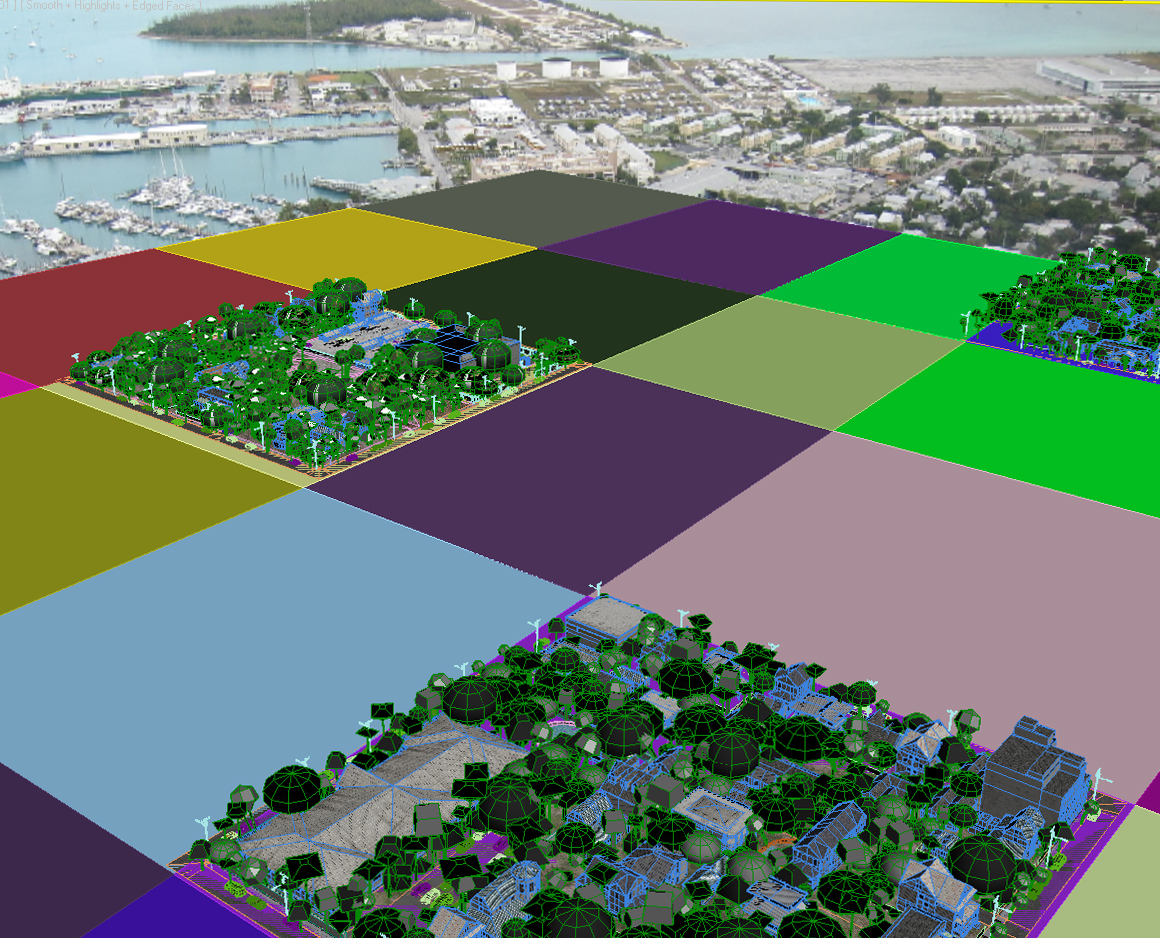
Try to work with some helpers such as lines, squares, etc. Each quarter is a square 150 x 150 meters.
Click on image to enlarge
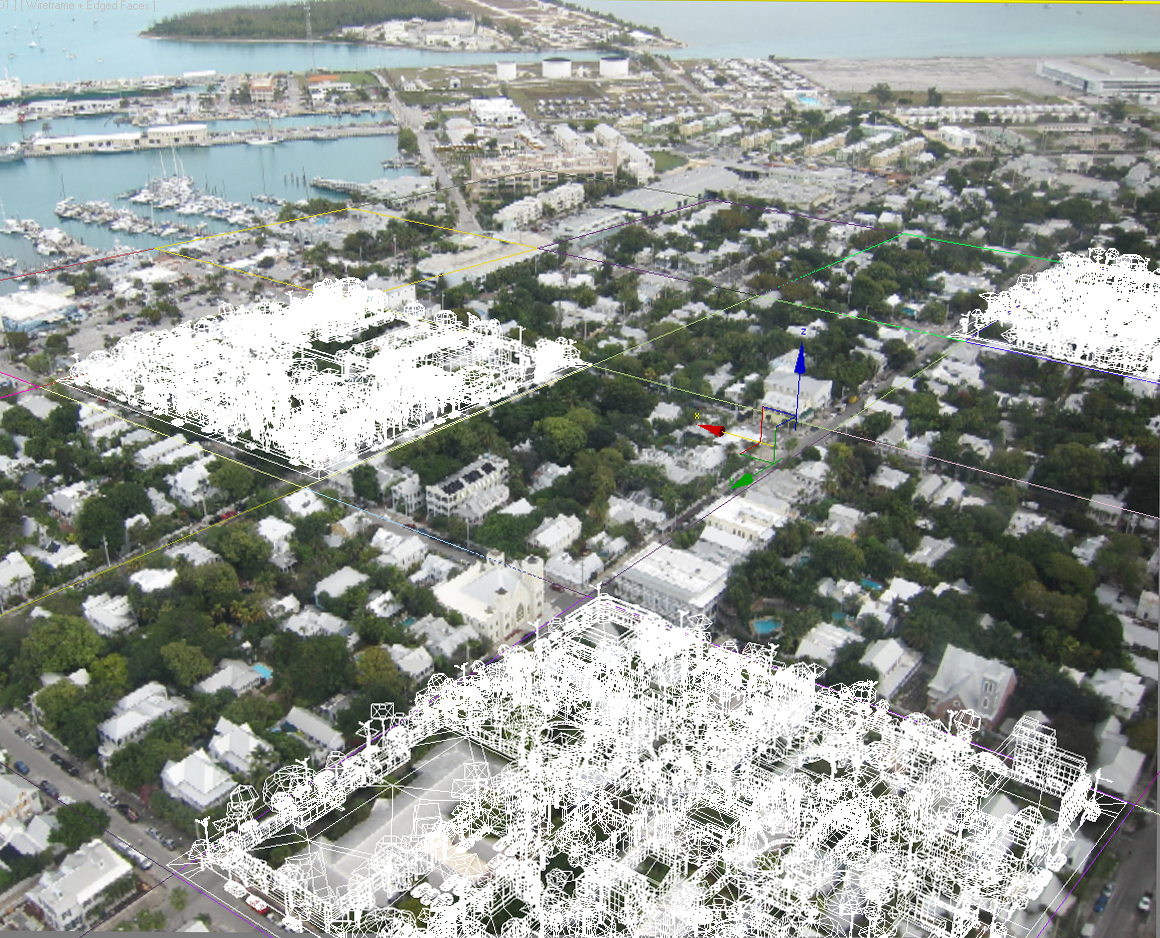
Use wireframe view often.
Click on image to enlarge
Using Evermotion Archmodels vol. 131 I was able to put 150 x 150 m 3d parts directly in the image.
Click on image to enlarge
Final result - three new 3d city blocks are perfectly matched with the photograph.
Hope it was useful for You! Good luck!










COMMENTS