Initial comments:
- while preparing an important model or working on some effect I always collect reference photos for it
- if I don't have to I don't use shortcuts, it doesn't matter if the rendering takes 2 or 12 hours if the final effect is worth it
- I have a rule that the quality of rendering depends on good materials, the settings are of secondary importance
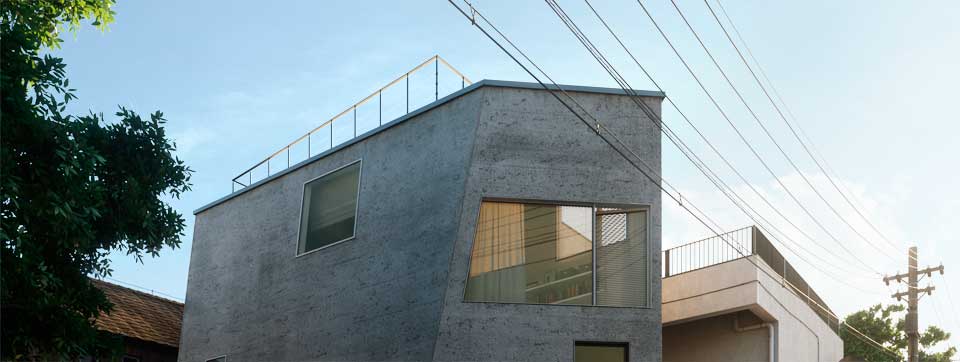
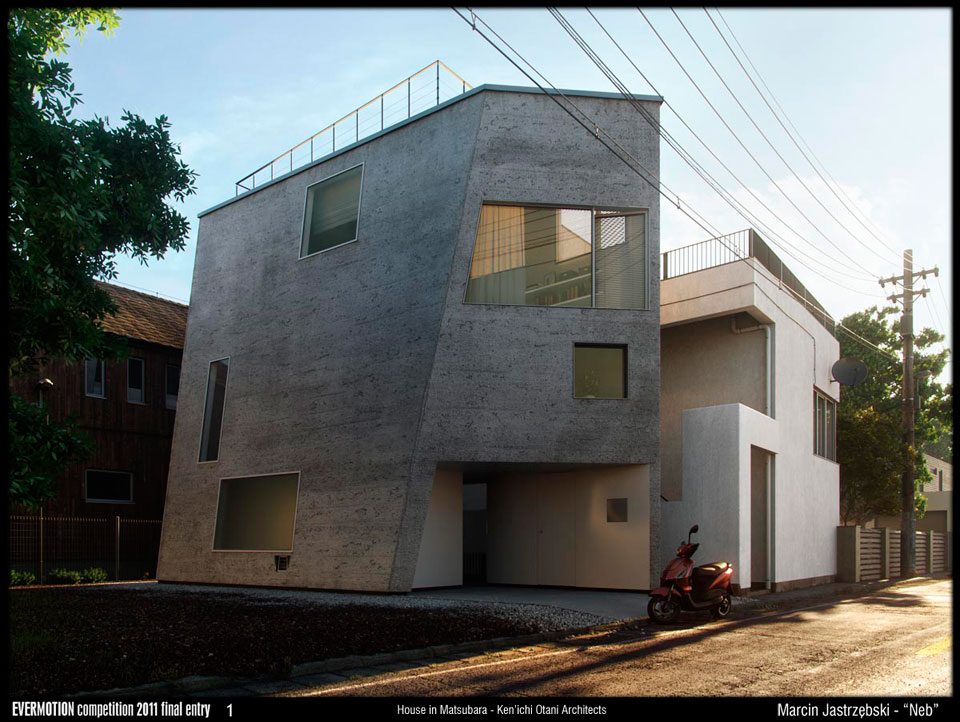
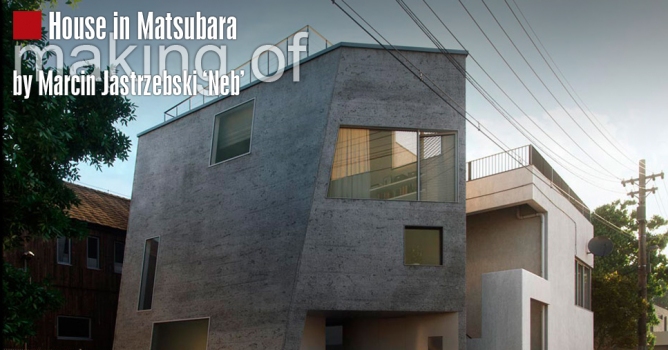
I prepared a tutorial describing my work on a competition project "House in Matsubara". I would like to share my experience in preparing more non-standard parts than modelling, texturing and 3D scene edition. It is enough to mention that preparing the basic models of the main building took me 3 days whereas the entire scene and the final renderings took me about a month of overtime work with short breaks. The biggest parts were created the fastest while the small ones- the most slowly, but they were the ones that made each of the three views so realistic.
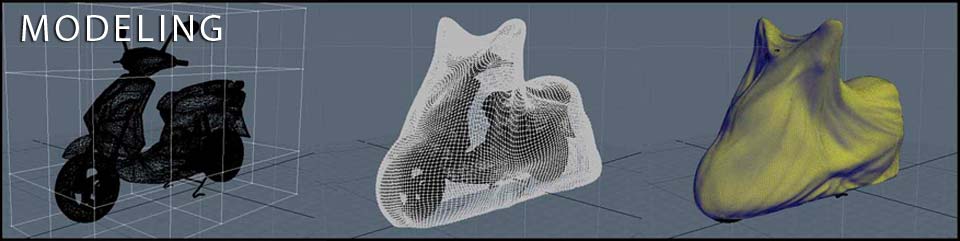
Modelling
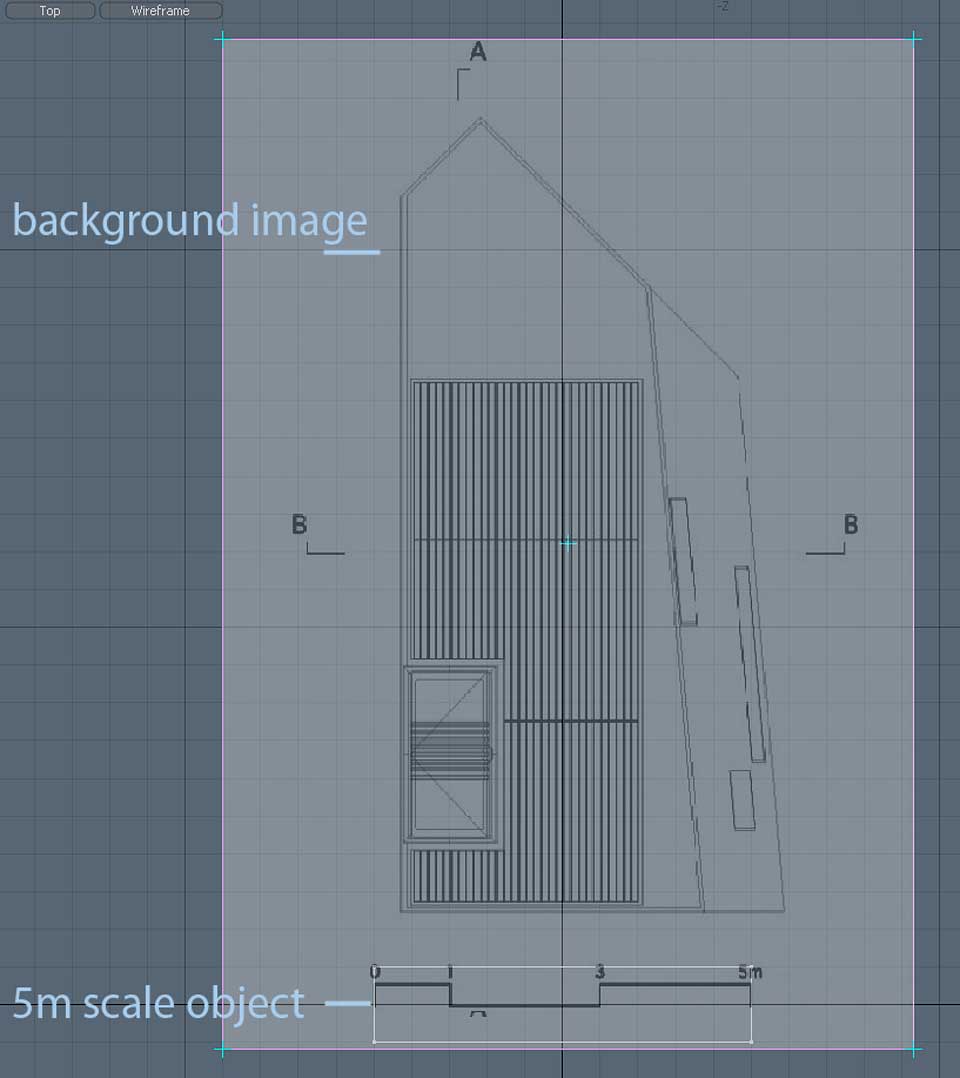
I found very few plans of the building and of a low resolution. On each of the projections there was a scale of 5 m length. I added appropriate plans to appropriate viewports in Modo as background images, I created a rectangle of 5 m length and I extended the bitmaps of the background proportionally so that the drawn scale covered my rectangle. On the basis of such plans I created the model of the building. Some of the details were prepared on the basis of the pictures only.

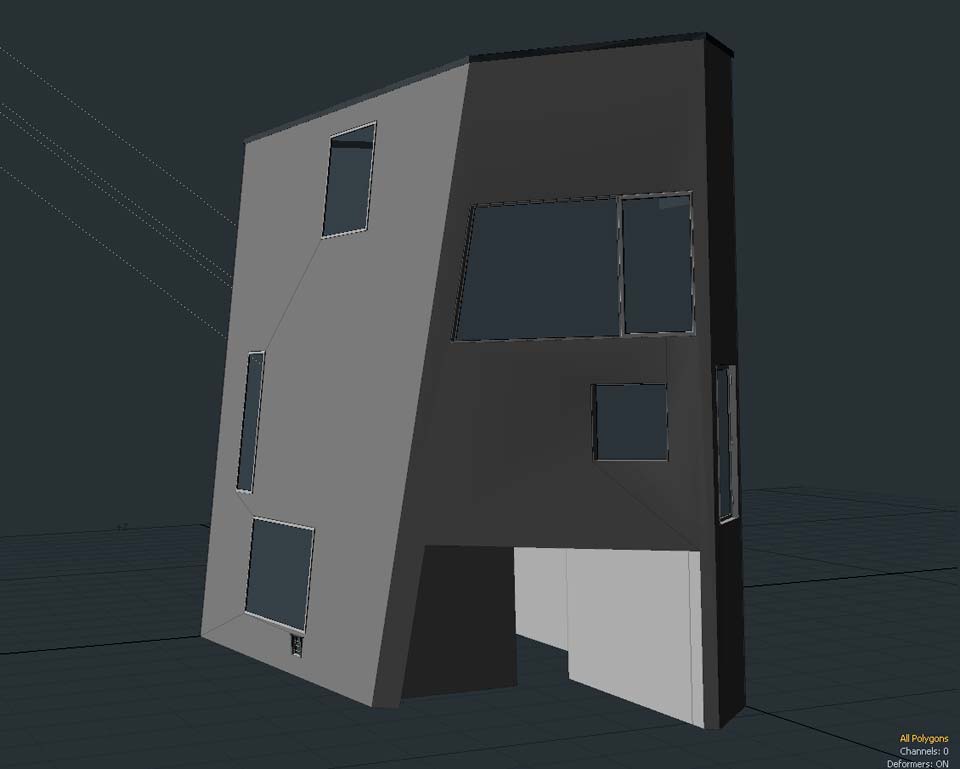
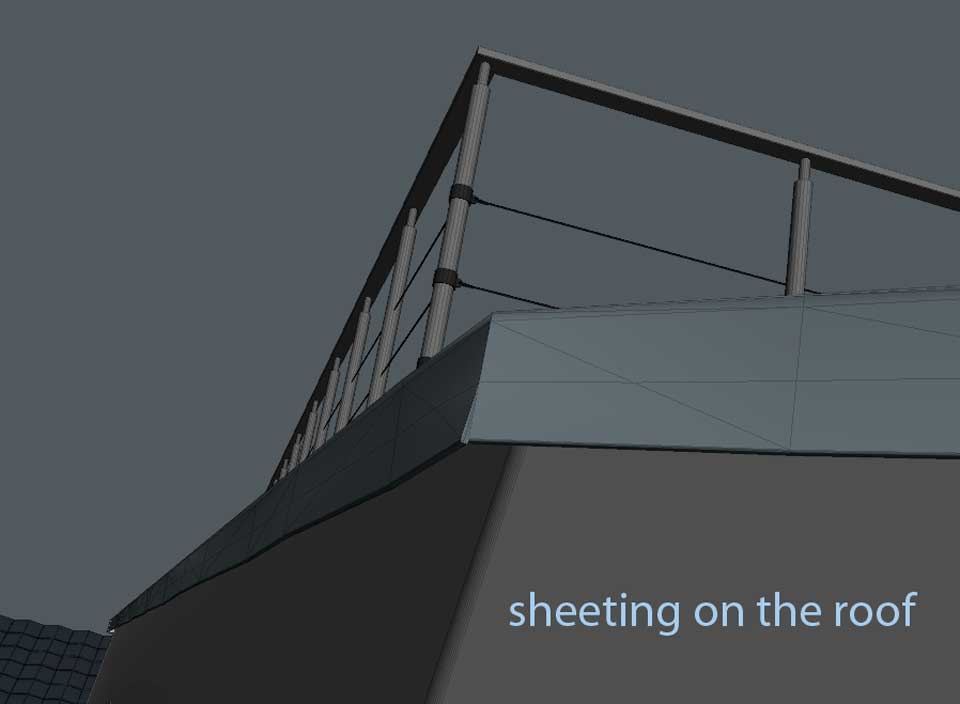
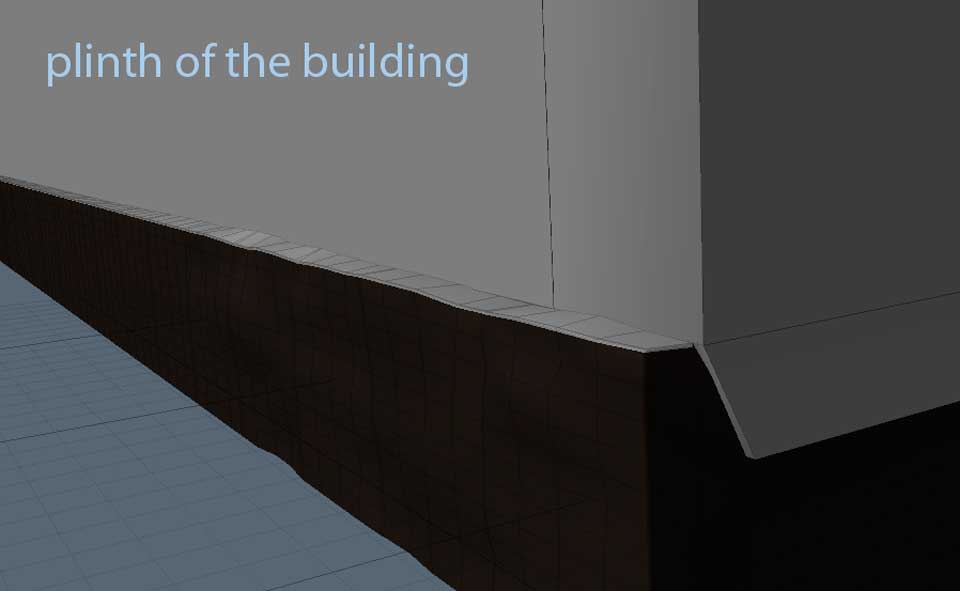
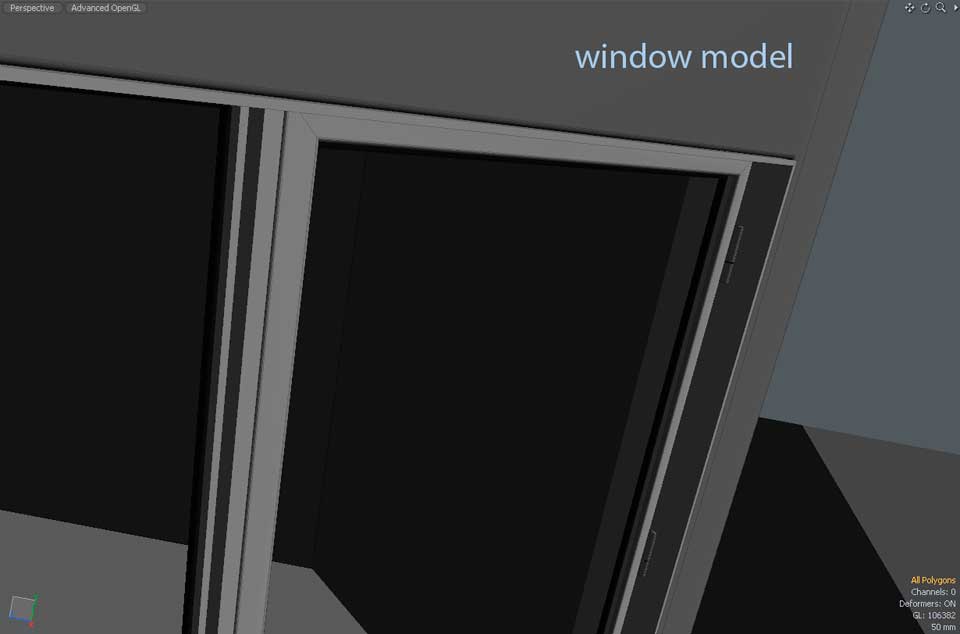
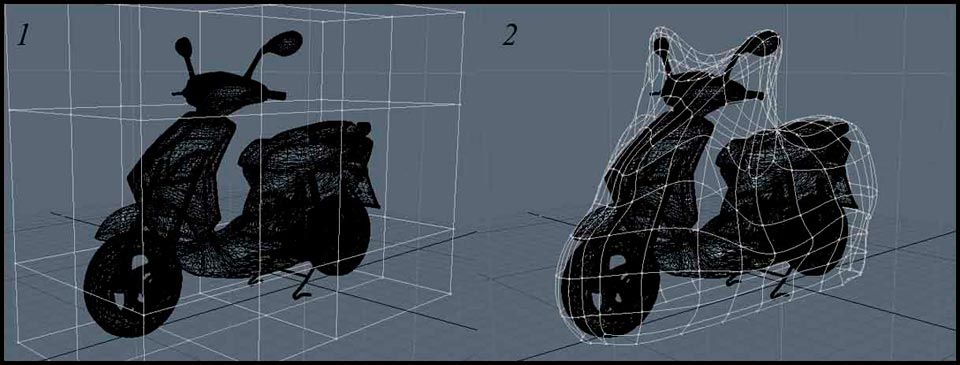
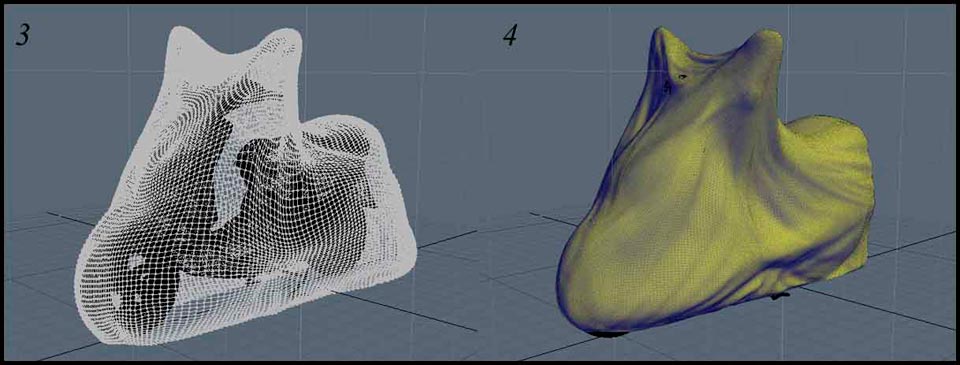
From the beginning I was trying to make the deformations of the elements such as: processing of the sheeting of the roof, roughness of the plinth of the neighbouring building, main deformations of the asphalt, curbs etc., already at the modelling stage. The objects in reality are not so ideally even and such procedures decide to a big extent about the final rendering's realism. To create roughness in Modo I normally use sculpting tools and for simple even roughness I use jitter function. Models with typical shapes are always prepared with a high precision in details in the finishing touch. An example can be window frames, which do not fit properly into the walls, with a small crack, a seal etc. Such attitude towards modelling makes the work on final views easier for me. At the beginning of work I am never a 100% sure what views will be set and how far from the object to put a camera.
Texturing
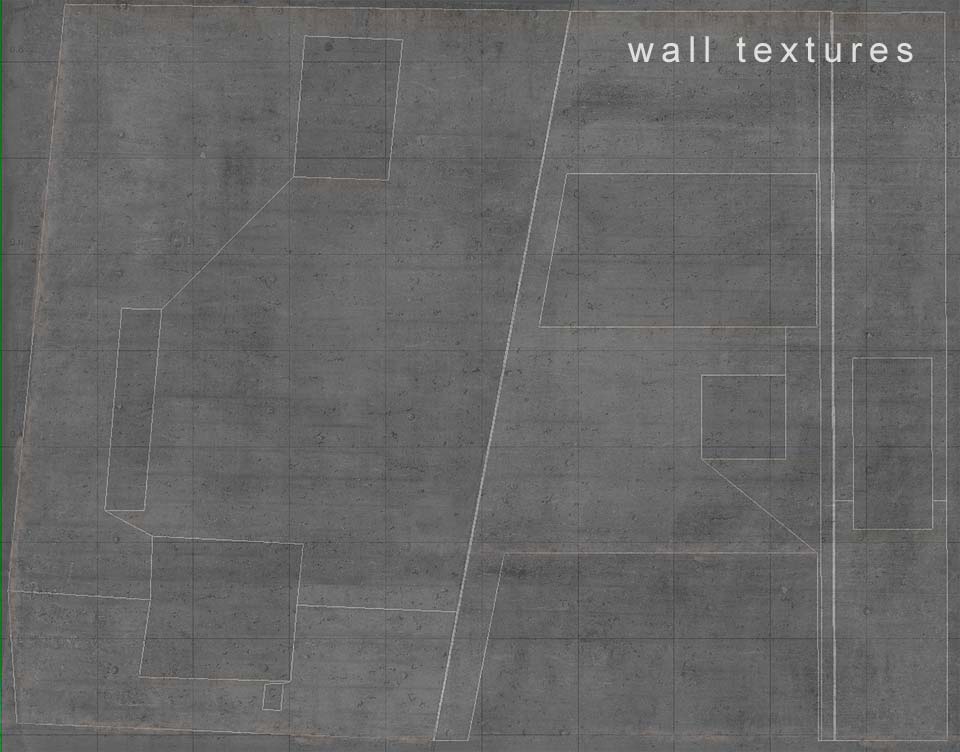
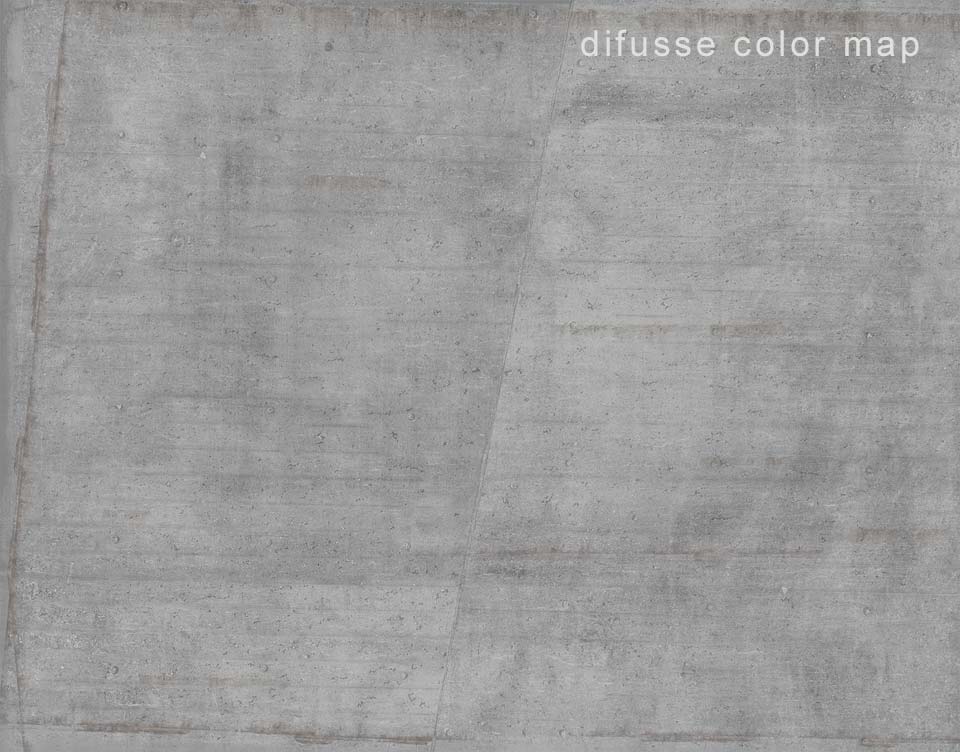
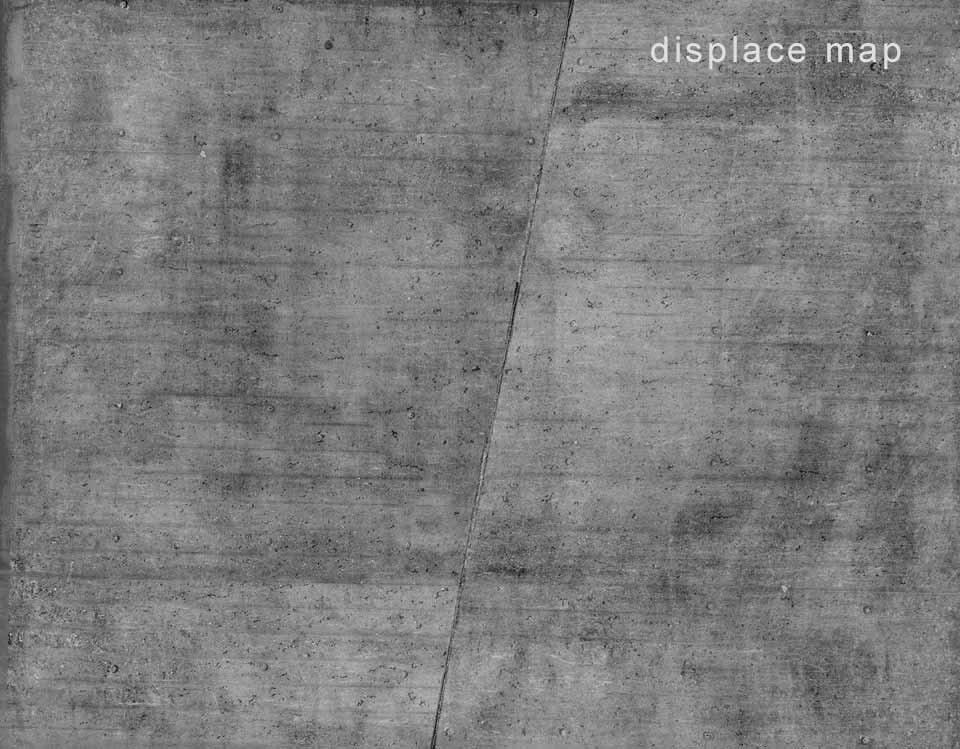
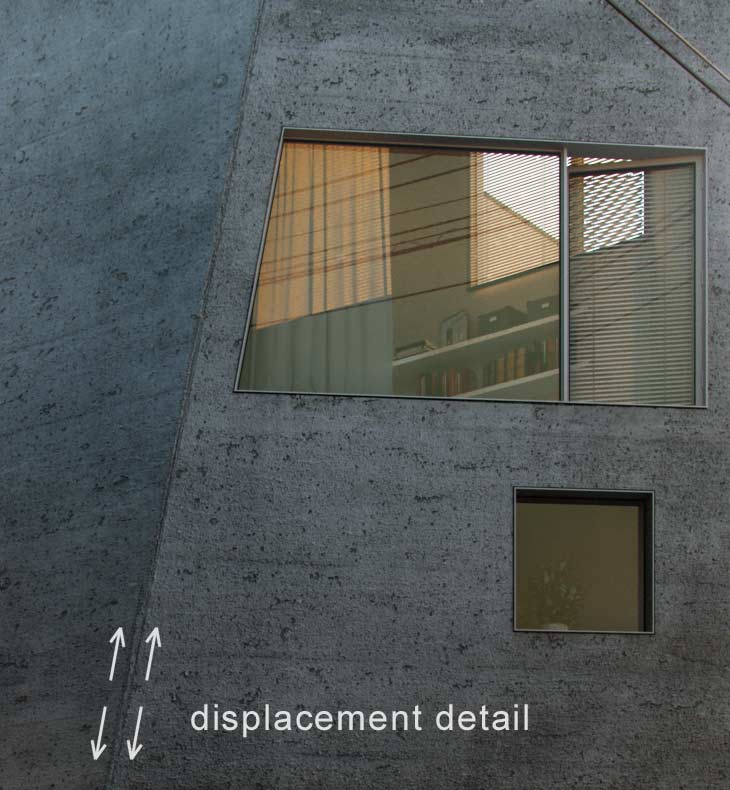
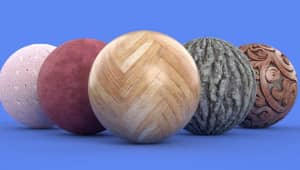
I started creating bitmaps from the material of concrete elevation of the building and the asphalt of the road. In Fryrender to imitate such surfaces I normally use a set of three textures: displacement map for unevenness, roughness map for full control of dullness or gloss and the basic diffuse colour map. Resolutions of the textures oscillated between 4000 and 8000 pixel in the longer axis. In this matter there is no compromising and any attempt of using lower resolution causes loss of quality of the details and a danger that the textured surfaces that are close to the camera will look blurry. UV mapping of the main surfaces gave me control over the precise location of the elements in textures. It was important because in most of the shaders I used displacement technique, with which I generated additional details in the look of the objects. In the outside walls material I used the displacement to create a rough rim between the walls. I make all the textures on the basis of screenshot created for an appropriate viewport.
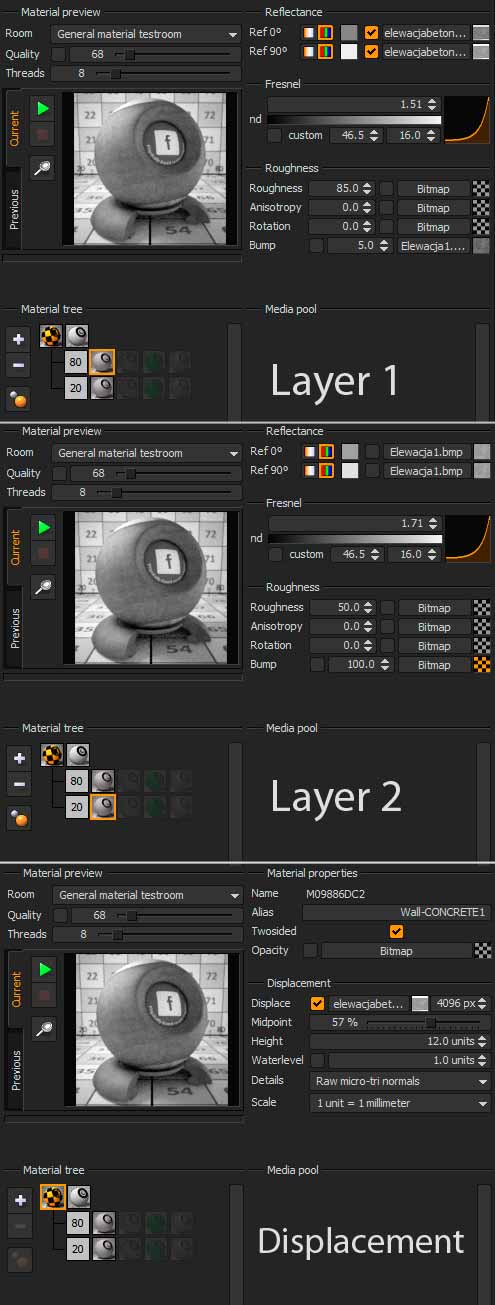
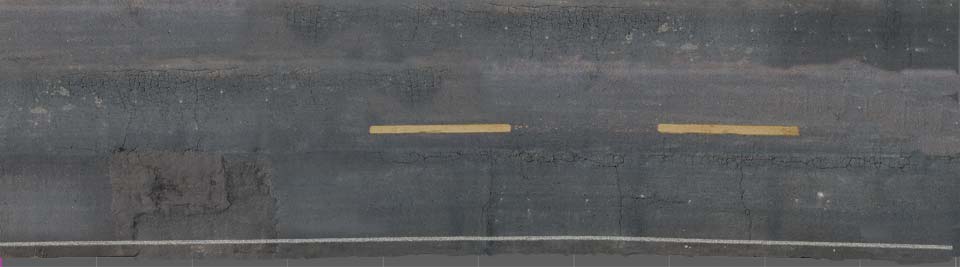
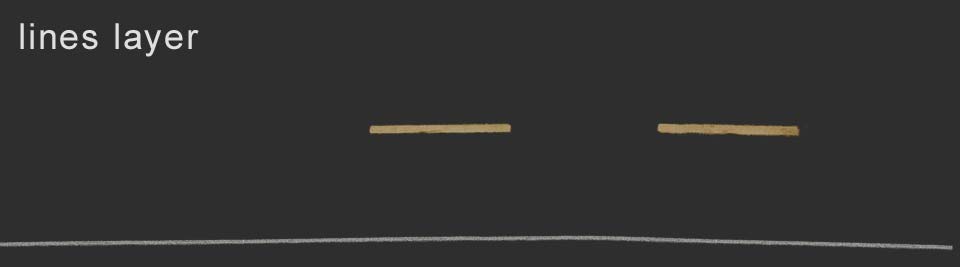
Next I put successive layers of textures from my resources; I add details when needed, like yellow stripes on the asphalt, slight damp patches on the elevation, roughness on the rims. Having all of this on the layers, I can position each element and edit. The crucial element is working on the final version of the texture this way (usually diffuse colour), because it is a basis to create further textures to the set which are roughness map, bump map, dispersion map and others when needed. If we don't achieve the final look of the texture and we generate next textures for other channels, in case of any changes we will have to correct the entire set.
Road
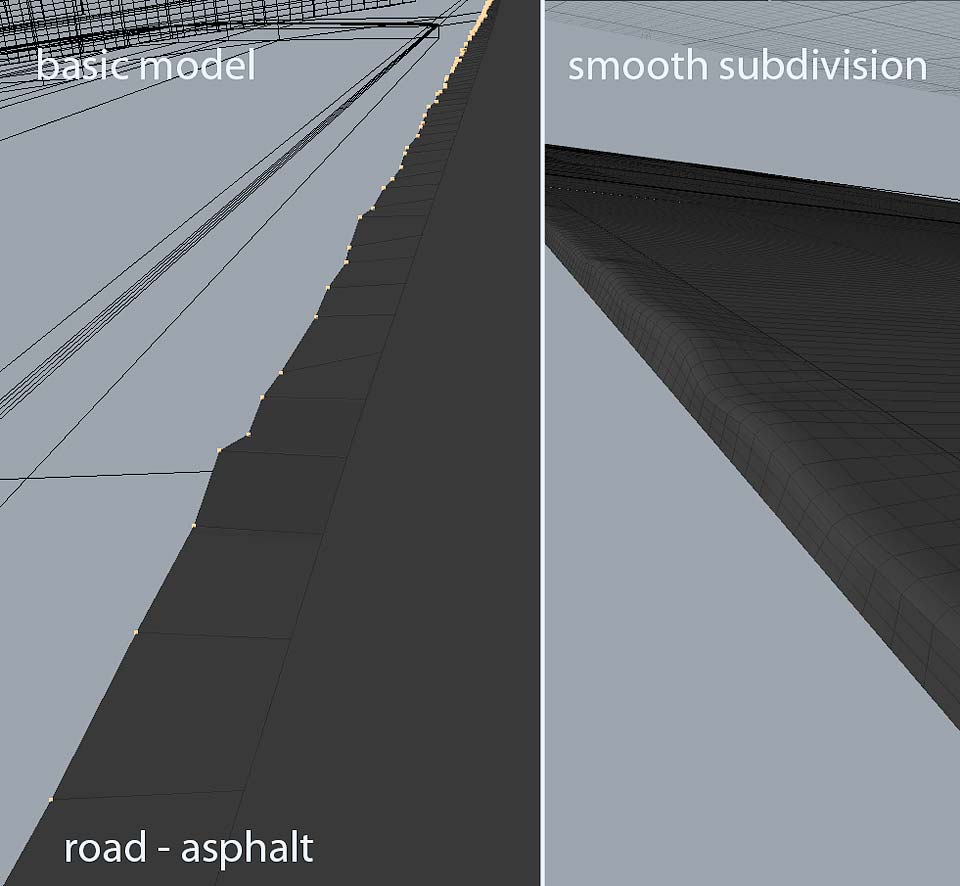
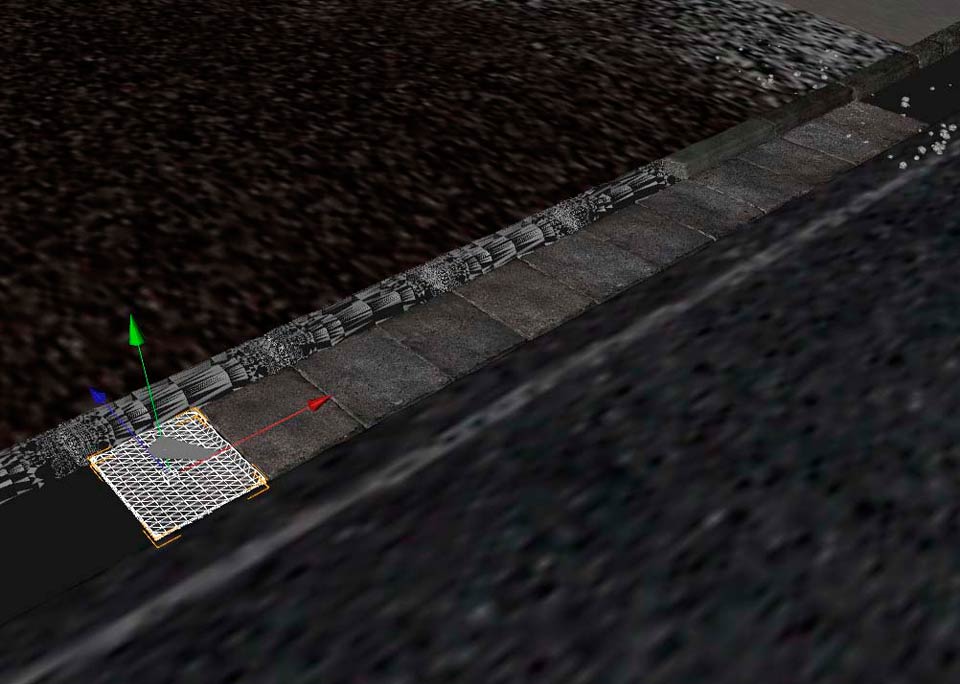
The model of terrain in the project is simple. I decided to focus on the detail of the rim of the road and the curbs and prepare these elements separately. I put a stripe of asphalt model on the main model giving it some thickness and modelling the rims with a division which later gives possibility of roughness edition with sculpting tools.
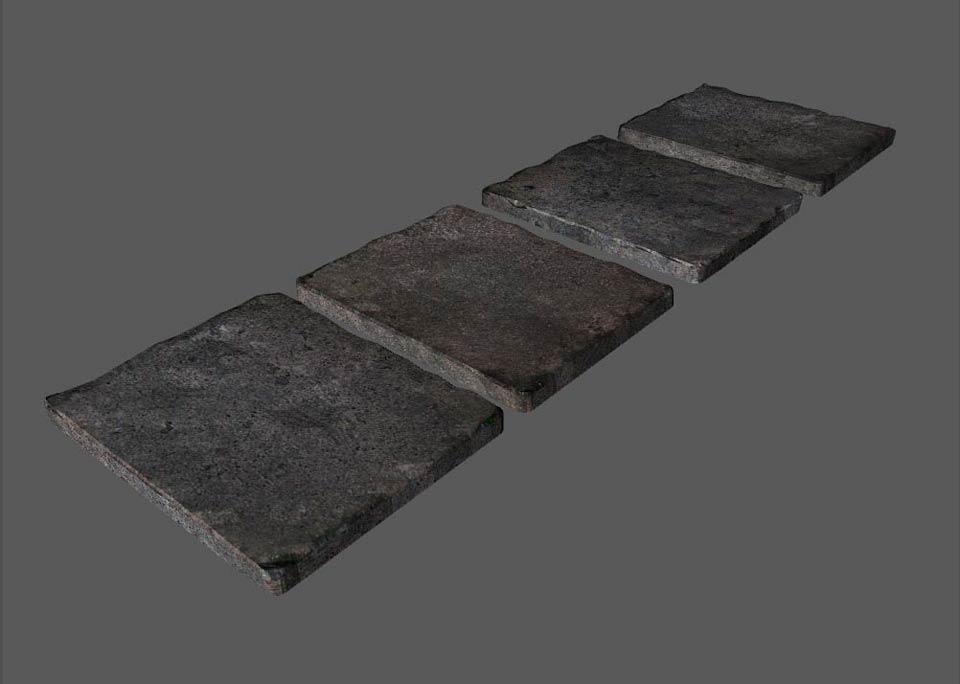
I matched it all to create a hollow in which I put the models of the curbs.
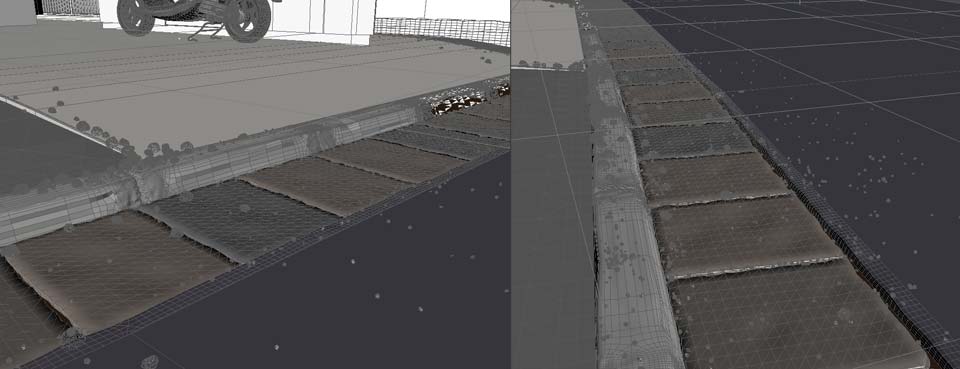
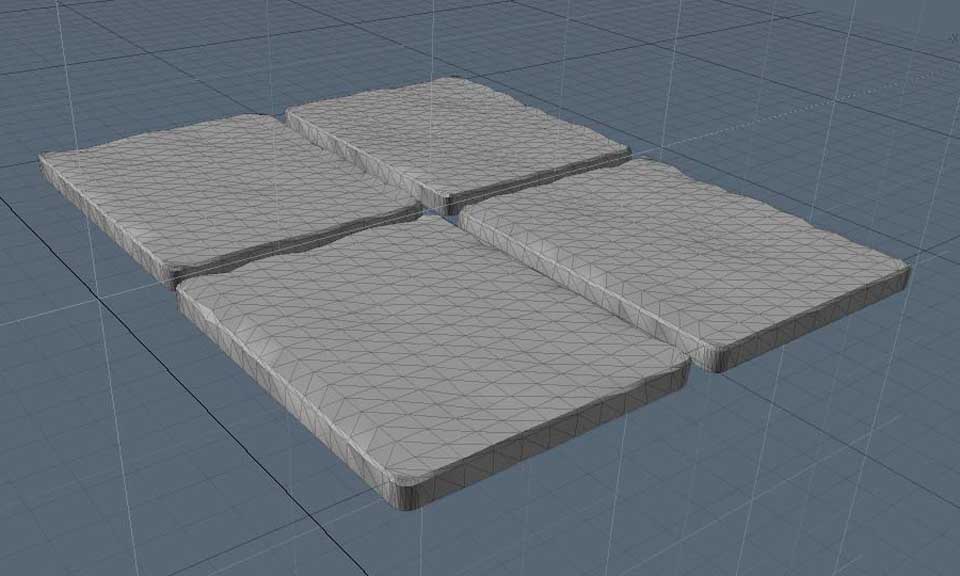
I made five different curbs and four concrete slabs. I copied them along the road generating Proxy objects from the originals. Having several different models and mixing their clones properly I got rid of a visible repetitiveness of the elements of a long curb.
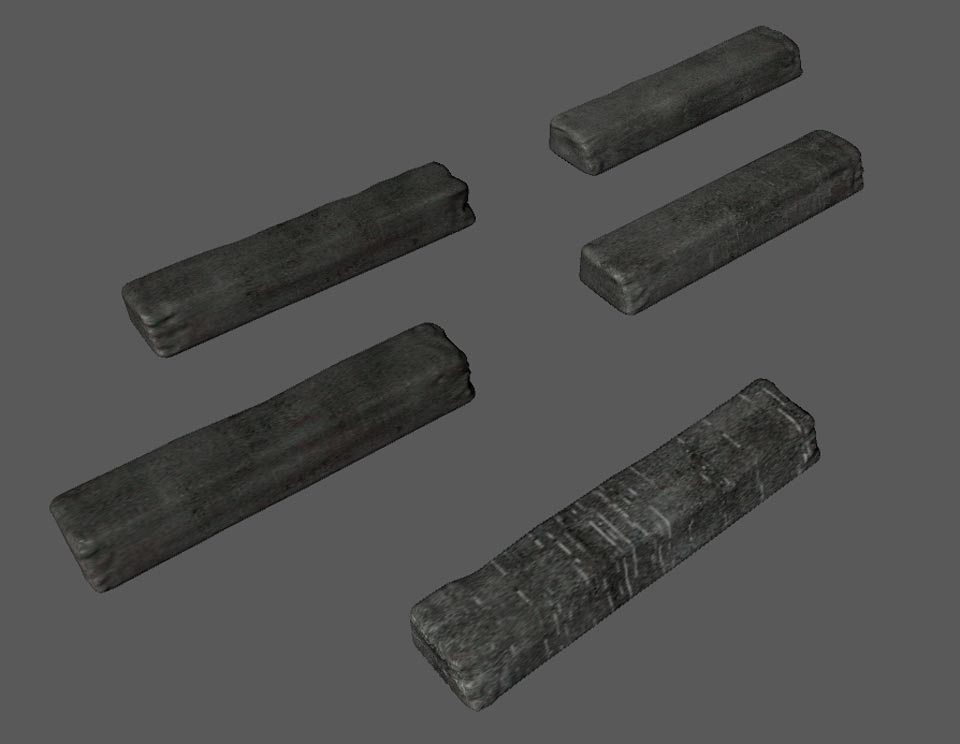
I detailed the objects of asphalt and terrain using displacement map. For asphalt I created a map with cracks and micro unevenness, for curbs I used a map of a slight roughness of concrete and for the main terrain unevenness of the ground and white stones. I many cases for displacement channel I use a map with colour channel and modify it properly using bitmap editor in Fryrender.
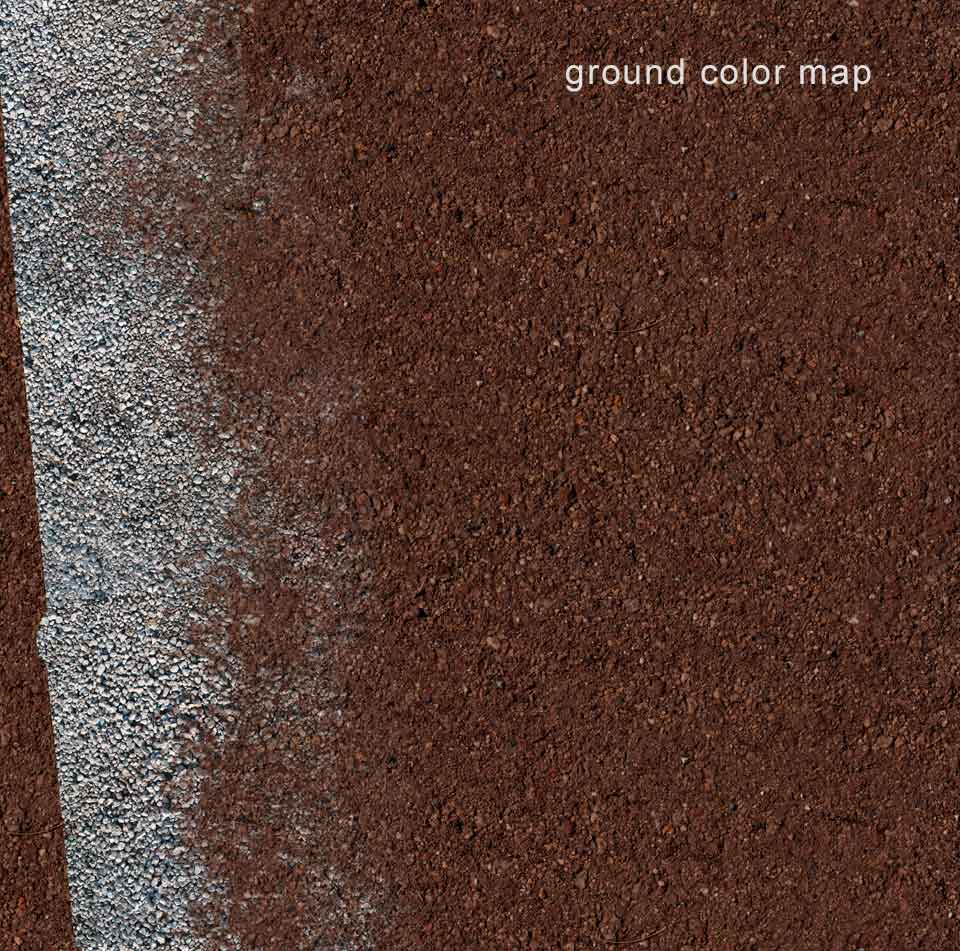
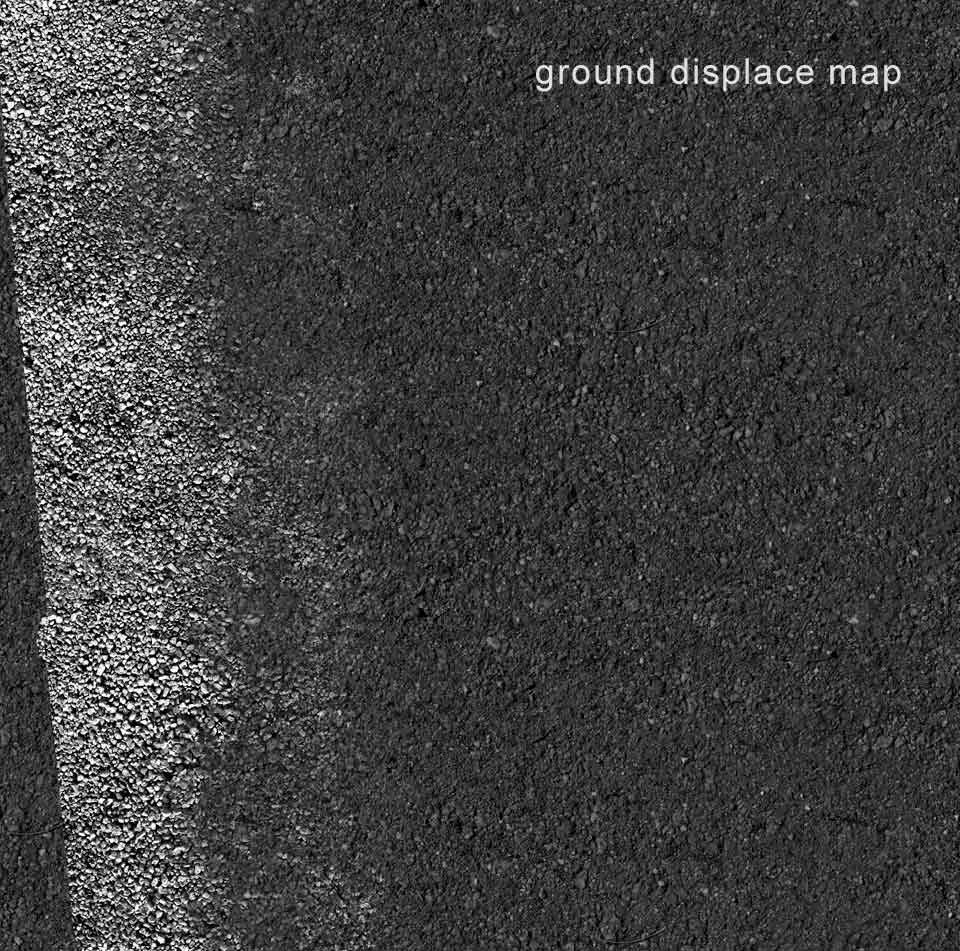
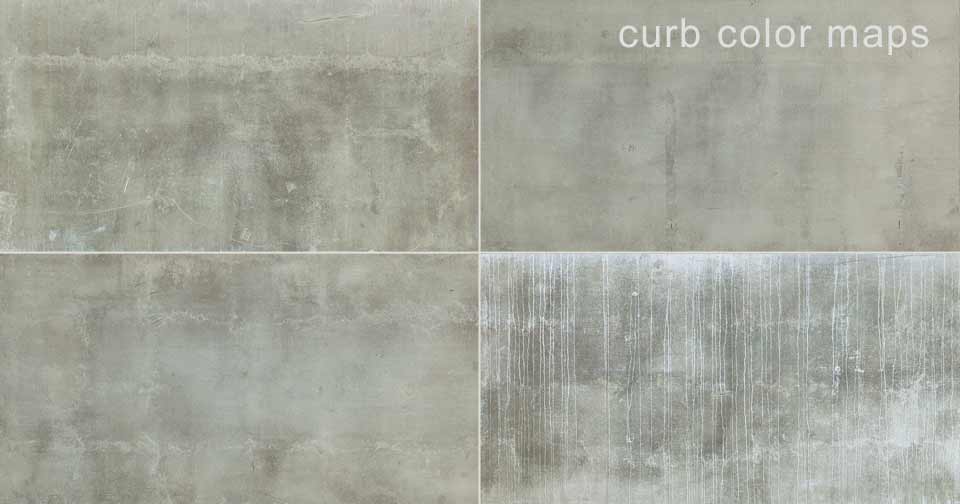
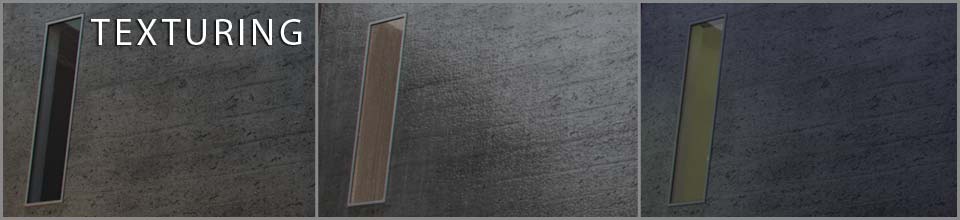
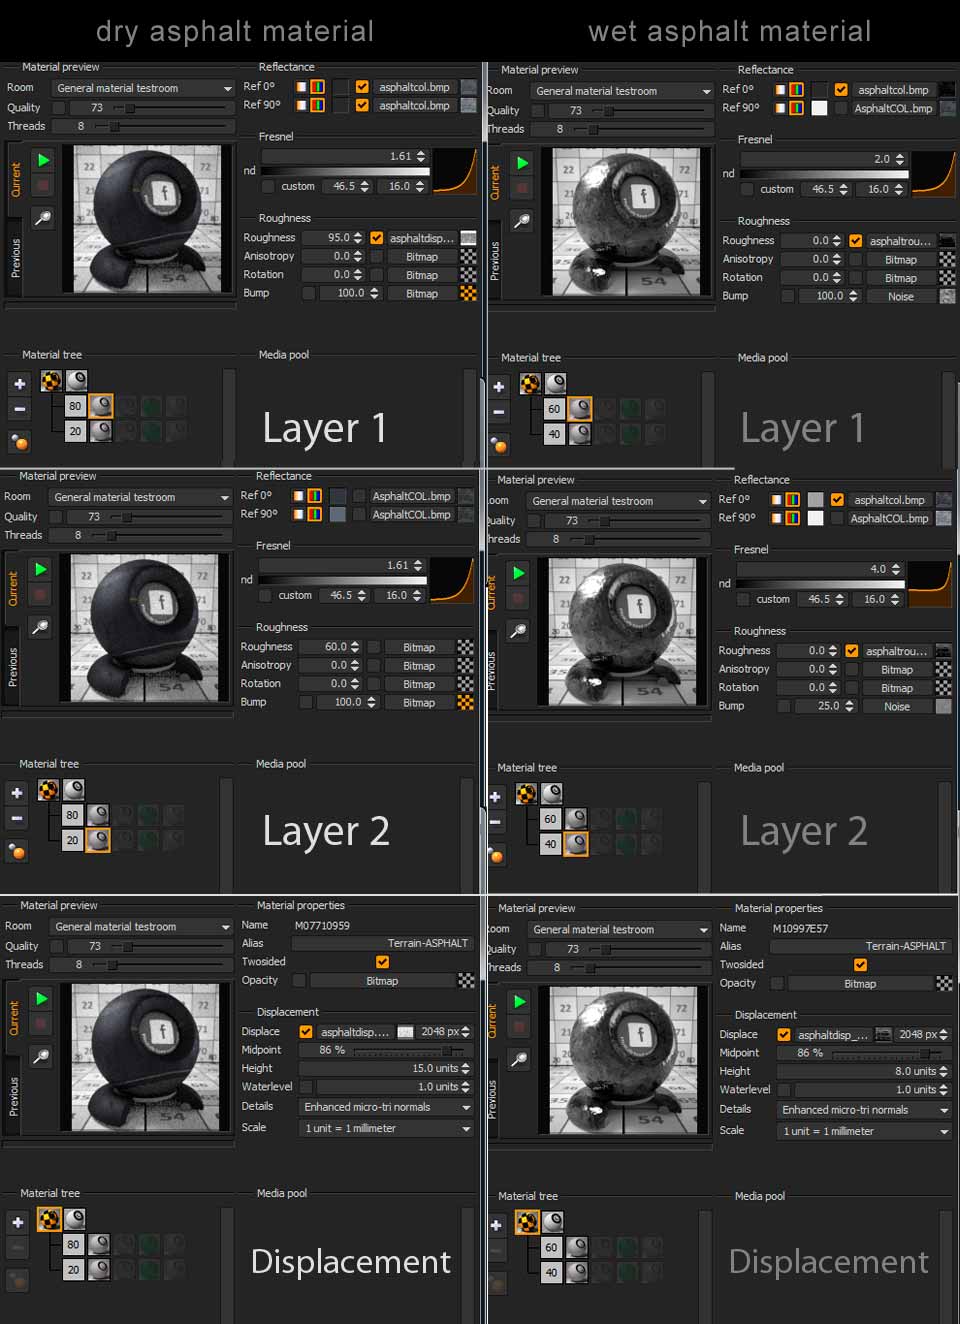
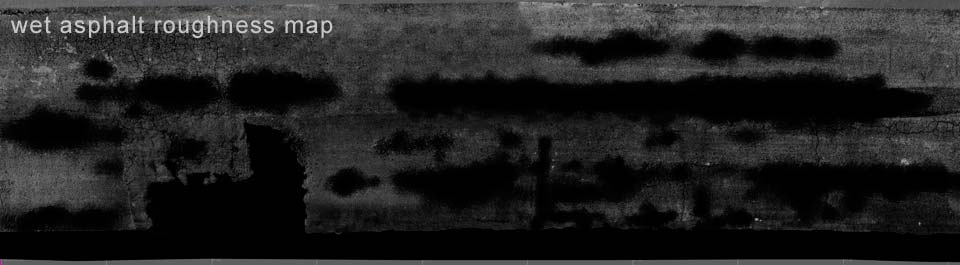
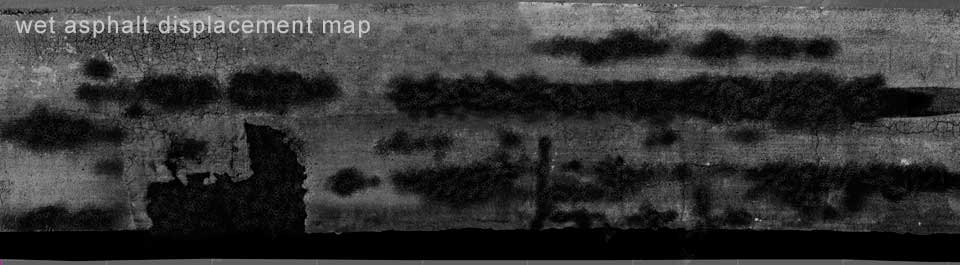
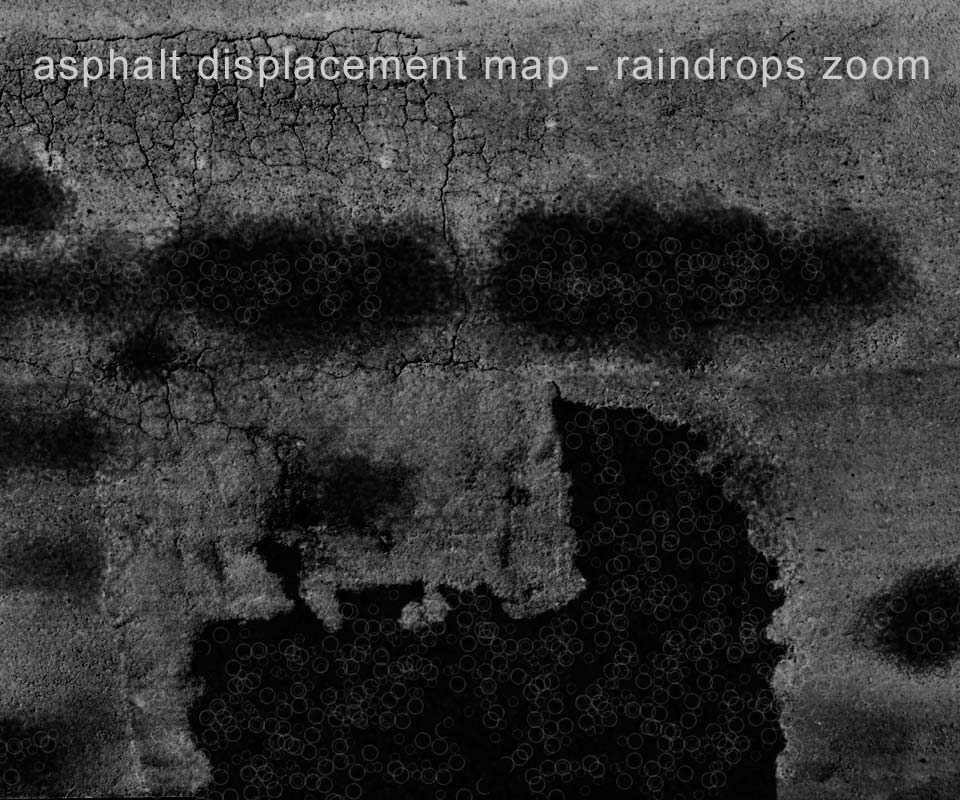
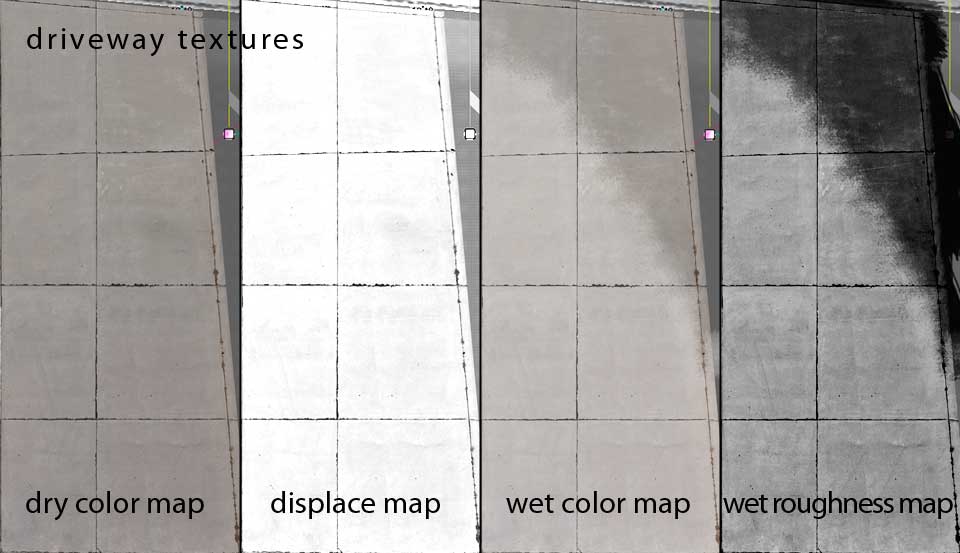
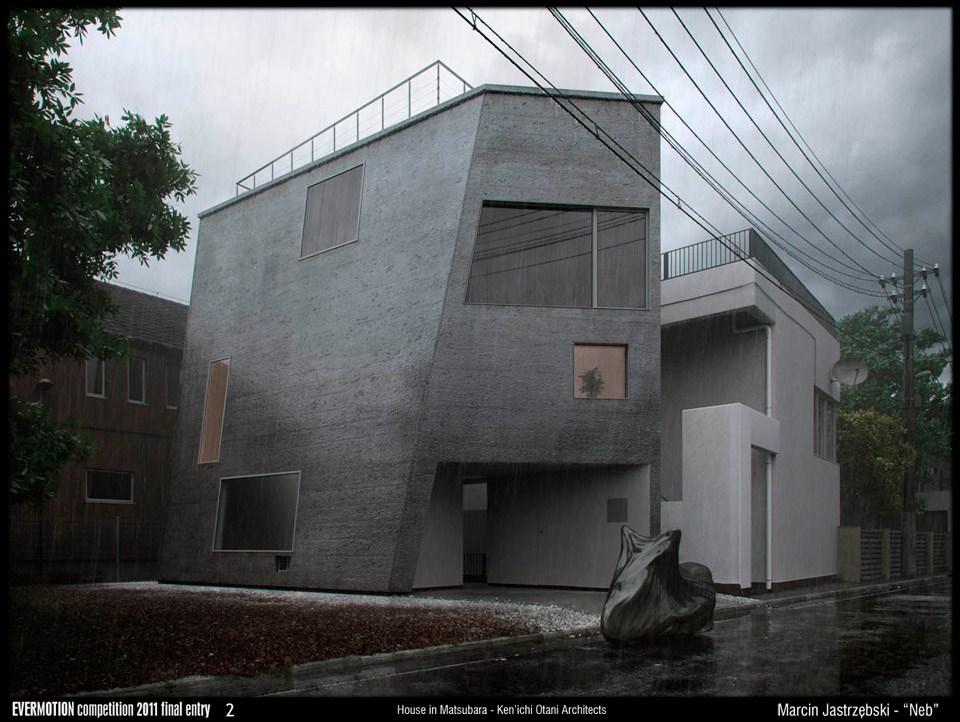
In this project I created some of the materials with the intention of modifying them for the rain version of the scene. In this context the most complicated material was asphalt. For dry asphalt (textures above) the crucial matters were: the slight roughness of the surface of the asphalt and the cracks in it. While creating the displacement texture I always try to define a 0 level, which is a basic level in my model, which is a grey colour in displacement channel. Having defined this colour I have a possibility of making depressions in the texture (which are areas of shades darker than the basic grey) and blackness and reliefs (lighter areas) even up to white colour. Below I am presenting textures for asphalt in the rain version and a demonstrative picture of the displacement depression starting from the grey point.

The texture of the asphalt for the roughness channel steers the gloss of the asphalt in the appropriate places and makes it completely dull in the deep cracks. The asphalt in the rain version demanded a simultaneous modification of the displacement and roughness textures. I planned to make paddles so the displacement channel had to have big areas of a uniform shade so as to get ideally flat areas of water in the render. Additionally to achieve raindrops effect on the paddles I put slight round shapes imitating this effect on paddles areas in displacement channel. After a few test renders I defined their appropriate shade so that the reliefs were not too aggressive. According to the assumptions I edited the texture for the roughness channel. In the paddle areas I used black colour to achieve a strong reflection of the surrounding on the water. I did not use any raindrops shapes here. The entire roughness channel worked stronger than in the dry asphalt version intensifying the reflections on the entire surface of the asphalt showing its wet surface.
Wet and dry
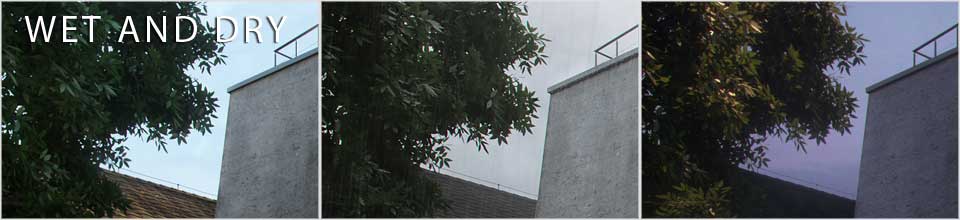
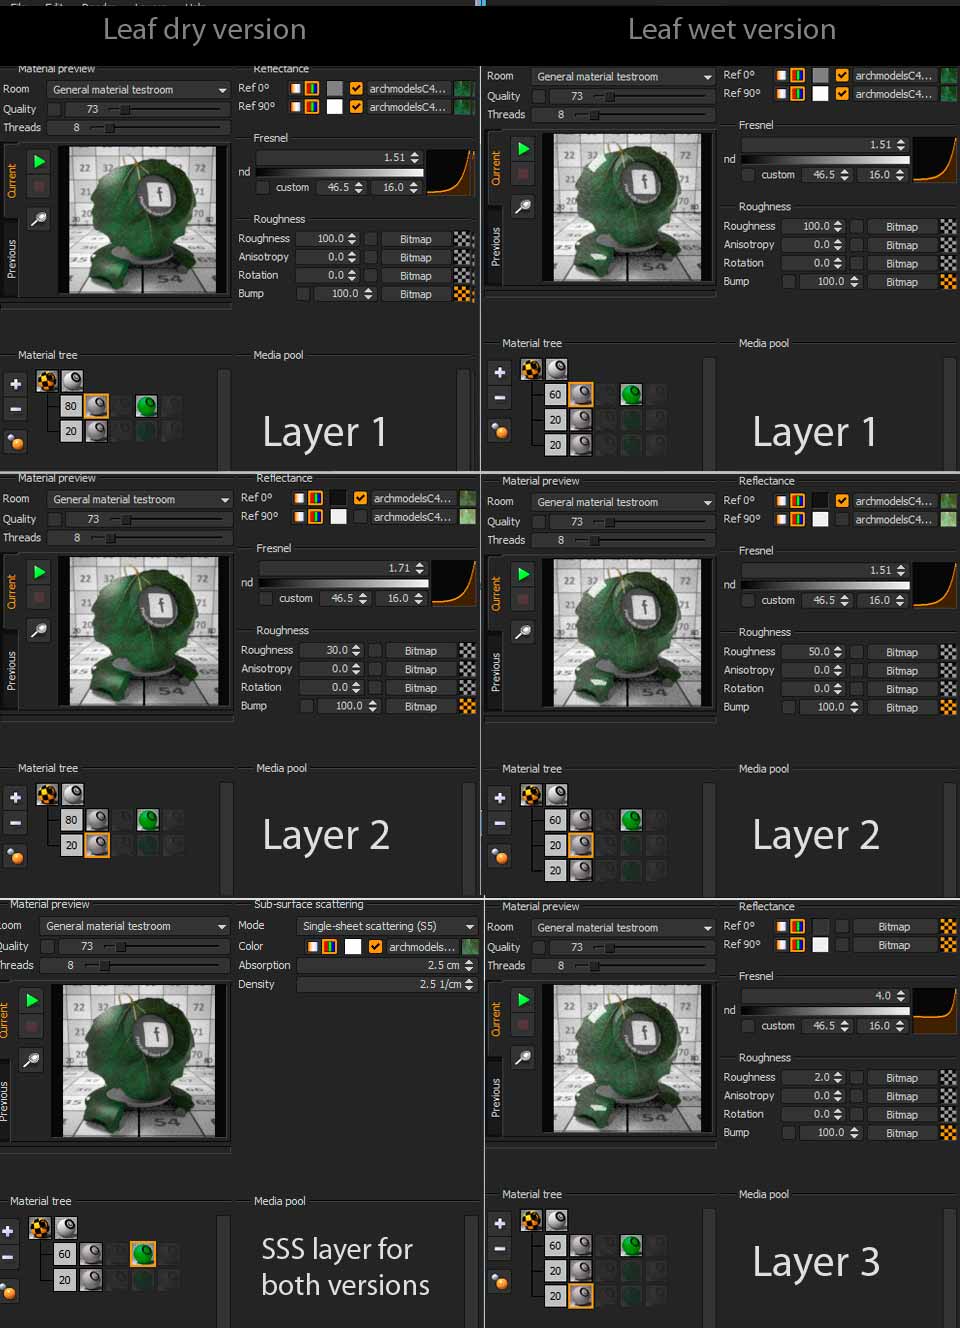
Mostly all the materials in the scene were modified in the rain version of the rendering in a similar way. In material editor of Fryrender I used a possibility of adding extra layers simulating adding additional properties to the object taking the settings of the existing layers. In this case to each material from a sunny version of the render I was adding an extra layer working with an appropriate intensity with parameters of a quite strong reflection imitating this way an effect of wetness of the object. Additionally for this layer I was raising the Fresnel curve. I defined the reflection intensity by using roughness parameter. I was trying to differentiate this effect because the objects have different gloss and also after getting wet they are not equally glossy. Below I am presenting an example of the settings for the material of dry and wet leaves of a tree.
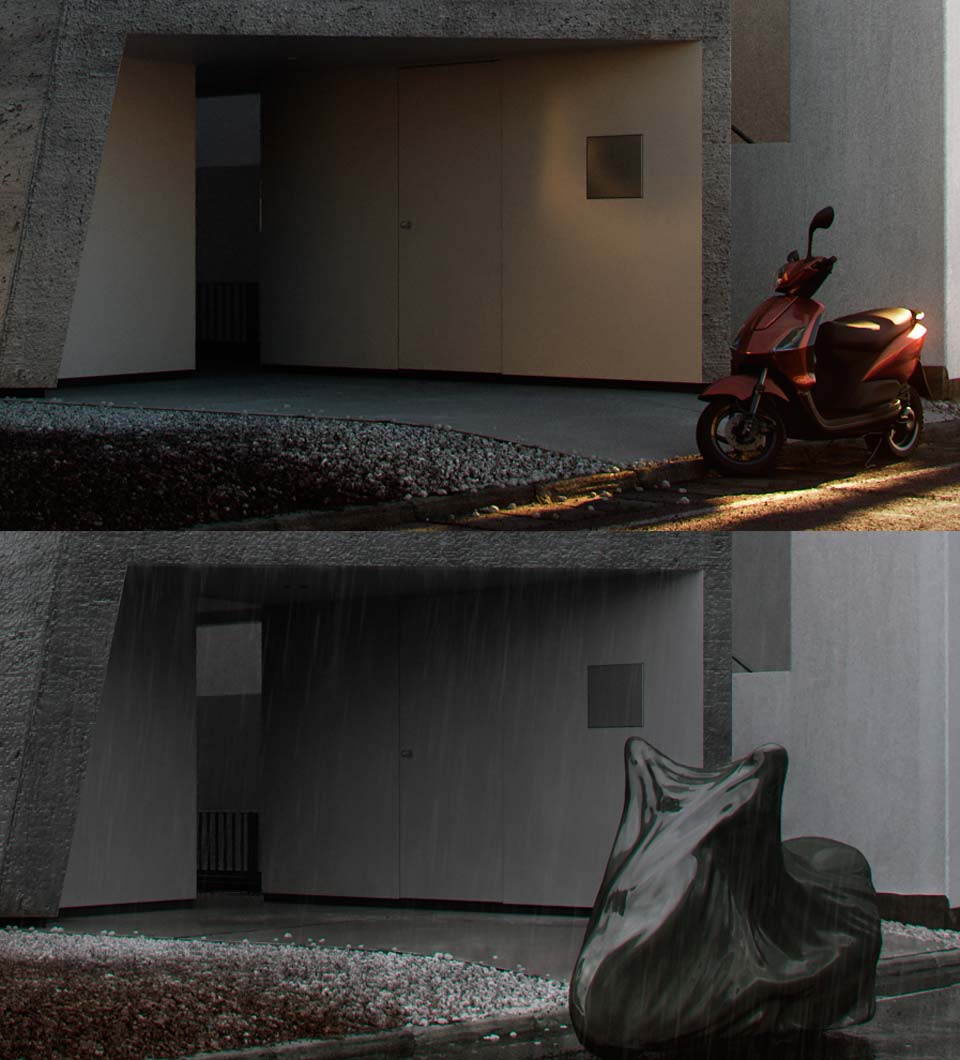
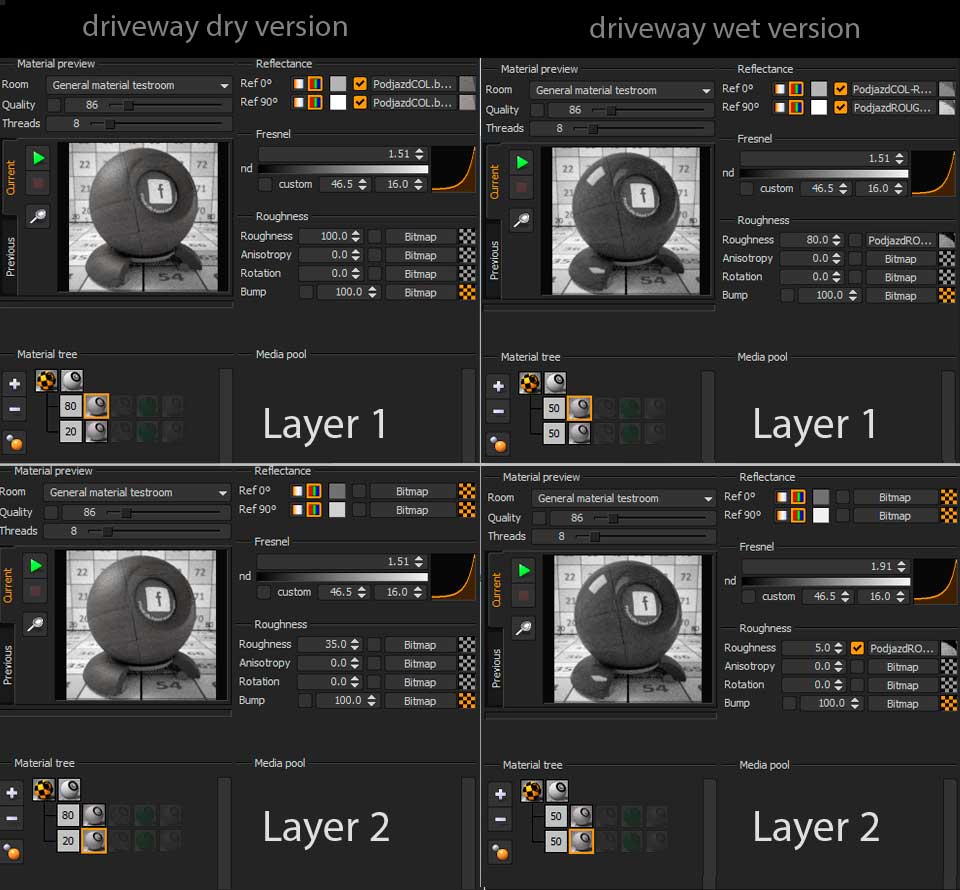
Another example of achieving an effect of a wet surface can be a concrete driveway in front of the building. In the rain version of this material I used an additional bitmap for roughness channel because the wet area does not occur in the entrance niche of the building. A part of the driveway is covered from rain by the building itself.
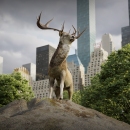
The electric pole
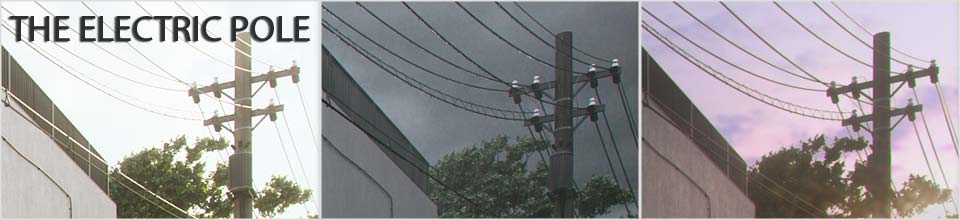
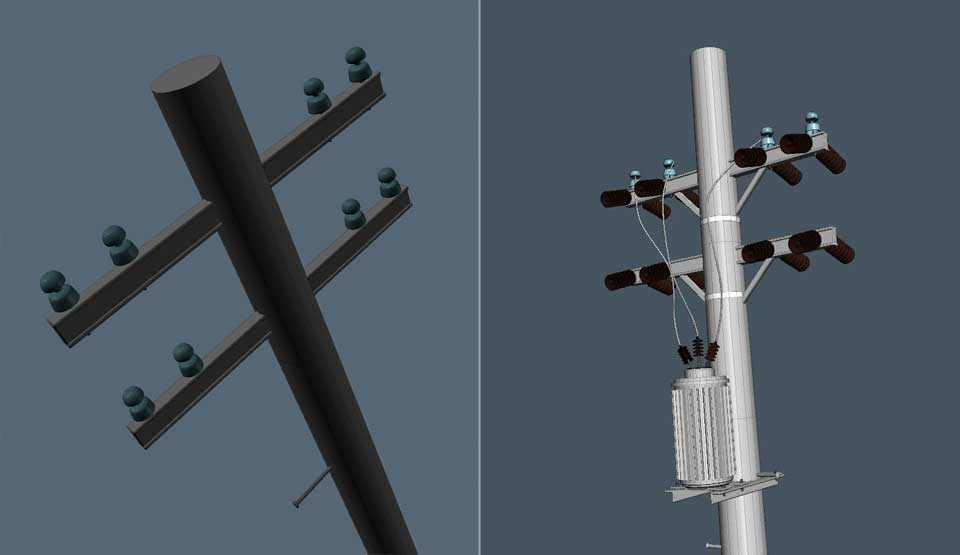
I had been planning to create an electric pole for a long time. The ones in Japanese style really fascinate me. The Evermotion competition gave me an opportunity to put my intention into life. According to my rules before starting the modelling I collected reference photos. On the basis of the photos I created a model of an electric pole in Modo with details. The electric lines and cables were added in Cinema4D, which I think has perfect tools for editing curves and making models based on them. At this stage I had a defined frame and I was editing the shape of the electric lines so that they looked good in the overall view.
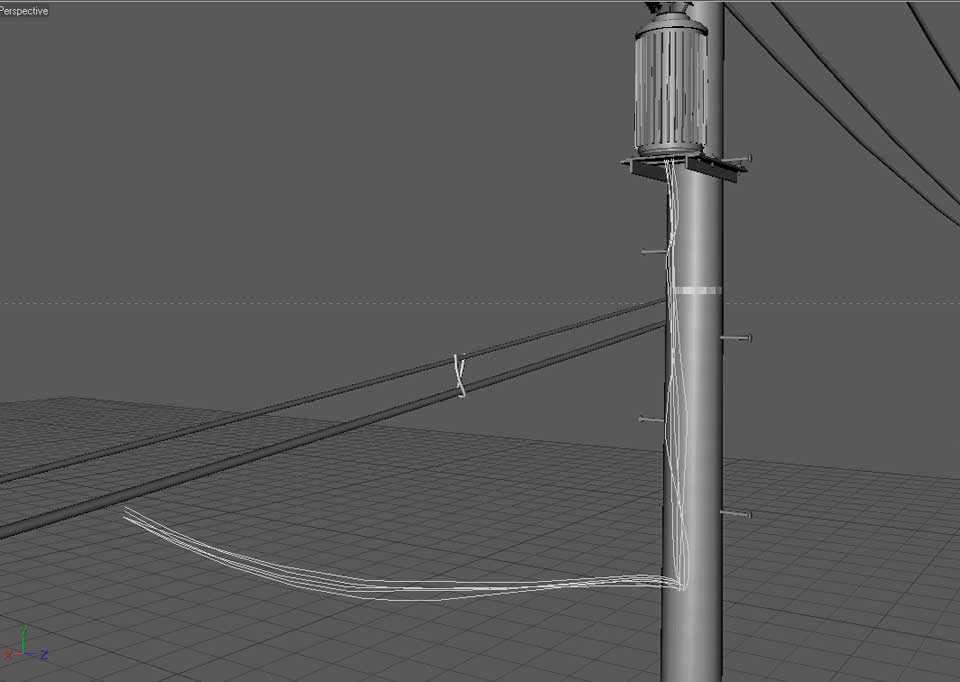
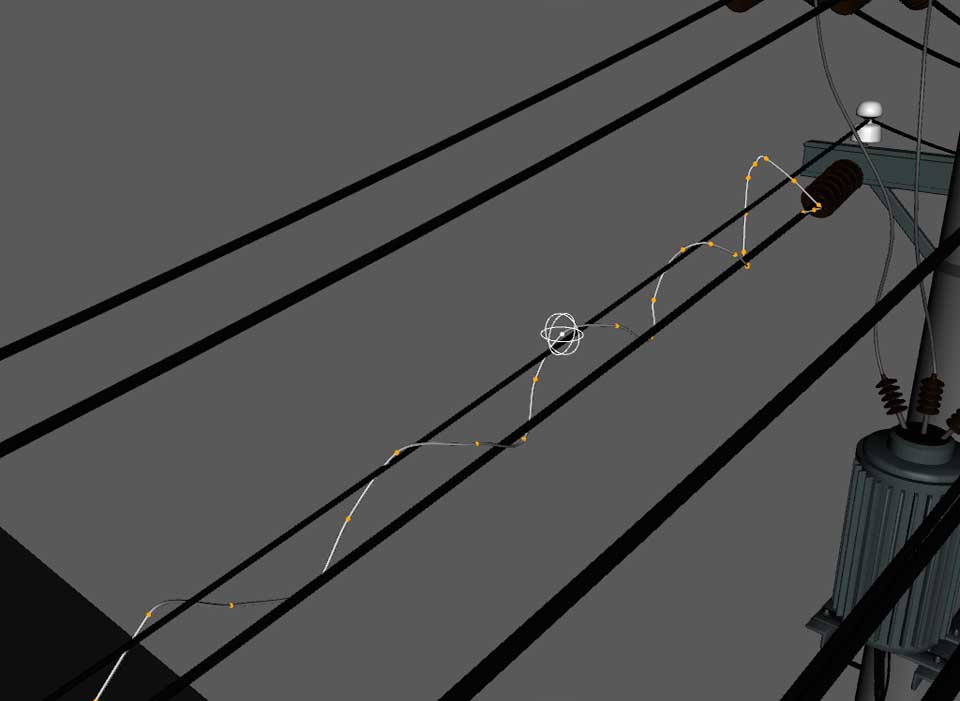
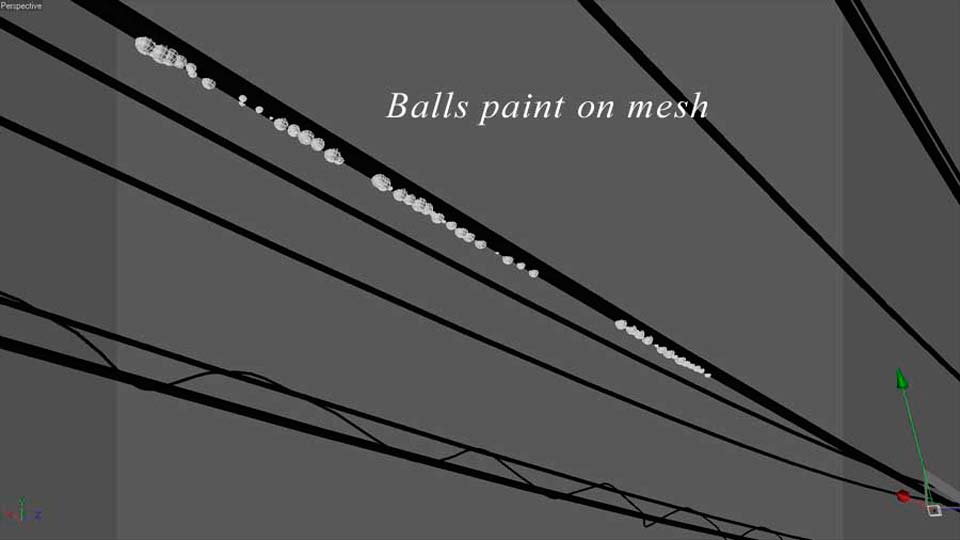
The models of 'electrics' took me the longest of all the models but the real problems started when I got an idea to create and effect of the drops of water on the electric lines in the rain version in 3D. I was looking for a method to achieve this effect and the real breakthrough was an idea to use metaballs function. At first I used Paint On Surface plugin and I painted the parts of the cables with the balls.
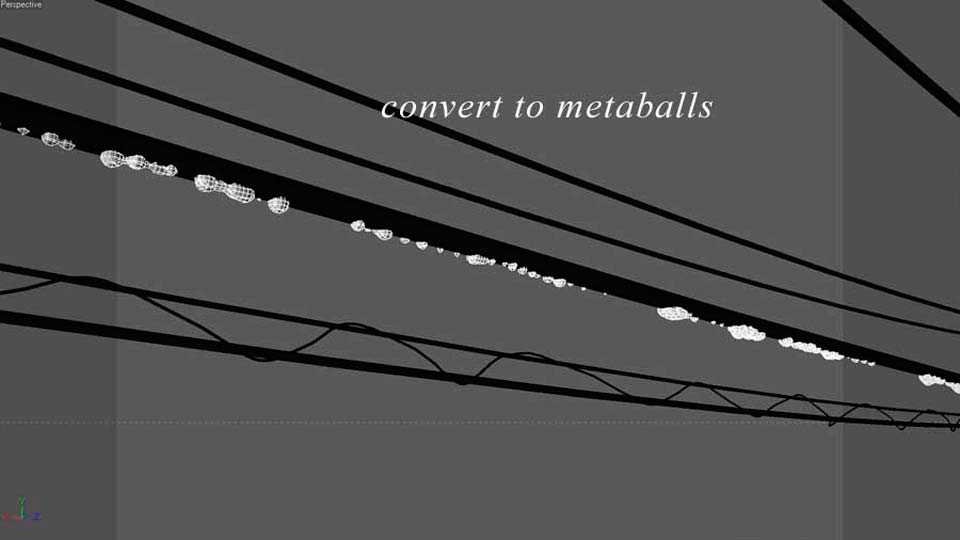
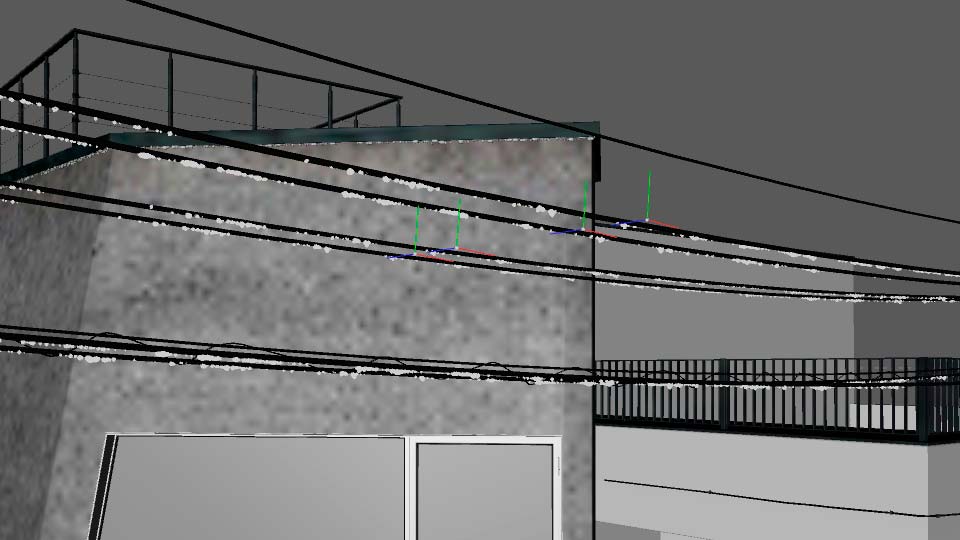
In this way I created about five long series of water drops, which I was later cloning on all the cables' entire length except for the areas with bigger angle. On such a layout of objects I put metaballs modifier, making all the water drops more realistic and smooth. I used water material for the drops. All electric models got proper materials, from metal, more or less glossy black cables, to concrete or the wood of the main pole.
Details
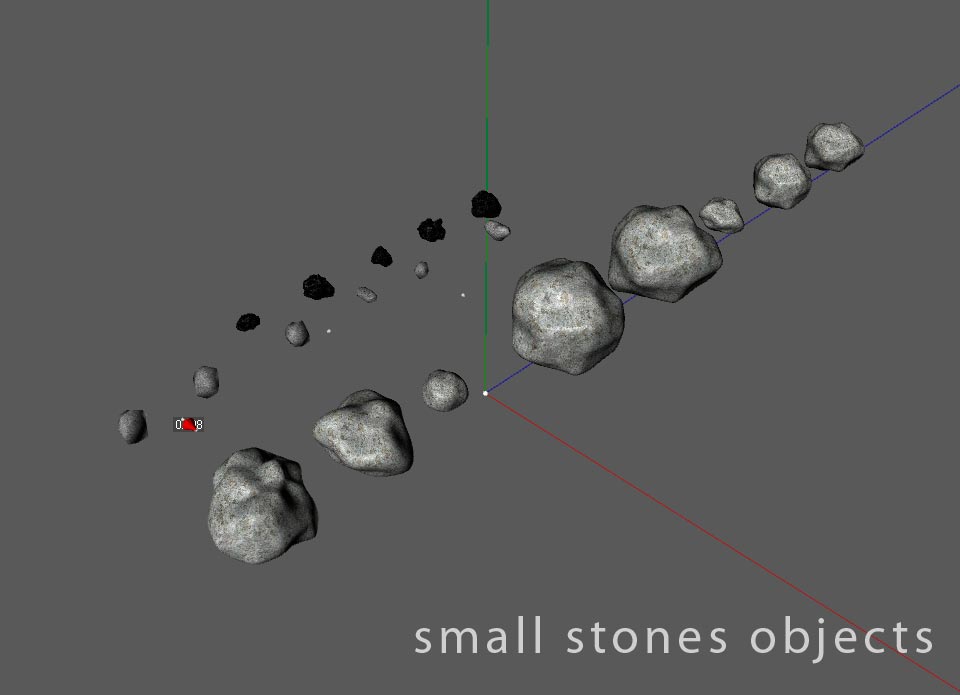
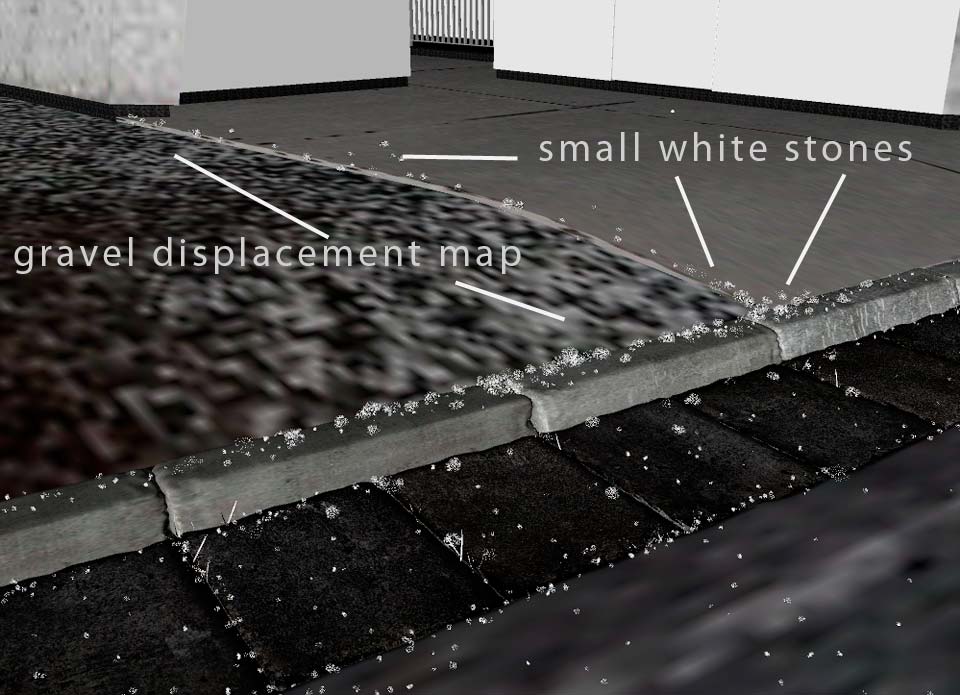
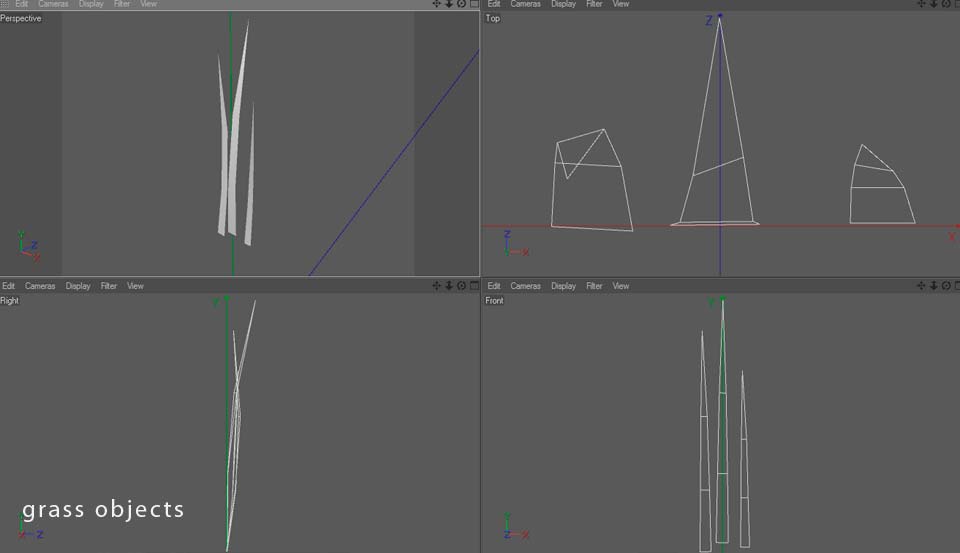
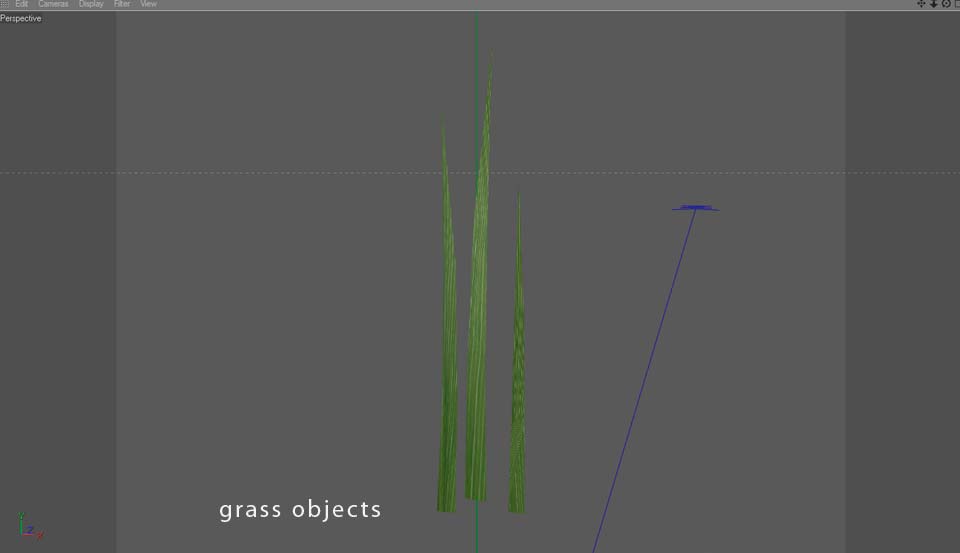
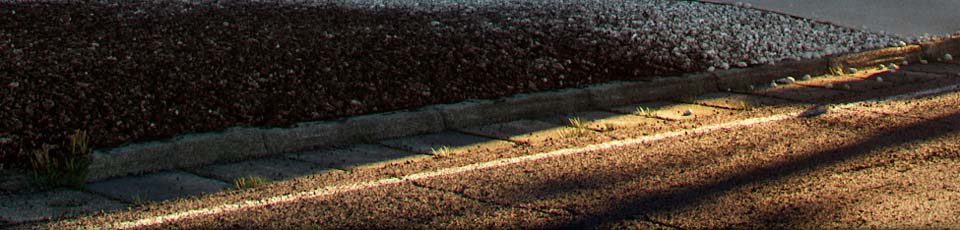
Small elements have a great influence on realism of a final rendering. They might not be visible straightaway but without them the scene would look artificial. These are: small stones on the ground, small plants, and elevation details. It is worth spending some time on these details because it is them that make us look at the render a little longer. Moreover, using these objects we can integrate the 3D models and merge them into the scene. Good examples of it might be the white stones which I made with displacement and small 3D models. This demanded correlating the scales of both techniques. The wide circle of white stones was made with displacement texture. In the areas next to the curb and the road and close to the driveway rims I put the small 3D models of white stones. I also placed several types of small stones on the road. The rigid boundaries of the displacement map were integrated this way with the neighbouring models and surfaces.
Small parts with the grass between the road slabs by the curb and on the curb itself worked in a similar way..
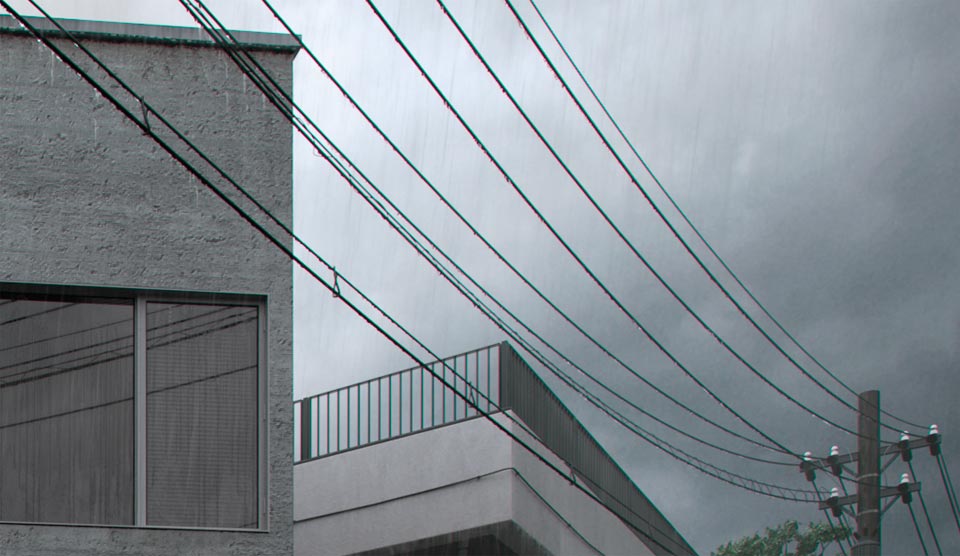
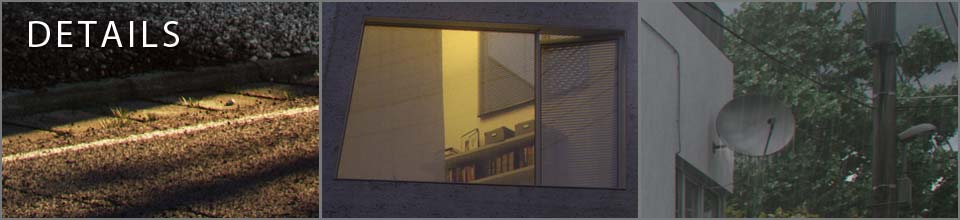
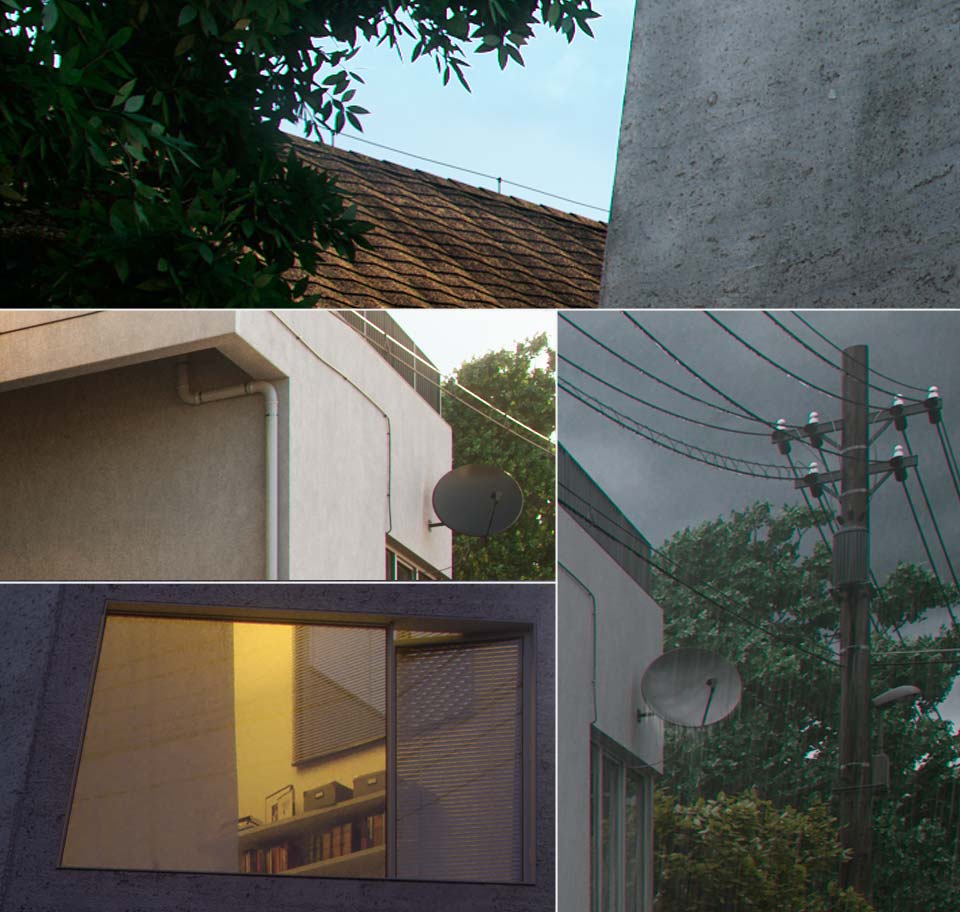
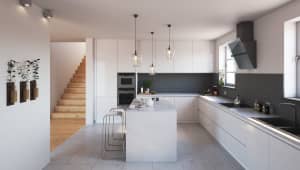
Here I would like to mention an important thing. Don't cut the rendering settings while making the details. To get the potential of this type of details, the final rendering should be set in high quality, with Antyaliasing settings being of a crucial importance. I was looking for spots to put some details in the scene all the time. So I made for example: cables with handles on the roof of the wooden house, handles for a roof gutter of the white neighbouring house, satellite aerial and cables and models of the elements of the inside of the house, which are visible through the windows. You can find the examples of the scene below.
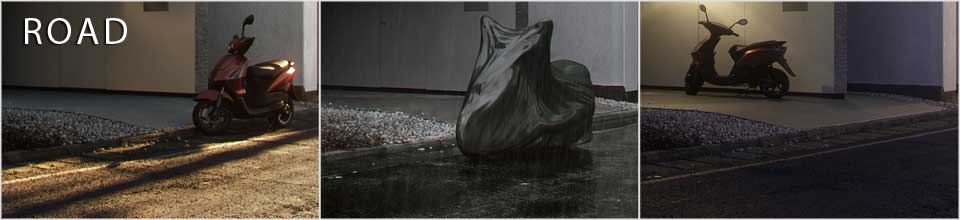
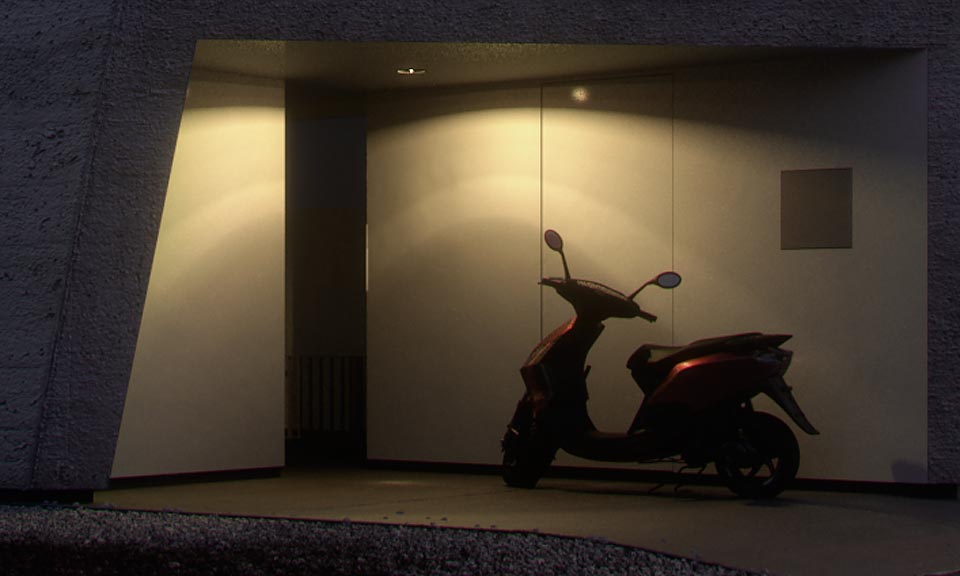
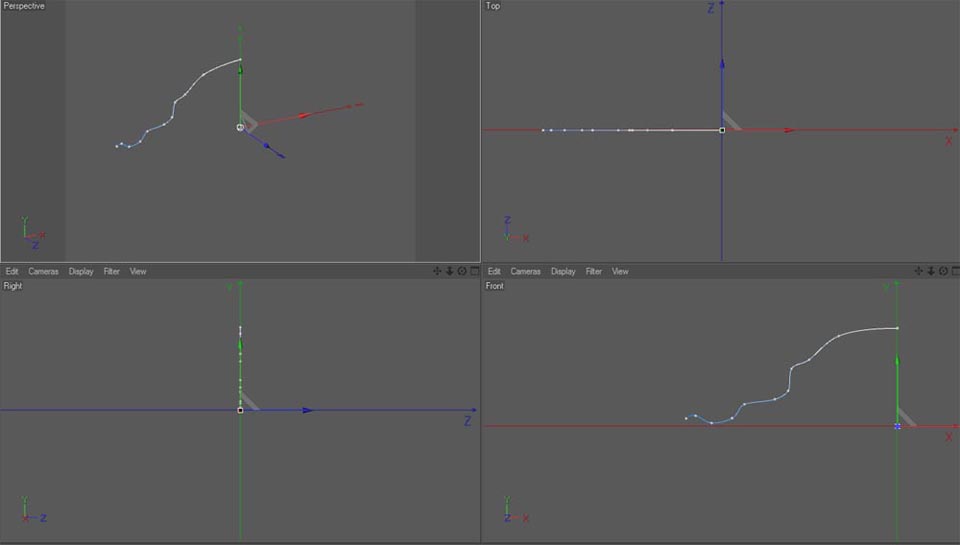
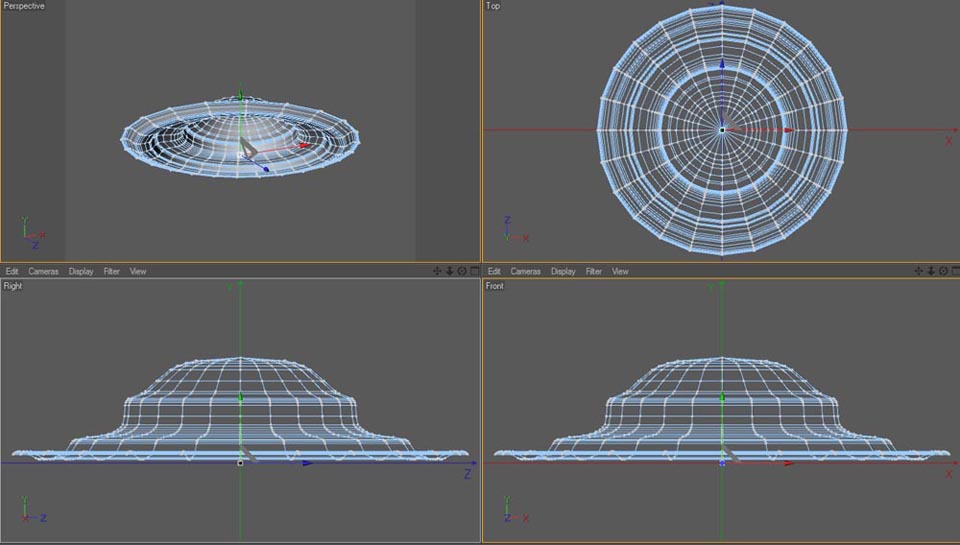
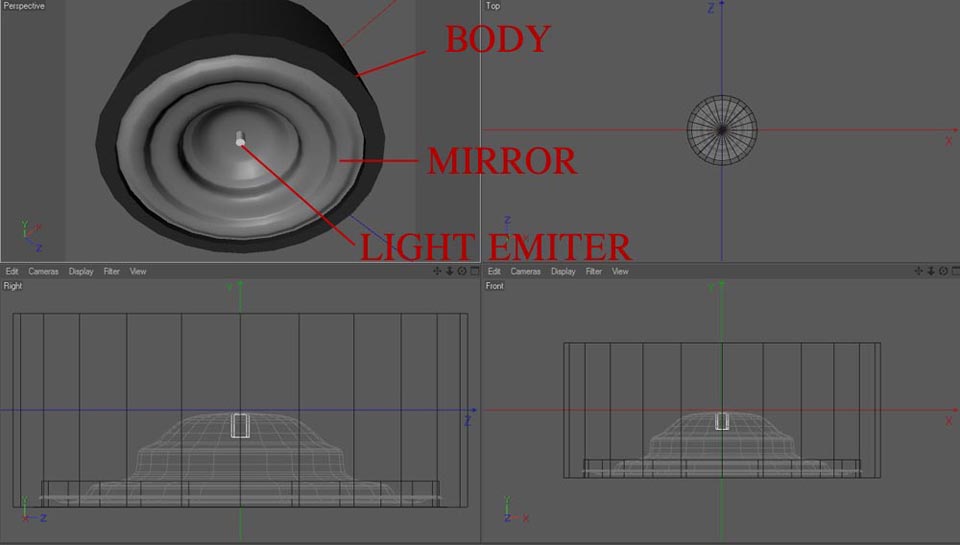
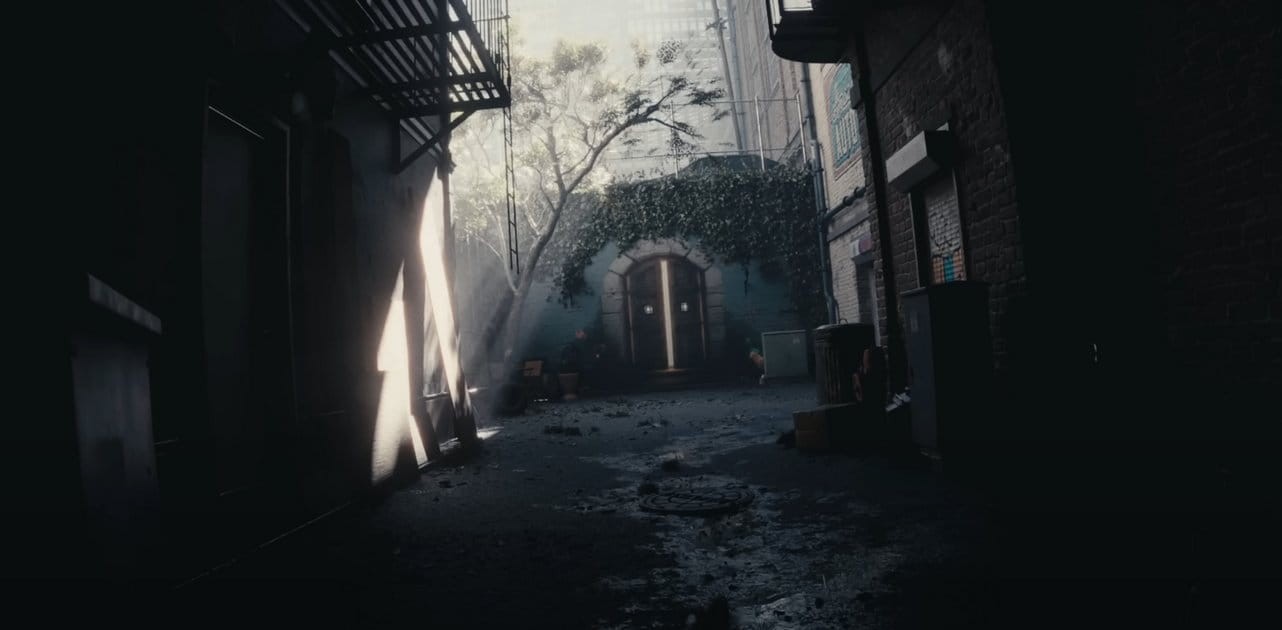
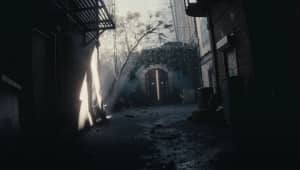
In the night scene I decided to present the IES light at the entrance to the building. In Fryrender making this type of lighting means modelling the fitting of this light like in reality and the rest is done by Fryrender. The crucial element is the shape of the reflection.

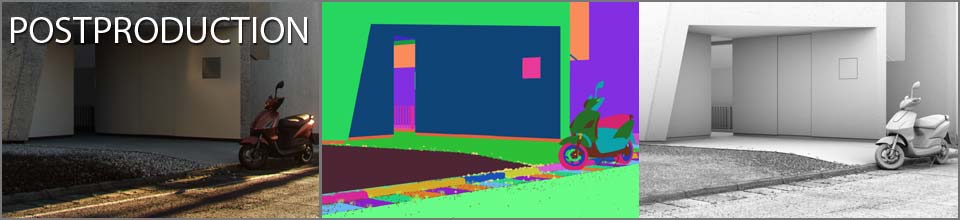
In the rain scene I made a tarpaulin covering the scooter from the rain. The model of it was made in Modo using the sculpting tools.
I additionally used plant models from Evermotion libraries and a model of a scooter. The last house on the right was bought on TurboSquid.
Details
I edited the final renders in Fryrender using a tonemapping option. Apart from the final view I usually render alpha channel, material ID, depth channel, AO channel. I save two versions of rendering: one nominal, blank, without or with a slight bloom effect and another one with rather big bloom effect. Then I connect these two renders properly in Photoshop using channel Z as Alpha channel, excluding the render with a strong bloom effect in the foreground and leaving it in the further ones. In this way I create an effective air perspective. I save all the renders in 16bit and in such tonal space I edit them in Photoshop. A rendering created and undergone tonemapping in Fryrender is so precise that the final postproduction limits to slight corrections of brightness, colour and contrast. I often work this way on a chosen part of the picture editing the shade parts or light in a certain spot. In the renders I substituted the bitmap of the sky, selecting it properly.
I save all the renders after processing in tiff 16 bit format and edit finally in the addition to Photoshop- CameraRAW. Camera RAW has great tools of a subtle colour, brightness and contrast edition and excellent options of adding aberration and vignette. For the rain version I needed a good matrix of the raidrops to put this effect in the postproduction stage. The version of fryrender I used hasn't got an option of blur in motion. I decided to use Vray for Cinema 4D to achieve this effect. I created an object of a long raindrop.
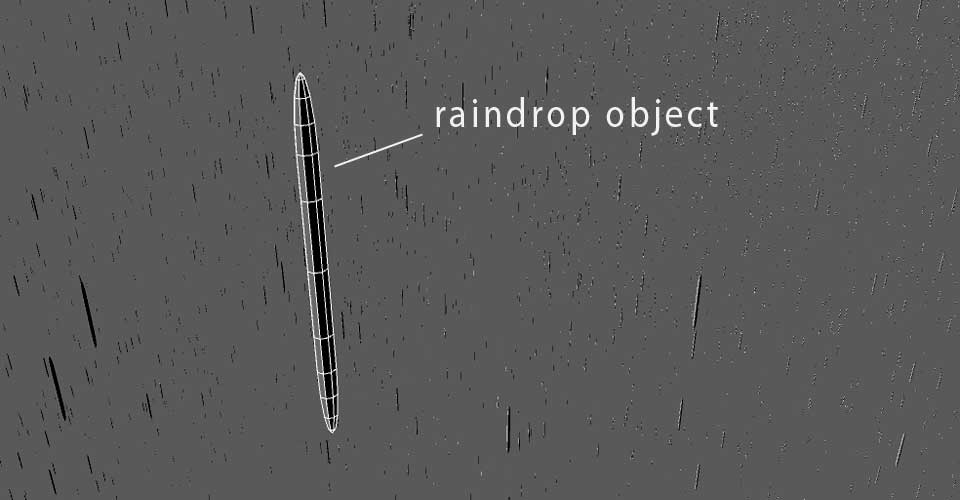
I copied it in different scale in a shape of a big rectangular prism.
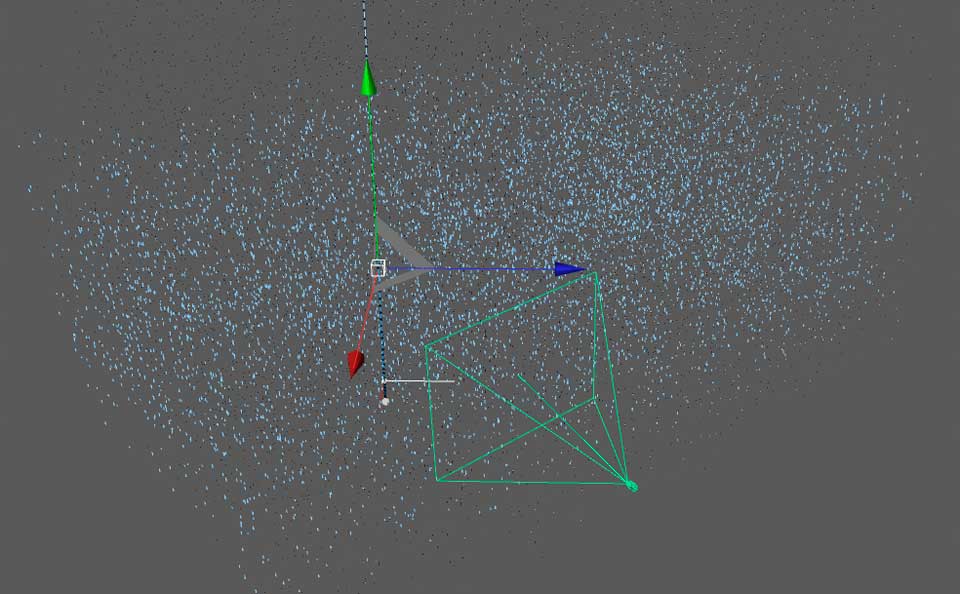
Such a rectangular prism made of raindrops was copied 4 times and I animated motion of each of the drops in front of the camera. I defined different falling speed for each object and slightly slanting movement.
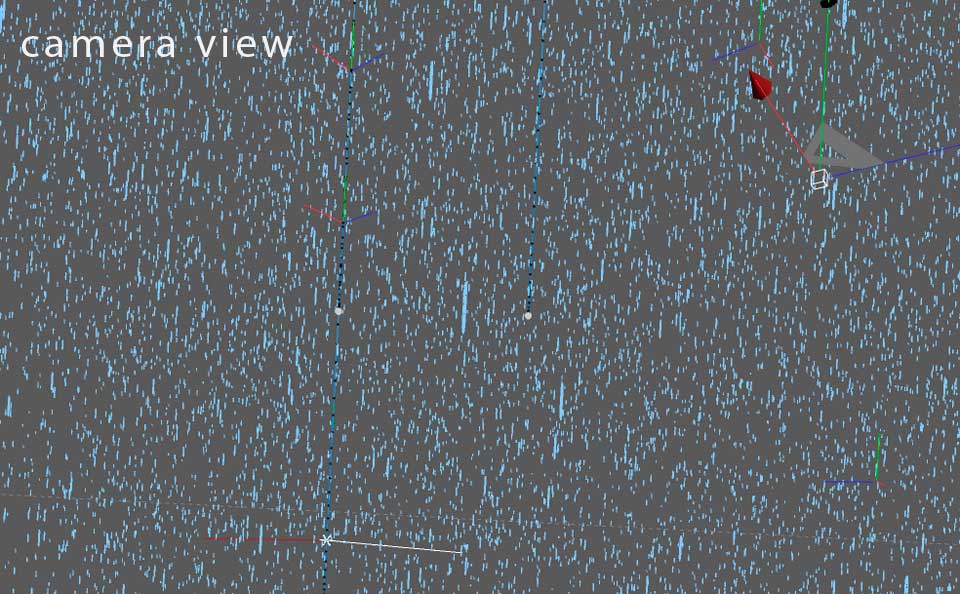
I set an appropriate shutter speed in camera options, I turned motion blur on and I set high parameters of render testing and I got a matrix of blurred raindrops.
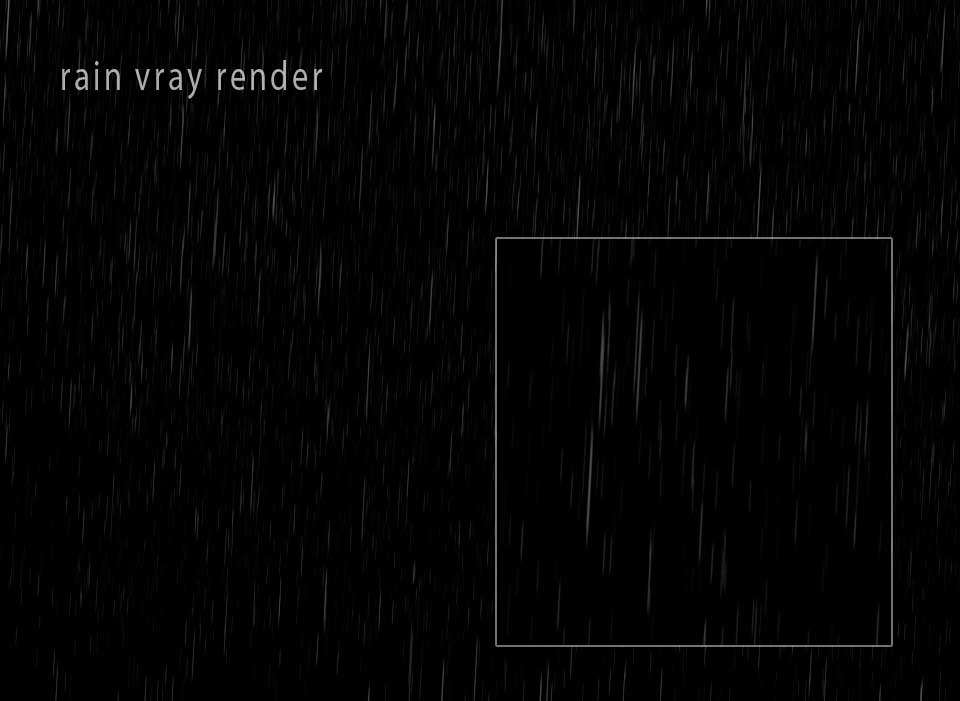
After a few attempts I put the bitmap on a render in Photoshop in Exclusion mixing mode on several layers with different diffusion. In the spots where raindrops looked too strong I used masking. I put a slight blur on some of them. That's all.

I would like to thank everyone that has read this making off and once again Evermotion Team for the second prize in the competition and support.
Best regards
Marcin 'Neb' Jastrzebski
www.nebula.com.pl


COMMENTS