Topology Study : How To Model Ski Googles in Blender
Using Blender modeling tools for creating realistic ski googles.


In accordance with the art. 13 section 1 and 2 of the European Parliament and Council Regulation 2016/679 of the 27th April, 2016 on the protection of natural persons, with regard to the processing of personal data and on the free movement of such data, and repealing Directive 95/46/EC (General Data Protection Regulation), hereafter RODO, I hereby inform that:
1. EVERMOTION S.C., 8 Przędzalniana Str., 15-688 Białystok, Poland is the Administrator of your Personal Data (APD)
2. Data Protection Inspector can be reached through e-mail: iod@evermotion.org
3. Your personal data are to be processed on the basis of art. 6 section 1 letter a, b and f of RODO in order to:
a) prepare, conclude and execute the agreement and for other purposes approved by you,
b) to execute the legitimate interest like marketing of products and the agreement, claim assertion or defence against claims resulting from the law regulations.
4. Entities entitled to the reception of your personal data may be the authorised public bodies; mail providers; providers of the services covered by the agreement; responsible for debt recovery, keeping the archives, document utilization, legal consulting, technical services, IT services and accountancy.
5. Your personal data shall not be transferred to the third country, nor to the international bodies.
6. Your personal data shall be processed within the period of the agreement and upon your additional consent until you withdraw it. APD shall keep the data for the period of any civil law claim execution connected with the agreement.
7. You have the right to demand an access to your personal data, to correct or to delete the data if there is no other basis for the processing or any other purpose of such processing or to limit the processing of the data, to transfer the data to another administrator and to raise objections to the further data processing if there is no legal basis for further processing and to withdraw any previous consent.
8. You provide the personal data voluntarily, however they are necessary to conclude the agreement. The refusal of providing such data may result in the refusal of the agreement conclusion.
9. You have the right to lodge a complaint to the Personal Data Protection Office when in your opinion the data processing violates the regulations of General Data Protection Regulation of the 27 April, 2016 (RODO).
10. Your data will be automatically processed, including the form of profiling.
11. You are obligated to forward above mentioned information to your representative, especially if you appointed this person in the agreement as the contact person or as the representative for the agreement execution.

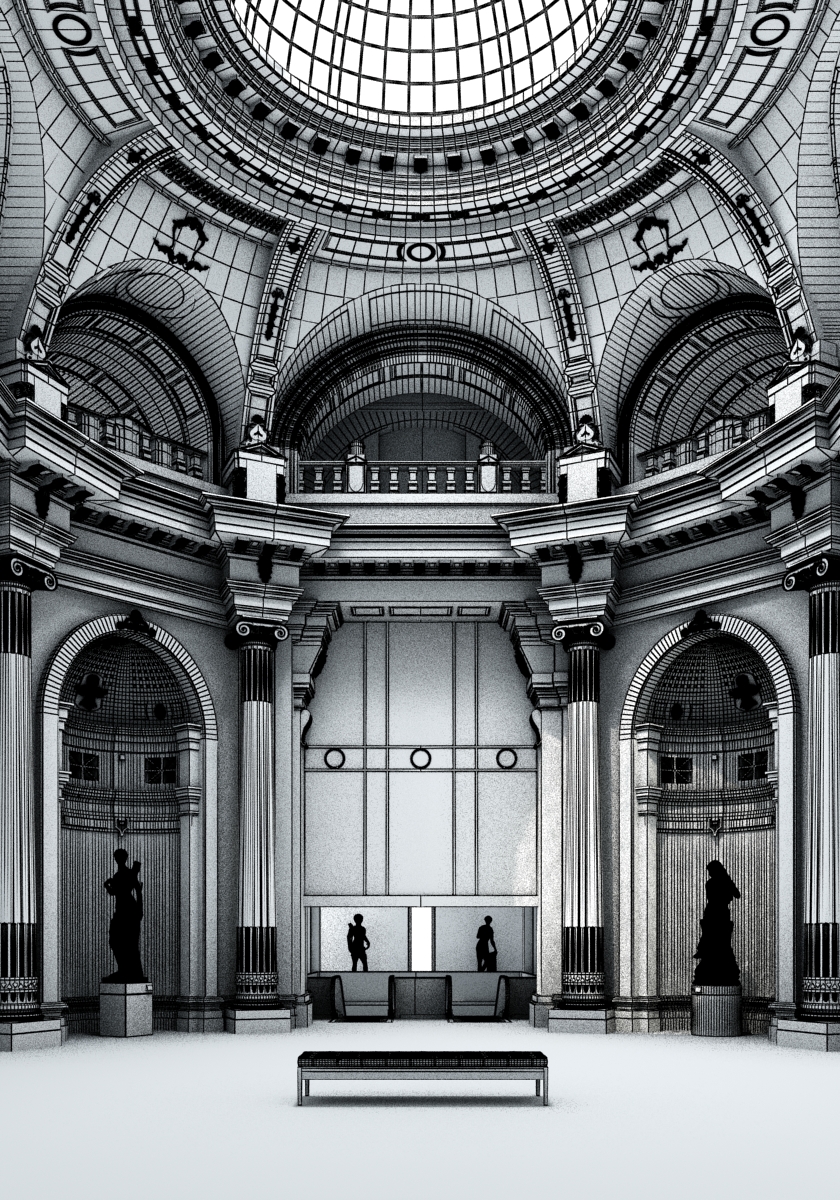
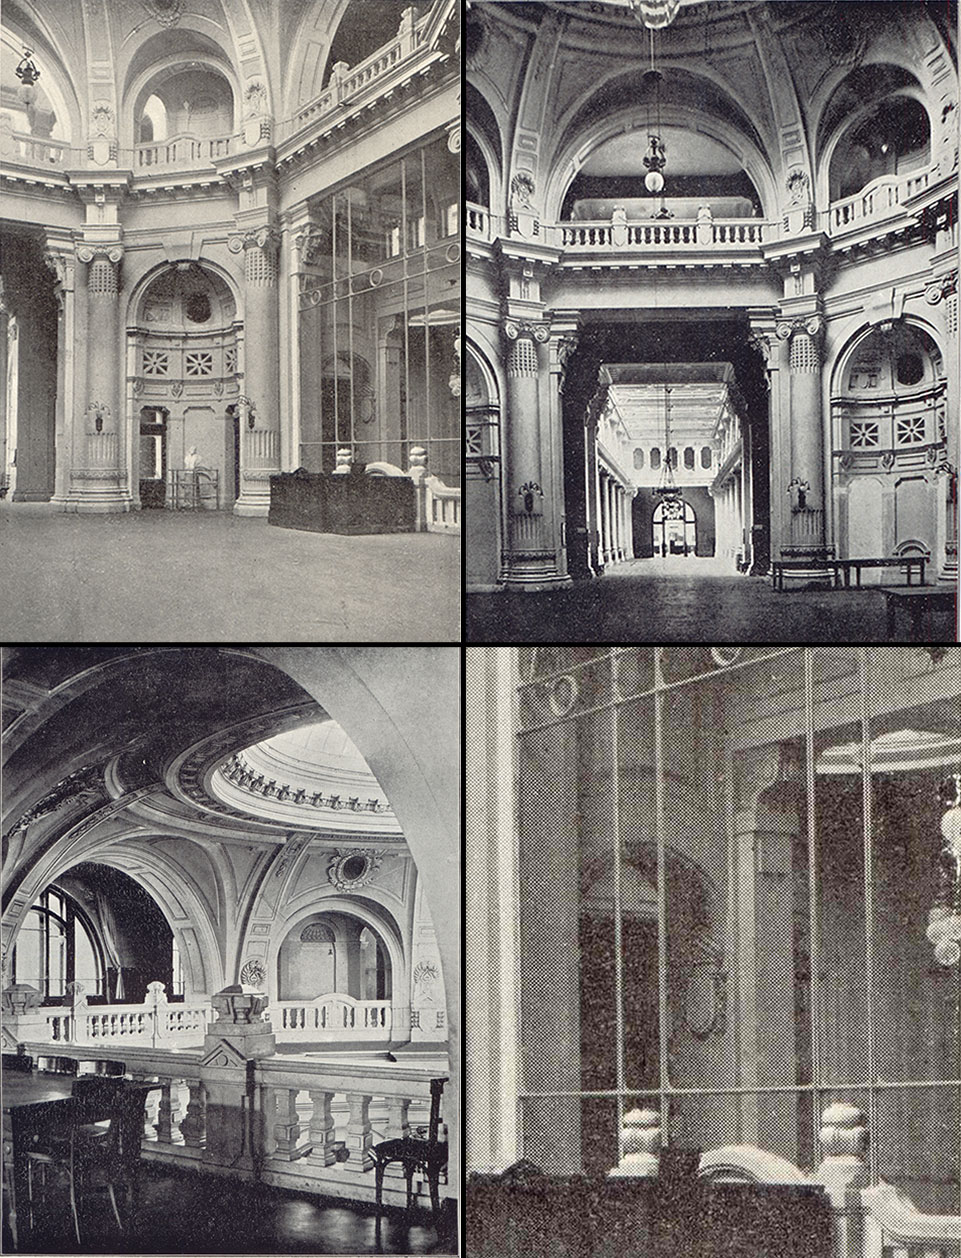
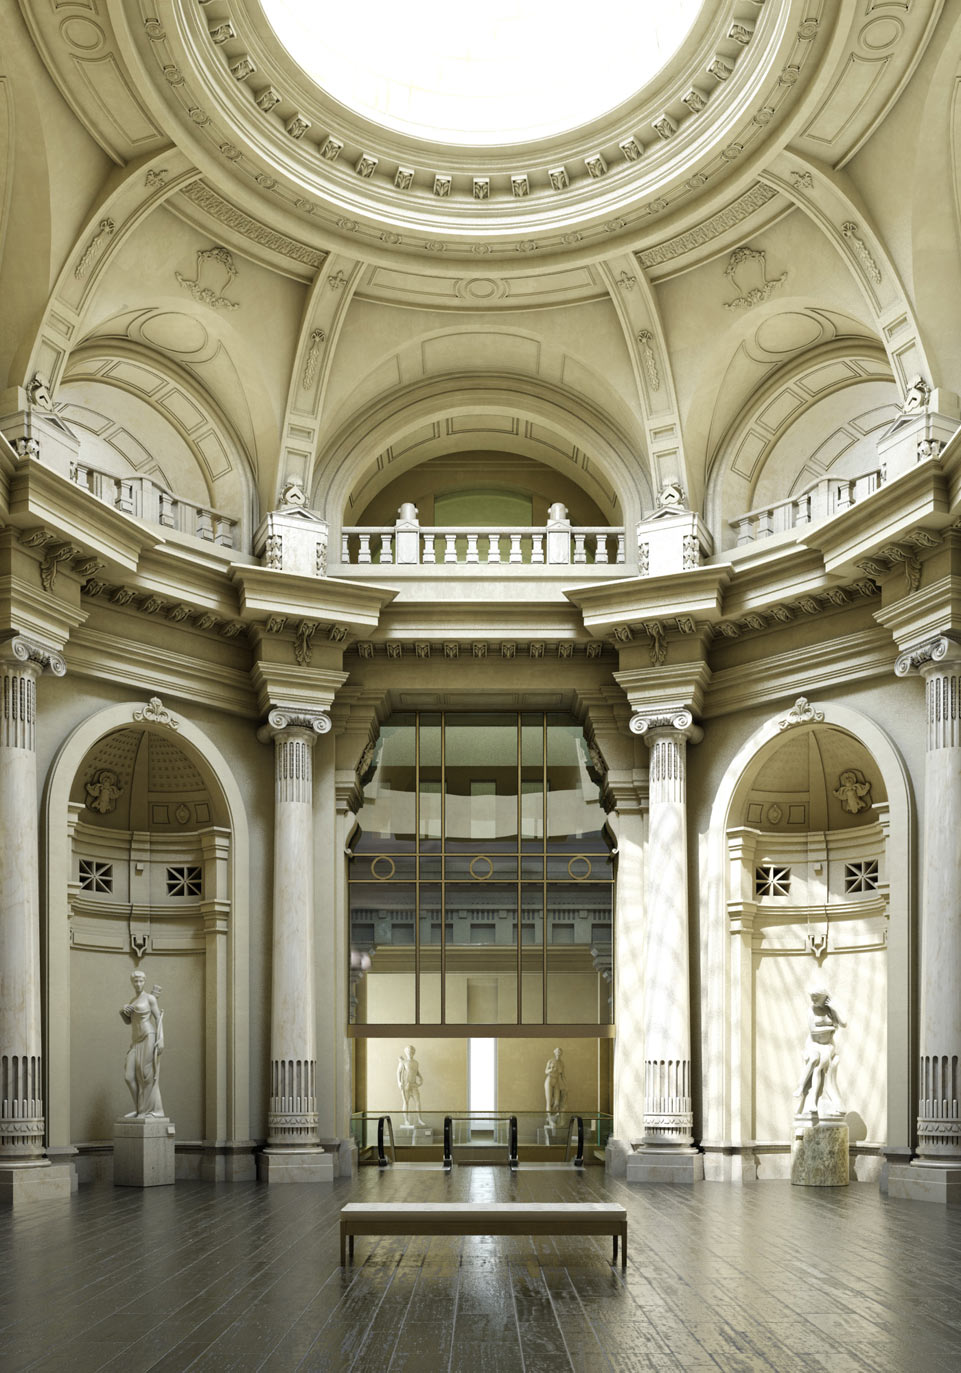
In the modeling one of my friends, Koroljov Ilja helped me a lot (mainly with the ornaments - the hard part hehe). We had to model everything from old photos.
Basicly everything is modeled from primitives. Because of the symmetrical composition of the whole room symmetry tool was mandatory in the modeling process. As well as other modifiers like lathe, sweep. When I start with a new part I usually draw the section of it using a spline. I extrude it (or use sweep, lathe...) and convert it into editable poly to be able to edit it after.
The whole image as it is looks like a very sophisticated scene but if you take a closer look at things you will find that all the details are pretty easy to model. I am not going to go deeply into this part because of the reason I described above and because the only interesting models are the sculptures which are evermotion models. In general the modeling part of the creation is the least interesting for me I must admit. And this is the part in which I am the least qualified in as well...
This is going to be more fun (at least it was for me). Some of the interesting materials of the scene: Sculptures:
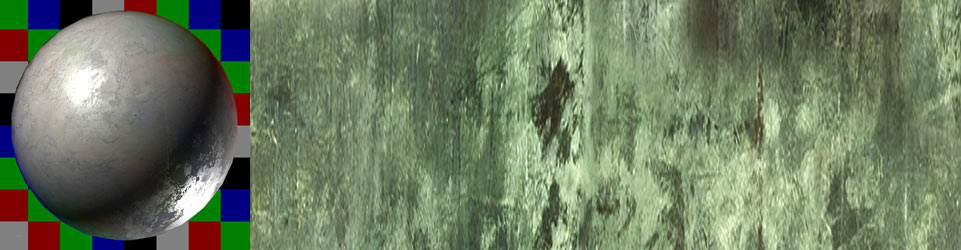
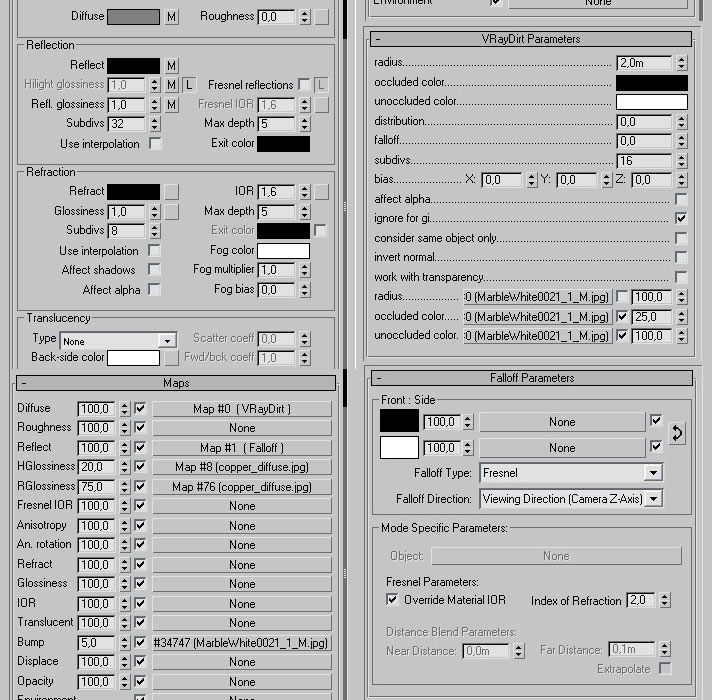
Plastered walls:
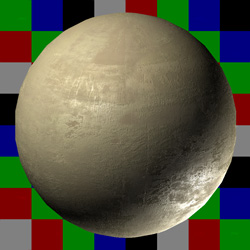

Stone floor:
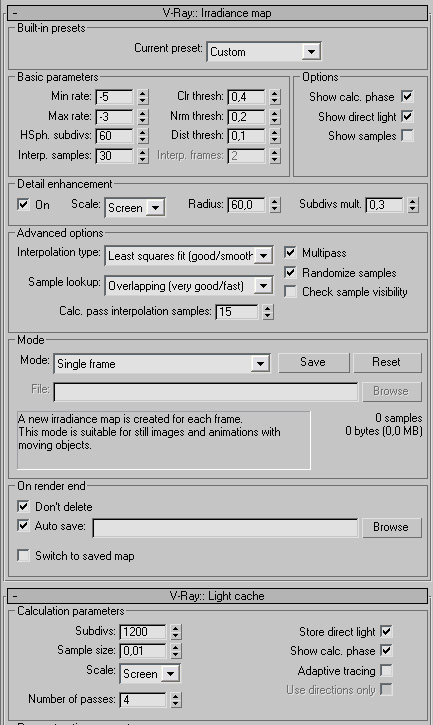
I left lightning after materializing deliberately. I of course have set up a temporary lightning to see the materials but it's finetuning is left for now. First to create the main ambient light with a vray plane that is slightly tilted in the direction of the sun.

There are several other vray spheres with a radius around 2 meters, you can see the places of lights clearly. For the sun I was using a vray sun.

Nothing special here to mention.
This is the original render:
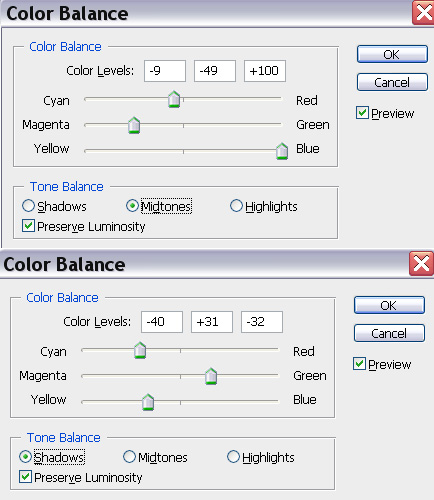
First thing is some color balancing and exposure control. I go to image/adjustments/exposure and set the gamma to 1,2-1,5. Now the image turned very bright and lost it's contrast. Don't worry! Now comes color balance. This time I wanted to create a different mood. A darker, uncomfortable maybe even disturbing color tone. For this I used these settings:
Light bloom: right after this I make a new layer and make it the last one (pull it down to the bottom at the layer bar) and paint it plain white. Now color select on our render with the white color and with a very small value of range. Now the brightest areas are selected. I go back to our white layer and press ctrl+J to make a duplicate of the selection I made with only pure white color. I bring this new layer to the very top and make a duplicate of it again. Now that we have two of them I apply a gaussian blur on one of them with a radius around 1 and to the other I apply a gaussian blur with a radius of 7.
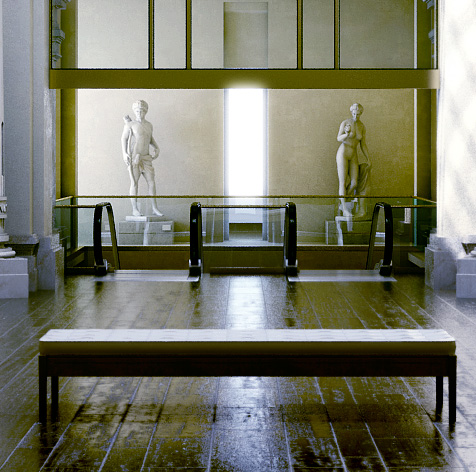
And finally here I added a lens flare effect with Knoll Light factory to the top with a magenta/blue color. Here's the result so far:

Now the volume light from above. Make a new layer. Make this layer the first one! Select the desired area and paint it pure white! Now comes radial blur. Now get eraser tool with a really high radius and a 0 hardness and erase the bottom of it.
Set the layer to Overlay and decrease it's opacity to 30-40 percent. Duplicate the layer and set it on normal.
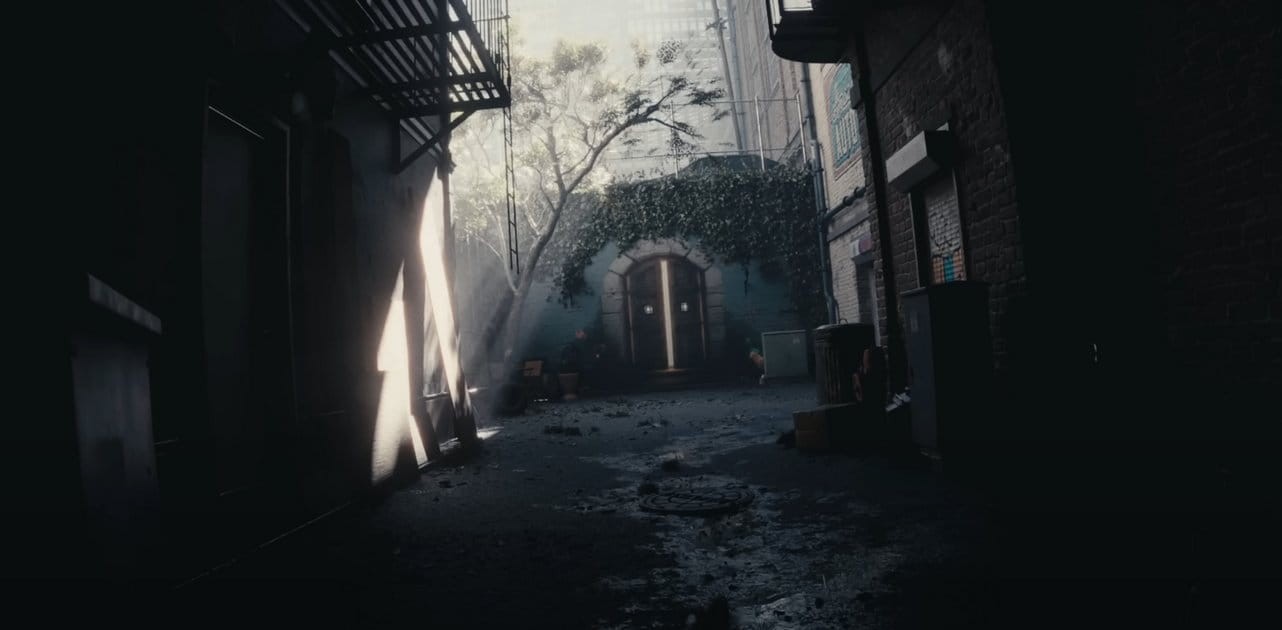
Now putting the girl there:
And here we are!

Only effects are left to do!
Depth of field: with Alienskin Bokeh plugin. Planar setup.
Chromatic aberration: done by using 55mm film tool. I tried to keep it as subtle as possible. I see a lot of images that are destroyed by the abuse of these effects (and most of those images are mine...). My advice is that you do that too and keep it low.
Vignetting: again with 55 m film tool. Not much to write here. It is only a matter of taste I guess.
Film Grain: with NIK color effects' film effect tool. It is on a separate layer that is created automatically by the plugin. It is set to 75-50 percent and I use erase tool with a high radius and 0 hardness on 10 percent flow to clear it from where I don't need that much grain (like from the pictures focus point, the gate and the girl).
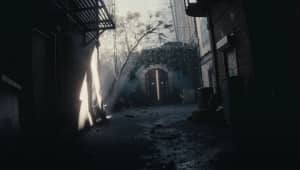
Here is the final result:

I hope I could help!


LEAVE A COMMENT


|

|

|

|

|


COMMENTS