Evermotion Pass 10% Off - Get Instant Access to Thousands of 3D Assets

Check Plans

Information Clause

In accordance with the art. 13 section 1 and 2 of the European Parliament and Council Regulation 2016/679 of the 27th April, 2016 on the protection of natural persons, with regard to the processing of personal data and on the free movement of such data, and repealing Directive 95/46/EC (General Data Protection Regulation), hereafter RODO, I hereby inform that:

1. EVERMOTION S.C., 8 Przędzalniana Str., 15-688 Białystok, Poland is the Administrator of your Personal Data (APD)

2. Data Protection Inspector can be reached through e-mail: iod@evermotion.org

3. Your personal data are to be processed on the basis of art. 6 section 1 letter a, b and f of RODO in order to:
a) prepare, conclude and execute the agreement and for other purposes approved by you,
b) to execute the legitimate interest like marketing of products and the agreement, claim assertion or defence against claims resulting from the law regulations.

4. Entities entitled to the reception of your personal data may be the authorised public bodies; mail providers; providers of the services covered by the agreement; responsible for debt recovery, keeping the archives, document utilization, legal consulting, technical services, IT services and accountancy.

5. Your personal data shall not be transferred to the third country, nor to the international bodies.

6. Your personal data shall be processed within the period of the agreement and upon your additional consent until you withdraw it. APD shall keep the data for the period of any civil law claim execution connected with the agreement.

7. You have the right to demand an access to your personal data, to correct or to delete the data if there is no other basis for the processing or any other purpose of such processing or to limit the processing of the data, to transfer the data to another administrator and to raise objections to the further data processing if there is no legal basis for further processing and to withdraw any previous consent.

8. You provide the personal data voluntarily, however they are necessary to conclude the agreement. The refusal of providing such data may result in the refusal of the agreement conclusion.

9. You have the right to lodge a complaint to the Personal Data Protection Office when in your opinion the data processing violates the regulations of General Data Protection Regulation of the 27 April, 2016 (RODO).

10. Your data will be automatically processed, including the form of profiling.
11. You are obligated to forward above mentioned information to your representative, especially if you appointed this person in the agreement as the contact person or as the representative for the agreement execution.

OK

How to use pelt mapping

Kuba 2008-09-22 00:00 tutorial  > 3ds MAX  > texturing

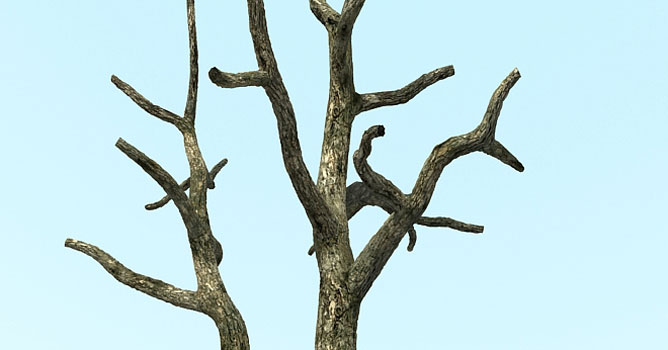
In this tutorial we will try to map a tree (main branches) using useful feature called pelt mapping.

First look at tree with default box mapping. If we would apply bark texture on it, it would look like this:


As we can see, texture on the branches has wrong direction, going vertically on the whole model. First of all apply 'unwrap uvw' modifier and uncheck 'Show Map Seam'so we won't see any old seams from box mapping.
Select 'edge' from sub object and choose point to point seam.

You may click two distant verticles to create a map seam between them.


Now you will be able to crate your own map seams which will be displayed as a blue lines. Let's create our first seams like on this picture. Create loop around base of each branch. Continue creating seams on the other branches just like it is showed on picture.


Each branch should have loop on its beginning, and one seam going through whole length. When you have finished creating seams, it is time to use pelt mapping.
Select face and click on Exp. Face Sel To Pelt Seams. Selection will expand to nearby seams, so you must be sure all seams are done correctly.
Next select 'Pelt' then 'Best Align' from the menu and then click on 'Edit Pelt Map'.


TUTORIAL - CONTINUE
 
Pelt Map parameters will pop up. Click on 'Simulate Pelt Pulling' few times, to stretch fragment of our mesh. It should look like this:


If you are done just exit this window. Now click 'Edit' button in parameters roll out.
Our new mapped part of mesh will be automatically selected. First of all rotate it a little to place it vertically Just like our bark texture. Look at view port, to control how does your bark texture look like on your model.
You may have to scale it up a little bit.

select 'Tools' -> 'Relax...' Set relax values as shown below


Keep Applying it until whole mesh will be stretched correctly without any overlapping faces.
Ant that's it, just continue mapping all branches in the same way. It may take some time, but in the end the result will be very good. Here you can check completely mapped model of this tree. (max 9 or higher)


Tutorial files
- scene.zip


Author: Kuba
Tags: tutorial pelt
You may also like...
Making of Batman Statue

Making of Batman Statue

Hi All, my name is Stanislav Klabik and I would like to show you the process of creation of my latest personal project Batman.
×

LEAVE A COMMENT

You need to be logged in to leave a comment. Don't have account? Register now.

berislav 07:38:42  |  18-10-2013
Dear Kuba, thank you for your time and effort for posting this tutorial. I was so happy when I saw it because that's the THING that I need for my renders to look complete. However, when I tried to use it on my work I almost vomited from despair because of things-steps that didn't work as you described here. If you see this message, please give me a hand with this, otherwise I will leave my branches box-mapped :) If you have few minutes of time, simply send me a pm. or reply to this message and I will explain what the problems are. I am sure that you will immediately know what to do because these are shameful problems, but I never did any unwrapping so here I am. Thank you once more, berislav