Evermotion Pass 10% Off - Get Instant Access to Thousands of 3D Assets

Check Plans

Information Clause

In accordance with the art. 13 section 1 and 2 of the European Parliament and Council Regulation 2016/679 of the 27th April, 2016 on the protection of natural persons, with regard to the processing of personal data and on the free movement of such data, and repealing Directive 95/46/EC (General Data Protection Regulation), hereafter RODO, I hereby inform that:

1. EVERMOTION S.C., 8 Przędzalniana Str., 15-688 Białystok, Poland is the Administrator of your Personal Data (APD)

2. Data Protection Inspector can be reached through e-mail: iod@evermotion.org

3. Your personal data are to be processed on the basis of art. 6 section 1 letter a, b and f of RODO in order to:
a) prepare, conclude and execute the agreement and for other purposes approved by you,
b) to execute the legitimate interest like marketing of products and the agreement, claim assertion or defence against claims resulting from the law regulations.

4. Entities entitled to the reception of your personal data may be the authorised public bodies; mail providers; providers of the services covered by the agreement; responsible for debt recovery, keeping the archives, document utilization, legal consulting, technical services, IT services and accountancy.

5. Your personal data shall not be transferred to the third country, nor to the international bodies.

6. Your personal data shall be processed within the period of the agreement and upon your additional consent until you withdraw it. APD shall keep the data for the period of any civil law claim execution connected with the agreement.

7. You have the right to demand an access to your personal data, to correct or to delete the data if there is no other basis for the processing or any other purpose of such processing or to limit the processing of the data, to transfer the data to another administrator and to raise objections to the further data processing if there is no legal basis for further processing and to withdraw any previous consent.

8. You provide the personal data voluntarily, however they are necessary to conclude the agreement. The refusal of providing such data may result in the refusal of the agreement conclusion.

9. You have the right to lodge a complaint to the Personal Data Protection Office when in your opinion the data processing violates the regulations of General Data Protection Regulation of the 27 April, 2016 (RODO).

10. Your data will be automatically processed, including the form of profiling.
11. You are obligated to forward above mentioned information to your representative, especially if you appointed this person in the agreement as the contact person or as the representative for the agreement execution.

OK

Creating Waterfalls

Ronel K. Pabico 2008-04-28 00:00 tutorial  > 3ds MAX  > particles

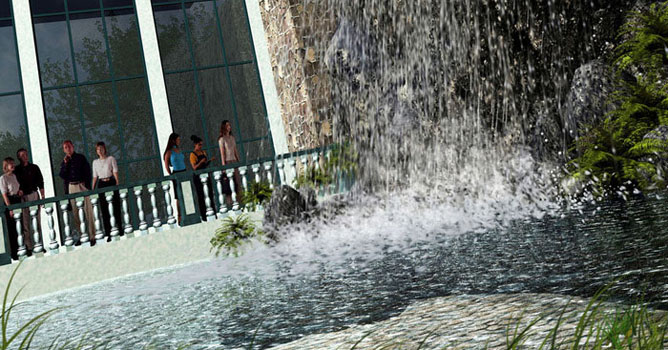
I want to share my work on how to create a Waterfalls from 3D Max Particle System.

SCENE PREPARATION
 
1. To start with, set units to meters, and renderer to default scanline renderer.

You can download my raw model for the building located on the following link.

Raw model scenet (3dmax 8 and above): download

Raw image should look like the image below


SCENE PREPARATION - CONTINUE

2. Modelling the accessories.

To model the riverbed
Create a plain lenght = 20m, width 25m, segments = 8 x 8
Applied with Noise Modifier : scale=0, strenght x=1.7, y=1.5, z=.25
Positioned it and leveled with the building bottom

To model the water surface
Create a plain lenght = 20m, width 16m, segments = 8 x 8
Applied with Ripple Modifier :amplitude 1=.06m, amplitude 2=.15m
Wave Lenght=1.0m, phase=.1, decay=.001
Positioned it about .5m below the ground floor fo the building.

To model the main rocks
Create a box, lenght=12m, width=2, height=8m segments 40 x 20 x 20
Apply with Noise Modifier to make it rough and bumpy.
Then apply with turbosmooth modifier to smoothen the surface
Position the bottom just level with the riverbed.

Accessorized the scene with small rocks, same procedure with the main rocks but with a smaller scale

The raw scene model will now look like on the figure below


3. To model the water falls.

From the Creating Panel, select Geometry and choose Particle Systems. On object type choose PArray. Then drag anywhere on the screen to create a PArray Icon. Size of the icon doesnt matter, as long as you see it then it would be fine. Or go to Tab Menu, choose Create then browsing down, choose Particles, there you can find also PArray


4. To model the water source.

Go to Creating Panel then Standard Primitives and on Object Type rollout choose box. On your top viewport, create a box about the width of the main rocks say lenght=8m, width=0.1, depth=0.2m. Positioned it on top of the main rock or where the waterfalls be located. Named it as source box. See figure below


5. Linking the source box to the particles.

Select PArray Icon, go to modify, under Basic Parameters go down on Object Base Emitter and press the box Pick Object then select the source box. Now click anywhere on the screen to turn off the selection
 

SCENE PREPARATION - CONTINUE

6. Now go to you perspective viewport and zoom a bit on the source box facing to where the water will fall.box, select the source box right click and choose convert to poly. Then on modifying panel select polygon, then select the front of the source box. Turn off the selection, by clicking on the gray box aligned with the word - Editable Poly, this will just turn off the highlighted portion but still the selection is active.


7. Select again the PArray Icon, go to modify and underneath the Particle Formation tick the box of Use Selected Sub-objects. This means that water will come out only on the face of the source box you selected.


8. Now make the four viewport viewable, zoom in to the source box and make some initial testing, move your time slider to 20 or 30 and see what happens. The particles emit at horizontal direction


9. Fine tuning particles for initial settings. , from the Viewport Display of PArray select Ticks, and for the Percentage of the Particles make 100%.

On the Particle Generation click on Use Rate=100, for the speed= .2 meter, variation 50, divergence 20

  • Speed - The velocity of the particle at birth, along the normal, in units traveled per frame
  • Variation - Applies a percentage of variation to the speed of emission for each particle
  • Divergence - Applies an angular degree of variation by which each particle's velocity can vary from the emitter normal


On Particle Timing, emit start at 0, stop at 100, Display until 100. life at 100 and variation at 25. On Particle size, put .06m, variation size about 10. This means that drops of water is about 60mm so it is viewable on my camera. See illustrated image for the initial settings.

SCENE PREPARATION - CONTINUE

10. Now adjust the time slider on about frame 40. As you can see in the image below, the Particles now have some development


11. Redirecting the Particles to fall downwards. For the meantime, drag the time slider back to frame 0, then maximized now your top viewport.
From the Creating Panel, select space warp (wave symbol), then on Object Type select Forces, then Gravity or go to tab menu, select create - space warps-forces then gravitty. Or go to Tab Panel and choose Create Menu, on the pull down menu items select SpaceWarps - Forces - then Gravity. See illustration below


Drag anywhere from the screen to make a gravity icon. On top its a square icon with x on center and on elevation its a line with an arrrow. The arrow indicates the direction of the force. Size and location doesnt matter as long as you see it. See figure below


Make the top viewport active, go to main tollbar and click on Bind to Space Warp icon, then click on Gravity Icon (the mouse pointer will change into small box with wavy diagonal lines) and drag them it to the Particles Icon. The particles will be highlighted in a second which means the binding is okay. Then go to modifying panel, on parameters, adjust strenght = .04


Strength = Increasing Strength increases the effect of gravity; that is, how objects move in relation to the Gravity icon's direction arrow. Strength less than 0.0 creates negative gravity, which repels particles moving in the same direction and attracts particles moving in the opposite direction. When Strength is set to 0.0, the Gravity space warp has no effect.

Decay = When Decay is set to 0.0, the Gravity space warp has the same strength throughout world space. Increasing the Decay value causes gravity strength to diminish as distance increases from the position of the gravity warp object. Default = 0.0.

12. Now play on your time slider at frame 25 and see the flow of the particles. We now corrected the direction and orientation of the flow of the particles. But as you can see, it goes down directly down at the bottom, instead at the water surface. We will now correct this to the next procedure. See figure below


13. Move back the time slider to 0, right click gravity icon and select hide selection. Go to Creating Panel, and select Space warps browse down the selection and select Deflectors and from the list click deflector. On top viewport drag on the location of the waterfalls, and assume the size of your water surface. Then on left or front view position it or aligned with water surface.


14. Make the top view active, go to main toolbar and select bind to space warp icon, then select defletor icon and wait until the icon change then drag it to the Particle Icon. Then go to modifying panel and on parameters and adjust the bounce. For this I make it .25, and variation to 40.

Bounce - Controls the speed at which particles bounce off the deflector. At a setting of 1.0, particles bounce off the deflector at the same speed they struck it. At 0.0, particles do not bounce at all. At values between 0.0 and 1.0, particles bounce off the deflector at a speed reduced from their initial speed. At values greater than 1.0, particles bounce off the deflector at a speed greater than their initial speed. Default=1.0.

Variation - The amount by which each particle can vary from the Bounce setting. Now the setup is almost complete, play with your timeslider and see the reaction of the particles. Move the time slider to 35. See image below
SCENE PREPARATION - CONTINUE

15. Applied now the materials to the models. See my materials below


16. Final fine tuning of particles. Position the time slider at 40 frame. Click PArray Particles, go to modify and from Particle generation adjust Use rate to 600. Then right click on the Particles, activate object properties, and enable Motion Blur, select image then click ok. See figure


Unhide and unfreeze all objects, click on camera, go to modify and activate Render Effect Pass with a total pass of 2. And finally press F10, go to Renderer, Object Motion Blur click apply. Frame duration to .5 samples to 10, duration subdivision to 10. Select source box, right click , choose object properties and untick Renderable. Then fire up RENDER.

This is my raw scene figures (unrendered)


The day scene render


The night scene render


Comments and critics are welcome.


AUTHORS INFO
Author: Arch Ronel K. Pabico
 
Author: Ronel K. Pabico
Tags:
You may also like...
3D modeling in landscape architecture: Designing green spaces and public spaces

3D modeling in landscape architecture: Designing green spaces and public spaces

In landscape architecture, digital tools enhance precision and creativity. 3D modeling has become an essential tool for architects and designers to visualize and refine their projects with unprecedented accuracy and detail.
×

LEAVE A COMMENT

You need to be logged in to leave a comment. Don't have account? Register now.

elric1976 09:11:23  |  30-05-2009
oops all I see is HTML code
elinarose 09:54:03  |  06-06-2009
what is this?
ronel 14:23:06  |  30-06-2009
ooooppps sorry about this one, dont know what happened in here. its beyond my jurisdition. anyway i will post one at the tutorial section on the forum... just stay tune
maxlucky 03:35:04  |  01-09-2009
thank you it's usefull!
battusani 09:23:35  |  21-01-2010
hai this is very good so nice my name is anil
WaseemOnLiNe 12:24:30  |  19-03-2010
Good tutorial, good explanation, thank you, and I wish you good luck in your life, and work.
Thanhduydesigner 05:08:10  |  02-06-2010
that's great !
keren66 14:06:54  |  15-10-2010
hey, very nice tutorial but i have a problem. it all works well but when i rener the image i dont see waterfall its like its not there at all, i see the image without it. what should i do to make the particles renderable? thanks
Oliya 14:08:13  |  27-04-2011
great~I have some question...Can u halp me? xuanwuji_yzp@sina.com~