Evermotion Pass 10% Off - Get Instant Access to Thousands of 3D Assets

Check Plans

Information Clause

In accordance with the art. 13 section 1 and 2 of the European Parliament and Council Regulation 2016/679 of the 27th April, 2016 on the protection of natural persons, with regard to the processing of personal data and on the free movement of such data, and repealing Directive 95/46/EC (General Data Protection Regulation), hereafter RODO, I hereby inform that:

1. EVERMOTION S.C., 8 Przędzalniana Str., 15-688 Białystok, Poland is the Administrator of your Personal Data (APD)

2. Data Protection Inspector can be reached through e-mail: iod@evermotion.org

3. Your personal data are to be processed on the basis of art. 6 section 1 letter a, b and f of RODO in order to:
a) prepare, conclude and execute the agreement and for other purposes approved by you,
b) to execute the legitimate interest like marketing of products and the agreement, claim assertion or defence against claims resulting from the law regulations.

4. Entities entitled to the reception of your personal data may be the authorised public bodies; mail providers; providers of the services covered by the agreement; responsible for debt recovery, keeping the archives, document utilization, legal consulting, technical services, IT services and accountancy.

5. Your personal data shall not be transferred to the third country, nor to the international bodies.

6. Your personal data shall be processed within the period of the agreement and upon your additional consent until you withdraw it. APD shall keep the data for the period of any civil law claim execution connected with the agreement.

7. You have the right to demand an access to your personal data, to correct or to delete the data if there is no other basis for the processing or any other purpose of such processing or to limit the processing of the data, to transfer the data to another administrator and to raise objections to the further data processing if there is no legal basis for further processing and to withdraw any previous consent.

8. You provide the personal data voluntarily, however they are necessary to conclude the agreement. The refusal of providing such data may result in the refusal of the agreement conclusion.

9. You have the right to lodge a complaint to the Personal Data Protection Office when in your opinion the data processing violates the regulations of General Data Protection Regulation of the 27 April, 2016 (RODO).

10. Your data will be automatically processed, including the form of profiling.
11. You are obligated to forward above mentioned information to your representative, especially if you appointed this person in the agreement as the contact person or as the representative for the agreement execution.

OK

Making of The Death Of A Bird

Rami Hamid 2008-03-11 00:00 tutorial  > 3ds MAX  > misc

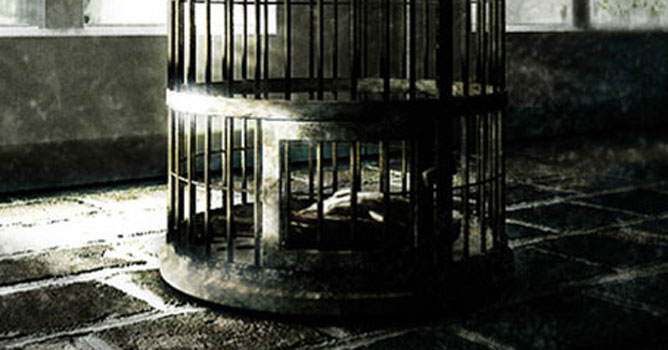
The Scene was modeled in Autodesk 3D Max 9. The whole idea was to model a bird cage as a part of modeling practice.

First the cage was modeled from an interiors decoration book where I came across the cage and happened to catch my attention.
The cage was modeled using polygons and splines. The upper part of the cage was made out of splines, used array to distribute the curved lines evely around the cage.
The middle and lower parts of the cage where made out of simple primitves ( cylinders and chamfered boxes ).
The upper hanger of the cage was done using a line section that I lathed using the modifier Lathe from the modifiers list in 3D Max 9.

The Windows were very simple ones, modeled using boxes, converted to editable poly, done some extrusions, bevels and insets to get the final shape.

The ground where the cage is sitting is a simple right angled spline done in the left viewport and applied "Fillet" to it's right angle vertex.


TEXTURING

Textures were done in Photoshop for the cage. The BASE material is a Terracota tile texture.
The Hard Light
Materials are dirty wall and grunge materials that I used to give the terracota tile a dirty texture and as you can see how this helped in creating the final texture for the bird cage.

The Window Materials were added in Photoshop from the lower picture.
I cut some parts from the picture, transformed them in PS, played with their hue and saturation to give them a greenish colour and reduced their opacity in order not to hide the background behind the window.

The Brick material was quiet a simple one, you can get these materials from the web, and you might actually find some better ones.
So as you see here, I had a base material, a bump material and a displacement material.

Some would say why displacement and bump together to which I would say, I added displacement for the overall bumpness of the bricks but added the bump material with a little bit high value to emphasise the bumpness in each brick (holes...etc.)


LIGHTNING

3 Vray Lights were used in this scene. Two outside the windows and one on the side of the cage as you can see. V-Ray Lights are the best to provide soft light to the scene. No colors were added to the lights, just plain white with a value of 242 RGB and a multiplier value of 30 each to be able to use them with my V-Ray Physical Camera.


Below you can see the renders setting that I used in V-ray to get the below render.


RENDERING

First thing I did was I've taken the 3D Max render into PS, Duplicated the layer, changed the blending mode to Soft Light, then played around with the Hue-Saturation of both the layers.

I added a Diffuse Glow filter to the original layer to get a bit of a glow on the left side of the cage because I had sunlight effect in mind for this scene.


Here I added the ground and the windows. I adjusted the curves for this layer then duplicated it and again played around with the Hue-Saturation values of both the layers.

I changed the duplicate layer's blending mode to Hard Light then duplicated the layer with the same blending mode to emphasize the dramatic colors on the bricks.
I then added some bluriness to the right side of the image to fake DOF (depth of field).


I actually painted the sunlight effect in Photoshop and gave it some Bluriness to have a soft feel. The sunlight has 3 layers, two white and one orange.
The second and third layers are duplicates of the first layer but their blending modes where changed to soft light to suite the scene.


And here is the bird image that I found on the web and used. I cut out the bird from the image, adjusted curves, Hue-saturation and duplicated the layer.
The blending mode of the duplicate layer was changed to Overlay to emphasize the dark colors of the bird.

The selected bird had parts of it cut out to fit into my scene. I did that by bringing the selected bird into my scene over my image, reduced it's opacity, and made cut outs where needed, like behind cage bars, door etc....


POST PRODUCTION

On the left, you can see the window parts cut out to suite the scene and adjusted in terms of opacity, Transformation and blending mode (Hard Light).


This is the original image that I got from the web to use as a background for my scene. It's adjusted as seen in the one below it.


The background had an adjustment in it's Hue-Saturation to give a cold feel, rather than a warm one as in the original.
Then a Diffuse glow filter was added to it to imply the effect that there is fog and mist in the place which again are all essential for making such modes.


A Grunge, Dirt Texture was then added to the overall scene to give it a bit of Darkness, Sadness and Old effect.


FINAL

This is the final image of this process. I hope this "Making Of" was helpful to some of you. Thank you for giving the time to read this through.


AUTHORS INFO
Author: Rami Hamid
e-mail: nospam


Author: Rami Hamid
Tags:
You may also like...
3D Tribe - new CG event

3D Tribe - new CG event

Join creative meeting in Gdansk, Poland, on 22nd of September.
×

LEAVE A COMMENT

You need to be logged in to leave a comment. Don't have account? Register now.

dennisfx 19:45:06  |  28-09-2011
superb!
carlos.yang 04:21:04  |  26-07-2013
非常好