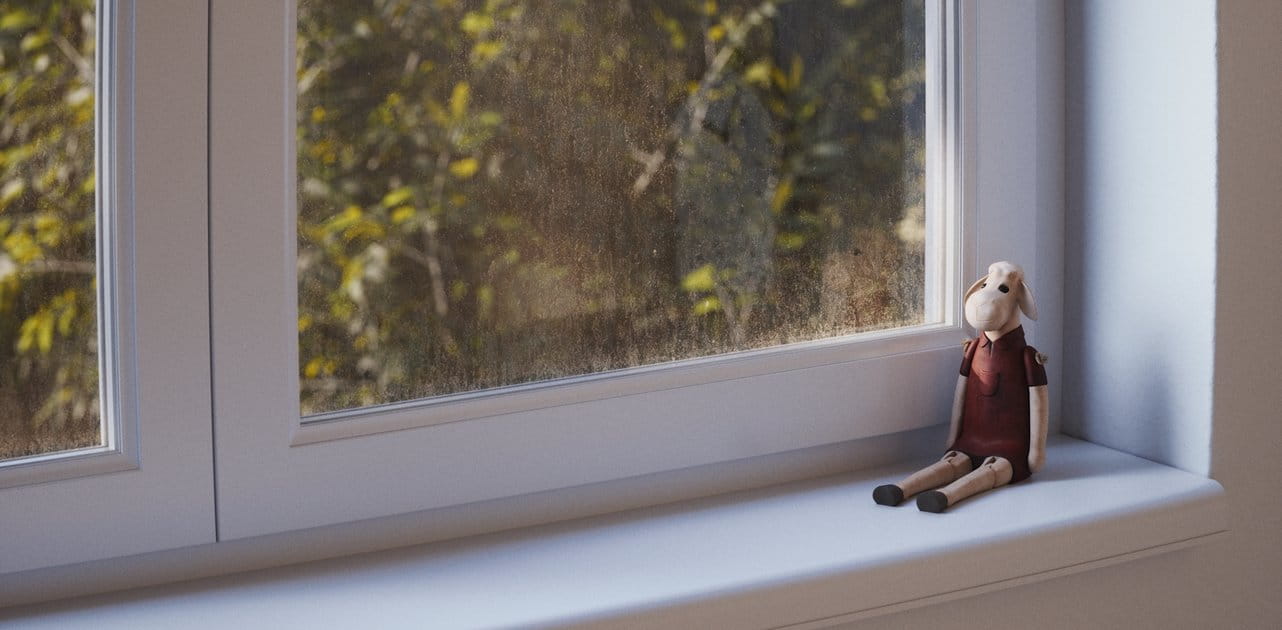
Create Dirty Windows - material tutorial
New tutorial by RenderRam.


In accordance with the art. 13 section 1 and 2 of the European Parliament and Council Regulation 2016/679 of the 27th April, 2016 on the protection of natural persons, with regard to the processing of personal data and on the free movement of such data, and repealing Directive 95/46/EC (General Data Protection Regulation), hereafter RODO, I hereby inform that:
1. EVERMOTION S.C., 8 Przędzalniana Str., 15-688 Białystok, Poland is the Administrator of your Personal Data (APD)
2. Data Protection Inspector can be reached through e-mail: iod@evermotion.org
3. Your personal data are to be processed on the basis of art. 6 section 1 letter a, b and f of RODO in order to:
a) prepare, conclude and execute the agreement and for other purposes approved by you,
b) to execute the legitimate interest like marketing of products and the agreement, claim assertion or defence against claims resulting from the law regulations.
4. Entities entitled to the reception of your personal data may be the authorised public bodies; mail providers; providers of the services covered by the agreement; responsible for debt recovery, keeping the archives, document utilization, legal consulting, technical services, IT services and accountancy.
5. Your personal data shall not be transferred to the third country, nor to the international bodies.
6. Your personal data shall be processed within the period of the agreement and upon your additional consent until you withdraw it. APD shall keep the data for the period of any civil law claim execution connected with the agreement.
7. You have the right to demand an access to your personal data, to correct or to delete the data if there is no other basis for the processing or any other purpose of such processing or to limit the processing of the data, to transfer the data to another administrator and to raise objections to the further data processing if there is no legal basis for further processing and to withdraw any previous consent.
8. You provide the personal data voluntarily, however they are necessary to conclude the agreement. The refusal of providing such data may result in the refusal of the agreement conclusion.
9. You have the right to lodge a complaint to the Personal Data Protection Office when in your opinion the data processing violates the regulations of General Data Protection Regulation of the 27 April, 2016 (RODO).
10. Your data will be automatically processed, including the form of profiling.
11. You are obligated to forward above mentioned information to your representative, especially if you appointed this person in the agreement as the contact person or as the representative for the agreement execution.


This tutorial require basic skills of using 3ds max and Particle Flow. This isn't step by step tutorial. I just present some technics and methods that I used to create Fireworks animation.
Here you can see finished flow, that I'm going to explain in this tutorial :

1. I decided that I use 3 different types of rockets, so at very beginning I divided particles to 3 parts (market red). Be aware that "Split Amount 02" send to "Yellow Rockets" event 80% of particles that still are in "Distribute" event after sending 40% (with Split Amount 01 operator) to "Red Rocket event".
1a. I also decided to Yellow rocket after blowing up have trails in 2 colors, so I need next divide.
2. Just apply standard operators what we usually have in Flow (Gravity is planar type with Strength reduced to 0.1)
3. Here in create trails after main particles using Spawn operator, that is common operation and doesn't need closer explanation.

4. How particles know when blow up ? As you probably remember 3ds max using Z-up system. When our particles starts falling down and reach proper speed (because of Force operator with gravity) we send particles to another event and then we blow it up using spawn test.

5. I used another Speed Operator rather than Speed options in Spawn operator, because in that way I achieve more interesting results.
5a. Like above, but in this time particles create disk structure (remember to set high divergence and variation values).
6. Like earlier I create trails after particles

7. To make animation more interesting and realistic I added also Wind force (just turbulence)

In this case I used "Material Dynamic" all the time, because I used "Particle Age" map.
"Particle Age map It alters the color (or map) of a particle based on the particle's life. The particles in a system begin as one color. At a specified age, they begin changing (by interpolation) to a second color, and then they change again to a third color before they die out."
(part of 3ds max help)
Remember also that Particle Age work only if you add Delete operator to flow (otherwise particles don't have age).
In all maps you have to set Texture mapping : Planar form Object XYZ, otherwise 3ds max whenever you try to render will pop up you what you don’t have mapping coordinates. Also in main material set Self-Illumination at 100%
Here is the most tricky part: "Particle Age" map has only 3 slots for color or maps... But you can dodge this using "Gradient Ramp" with Gradient Type: Mapped and Source Map: Particle Age (standard) Now we can unlimited amount of color that we can apply.

My materials:
M1.
This is material for rocket trails, I created 2 types this material (only difference is color in diffuse channel).
Map in Opacity channel cause that when particle getting older become less visible.
Map in diffuse channel cause that when particle getting older changing their color.

M2.
That are one color particles, so I don't need to have any map in diffuse channel. In opacity channel I have very dense and vary blach&white map, this cause some flickering that you can observe in real life.

M3.
That three materials ale made using diffuse map (like in M1, but only different gradient) and opacity map (like in M2).

And final part :
That's render from 3ds max :

That render I saved as .png (with alpha) and open in Combustion, copied 2 times and set Blending Mode for copies to Color Dodge (to make color more saturated and stronger). Then I nested this layers and add a little blur (0.6) and Glow (2 times, one with large radius - about 20 - and one with very small - about 0,3).
After that I get this result:

Instead of black background you can of course use some picture..
If after finishing this tutorial you still have some problems to achieve safisfating results write to me : streaker.at.o2.pl and I will send you my finished scene.
Streaker received Evermotion CD for free. You can also write tutorial / making of ... and win one of our CD's:


LEAVE A COMMENT


|

|

|

|

|


COMMENTS