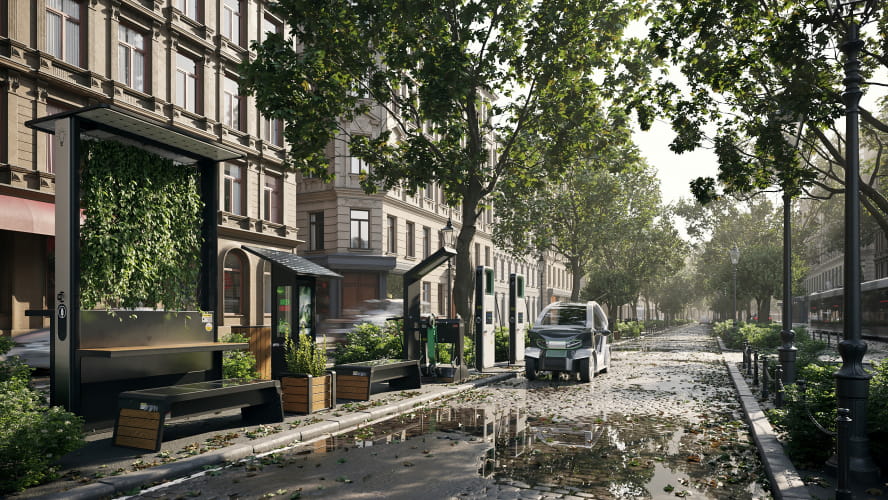
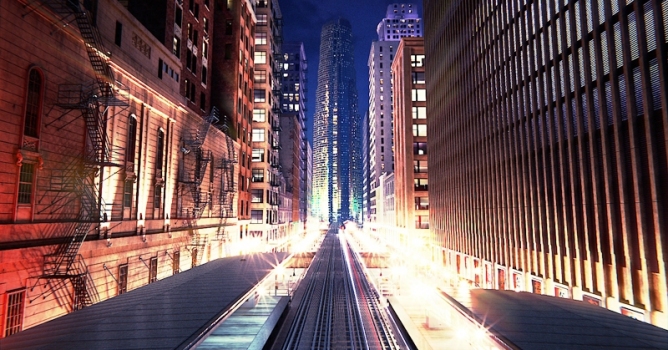
Described scene comes from Evermotion Archexteriors vol. 28 available in Evermotion Shop.
Click on image to enlarge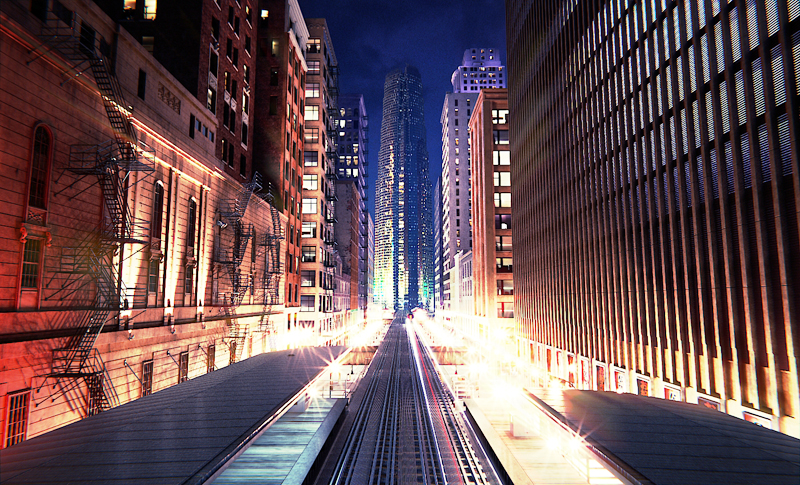
As everybody knows post production can work wanders and is absolutely necessary in 3D graphic nowadays. It can change the ugliest duckling into a beautiful swan, save a lot of time and add extra realism to our renders. But it all comes with a prize. A prize of money we need to spend for additional software that does the job well. Another flaw is that we need to upload our passess to another program and work on them from the scratch. And what about any changes that may be needed in 3D scene? They always result in recreating all the steps in Photoshop or any other 2D software. But there's a solution. With Blender we can composite our final image as we do it anywhere else. It's free, it reloads all the images while opening the file and it's more intuitive than you think. As an example of its abilities I decided to recreate in it the whole postproduction I made for my night scene from Archexteriors 28 using Photoshop. But this tutorial is not about making the exact same image. Instead I would like to show you the whole process and intruduce you to some of the Blender's fine post production tools.
Click on image to enlarge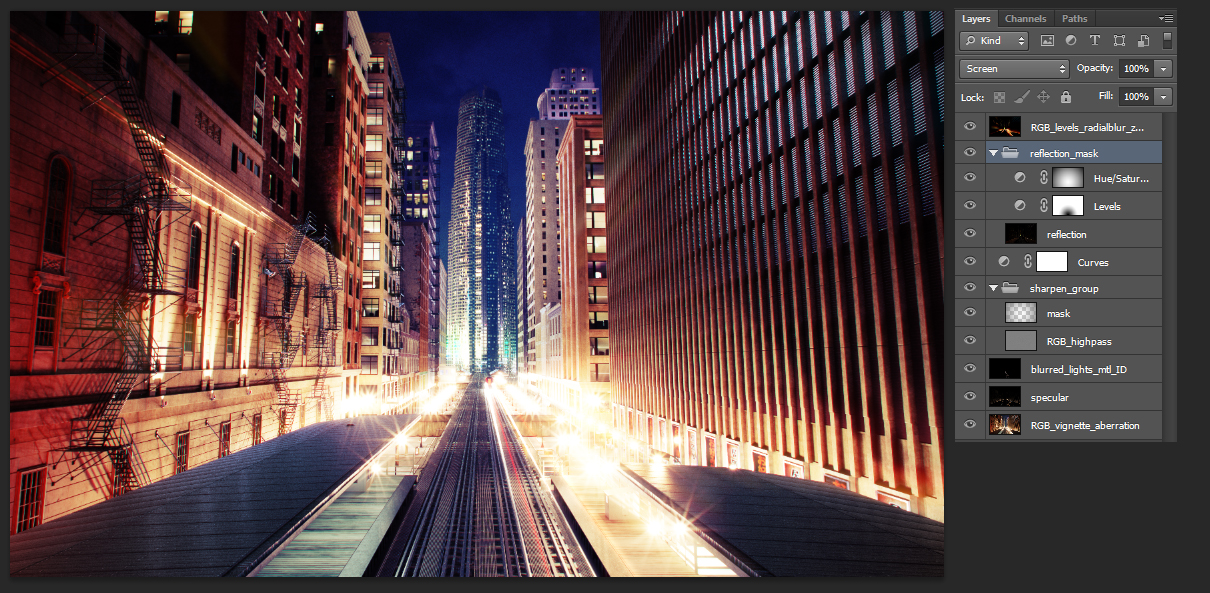
As you can see my postproduction was quite easy to setup. I based on RGB pass that I distorted using Chromatic Aberration and Vignette and mixed with specularity pass. Using selection from Material ID pass I extracted light beams of moving metro from RGB pass, blurred them and mixed with the main image. I sharpened it using High Pass and grey mask that limited the effect to the furthest parts of my scene. I improved the look of my image using Curves on its all channels, added Reflection pass with a few less important, additional maps. Finally I blurred the image with Radial Blur filter and mixed with the final result.
Click on image to enlarge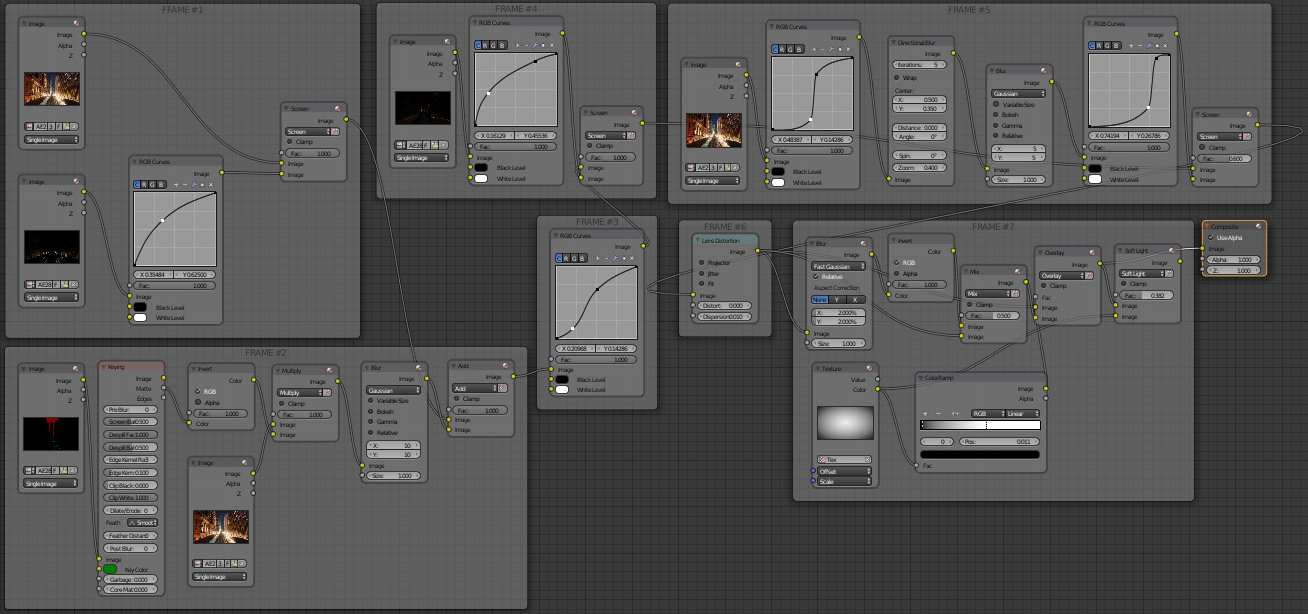
Blender post production is based on a powerful nodes system. As you can see I devided my whole setup into several frames that I'm just about to describe one after another. My work is based on passess from V-Ray that were created inside 3ds Max.
Click on image to enlarge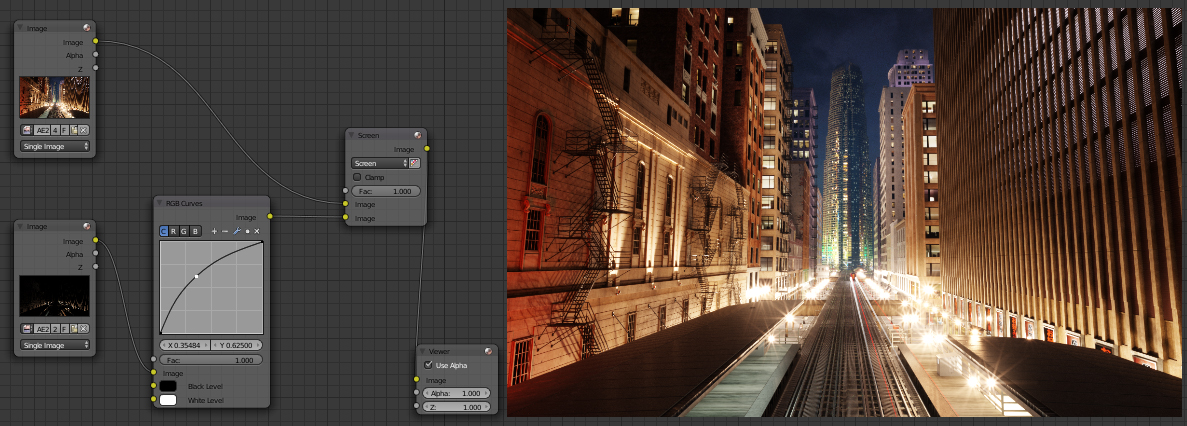
Frame #1. Let's start from something simple. I added two image nodes and loaded RGB and Specularity pass to each one of them. Just like in Photoshop, I mixed them together using Mix node that I set to Screen mode. In order to brighten Specularity pass a bit, I made it go through RGB Curves node with a slightly raised curve.
Click on image to enlarge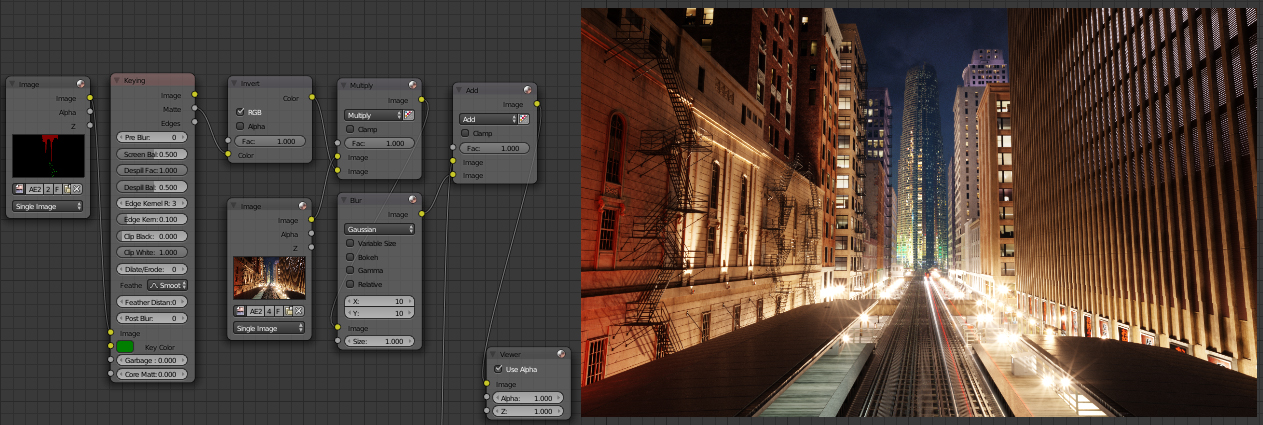
Frame #2. Me second step was to increase the effect of light beams that were left by metro. First I uploaded Material ID pass to yet another image node. Because the lights were marked as green, I used Keying node from Matte set. I chose the proper Key Color using Blender's picker in order to extract the Matte I needed. This way I converted my image into a black one with the area I was interested in painted black. Because I needed something completely opposite I inverted it in order to combine it with RGB pass correctly. I mixed images together using Multiply which resulted in pitch black image except the colorful light beams I needed. I blurred them with a help of Blur node and added the result with the output from Frame #1.
Click on image to enlarge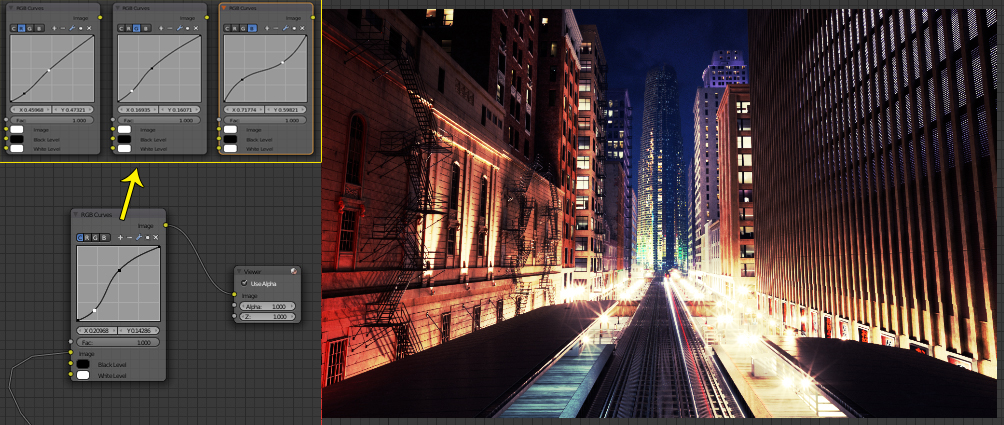
Frame #3. Time for a subtle changes in contrast and color of my render. Once again I used RGB Curves node but this time change the shape for every curve from each channel. Be aware that this node works differently than Curves from Photoshop and using it may be a little confusing!
Click on image to enlarge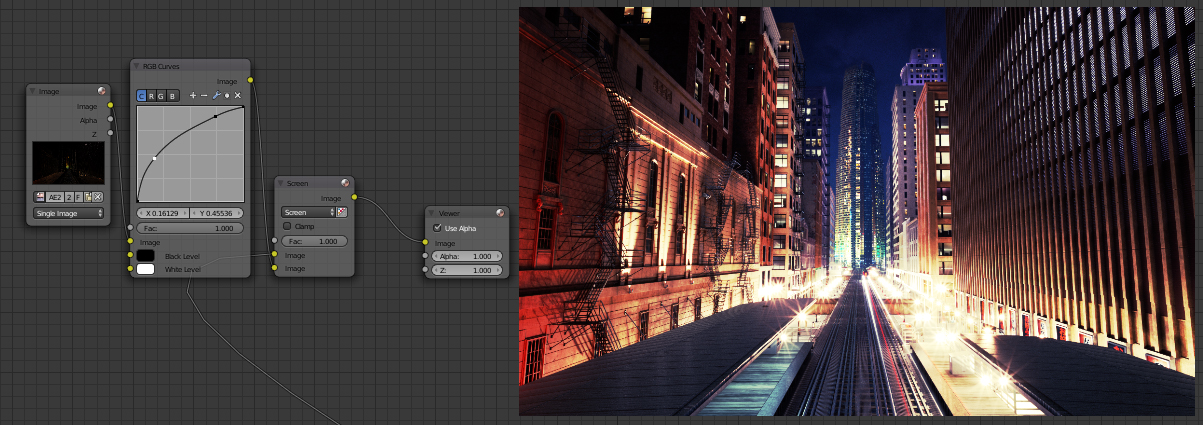
Frame #4. Time to recreate Reflection Mask in Blender. I loaded Reflection pass and improve it look with RGB Curves node and its tweaked channels. I combined the result with the main image that came from Frame #3 with a Screen blend type.
Click on image to enlarge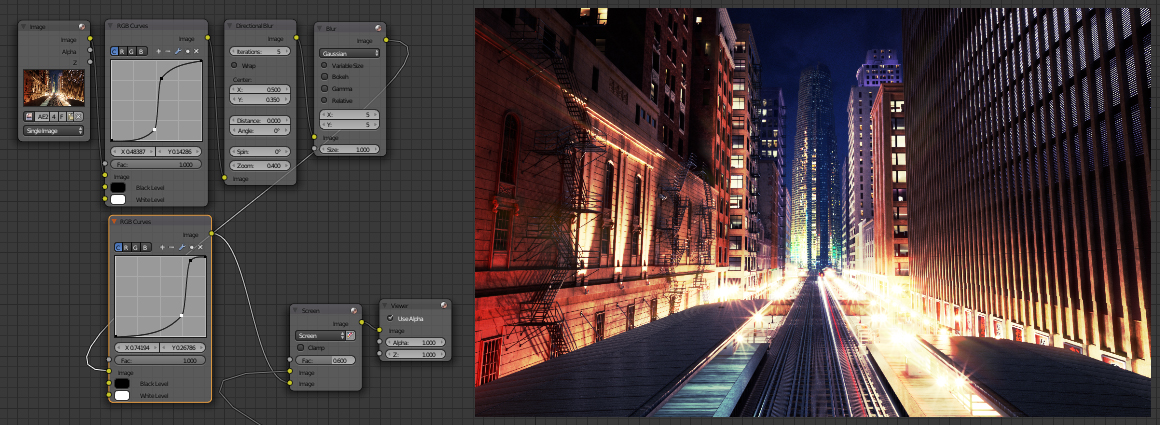
Frame #5. In all my night renders from Archexteriors volume 28 I used Photoshop Radial Blur in order to make them look a little bit more dynamic and living. Blender offers similar node called Directional Blur with its several option. I used highly contrasted RGB pass as an input and picked the spot from which zooming starts using X and Y values. As the output looked a bit cheesy I blurred it with a Blur node and improved it with RGB Curves once again. I mixed it slightly with the output from fourth frame.
Click on image to enlarge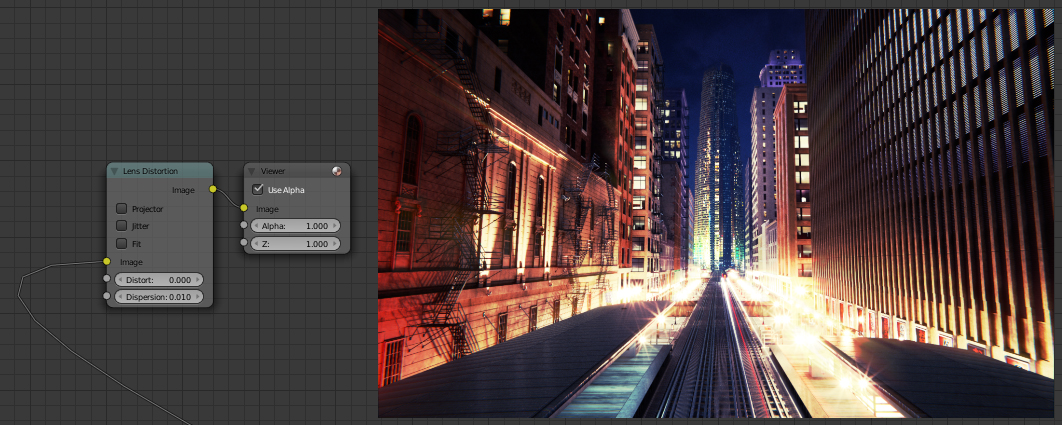
Frame #6. If you wish you can ignore the next step as not everybody uses the effect of dispersion in their renders. Otherwise add Lens Distortion node and put your image through it. Keep your values low as there's nothing worse than over postproduction.
Click on image to enlarge
Frame #7. Here in Evermotion we tend to use High Pass filter when we seek for reliable ways to sharpen our renders. As Blender does not provide us with such node I needed to build one all by myself. I used the output from Frame #6, blurred it with Fast Gaussian Filter Type, inverted it and mixed it with the same raw output. Overlaying it with the main image did the trick but I wanted to go even further. I decided to control the range of the effect just like I did in Photoshop. To achieve this goal I made a simple spherical Blend texture, added it as a node, played with its Scale sliders and set its contrast using Color Ramp. Finally I plugged it as a Fac value for the last described node that made my final render sharper with the distance. My final touch was adding small vignette with Soft Light blend type and texture I created.
Do you like this scene? This scene is a part of Evermotion Archexteriors vol. 28 available in Evermotion Shop.


COMMENTS